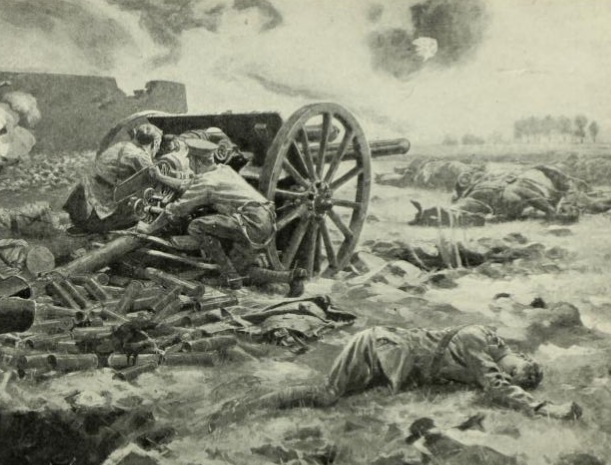
Everyone has heard of the first day of the Somme, famously the day on which the British Army suffered its highest casualties on a single day. Fourteen days later the British Army made its next big push. Demonstrating that occasionally lessons are learned and learned quickly, the plan was a bit different from on the 1st of July.
There wasn’t quite as many guns or ammunition as there was on the first day, but all of it was concentrated ion the German defences along Bazentin ridge and the German guns behind it. One the 1st of July there was one gun to every 20 yards of front – spread over two defensive lines and the preparation lasted for a week, firing 1.5 million shells . On the 14th there was one gun for every 6 yards and the preparation lasted for 48 hours, firing just under half a million rounds.
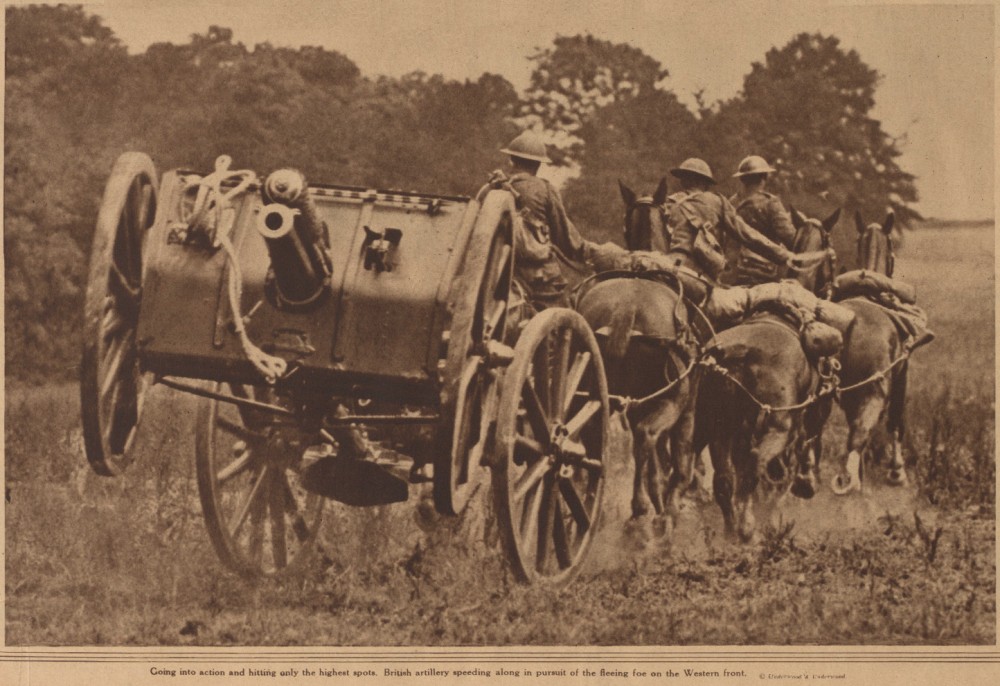
The Deccan Horse photographed on the Somme 1916. I wonder if any of the limbers on the road are from N Battery?
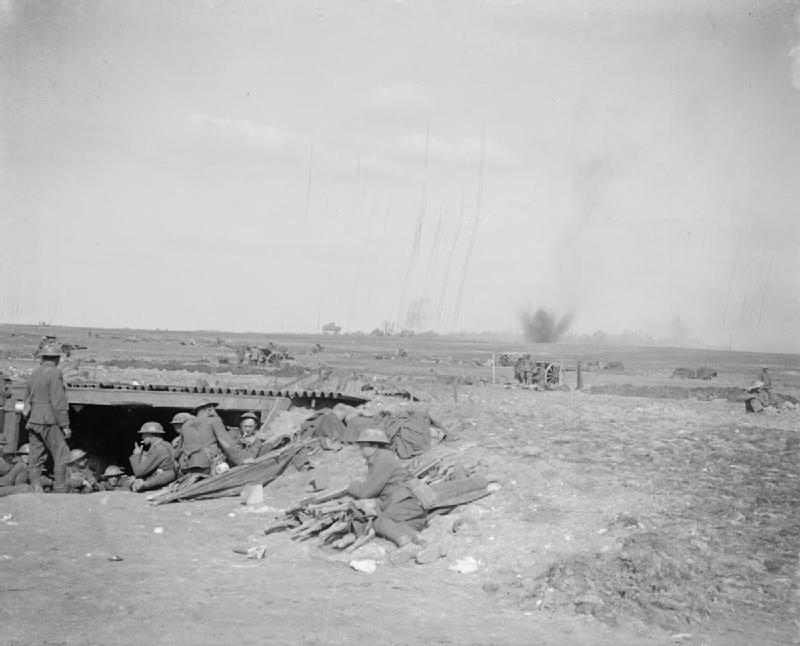
H Hour was 03.25 at dawn. The infantry of five divisions moved out into no mans land at night, and guided by mine tape deployed quietly a few hundred yards from the German front line. It was a great success and about three miles of German trenches were taken and a gap wide enough to launch cavalry – supported by a battery of horse artillery that still exists as N battery the Eagle Troop. However, by the time the cavalry was in action the Germans had blocked the gap.
N Battery RHA came into action just short of the wire protection the 14 July German Front line
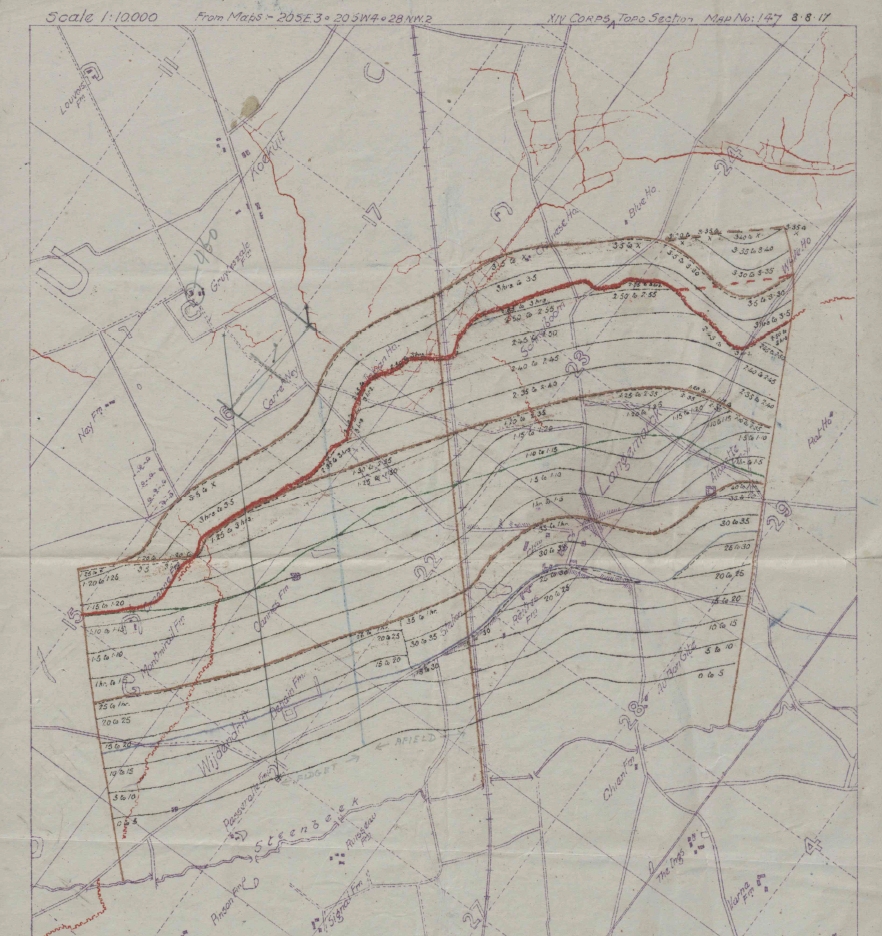
The map is the hand drawn trace for the XIII Corps fireplan for the attack on 14th July. Delville Wood is on the right hand side just below the number 12. The wood above the number 10 is High Wood. The poet and author Robert Graves was wounded in this attack at the churchyard in the village of Bazentin-le-Petit to the left of the number 9.
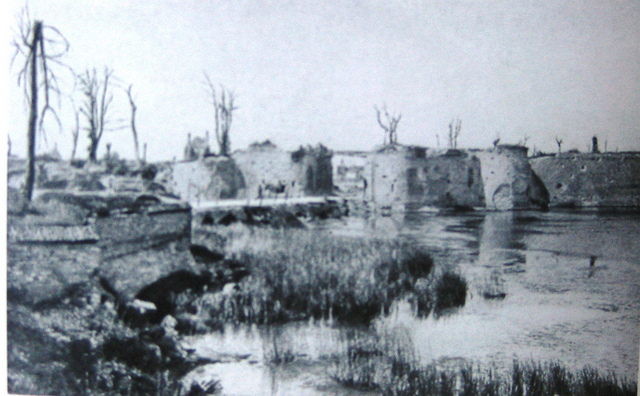
An abandoned German trench in much shelled Delville Wood taken September 1916 (Warwick Brooke – This is photograph Q 4267 from the collections of the Imperial War Museum)
The area between Delville and High woods was the focus for fighting for the next two months. It was calculated that seven shells a second landed on Delville Wood at times.
Two of the casualties on that day was Lieutenant Colonel Dudley George Blois DSO Commander of 84th Brigade RFA and his Trumpeter. They were riding forwards to recconoitre new positions for 84th Field Brigade of 18th Division and caught by shellfire. Blois a descendent of the royal house of Blois, is commemorated in Blythburgh Church in Suffolk.
If you are interested in visiting any of these battlefields and hearing the Gunner side of the story contact Gunner Tours.
“On ne passe pas’” (They shall not pass!) emerged from the battle of Verdun as watchwords of French. This phrase, widely attributed to General Phillip Petain has been used as a rallying cry for France since then, and an inspiration for subsequent defiance by, among others, Spanish Republicans, south American revolutionaries and the Russian Feminist group Pussy Riot. But like many national symbols and iconic events, much of the story is myth, factoid rather than fact. But the story behind the myth does reveal something about the battle of Verdun and the men who coined the catch phrase.
Verdun was one of the major battles of the First World War, costing the French and the Germans about a quarter of a million casualties each. The battles of Verdun and the Somme, linked inextricably, dominated the Western Front in 1916. The Germans intended to break the French Army by forcing it to fight a battle of attrition under unfavourable circumstances. The battle was launched with heavy artillery support on 22nd February 1916. Catching the French ill prepared, the offensive was initially successful, inflicting heavy casualties on the French and their forces in disarray, crowned by the capture of Fort Douamont on the 25th February.
General Henri Phillipe Petain
The same day, General Petain, commander of the Second Army, was ordered to take charge of the Verdun sector. He was chosen purely because his army was in reserve and available. Petain was an infantryman with an undistinguished pre war career only enlivened by his rejection of the pre war orthodoxy that willpower and aggression could overcome modern weapons. As an instructor at the Ecole de Guerre he preached the heresy that “firepower kills,” with the logical implication that a well organised defence would stop the Attaque à outrance (attack to excess). His rise to army command in the first eighteen months of the war had confirmed the need to “separate the real from the imaginary and the possible from impossible.”i An address to a decimated regiment illustrates this.
You went into the assault singing the Marseillaise; It was magnificent. But next time you will not need to sing the Marseillaise. There will be a sufficient number of guns to ensure your attack’s success.
Petain’s “On Les Aura” as a propaganda poster
The measures Petain took to defend Verdun were based on firepower and belief that there were no short cuts to victory. He centralised control of the artillery and massed defensive fires where it could be most effective. He organised administration and logistics and arranged for a systematic and early replacement of formations committed to Verdun, known as the “Noria” (bucket chain) or “tourniquet” (turnstile).
Petains Catch phrase “Courage, on les auras” was a reference to Joan of Arcs words at Orleans. “Our enemies, even if they hung in the clouds, we shall get them! And we will drive them out of France!”
On 10th April Petain issued an order of the day which ended with the phrase “Courage, on les auras” (Take heart, we’ll get them.) This was meant to stick in the memory as a catch phrase. It was a allusion to the words of Joan of Arc at Orleans. “Nos ennemis, fussent-ils pendu aux nuages, nous les aurons! Et nous les bouterons hors de France!” (Our enemies, even if they hung in the clouds, we shall get them! And we will drive them out of France!) They were a reminder of the need for patience a war that could only be won by only fighting winnable battles but might take a long time.
Petain’s realistic, pessimistic approach to value counter attacks, did him no favours with Joffre, the French commander in chief or with the politicians. On 27th April Petain was promoted to Commander of the Central Region, and replaced as commander of the 2nd Army, by General Robert Nivelle who was more to Joffre’s taste. Like Petain a mere colonel in 1914, Nivelle’s career had a meteoric trajectory. A heroic action at the Marne was followed by successful command of a brigade, divisional and corps. A whole hearted believed of the ideas of de Gradnmaison, Nivelle believed that success in battle was based on the will to win and that flawed leadership (but not his) led to “defaillance”, (weakness or breakdown). However, artilleryman Nivelle was also aware of the necessity of good infantry artillery co-operation. He was probably responsible for the most important technical development that enabled attacks to succeed, the barrage roulant – the creeping barrage.
Target areas for Phosgene bombardment 323 June 1916
On 23 June 1916 the Germans planned a major attack by their elite mountain corps. This would be preceded by “Green Cross”, chemical artillery shells containing Phosgene, a new very lethal choking agent, which the Germans thought might penetrate French gas masks.
2nd Army Order of the Day 23 June 1916
The phosgene barrage caused consternation and 1,800 casualties, mainly among French gunners. By the end of the day German infantry penetrated the furthest they ever achieved towards Verdun. Nivelle issued an order of the day that included the words “Vous ne les laisserez passer, mon camadares” (“You will do not let them pass”
Crisis at the battle of Verdun 23 June 1916. The solid blue line shows the French line before the attack. The dashed line shows the furthest extent of the German advance and the blue crosses the positions restored by the French by 2nd July
This wasn’t an original phrase. It had been circulating among the troops for some time, but there is no evidence that Petain used the phrase himself It was an appeal drawing on ‘cran’ (guts) very much Nivelle’s style . However this was out of character for Petain whose command style was based on promises of artillery support and avoided appeals for flesh to face material or attempt the physically impossible. The crisis passed and the very next day, the preliminary barrage started on the battle of the Somme. From this moment Verdun became a secondary sector. However, throughout the remainder of 1916 Nivelle, occasionally constrained by Petain conducted a series of counter attacks which cumulated in the dramatic recapture of the Fort Douemont on 24th October. On that day the French troops advancing under a creeping barrage recaptured the ground that it had taken the Germans months to capture.
Monument to the village of Fleury close to the German attack on 23 June
At the end of 1916, the French government had lost confidence in Joffre, their commander in chief, held responsible for the neglect of the defences of Verdun and the disappointing results of the Somme offensive. On the 27th December 1916 Joffre was promoted to Marshall and removed from command, to be replaces by Nivelle, who promised a decisive victory if allowed to use his tactics on larger scale. The failure of the Nivelle Offensive in May 1917 and the subsequent mutinies led to Nivelle’s fall and replacement by Petain. Nivelle was largely forgotten and Verdun became, in the public mind synonymous with Petain.
Pussy Rioter: “they shall not pass” chic.
In the meantime he catch phrase “On ne passe pas” , to use an anachronism, went viral. It joined “Old Contemptables” “In Flanders Fields” and “over the top” evoking aspects of the war. The call for the spirit to over come material odds made it attractive for the underdog and even chic.
The difference catch phrases of Petain and Nivelle illustrate different approaches to the battle of Verdun. They were also present in the British high command. The logic of Petain’s approach leads to the “bite and hold “ school identified with Rawlinson and Plumer, while Nivelle’s appeal to strength of will has much in common with the “Harroshing” of Haig and Gough. Indeed, Haig’s “Backs to the wall” order of the day in April 1918 is very similar to Nivelle’s appeal on 23 June.
If you ever need to use this article to settle a bet, donations are always welcomed by the battlefields Trust, a UK Charity dedicated to preservation, interpretation and presentation of battlefield heritage. Battlefields Trust Just Giving
There is a lot to see at Verdun, where far more of the battlefield was abandoned after the war. Far fewer Britons visit Verdun, know as much about this battle or even its connection to the battle of the Somme. If you are interested in visiting the battlefield of Verdun or other battlefields of the Western Front contact me.
The Battle of the Somme was the largest, most bloody battle fought by the British Army. The popular image in Britain is of waves of foot soldiers going over the top into a hail of shells and bullets. But whether they succeeded often depended on how well the Gunners had breached then barbed wire, damaged defences, neutralised enemy batteries and neutralised enemy in the path of the infantry, and whether the infantry used the barrage.The Somme was an artillery battle, the first of its scale waged by the Royal Regiment. The artillery plan for the 1st of July assault was the first army wide artillery instruction. Within common principles and guidelines each corps developed its own fire plan. In one sense the First Day of the Somme was a very big experiment with each Corps trying out a different technique for supporting the infantry.
The verdict was clear by the end of the day and the tactics used by the XV and XIII Corps, of heavy counter battery fire and a creeping barrage became the norm for future attacks.
The majority of the BEF’s troops were “Kitchener’s” New Army Volunteers, raised for the duration of the war.However, many of the regular and territorial units which fired in the opening barrage and on the first day of the Somme are still part of the Royal Artillery.
VII CORPS
The northern most corps, VII Corps of the 3rd Army was made by two Territorial Divisions, the 46th (North Midlands) and the 56th (London). 210 (Staffordshire ) Battery can be considered the descendants of the CCXXXI (231)and CCXXXII (232) (II and III North Midlands Brigades) recruited from Staffordshire
This picture shows a QF 4.7″ gun on the III Corps front later in July 1916. The Territorial Heavy Batteries were each armed for four of these obsolescent guns, retained in service because of the shortage of modern long ranged artillery. AWM)
265 (Home Counties) battery might consider themselves associated with the territorial artillery brigades of the 56th (London) Division at Gommecourt. The Home Counties Territorials also formed the 1/1 (Kent) Heavy Battery with four 4.7” Guns, part of the 48th Heavy Artillery group supporting the VIIth Corps at Gommecourt, as was the 1/1 Lowland Heavy battery, raised from the recruiting area of 207 (City of Glasgow ) Battery.
VIII CORPS
The VIIIth Corps, was the Northernmost army corps in the Fourth Army. One of its infantry divisions, the “Incomparable 29th Division” formed from regular units serving across the world. This division fought in Gallipoli and in all of the major battles on the Western front from the Somme onwards. The part of the battlefield over which the 29th Division advanced is includes the preserved battlefield of Newfoundland Park, one of the most visited and photographed. One regiment and four current day batteries have antecedents which served with the 29th Division on the First Day of the Somme.
This photograph taken after the first day shows an 18 pounder gun, its crew stripped to the waist in the sunshine, firing a barrage from the Carnoy Valley south east of Montauban. This was the equipment used by the field batteries that have survived to modern times.
The XVII Field Brigade is still part of the Gunners, being renumbered 19 Regiment after the Second World War. One of XVII Field Brigade’s batteries, numbered 13 Battery in 1916 is still part of 19th Regiment, having been renumbered as 28 battery in 1947. According to the fire plan, this battery fired the artillery support for the doomed attack across Newfoundland Park.
B and L Battery RHA also were part of the 29th Division and fought on the first day of the Somme. XV Brigade RHA was formed from RHA units, but was equipped with the 18 pounder field gun and carried out the same function as a divisional field artillery battery. B Battery sent an OP party forward to support the capture of the Hawthorn ridge crater caused by the much photographed mine.
10 Battery RFA, now 25/170 (Imjin) HQ Battery of 12 Regiment served in 147 Field Brigade, also part of the 29 Divisional artillery group.
The heavy artillery of the VIII corps included 1/1 Highland Heavy Battery, part of 1st heavy Artillery group raised from the recruiting area of 212 (Highland) Battery, and 1/1 Welsh Heavy Battery, raised in Carnarvon. Both territorial batteries were equipped with four 4.7” guns.
X CORPS
The South African war vintage BL 6 inch 30 cwt Howitzer equipped several batteries for the Somme, including 17 Siege Battery.
To the right of VIII Corps was X Corps, which attacked the dominating ground around the village of Theipval. None of the field batteries of its new army and territorial had survived to the current day.
However, 17 Siege Battery RGA, the
BL 6-inch howitzer and a four wheel drive tractor
recently disbanded 52 (Niagra) Battery was part of 40 Heavy Artillery Group which was the Northern Group supporting X Corps. The battery was equipped with four 30 cwt 6” Howitzers and fired on targets in the sector attacked by the 36th Ulster Division and commemorated by the Ulster Tower memorial.
III CORPS
The III Corps attacked either side of La Boiselle on the Albert-Bapaume road. This was the point of main effort of the Fourth Army. North of the road, the 8th Regular Infantry Division attacked towards the village of Orvilliers. Its artillery group included V Brigade RHA, now 5 Regiment, and XLV Brigade RFA renumbered as 14 Regiment in 1947.
This photograph of a 60 pounder Gun is from 1918 rather than 1916. 90 Siege Battery, the antecedents of 38 Battery, were equipped with four of these long ranged guns.
As with XV RHA, V RHA Brigade, was equipped as a field brigade, there being a greater need for field rather than horse artillery in trench warfare. V Brigade RHA’s batteries included was O and Z batteries RHA.
XLV Field Brigade, which became 14 Regiment and three of its batteries have also survived. 1 Battery as “The Blazers”, 3 Battery RFA as 13 (Martinique) Battery and 5 battery as 5 (Gibraltar 1779–83) Battery. This divisions attack just north of the Albert Bapaume road towards Orvilliers also failed with heavy casualties
The Heavy Artillery of III Corps included:-
1 Siege Battery equipped with four 6” howitzers, part of 27th heavy Artillery group. This became 73 battery, now part of 4/73 (Sphinx) Battery.
90 Heavy Battery RGA, equipped with four 60 pounder guns. part of 22 Heavy Artillery Group became the current day 38 (Seringapatam) Battery.
1/1 London (Woolwich) Heavy battery was part of 34 Heavy Artillery Group RGA, equipped with four 4.7” guns.
XV CORPS
Man handling a BL 6 inch 26 cwt howitzer near Pozieres 1916.
XV Corps was to the right of III Corps. One of its two assaulting infantry divisions was the regular 7th Infantry Division. The artillery group included XXXV (35) Brigade RFA, which still survives as 29 Commando Regiment, as does one of its batteries 12 Battery RFA, now 8 Alma Commando Battery as do F and T Battery RHA which served as part of XIV brigade RHA. The attacks by the 7th Infantry division were among the most successful of the day, due in part to the innovative creeping barrage fired by the artillery of the corps.
1/2 Lancashire Heavy Battery, based in Sefton Barracks Liverpool, in the current day 208 battery recruiting area was part of the 18th Heavy Artillery Group equipped with four 4.7” Guns
XIII CORPS
The attacks by the two New Army Divisions of XIIIth Corps were the most successful of the day.
Heavy Work. manhandling the 60 pounder on the Somme 1916
115Heavy Battery RGA, the current day 18 (Quebec 1759) Battery was also equipped with four 60 pounder guns as part of 29th heavy Artillery Group in support of the XIII Corps. This was the right hand British Corps in the attack on the 1st day of the Somme. Their counter battery fire was particularly effective, supported by additional French heavy guns and a factor in the breakthrough in the XIII Corps sector.
1/1 Lancashire Heavy Battery was part of 29 Heavy Artillery group supporting XIII Corps, This too was raised in Sefton Road, Liverpool.
The story on each Corps sector is different. There are the personal accounts of the men who served the guns. And there is the story of how the Army developed the techniques learned at a painful cost to turn the Somme into the “Muddy Grave of the German army.”
If you would like to visit these places and see what the Gunners did on the Somme, there are still places available on the Somme Centenary Gunner Tour.
The first day of the Somme is best known for 57,000 casualties suffered by the British Army; the largest in a single day, and the event that supports the idea of British generals as “Butchers and Bunglers.” Yet, paradoxically, it was concern for safety which led to disastrously high casualties and failure of most of the attacks.
Attacks on the British Sector of the Somme
The battle of the Somme originated from a decision taken in December 1915, that the Entente powers, Britain, France, Italy and Russia would all launch an attack as soon as possible in 1916. The Somme was selected as the site of the Anglo French offensive because it was the junction between the two armies. It was originally envisaged that the French Army would take the lead. However, the German offensive at Verdun, started in February 1916 cost the French and Germans armies over 200,000 casualties each. By June 1916 not only would the British have to take the lead at the Somme, offensive but the bear This had two consequences, there were fewer French troops available which meant that the British would have to take the lead. Furthermore, the attack of the Somme was imperative to take pressure from the French at Verdun.
Sir Henry Rawlinson, commander of the Fourth Army. His initial plan for a methodical advance was rejected.
The British Army had limited experience of offensive battles, and had never planned an operation of the scale of the battle of the Somme. In March 1915 the British had launched a successful breach into the German lines at Neuve Chapelle, supported by a concentrated barrage by the artillery of the British Expeditionary Force. During other attacks in 1915 a shortage of artillery ammunition had prevented the British from repeating this level of fire support. However, by 1916 British industry had geared up to supply the vastly expanded British Expeditionary force swelled by millions of volunteers who Kitchener’s New Army recruited in 1914-15.
The largest ever British Army would be supported by the huge quantity of artillery pieces, 1072 light and 442 medium and heavy guns
GHQ issued no special instruction on the co-operation of infantry and artillery as, in the words of the official history, this main feature of the theory of the assault was well understood. In summary, towards the the close of the bombardment, shortly before Zero, the artillery would put down an intense barrage on the enemy front trenches; at Zero this would be lifted and dropped on the next trench, from which it would be lifted at a fixed time. Before each lift, the infantry under cover of the barrage was to creep to within as close assaulting distance as the barrage permitted. This was around 100 yards from the enemy’s front parapet and the infantry was to assault as soon as the barrage lifted.”
General Douglas Haig. He applied pressure to spread the artillery very thinly
It was impressed on all, at conferences by both Haig and Rawlinson that “nothing could exist at the conclusion of the bombardment in the area covered by it.” Owing to this optimism, the problem of evicting the Germans from the labyrinth of trenches was seen just as one of assault only. It was not seen as a race for the parapet between the attackers across no man’s land against the defenders in the their dug outs. Instead it was seen as something that could be done at leisure.
Not everyone shared this assumption. “Some Regimental officers suggested that the infantry might creep even nearer to the barrage, as was done later on and in at least one instance on the 1st of July. Forty yards was suggested instead of a hundred but it did not receive official approval. (1)
The race for the parapet: lethal game of rock-paper-scissors
The race to the parapet was the essence of attacking a trench. It can be envisaged as a rather deadly form of ‘rock-paper-scissors’. The defenders can either be in their dugouts or manning the trenches. The attackers can either send artillery rounds or infantrymen. Defenders lining trenches would slaughter attacking infantry but were vulnerable to artillery fire. Defenders would be reasonably safe in their dugouts, but could do nothing if the attackers were waiting at the top of the dugout steps. The key was for the assaulting infantry to be so close to the artillery barrage that the defenders had no time to react.
Infantry could advance close behind the directional shrapnel barrage.
The shrapnel shells from the British 18 Pdr Field gun were highly directional, and ejected forwards, like the blast from a shotgun. In the Boer war the British found that infantry could advance to within 50 yards with some safety. Japanese troops had also used these tactics in the Russo-Japanese War, as had the French in their costly 1915 offensive in Champagne. The “dapper and charismatic” artilleryman Robert Nivelle had developed a creeping barrage (le barrage roulant) 80-100m ahead of the leading infantry. (2)
Shell splinters for HE shells could fly hundreds of yards laterally, making it dangerous for friendly troops to approach closer than 200 metres.
The trouble with this tactic was that it had a fatal cost. Artillery rounds do not all land in the same place, but are scattered in a cigar shaped pattern, through variation in the propellant and further dispersed by variations in the wind and of temperature and human error in laying the piece. So “getting close to the barrage” inevitably meant “in a place likely to be struck by shrapnel from a shell that fell shorter than most”. Indeed the rule of thumb, later in the war, was that unless the infantry were taking casualties from their own artillery fire, then they were not close enough.
So the commanders faced a dilemma. The men lost to artillery fire would usually be far lower than the casualties suffered from the machine guns of alert defenders. However, if the artillery preparation was going to leave the defenders unable to resist then would it be right to expose the infantry to friendly fire casualties?
British (and some French) Artillery positions behind 29th Division of VIII Corps at Beaumont Hamel
To make matters worse, the gunners firing the barrage were mostly Kitchener’s Army men. Their gunners, technicians and officers had limited training and experience, and were using ammunition and guns produced by newly expanded or hired suppliers. It might have been sensible to apply nn extra safety margin. The plans for the 1st July seem to bear this out.
The fire plan for the first day of the Somme specified an artillery barrage that would lift from the German front line trenches at zero hour, even though the distance between the British and German Trenches was much wider – from 200-800 metres across most of the assault frontage. Some British units left their trenches before zero hour, and worked their way as close as possible to the German trenches. Where they did, the British succeeded in capturing the German front lines; the Ulstermen at the Schwaben redoubt, the Highland Light infantry at the Leipzig redoubt and the 30th Division near Maricourt. Elsewhere, success was more illusive and on much of the front the assaulting infantry faced fully manned trenches.
Artillery Bombardment Beaumont Hamel Somme 1916
The excessive safety distance between the starting barrage and the infantry wasn’t the only reason that casualties were so heavy and the gains so slight on the 1st July. There needed to be enough breaches in the German wire. Where the wire was intact, the advance stopped. It helped if the defenders were crushed in their dugouts or demoralised by the barrage. There were more, and heavier guns, and the dug outs were less deep south of the Albert-Bapaume. The Germans had to be prevented from bringing down their own defensive barrage preventing movement across no mans land. There were fewer German guns south of the Albert Bapaume Road, and the British could call on the more numerous French heavy guns for counter battery .
Lieutenant General Sir Aylmer Hunter-Weston By F. A. Swaine – http://www.archive.org/details/cu31924088057223, Public Domain, https://commons.wikimedia.org/w/index.php?curid=2494174
The worst losses and least success was on the frontage of the VIIIth corps where a “safety factor” played a grotesque part in the tragedy that unfolded. A number of a mines had been dug under the German trenches. Almost all were scheduled to be detonated at 07.28, on the 1st July, two minutes before zero hour. This would allow two minutes for the debris to fall before the British infantry assaulted the crater. One of these was under the Hawthorn redoubt near the village of Beaumont Hamel. The commander of VIII Corps, Lieutenant General Sir Aylmer Hunter-Weston wanted this to be fired some hours before the attack, so that the redoubt could be occupied before the assault, but sufficiently in advance that any general alarm would have died down by zero hour. This was vetoed by more senior commanders, but as a compromise the mine would be fired at 07.20, ten minutes before Zero.
Barrage map for 29th Division at Beaumont Hamel showing wire cutting tasks for 18 pdr batteries (blue) and trench mortars (brown) and preparation targets for 4.5″ Howitzers (yellow)
This allowed for a plan to occupy the crater early, but it required the heavy artillery bombardment of the redoubt and adjacent trenches to lift during the assault. However, instead of fire lifting only from the immediate area, all of the VIII Corps heavy artillery was ordered to lift at 7:20 a.m. and the field artillery to lift at 7:25 a.m. A light Shrapnel barrage fired by the divisional field artillery, was to continue on the front trench until zero hour but in the 29th Division sector, half of the guns were to lift three minutes early.
Barrage map for 29th Division Artillery showing the sections of front line trench and final lines for each battery.
This allowed the German defenders ten minutes notice of the impending assault and condemned the infantry from three divisions to heavy casualties and failure across the breadth of their front. It did not matter how well the wire had been cut or whether the infantry crept out into no man’s land. One of the attacking battalions lost all its officers before zero hour.
So why did the seemingly responsible commanders, who were professional experienced soldiers, get this decision so wrong?
7,000 shrapnel shells, enough for a divisional creeping barrage
One simplistic, but popular explanation is that the commanders were incompetent “butchers and bunglers”iii. Professor Norman Dixon in the Psychology of Military Incompetence (4) argued that there was something about military training which led to poor decision making. Indeed, the performance of General Sir Aylmer Hunter Weston is hard to describe as anything less than incompetent. “Hunter-Bunter” was a strange man with a command style reminiscent of that of the monstrous Blackadder creation General Sir Anthony Cecil Hogmanay Melchett. The disastrous decision to lift fire early across the VIII Corps front was very much in keeping with his micro-management and idiosyncratic decision-making. He had a history of over compensating for the risks of friendly fire in Gallipoli. He was found out on the first day on the Somme. Afterwards, although he retained his command, he was never entrusted with command in an offensive and only employed on quiet sectors. Could he have been removed earlier? To be fair to Rawlinson and Haig, Hunter-Weston was new to the Western Front. He had commanded the 29th Division and then the VIII Corps at Cape Helles in Gallipoli and arrived with his corps as an experienced commander and a reputation of relatively competent performance.
The Second Wave: Colonel Walford’s Impression of an attack on the Somme, following the barrage shown on the left
Elsewhere in the BEF the disastrous decision about fire plan timings resulted from agreements between groups of people, commanders and subordinates and their staffs.
In the first instance, the senior commanders were not looking at this problem. The correspondence between Rawlinson and Haig shows a focus on the problems of exploiting success. In earlier battles such as Loos and Neuve Chapelle the British infantry had taken the German first line wherever they had adequate artillery support.
The plan for the Somme was a bad compromise. Rawlinson, commander of the fourth army, put forward a plan for a phased advance, initially taking just the first German line, which he and his staff thought was within the capabilities of the resources available. Haig did not think this was ambitious enough. He rejected the plans and insisted that an attempt should be made to breach both the front line and the second line to ensure that any opportunity for a breakthrough was not missed.
Hawthorn Redoubt mine. By F. A. Swaine – http://www.archive.org/details/cu31924088057223, Public Domain, https://commons.wikimedia.org/w/index.php?curid=2494174
On this occasion Haig was able to impose his will on Rawlinson, despite reservations about the artillery being spread too thin made by the newly appointed artillery adviser at GHQ, General Birch. Birch and Rawlinson, having expressed their opinions in private, then issued orders and expressed their confidence in them.
As the Official History notes, not everybody assumed that the enemy would be flattened by the preparatory barrage. There seems to have been sufficient internal criticism for Rawlinson to include the following in the Fourth Army tactical notes;
“it must be remembered that all criticism by subordinates of their superiors, and of orders received from superior authority, will in the end recoil on the heads of the critics and undermine their authority with those below them.” (5)
The battlefield today. Part of the 29th Division sector in Newfoundland Park. The barrage on the German trenches at the far side of the patk was provided by 13 battery of XVII Field Brigade, which is still in the Royal Artillery as part of 28/143(Tombs Troop) Battery an AS 90 battery in 19 Regiment.
This was hardly the atmosphere in which to challenge the fundamentals of the plan. The late, great professor Richard Holmes remarked in the episode on the Battle of the Somme in the Western Front BBC series that the generals of the first world war were stronger in physical than moral courage.
It should be said that the BEF was very quick to learn and the next major attack, on the 14th July, less than two weeks after the first day, was conducted with a much greater concentration of artillery fire and with the infantry following a creeping barrage.
Major General J F N Birch CB, Haig’s senior Gunner argued that the artillery was spread too thin
There is a modern relevance of the battle of the Somme. This was a major high profile project into which much had been invested and expected. The resources available weren’t enough to deliver the hoped for results. At the heart of the plan were flaws that, could have been spotted and rectified but were not. The plan required subordinates to achieve “stretch targets”, “do more with less”, and “sell the party line” within an organisational culture that inhibited internal criticism.
The safety margin dilemma occurs frequently across all walks of life. If anything, the compensation culture makes it harder to choose to take risks. It is very hard to imagine the modern British Army willingly encroach on safety distances even if was the only way to win a battle.
We may not face machine guns and un-cut wire, but we often make important business and other decisions against a back ground of pressure from peers and superiors to agree to deliver uncertain commitments as part of a team effort. Many of us are under pressure to support decisions that have been made and face severe personal and career sanctions for whistle blowing. What is it that we can do to be more effective both as leaders in these situations and followers?
If you would like to visit the Somme and see the story of the artillery on the Somme join Gunner Tours on the Somme Centenary tour. info@gunnertours.com
The centenary of the battle of the Somme, which took place between June-and November 1916, has a special significance in Gunner history. This was the largest battle fought by the British army, costing 400,000 casualties. While public interest in the battle centres on the infantry who went 'over the top' on the first of July, the Gunner battle started a week earlier with the opening bombardment by the largest number of guns assembled.The Somme was essentially an artillery battle, with the guns the only weapons capable of clearing wire, destroying and neutralising defences and artillery. This was an awesome responsibility, and the success or failure of the infantry was down to the effectiveness of the fire plan. The story of how the Royal Artillery learned during the campaign is one of successful innovation, and a matter of pride to Gunners.It is also a human story. We will see where Gunner staff work made a difference; where Gunners went over the top with the infantry and where . Gunners worked to the point of exhaustion in the service of the guns.This tour will tell this story at the places where this largest artillery battle took place 100 years after the opening barrage was fired.
Notes:
(1) Brigadier-General Sir James E. Edmonds; Military Operations: France and Belgium, 1916, Volume I: Sir Douglas Haig’s Command to the 1st July: Battle of the Somme,, 1932
(2) Strong P and Marble S, Artillery in the Great War
(3) John Laffin;s polemic “Butchers and Bunglers of World War one” is the publication which is most associated with the term.
(4) Dixon N F, On The Psychology Of Military Incompetence, Basic Books, 1976
Camp of 1/5th Hampshire Howitzer Battery at Makina Masus near Basra, 1915 (NAM. 1987-01-70-42)
This photograph in the National Army Museum Collection shows the men of the 1/5th Hampshire Howitzer battery in Mesopotamia, modern Iraq in 1915. It was a Territorial unit, with many men from the Isle of Wight. Around half of the battery and three other batteries from the Regular Xth Field Brigade which served alongside them, would die during the war. This November is the centenary of the fateful events which lead to these units being doomed to suffer some of the highest proportional losses of any Gunner units losses in the Great War.
Turkish Prisoners
The 1915 campaign in Mesopotamia is over-shadowed by the Gallipoli expedition. After the Ottoman (Turkish) Empire joined the war on the side of Central Powers the British send a small expeditionary force “Indian force D” based on the 6th (Poona) Indian Infantry Division to secure the oil refinery at Abadan, important for fuel oil for the Royal Navy. In addition to the 1/5th Hampshire Howitzer battery, the artillery included the Xth Brigade Royal Field Artillery, (63,76 and 83 batteries) The 1st Indian Mountain Brigade, 23rd and 30th Batteries), a Territorial Army unit and S Battery RHA
The Mesopotamian campaign started well and by April 1915 had secured its limited objectives. After landing at Fao on the 6th November 1914, the expeditionary force defeated the Ottoman defenders in battles for Basra and Qurna in 1914. At the battle of Shaiba 12-14 April 1915, the British defeated an Ottoman attempt to evict them, the last time that they would threaten Basra. But what next?
The strategists in London wanted to scale the operation back, in favour of the Western Front and other theatres. Those in India saw an opportunity to exploit success and capture Bagdad given the light, defeated opposition. This was to be achieved with the resources in theatre.
So on a logistic shoestring, General Townsend with a force of around 11,000 men of the 6th Poona Division was ordered to advance up the River Tigris, supported by river gunboats as far as Kut-al- Amara and , if possible Bagdad. On 29 September the British defeated the Ottomans south west of Kut after an night march and dawn attack.
By 21 November the 6th Division was approaching the next line of Ottoman defences on a six mile front at Ctesiphon 26 Km South East of Bagdad. The Turkish commander had entrenched his troops across the valley. The British plan was to form four infantry columns and attach the Turk positions at dawn on the 22nd while a flying column manoeuvred around the right, Eastern flank. Much of the fire-power to support the attack was to be from gun boats on the River Tigris. The Turks concentrated their artillery fire on the gun boats and by the end of the 22nd each side had suffered close to 50% casualties in a very bloody battle. Both commanders ordered their men to withdraw. Townsend had only a few thousand unwounded men, not enough to capture and hold Bagdad, and thousands of wounded. He fell back to Kut. The suffering of the wounded was pitiful. Townsend entrenched his men at Kut and waited for relief. The Turks brought up reinforcements, defeated relief efforts and in April 1916 Townsend and his Army surrendered. Prisoners of War were not well treated by the Turks and around half of the British and Indian soldiers who fell into their hands died in Mesopotamia or on a forced march to Anatolia or in the harsh conditions there.
Among them were the men of the 1/.5th Hampshire Howitzer Battery and the three batteries of the Xth Brigade RFA (63,76 and 82). The Commonwealth War Graves records lists 442 dead from these units, which had an establishment of around 800.
Two batteries of the current day 106 Regiment are based in Hampshire are continue the traditions of Hampshire volunteer artillerymen, even though 457 and 295 batteries draw on the traditions of the Hampshire Yeomanry. The regular batteries were reformed, but none survived the post WW2 reorganisations.
One other battery which took part as Force D is still in existence. The 23rd Peshawar Mountain battery (Frontier Force) was transferred to the army of Pakistan in 1947. https://en.wikipedia.org/wiki/23rd_Peshawar_Mountain_Battery_(Frontier_Force)
Camp of 1/5th Hampshire Howitzer Battery at Makina Masus near Basra, 1915.
Photograph, World War One, Mesopotamia (1914-1918), 1915.
1/5th Hampshire Howitzer Battery landed at Basra on 23 March 1915 and joined 6th Indian Division which had arrived in November 1914.
It fought in the Battle of Shaiba (April 1915) and took part in the advance towards Baghdad, including the Battle of Es Sinn, capture of Kut (September 1915) and Battle of Ctesiphon (November 1915). The battery was captured by the Turks following the British surrender at Kut in April 1916.
Blackadder goes Forth was the final series of the Blackadder BBC TV comedy programme. “The series placed the recurring characters of Blackadder, Baldrick and George in a trench in Flanders during World War I, and followed their various doomed attempts to escape from the trenches to avoid certain death under the misguided command of General Melchett.” The six programmes in this series were a satirical comedy set in the trenches of the Western Front. The characters were grotesque and funny, but the series ended with the poignant death of most of them in a hail of bullets in 1917, in slow motion with a final scene cutting into a shot of a field of poppies.
Major R J Blackadder MC
This was the “Oh What Lovely War” version of the First World War, with a heavy handed moral slant, but it is also glorious comic satire. And being funny is one of the core values of the British Army. Not the official Core Values of the British Army , which are Courage, Discipline, Respect for others, Integrity, Loyalty and Selfless Commitment. All worthy ideals but they do not round out the character of the British Army. There are at least three other unofficial core values –“ Sense of Humour”; “BS Baffles Brains” and above all “Don’t get Caught” all come to mind.
This photograph advertised on e bay was captioned as showing soldiers from 152 Siege Battery RGA
There is a grain of truth in each episode of Blackadder Goes Forth. Starting with the existence of a Captain Blackadder in the Royal Field Artillery, as reported by the Radio Times in 2014. The Imperial War Museum (IWM) has a copy of his diary. This is listed as providing details of his service in 151 Siege Battery Royal Garrison Artillery. However, Peter Hart and Nigel Steel, both senior staff members of the IWM, record his unit as the 152 Battery – so I am not sure which is right. Both of these batteries were raised in Scotland, equipped with four 8″ Howitzers and deployed to France in August 1916. Blackadder took part in the major battles from the 1916 battle of the Somme to the end of the war and his observations are a primary source for these battles. During this time he rose from lieutenant to major and decorated for gallantry for organising the withdrawal of his guns , ammunition and stores under heavy fire.
The real Blackadder, with his accounting background looks a little more like Tim McInnerny’s Captain Darling.
8″ Howitzer of the type used by 151 and 152nd Siege Batteries
However, the extracts from his diary from summer 1917 in the 3rd battle of Ypres make it clear that he was far from a pen pusher with a paper-clip fetish.
The road to the new position is a mere apology for a road and as we are taking down the first gun at night the road surface collapses and the gun sinks to its cradle. It has lain there for three days now and we have not been able to shift it — two caterpillars failed to move it. Now we have had heavy rain so it is very doubtful if we will get the guns to their new place at all. The result of three nights’ work is to get one gun into a hole and another off to a workshop. Tonight I am to get the gun out of the ditch and another to the workshop if possible. The Hun shelled the battery all afternoon, broke another limber and badly damaged the road again. About midnight he again shelled and set off more ammunition but all the men got clear. I got the gun out of the ditch with two engines and into the new position. It was difficult to get the gun away to the workshop owing to the road being cut up but we succeeded without mishap about 3 a.m.”
8″ Howitzer towed by a Holts Tractor IWM Q 4322 These are the “Caterpillars” mentioned by Blackadder
A location for 152 Siege Battery on the road from Bosinge to Langemark – whether Blackadder was with this battery is less certain
29 July (1917) At night, about 11 p.m., the old Hun began to strafe us and all around. The guns got it first of all so I ordered all to clear out. Then he worked up towards the fighting post, a concrete erection left by the Hun. Several of the gunners had come up here for shelter some very badly shaken. The shells were falling very near now, the concussion putting out the lights several times, then, all of a sudden, a tremendous crash and all darkness and smoke almost suffocating us — a direct hit on the post! We lit the candles again, but could hardly see for the smoke.
Conditions in the field in Flanders. This 18 Pdr is much smaller than the 8″ Howitzers in Blackaddder’s battery.
After ascertaining all were untouched I tried to get out, the shelling having moved to the guns again, but found the entrance blocked with debris. All wires had been broken too so we were out of touch with the guns and headquarters. We soon worked a passage out and set to work to get into communication. Meantime some of the ammunition on No. 3 gun had been set on fire and the limber and stores were burning merrily: I got this gunner to come with me to put the fire out, this we did without mishap and returned to the concrete post. About 2 a.m. the shelling stopped and at dawn we reckoned up the damage done. Casualties, nil, material destroyed, very little. The fighting post was only slightly damaged and will stand many more hits thanks to the excellent work of` the Hun.”
A gun under repair.
Once again, it is ‘Der Tag’ and again we are nibbling at the Bosche line. Our Battery is busy closing up the Hun guns and during the day in addition to carrying out our programme during the attack, we received many calls from aeroplanes who saw Hun guns active. The Hun strafed the Battery area just before zero hour and broke all the communications to the guns, but we got these put right just in time. He did little damage though he hit No. 2 gun pit twice. During the day too, he endeavoured to neutralise the Batteries about our area with shrapnel and high velocity guns, but we got off with no damage.
Lieutenant Robert Blackadder 152nd (sic) Siege Battery Royal Garrison Artillery. (Steele and Hart Passchendaele: The Sacrificial Ground)
If you want to visit the area where the real Captain Blackadder fought, or hear the gunner side of the First World War, contact Gunner Tours www.gunnertours.cominfo@ Gunnertours.com
Sources :
1. Steele and Hart Passchendaele: The Sacrificial Ground – on e of the best histories of this battle, drawing heavily on personal accounts and one of the few that tells the story from the Gunner’s perspective.
2. https://livesofthefirstworldwar.org/lifestory/366252 The entry credited to Paul Evans look like the work of Firepower’s archivist
3.http://1914-1918.invisionzone.com/forums/index.php?showtopic=101508 The pictures of 152 Seige battery, triggered by someone’s family research.
Australian gunners manhandle 18 Pdr Guns inland from ANZAC Cove
25 April was the anniversary of the landings on the Gallipoli peninsular. It has become synonymous with the Australian and New Zealand forces, the ANZACs. This was the day when the forces of these dominions first played a significant role in military operations. Gallipoli; in particular ANZAC Cove has become a place of pilgrimage for antipodeans commemorating the endeavours and sacrifices of the antipodean dominions.
ANZAC Corps Artillery Positions 8th May 1915. The broken hilly ground has forced the guns to be deployed forward in ones and twos. The guns marked “M” are mountain guns. (HQ ANZAC CORPS GS WD May 1915)
But the ANZAC corps which fought in Gallipoli was not just made up of Aussies and Kiwis. British and Indian gunners also served in it. The Corps comprised the 1st Australian Division and the Australian and New Zealand Division. Neither included as much artillery as a British infantry Division. The 1st Australian Division included three artillery brigades, each of three four gun batteries equipped with 18 Pdr field guns, a total of 36 x 18 Pdr guns. The Australian and New Zealand Division’s artillery support was the 1st New Zealand Artillery Brigade with twelve 18 Pdr guns and a howitzer battery of four 4.5” Howitzers. By comparison a British infantry division was supported by fifty four 18 Pdr guns, eighteen 4.52 Howitzers and four 60 Pdr guns. The ANZAC Corps had less than half of the artillery that supported comparable British formations.
It was particularly short of howitzers capable of lobbing high explosive shells over hills and into trenches. Almost all of its guns were 18 Pdr guns with a flat trajectory and very difficult to deploy in the hills inland from Anzac Cove. Often the way to enable the guns to engage was to run them forwards with the infantry in the direct role. These guns were supplied solely with shrapnel shells which was almost useless against troops in trenches. Although the Allies could call on the support of the naval guns of the fleet, these too had a flat trajectory and could not be easily brought to bear onto Turkish positions among the hills.
At least three other Imperial gunner units were brought in to support the ANZAC Corps to redress this deficiency. Even so, the expeditionary force as a whole was never supplied with the level of artillery support, either in the number of guns or ammunition that was found necessary to support a successful attack.
Gunners from 24 Mountain Battery and their 10 Pdr BL Mountain Gun
The 7th Mountain artillery brigades of the Indian Army was attached to the ANZAC Corps.The mountain artillery were the only artillery part of the Indian army manned by Indian rather than European gunners. Ever since the Indian Mutiny Indians were not entrusted with artillery, with the exception of the relatively small mountain artillery, a kind of elite which supported operations on the North West frontier, between British India and Afghanistan.
The two batteries which formed the brigade: 1st (Kohat) Mountain Battery and 6th(Jacobs) Battery are still in existence in the Pakistani Army. These were equipped with the BL 10-pounder Mountain Gun. This was a 2.75 inches (69.8 mm) calibre gun, which lacked a recuperator or recoil system. It could be dismantled into 4 loads of approximately 200 pounds (90.7 kg) for transport, typically by mule. It could fire a shrapnel round or common shell. This was a shell filled with a low explosive such as gun powder. As a whole this was a weapon better suited to colonial warfare than a C20th battlefield. It was deployed in sections of two guns, as can be seen in the sketch map.
Sketch map showing artillery positions on 11th May 1915. (ANZAC Corps GS WD May 1915)
Major Ferguson, (known to the Australians as “Percussion Sahib”) commanded the 21st Mountain Battery. He met Colonel Sinclair-Maclagan, commander of the 3rd Infantry Brigade on the morning of the 26th April . ‘I found him at last, plumb in the middle of the firing line and asked where he wanted artillery support…. He waved his arm through a semi circle and said everywhere around there. I selected a gun position pretty high up and ordered up the battery. After a long interval a very heated subaltern arrived with a couple of gunners carrying wheels and said that all the loads would have to be carried up as the ground was very steep and sodden with rain, and the mules weak, and that we could not possibly have four guns in action in under an hour… We got into action at last and began shelling movement on the chessboard, while two guns began shelling us… The Australians were very polite about our assistance that day, as always.” Within three weeks the 7th Mountain Brigade unit needed 75 replacement soldiers.
5″ Bkl Howitzers firing Gallipoli 1915
The 1/4 Lowland Brigade RFA, (4th City of Glasgow) equipped with 5“ Howitzers was transferred from Cape Helles to support the ANZAC Corps at the end of July 1915. This was a territorial unit whose heritage and traditions are maintained by 207 (City of Glasgow) battery RA, who hold what is believed to be the breech of the gun which fired the last rounds on the Gallipoli campaign.
6 Pdr Howitzer landed at ANZAC Ciove
A lone 6” howitzer, under the the command of Regimental Sergeant Major David Hepburn with a Royal Marine Artillery detachment was deployed ashore in mid May and attached to the New Zealand Artillery Brigade. His gun had been deployed on the battleship HMS Prince George, which was damaged below the waterline by a shell on 3rd May. “We had to fire over two successive ridges each 400 feet high at a target only 1,300 yards away. We could not see the target. We had the sea at our backs, and that was the only direction in which we did not fire. On one occasion we fired in one direction, then turned the gun round completely and fired in the other direction. One afternoon we received a message “engage enemy heavy gun!” Out came the map and from the map we laid our gun. It pointed bang over our won headquarters! It is ticklish work when the shells only just slither over the crests and when the target is only 30-100 yards from our own trenches. I never did get over the idea of firing so close to our own men.(2)
Brigadier C Cunliffe Owen CBR DSO (National Portrait Gallery)
Several of the artillery commanders in the ANZAC units were Royal Artillery Officers. Brigadier Charles Cunliffe Owen CBE was Brigadier General RA of the ANZAC Corps. A South African War veteran he had commanded 26 Brigade RFA in 1914 in the Retreat from Mons and the battles of the Marne and the Aisne and the 2nd Infantry Brigade in Ypres.
The CRA of the Australian and Zealand Division was Lieutenant Colonel G N Johnston RA. He was born in Canada but schooled in Scotland and commissioned through Woolwich. Johnson served
Brigadier G N Johnston DSO
throughout the war as CRA of the New Zealand Division receiving the CMG and DSO and mentioned in dispatches eight times.
The CRA of the 1st Australian Division was Brigadier Talbot Hobbs, an Australian architect and militiaman who ended the war succeeding Monash as the GOC of the Australian Corps. His senior staff officer, Brigade Major Royal Artillery (BMRA) was Major Stuart Anderson, a British Regular Officer. Educated at Westminster and Clare College Cambridge. Major Anderson was appointed as the Instructor in Gunnery for the Australian Commonwealth forces artillery in 1912, and in 1917 he became CRA of 1st Australian Division.(3)
Gunner Tours is happy to provide subject matter expertise for any group seeking to understand the Gunner side of the Gallipoli Campaign.
REFERENCES
1. AWM War diary HQ ANZAC CORPS GS May 1915
2. IWM Docs manuscript quoted in Hart Gallipoli
2. Venn, J, Alumni Cantabrigienses: A Biographical List of All Known Students, Volume 2
I recently took a group of businessmen on a visit to the battlefields of the western front. One of them, Richard Whittemore, told me a fascinating story. His great-grandfather was one of six brothers who served in the First World War. Three of them died and are buried in France. A fourth is commemorated on the Helles Memorial in Gallipoli.
Private 6710 Whittemore Sidney J
Sydney Whittemore was a regular soldier who served in the 1st Battalion of the Bedfordshire Regiment. This unit fought at Mons Le Cateau and the battles of the Marne and Aisne before deploying to Ypres. He died on 7th Nov 1914. The battalion had recently deployed to the trenches East of Ypres. According to the war diary, “Enemy broke through line held by Regt about 200 yards to our left, carrying next Regt & some of our men with them. Our supports were moved to left… & assisted in driving enemy back. Qr. Mr.Sergt. Byford [4893 Thomas William BYFORD, DCM] (awarded Distinguished C. Medal) collected about 40 men & captured trench held by 21 Germans, killing or capturing all. Pte. Falla [8095 William FALLA, DCM] (awarded Distinguished C. Medal) ran on in advance, & getting on left of trench enfiladed enemy whilst remainder were rushing the trench. Our casualties about 7 officers & 140 other ranks killed wounded 7 missing. It is likely that Sidney Whittemore was fatally wounded, as he is buried in Bedford House Cemetery, several miles west.
Lieutenant Frederick Whittemore MC
Frederick Whittemore was a hero. He joined the army, aged 18 in 1896 in the Bedfordshire Regiment. He served in the Boer War as a soldier. By 1914 he was Company Sergeant Major in the 2nd Battalion the Bedfordshire Regiment in South Africa. On 17th October he was commissioned in the field to replace the officers that had been lost up to that point. 2 Lt Whittemore was wounded on the 29th October 1914 in the first battle of Ypres. On his recovery he joined the 1st battalion and served with distinction in the heroic defence of Hill 60. As the sniper Officer he was credited with accounting for over 50 of the attacking Germans, but was wounded again with as bayonet. His actions resulted in the award of the Military Cross in December 1915.
“Following twenty years of service in the regiment and having served through two wars, Lieutenant Whittemore, MC, was mortally wounded during a night patrol on 29 March 1916. His comrades tried desperately to recover his body, but despite several attempts, were unable to reach it. As a result, Lieutenant Whittemore is remembered on the Arras Memorial to the missing. “
It was soldiers like Frederick and Sydney Whittemore who epitomised the “Old Contemptables” of the BEF.
13657 Private Whittemore G W 9th Bn Sherwood Foresters (Notts and Derby Regiment).
George Whittemore was a member of one of the first Kitchener Battalion of the Nottinghamshire and Derby Regiment which formed in Derby in 1914. It sailed for Gallipoli and landed at Suvla bay in August 1915. He was killed on 15th October 1915 but has no known grave and is commeorated on the Helles memorial.
G/14877 Private Whittemore F A, (MM and bar) 7th battalion Royal Sussex Regiment
Frederick Arthur Whittemore served in the 7th battalion The Royal Sussex Regiment died on 26th August 1918 aged 21. This gallant young soldier was killed in an attack on the Carnoy- Montebaun spur, almost on the 1st July 1916 front line. The attack in which he was killed seems to have been casually organised and ill supported, and as fatal to the assaulting infantry as any on the 1st July 1916. The total advances was planned to be three miles. There was “some difficulty calculating the barrage, as the position of the leading troops of 35th Brigade was not known and it was not possible to arrange for the barrage to conform with the barrage of the 58th Division, (the other formation attacking.) . Divisional orders were not ready until 11 pm, and did not reach the commander of 36 Brigade until after midnight and 2 am before he could collect his battalion commanders to issue verbal orders for a 4 am attack, and there were three miles to march to reach the start point. Further delay took place in consequence of the late arrival of the pack mules with reserve small arms ammunition , and of shelling which forced the battalions to leave the road and march across wire and trenches on a compass bearing, the latter part of the way in single file.
Thus the 7th Royal Sussex (and 5th Royal Berkshire) were unable to reach the starting line in time to move off before 4.30 and 4.45 am respectively, and lost the barrage, which in any case dropped too too far ahead, nearly 1500 yards, to be of any use. Both came under machine gun fire. The Royal Sussex were held up in the valley in front of their first objective. The Germans spotted a gap between the two battalions and counter attacked, threatening part of the R Sussex near some old mine craters, (from the pre July 1916 front line). The fight went on all day until the neighbouring formation on the left captured a key village behind the German right at around 4.30 pm. (2) The CWGC records list 24 soldiers from 7th Royal Sussex who died between 26 and 28th August 1918. Three of these men, like Frederick Whittemore were recipients of the Military Medal.
19833 Private Whittemore C Bedfordshire Regiment
19833 Private C Whittemore of the 4th Battalion the Bedfordshire Regiment died , aged 23 on the 27th August 1918 and is buried in the AIF burial Ground Flees. He probably died in one of the two attacks made by 190th Brigade on Thilloy.
Richard’s grandfather survived the war. The medal cards list a Whittemore in the Bedfordshire Regiment, awarded the Mons star who survived the war. The family tradition is that he was a machine gunner, and suffered such severe shell shock that he spent the rest of his life in mental institutions. His family maintained a fiction that he had run off to India and married someone there. In fact he was incarcerated in a local mental hospital a few miles from where his children were growing up. He died and is buried in an unmarked grave.
This was the result of some internet work and I am not sure exactly what the family relationships were. However there seem to have been a lot of casualties, and medals awarded to a relatively small number of brothers or cousins.
Gunner Tours have launched the 2015 public tour programme. They tell the story of the key battles with a focus on the role that the artillery played, and the stories of those who served the guns. Around 25% of the British Army of the First World War served in the Royal Field, Garrison or Horse Artillery, and a similar proportion in the Second World War.
First World War
The First World War was an artillery war. Success and failure was largely determined by how artillery was used and how well the guns were served.
Somme and Arras 19-22 June 2015 A long weekend of four days
and three nights to two of the largest battles of the First World War. The 1916 battle of the Somme was the largest and most costly battle fought by the British Army. The Arras battles of April-May 1917 were the most intense of the war. This area was also where the war on the western front was decided in the open warfare of 1918. £319
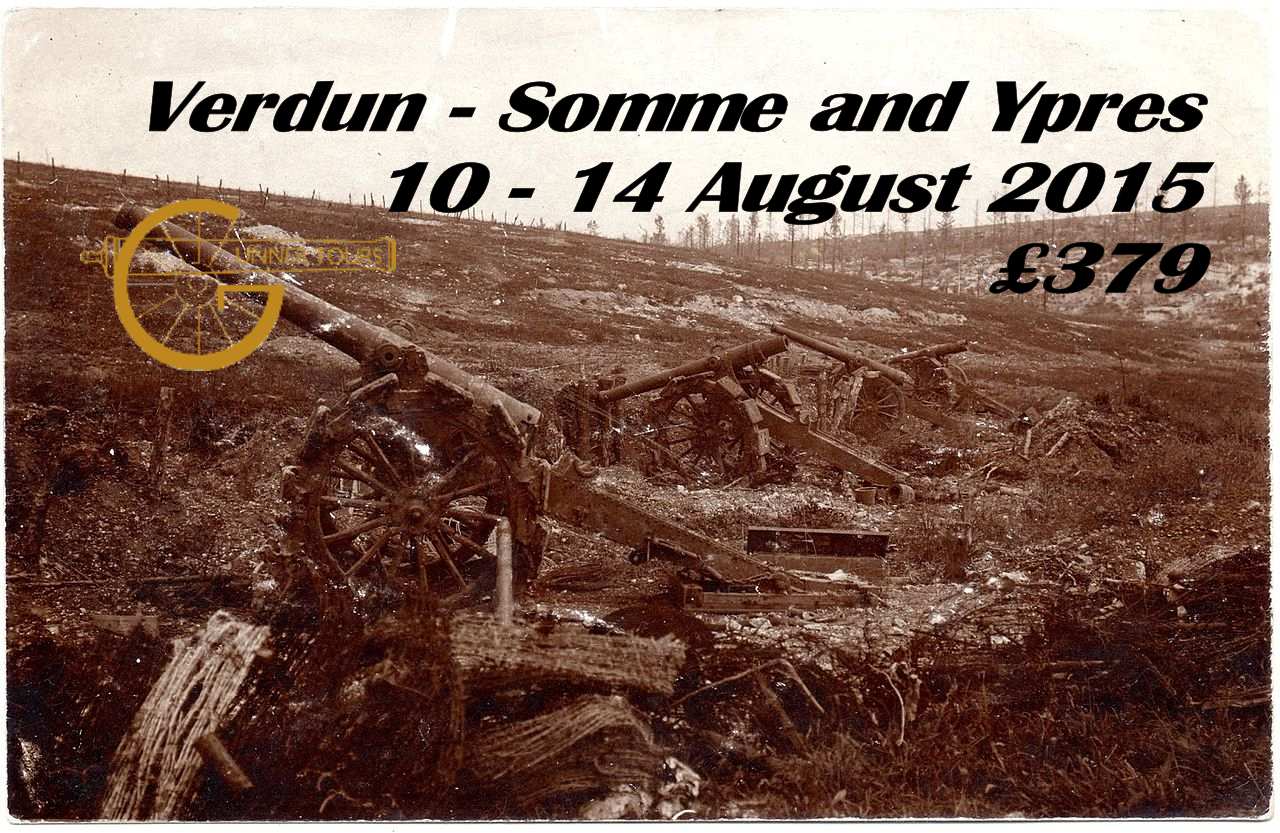
Verdun, Somme and Ypres 10-14 August 2015. Five days and four nights. We will visit three of the most important battlefields on the Western Front, and look at the British French and German gunners. The battle for Verdun in 1916 was the first of the huge battles of attrition. The Somme offensive of 1916 was designed to relieve the pressure on the French army at Verdun. The battles for the Ypres salient were the longest and bloodiest battles fought in Belgium. £379
“Wipers” 11-14 September 2015 Four days and three nights. The Belgium city known as Ieper in Flemish and Ypres in French was known to British soldiers as “Wipers.” It was the main seat of British Army’s operations in Belgium from October 1914 to the end of the First World War, and a focus for Remembrance since then. Our tour will look at the artillery side of the story and of the gunners who served and suffered there. £319
BEF Western Front 9-13 November 2015 Five days and four nights, covering the sites of the major battles of the British Expeditionary Force from Mons in 1914 to victory in 1918. £349
Second World War
Gunner Tours is offering two tours to Normandy, based on the specialist knowledge and expertise of our chief guide Frank Baldwin who has written about the role of artillery on D Day and in the Normandy campaign as well as providing the written guide to the D Day Beaches for the Royal Artillery for the 70th Anniversary of D Day.
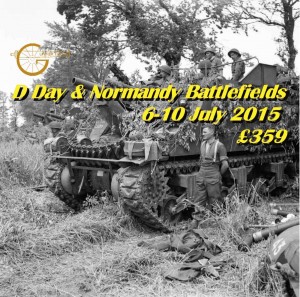
D Day and the Battle for Normandy 6-10 July 2015 This is five
days and four nights expedition to the D Day sites and some of the battles inland. £359
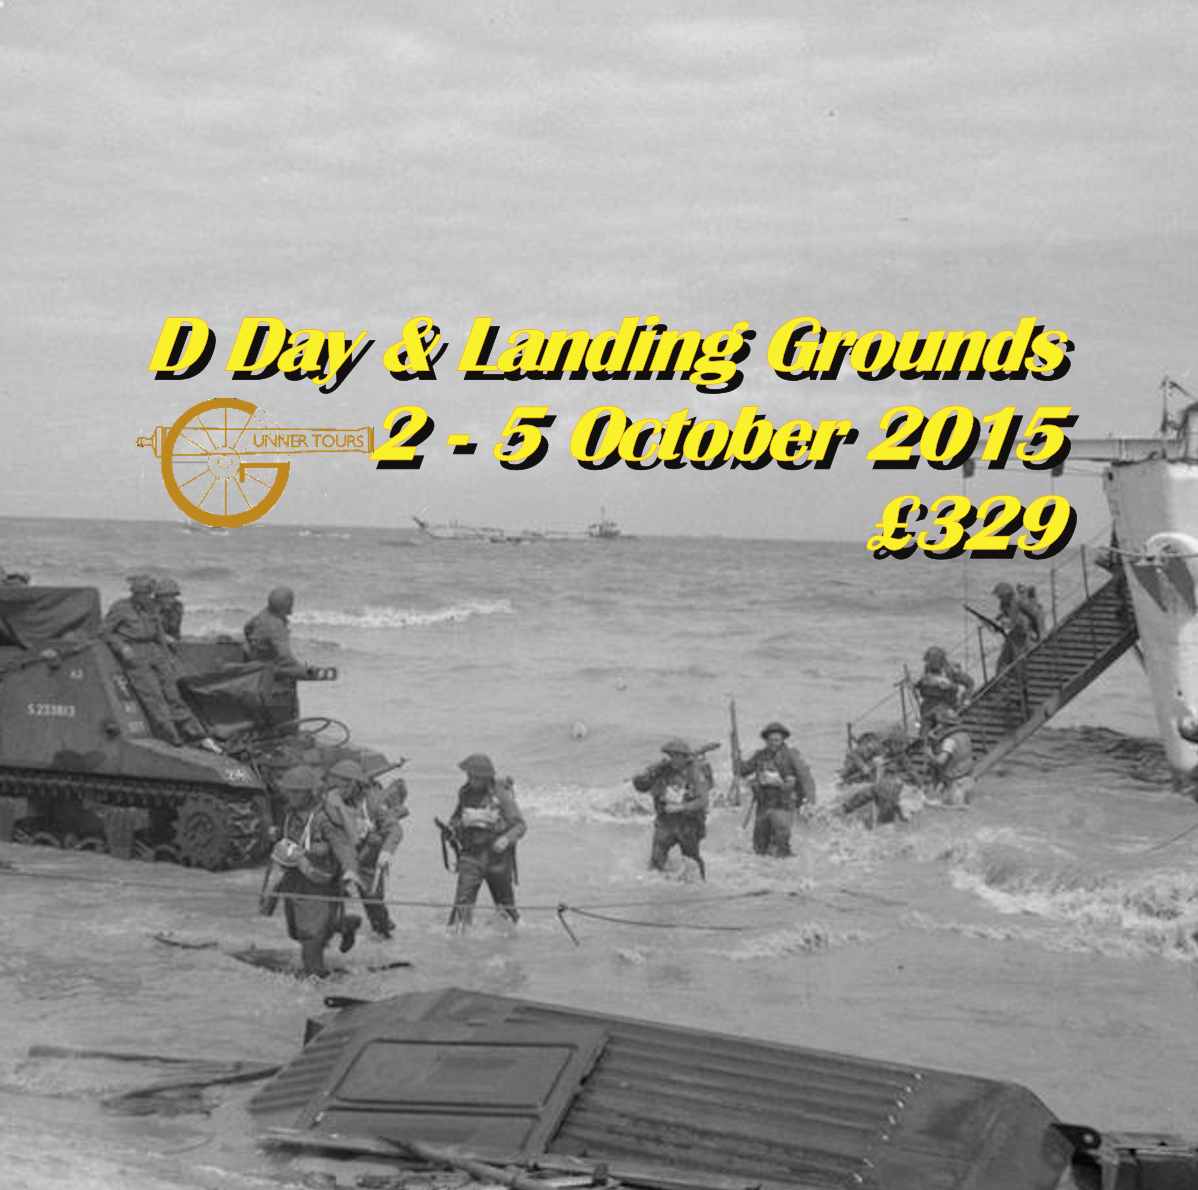
D Day Beaches and Landing Sites 2-5 October 2015, A visit over a long weekend to the D Day beaches and Landing sites. There is a gunner story on each beach and landing site. £329
For details on each tour click the link in the date or check the details on the Gunner Tours website
Two dramatic episodes from 1914 have been the centre of commemorations for the Royal Artillery. E Battery were supporting the cavalry screen ahead of the BEF when they fired the famous first shot on 22nd August 1914. The role of L battery in the “Affair at Néry” on 1st September 1914 has caught media and public attention ever since 1914. The German surprise attack on the 2nd British Cavalry brigade was beaten off with heroic acts rewarded by three Vcs and two MMs to the men of L Battery, and led to the award of the Honour Title of “Néry”. These events have tended to overshadow the other actions undertaken by E and L battery during the First World War, and by other batteries of the current 1st Regiment RHA.(1)
The current batteries are A Battery (The Chestnut Troop), B, E, L (Nery) and O Battery (The Rocket Troop) . Their 1914 home stations and wartime deployment are summarised in the following table.
Battery
Station in 1914
Deployment
A
Ambala India
Indian Bde RHA then XVIth Bde RHA 4 Cav Div/Army troops
B
Ambala India
XVth Bde RHA 29 Div
E
Newbridge, UK
1 Cav Div then 3 Bde RHA – 2 Cav Div.
L
Aldershot, UK
1 Cav Div then XVth Bde RHA
O
Ipswich,UK
Vth Brigade RHA 8 Div then Army troops
Each Battery was commanded by a Major with a battery captain, and three subaltern section commanders. Two Subsections formed a Section and in a six gun battery these would be designated as Left, Centre and Right Sections. A Subsection consisted of a single gun and limber drawn by six horses (with three drivers), eight gunners (riding on the limber or mounted on their own horses), and an ammunition wagon also drawn by six horses (with three drivers).
The 13 Pdr Nery gun on display in the Imperial War Museum london
RHA batteries were armed with the 13 Pdr Gun. The 13 Pdr fired a 13 lb shrapnel shell to a range of 5,900 yd (5,400 m). The 18 Pdr, which equipped the Field Artillery fired a projectile weighing nearly 50% heavier and for which an HE shell was in service by October 1914. It also out-ranged the 13 Pdr and had a range of 6,525 yd (5,966 m) and 7,800 yd (7,100m) with the trail dug in. During the course of the war all but E Battery were re-equipped with 18 Pdr.
The introduction of the dial sight had made it possible to operate in an indirect role. However the flat trajectory of the 13 Pdr and the limited signal equipment tended to restrict indirect fire to situations where the battery commander could position the guns behind cover and act as the observer from a position where he could see the guns and the target. There were no established forward observer parties, but as trench warfare developed and telephones and wire became more widely available, an observation post might be deployed at some distance from the battery or a liaison team sent to the infantry.
Although indirect fire techniques were known and practised, the RHA went to war with equipment better suited to operating in the direct role. The 13 Pdr had a flat trajectory and it would be difficult to find good indirect gun positions in broken country such as the industrial landscape of Mons. The only ammunition provided for the 13 Pdr was shrapnel, which is very effective against troops in the open, but almost useless against troops behind cover.
The part the Horse Artillery played in the opening months was not far removed from pre war expectations. British Cavalrymen were equipped with the same SMLE rifle as the infantry and marksmanship training, which gave them an edge of the carbine equipped Germans in dismounted action. However, it was the battery of 13 Pounders supporting each brigade which contained the major part of its fire power, and guns which would inflict the majority of casualties in the Fist World War..
Positioning a 18 Pdr Gun The Battle of Arras April 1917
The Commonwealth War Graves Commission (CWGC) records 233 men as serving in one of the batteries.(2) Given WW1 norms of two wounded for each dead, this would imply around 700 casualties during the war. The establishment of a 1914 RHA Battery was five officers and 200 other ranks, giving 1,025 for the five current batteries. This gives a conservative estimate of a fatality rate of just under 23% of the establishment across all batteries. The casualties were not evenly distributed. L Battery’s 78 fatalities implies a figure of killed and wounded well in excess of the battery establishment of 205. Nor was 1914 the year in which L Battery suffered its highest casualties.
Current 1 RHA Batteries Fatalities 1914-1921
A
B
E
L
O
All Batteries
1914
0
0
4
26
0
30
1915
1
12
1
9
3
26
1916
2
8
0
1
5
16
1917
3
30
9
30
17
89
1918
23
6
2
11
12
54
1919
0
2
3
0
1
6
1920
0
4
1
1
0
6
1921
3
3
0
0
0
6
Total
32
65
20
78
38
233
(Note that these figures are an indicative minimum. The CWGC database does not always identify the unit in which a soldier served. . )
Even before Néry, the fortunes of war placed L Battery in a position to play a significant role in the battles of Elouges on the 24th and Le Cateau on the 26th. On each occasion they brought down fire on German troops attempting to outflank the army. Even without Néry curtailing their participation in the campaign, L Battery were one of the most actively engaged RHA Batteries.
The fighting in the early months of the First World War was very different to other campaigns on the Western Front, or even other campaigns of the war. The pattern of warfare was closer in some ways to that of the previous century. The battles were of short duration with one side disengaging. Mons, Le Cateau, Elouges and Néry can be identified by a single day. At Le Cateau the British Army even deployed anachronistically on an open plain with the guns drawn up in the front line as if it were 1815. It was not until the battle of the Aisne that both sides became aware of the power that C20th weapons gave to the defence. After the trench lines developed between September and November 1914 the character of the war changed to become one continuous engagement. There would be no more individual battle days as bloody as Nery, but a trickle of casualties throughout the four years of the war, with some days bloodier than others.
1915
In November 1914 O Battery arrived on the Western Front as part of the Vth Brigade RHA in the 8th Infantry Division’s artillery. . In 1915 The Chestnut Troop joined them on the Western Front as part of I Indian Brigade, Royal Horse Artillery. They both took part in the battles in the Neuve Chapelle area 1914-15.
The rebuilt L Battery joined B battery in the XVth RHA Brigade as part of the divisional artillery of the 29th Division in 1915. This division was formed from regular army garrisons around the world and first deployed in the Gallipoli campaign. It would become known as the “Indomitable” 29th and would take part in more attacks than any other formation. There is no specific monument in Gallipoli for the artillery of the 29th Division. However, one of the first fatalities suffered by the reconstituted L battery was Bombardier Darbyshire, who only relinquished the layers seat of F Sub at Néry after his ears and nose bled from concussion. He was killed on 12th July 1915 and is buried in Lancashire Landing Cemetery at Cape Helles, along with nine other horse gunners from B and L Battery. A further seventeen are buried or commemorated elsewhere in Turkey, Egypt and Malta.
1916
After the evacuation from Gallipoli the 29th Division was brought back to the Western front, in time for the big push on the Somme. The Divisional symbol of the red triangle can be seen at Newfoundland Park, and tin triangles can be seen on the packs of the soldiers from the divisions filmed on the First Day of the Somme. At 07.30 on the 1st July the 2nd Royal Fusiliers and 16th Battalion the Middlesex Regiment stormed the crater formed by the detonation of the Hawthorn mine. 2 Lt Grant-Suttie and a party of telephonists from B Battery advanced with the CO of 16th Middlesex into the mine crater, but were forced to withdraw, with Bdr Port wounded, and Bdr Brockett and Driver Indge missing. Brockett’s body was found and he lies in Hawthorn Ridge Cemetery No.1, Auchonvillers. Indge’s was never identified but might be one of the 68 unidentified graves in this cemetery. He is commemorated on the Thiepval Memorial to the Missing.
O battery also took part in the battle of the Somme supporting the operations of the 8th Division on its disastrous first day, and in October in the battle of Le Transloy. Three O battery soldiers are buried on the Somme. The lower number of fatalities in 1916 than in 1917 and 1918 might be attributed to the weakness of the German counter battery artillery in the Somme. Nor were any of the batteries placed in situations were they were exposed to small arms or direct fire. There were very few occasions in 1916 where sufficient ground had been gained to justify moving the guns forward. No German counter attacks threatened the guns.
1917
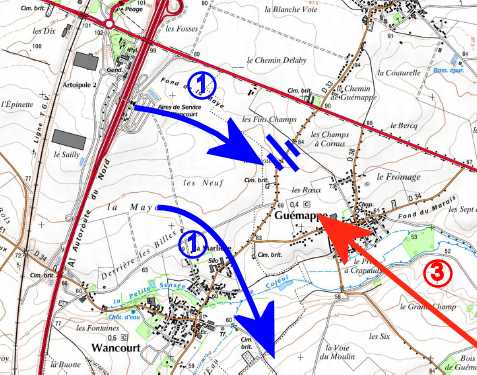
Second Battle of the Scarpe: 24 Apr 1917 15 Brigade RHA action. (1) 50 Div Captures Wancourt Ridge. (2) 15 Bdee deploys forwards. (3) German Counterattack recaptures Guemappe
1917 was the bloodiest year for the 1st RHA Batteries, and can be attributed to the three major British offensives in that year. The 29th Division (B & L ) and V Brigade RHA (O Bty) took part in all three offensives. E Battery in two and Chestnut Troop in one.
18 Pdr guns under fire at the Battle of Arras 24 Apr 1917
The five week long Arras offensive 9 April – 16th May 1917 was one of the most intense the BEF endured. The daily casualty rate over the course of the battle was higher than any other BEF offensive. The initial attack was very successful, largely due to improvements in artillery technology and tactics,. German batteries were located by sound ranging and flash spotting, improved fuses increased lethality and enabled wire to be cut more easily. Aerial observation techniques and creeping barrages made it easier for the infantry to assault. In 1917 O Battery’s Vth RHA Brigade became an army artillery brigade and used to support whatever part of the line needed additional artillery support. On 9th April they supported the attack on Vimy Ridge by the Canadian Corps.
When attacks were successful artillery would need to be redeployed forwards if the infantry were not to advance beyond artillery range. On 24 April B and L Batteries followed up an infantry advance into a valley just North of the Wancourt Tower. As soon as the success signal was given the guns galloped forwards. According to the infantry the advance of the guns was a magnificent and inspiring sight, carried out with great dash and skill.(3) Unfortunately a German counter attack drove the infantry off the ridge, leaving L and B Battery in the open within rifle and machine gun range of German troops. The operations on the Arras front between April and June 1917 cost the XVth Bde RHA 49 killed, (including the BC and another officer from B Battery and six other officers) 74 wounded (including officers from each of B and L officers) and a further 13 men evacuated with shell shock.
There is a memorial outside Langemarck to Harry Patch, the last survivor of the Great War whose and his comrades, took part in the the attack Langemarck on 16 August 1917. B and L Batteries supported fired on the fireplan Barrage map supporting the attack on .
The 29th Division was used as an assault division twice in the 3rd Battle of Ypres, fought in a muddy artillery landscape. The artillery destroyed the drainage along with the buildings and vegetation. On 16th August the 29th division assaulted the Langemark area alongside the 20th Division which included the late Harry Patch and his pals. Seven weeks later 29 Division attacked again on 4th October towards Poelcappelle. The main memorial to this attack is the memorial to Private Fred Dancocks of the 4th Worcesters who was awarded the VC for his gallantry capturing a bunker near Namur crossing on the old Ypres-Staden railway line, which is now a footpath.
The 3rd Battle of Ypres was an artillery battle. The Germans held the ring of low hills around Ypres. As the allies advanced it was hard to find solid ground for gun positions around the muddy shell holes. Solid platforms might be constructed from wood or even boxes of rations. These made it easier for the German counter battery fire. During the campaign B, L and O battery would have spent a lot of time in their gas masks. The Germans unleashed a new horror on the battlefield during this battle, drenching gun positions with persistent blister agent – Mustard Gas.
Part of the predicted fire plan supporting the attack at Cambrai
After the 3rd Battle of Ypres petered out in the muddy ruins of Passchendaele the 29th Division was picked to reinforce the 3rd Army’s attack at Cambrai. This battle was a test for new technology and tactics. Instead of a lengthy preliminary bombardment, the battle of Cambrai would use 400 tanks and a short intense fire plan based on predicted targets. The fire plan was as innovative as the massed use of tanks. All of the batteries of the current 1 RHA took part in this battle. The initial attack, on 20th November created a breach in one of the stronger sector of the Hindenberg line, capturing as much ground in fifteen hours as in five months in the Ypres Salient. The Germans too had a tactical surprise in store. On 30th November they too launched an attack under a heavy predicted barrage, in their case led by storm troops which infiltrated into and then broke through British infantry on the salient caused by the British success. This advance threatened the army artillery massed behind the British infantry, with some Germans within 40 yards of the guns. L Battery was order to act the rearguard to allow the army artillery to escape. They and a mixed force of infantry and artillerymen inflicted around 150 casualties on the Germans before withdrawing. The eight L Battery soldiers commemorated on the Cambrai memorial are evidence of the cost of this operation. The official history includes praise for L Battery, a rare mention of an individual battery.(4)
Cambrai would be a good battle for a 1st RHA commemoration. This the one battle in the war in which each battery served. It allows for a focus on the tactical and technical innovation which has characterised the professional ethos of the Royal Regiment.
1918
This Walford watercolour captures the spirit of the actions by Chestnuts, D and O Batteries in March 1918
At the beginning of 1918, the Germans had a chance to win the First World War before the American Army took the field in strength. The Germans redeployed troops released from the Eastern Front by the collapse of Imperial Russia. After three years of allied attempts to break the stalemate of the Western Front, the German offensives from 21th March initiated a eight months of mobile warfare. Between March and June the Germans achieved a series of breakthroughs and forced the allies back.
All of the Batteries were involved in these battles. The Cavalry divisions were deployed to plug gaps in the line. The majority of Chestnut Troop’s war dead are buried or commemorated on the Somme battlefields of 1918. There is an account in the History of the Royal Artillery on the Western Front of how the observed fire from E and two other RHA Batteries held a German advance on the 22nd March for a whole day. (5) The BC of O Battery was given 600 infantrymen back from leave, eight lewis guns from No3 Kite Balloon Company to fill a gap in the line. (6)
These battles are rarely the subject of battlefield studies. They are as significant as defensive battles as Mons or Le Cateau, but much larger. These are the only major defensive battles fought by the British Army that approach the scale of the operations on the Eastern Front in WW2.
“British Artillery speeding along in pursuit of the fleeing foe.” Did the NY Tribune publish a picture of E Battery in October 1918?
The tide turned in August with the dramatic breakthrough at Amiens which repeated the techniques demonstrated at Cambrai, but on a larger scale. 450 tanks supported by a surprise predicted barrage by just under 1,500 guns and 800 aircraft broke through and destroyed a German army in what was the “Black day” for the German army. Chestnut Troop, E and O Battery took part in these operations.
Menin Gate 1918. From positions on the Left of this view, B and L batteries fired the barrage behind which the infantry cleared the Germans from Ypres ay the end of the war.The Menin Gate today
After Cambrai the 29th Division was redeployed to the Ypres sector and fought in the defensive battle of the Lys and in the counter attacks in the summer On the 27th September 1918 B & L batteries, with the other batteries of 15 Bde RHA came into action outside the Menin Gate in Ypres.(7) The following morning they fired a creeping barrage in support of the 29th Division attack which recaptured the ground ceded in April capturing the village of Gheluveldt by the end of the day. L and B Batteries were deployed forwards to Gheluveldt on the 30th September, and supported the attacks over the River Lys in October.
1919 and Afterwards
The Armistice did not mean demobilisation. The CWGC records war dead until 1921 as the regular army was deployed to respond to the messy aftermath of the War. The CWGC records the deaths of Lance Naik Batu Khan of Chestnut Troop in St. Sever Cemetery Extension, Rouen (23 Dec 1918) and Driver Noor Mohammed of B Battery in Haidar Pasha Cemetery in Turkey (30 Jan 1920), and serve as a reminder of the British Army as an Imperial force and the Regular Army’s relationship with the Indian Sub continent.
The history of 1st RHA’s batteries on the First World War is that of the Western Front, its batteries were ubiquitous, “quo fas et gloria decunt”. Their actions took place among some of the familiar land marks of the Western front. Their battles tell the story of the development of technology and tactics during the wear and the part that the Gunners. Anyone taking a professional interest in the develo-pment of artillery on the battlefield would be remiss if they restricted their interest to the 1914 battles.
These were also actions in which at least 233 men lost their lives and perhaps 500 wounded. One of the key themes of commemoration is Remembrance, which should include understanding what these men did and why. The Centenary is an opportunity to visit the graves, memorials and the places where these men fought and fell. Of course, we celebrate the achievements of the Bradbury, Dorrell and Nelson at Nery, worthy of the highest award for gallantry that Britain can bestow. It is proper that L Battery remembers these men and the others that were lost at Nery. But the Centerary ought to be the time to find out about some of the other men who served the guns and remember them. Were the eight members of L Battery who fell on 30th November at Cambrai necessarily less brave? Were any of the men who fell any less mourned?
While many people are familiar with the battles and battlefields of the Western Front, far fewer have explored them from the Gunner’s point of view. The actions by the 1 RHA batteries are ideal topics for battlefield studies, conveniently located from the UK. The Centenary of the First World War is an ideal opportunity to undertake low level battlefield studies.
For more information on planning battlefield studies ands staff rides contact Gunner Tours www.gunnertours.com
NOTES
[1] This article is based on a talk given to the Officers of the 1st Regiment Royal Horse Artillery on 8th April 2014.
[2] www.CWGC.org These are minimum numbers. The CWGC also lists RHA as “15 Brigade RHA,” which may include soldiers who might or might not be members of B or L Battery. They might have been members of Y Battery, the Warwickshire TA RHA Battery or the Brigade Ammunition Train.
[3] Farndale The Royal Regiment of Artillery on the Western Front
[4] Esmond, J E. Military Operations France and Belgium 1917, The Battle of Cambrai CH XV HMSO 1934
[5] War Diary D Battery RHA quoted in Farndale The Royal Regiment of Artillery on nthe Western Front
[6] Esmond, J E. Military Operations France and Belgium 1918, the German March Offensive and its preliminaries, CH XV HMSO 1934
[7] WO/95-2291 15 Bde RHA War Diary Entry September 1918
Military history, Battlefield heritage and Touring
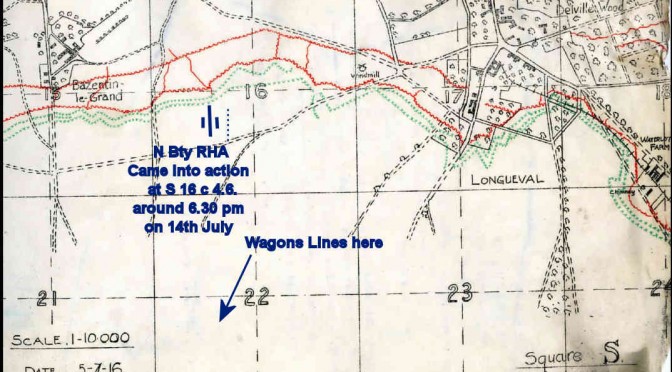
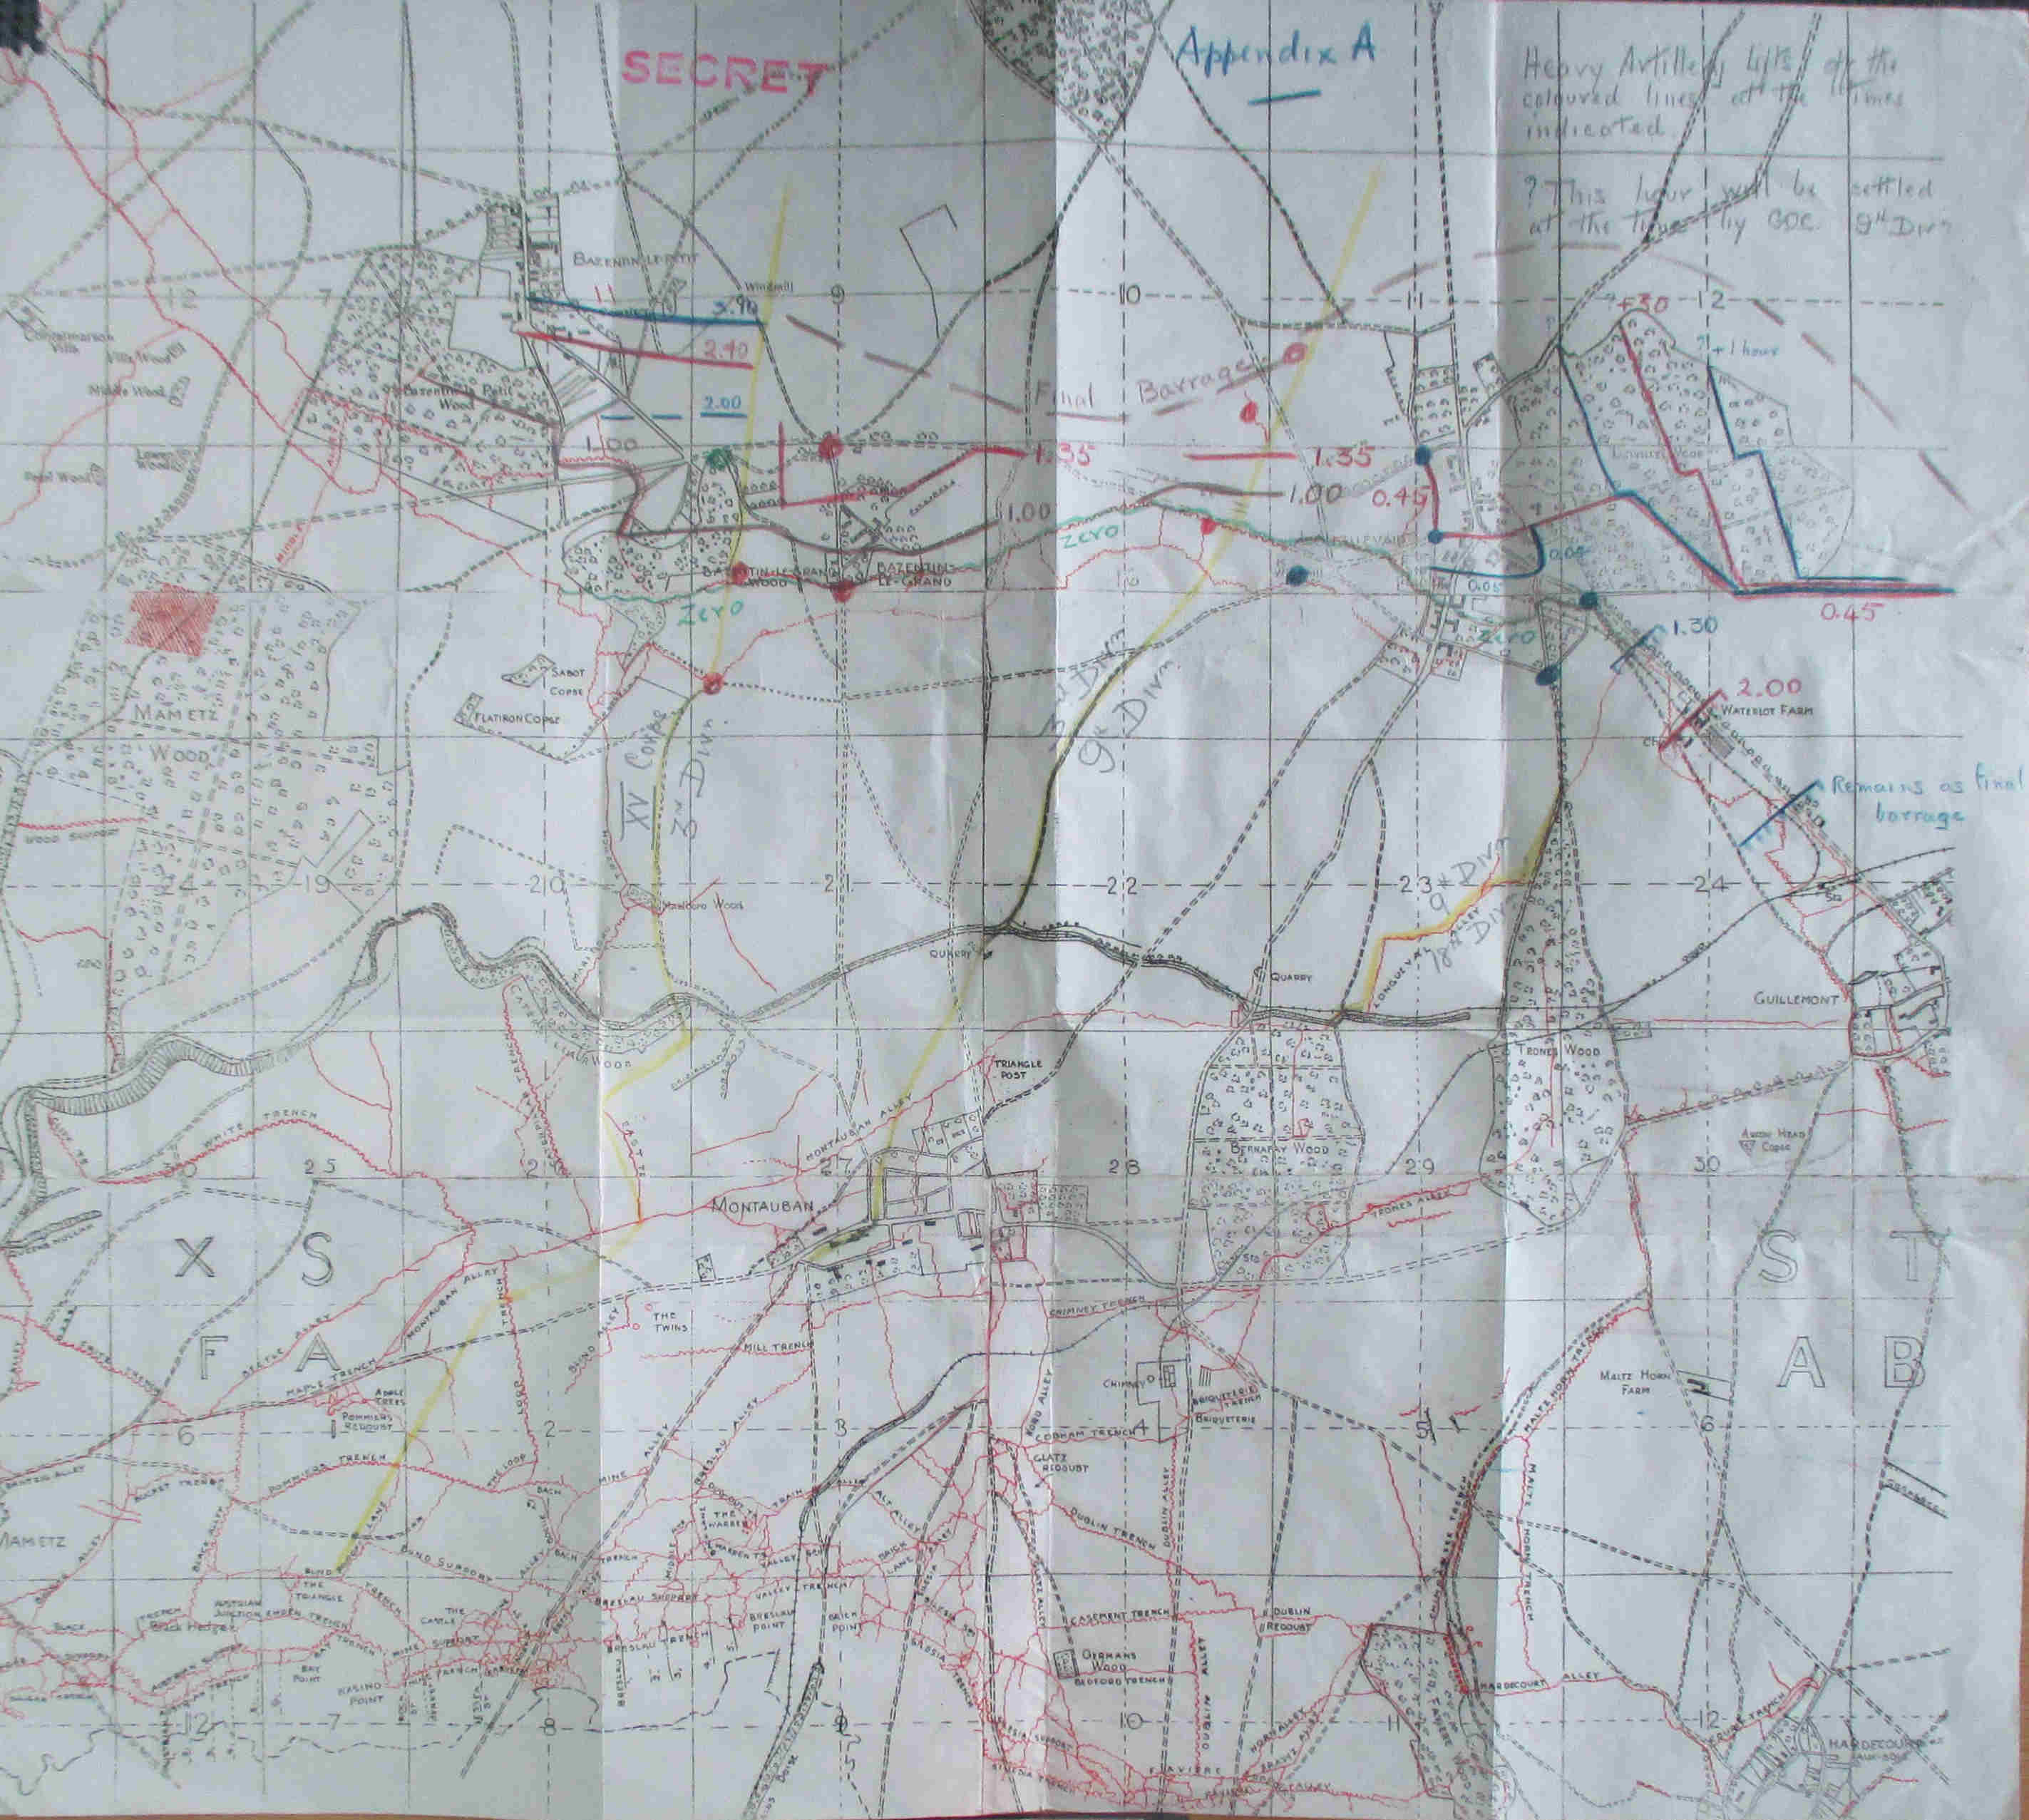 Everyone has heard of the first day of the Somme, famously the day on which the British Army suffered its highest casualties on a single day. Fourteen days later the British Army made its next big push. Demonstrating that occasionally lessons are learned and learned quickly, the plan was a bit different from on the 1st of July.
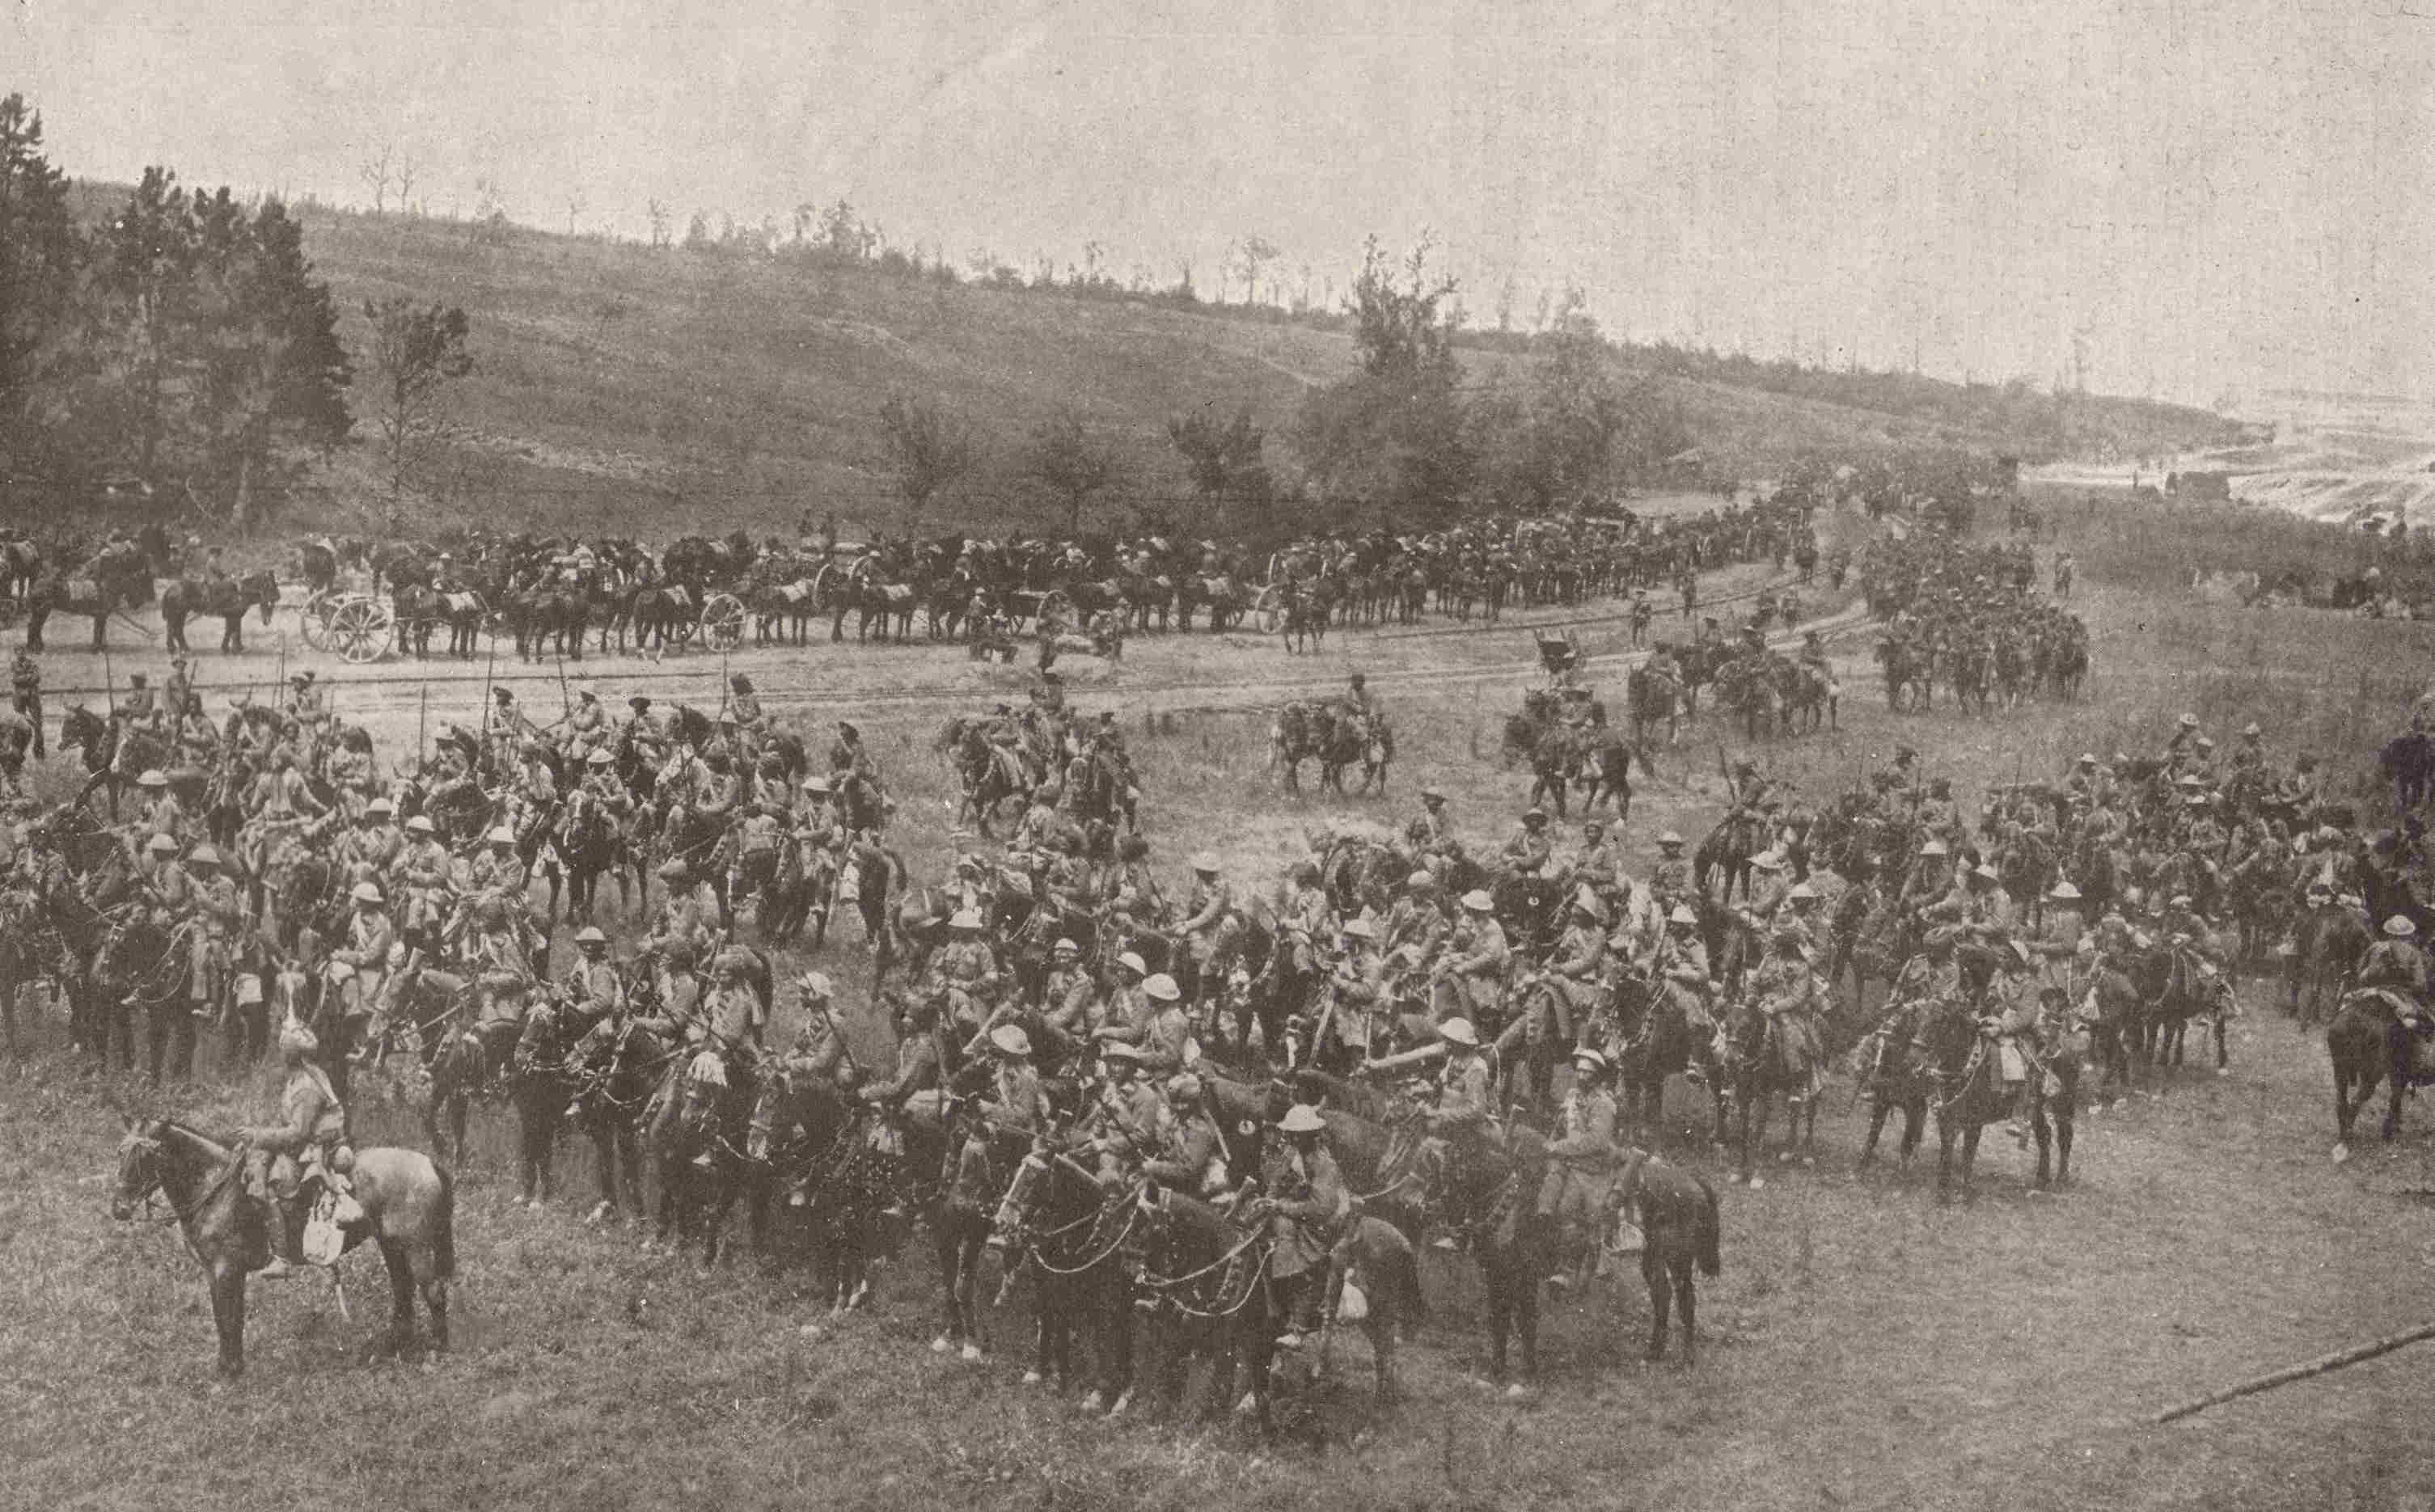
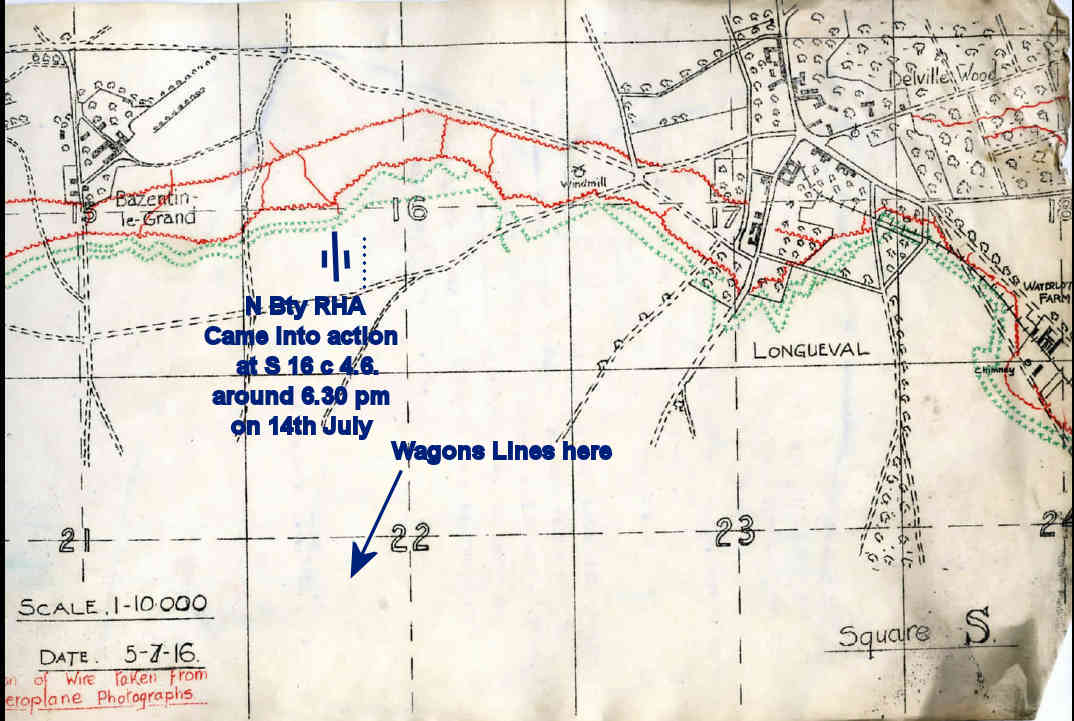


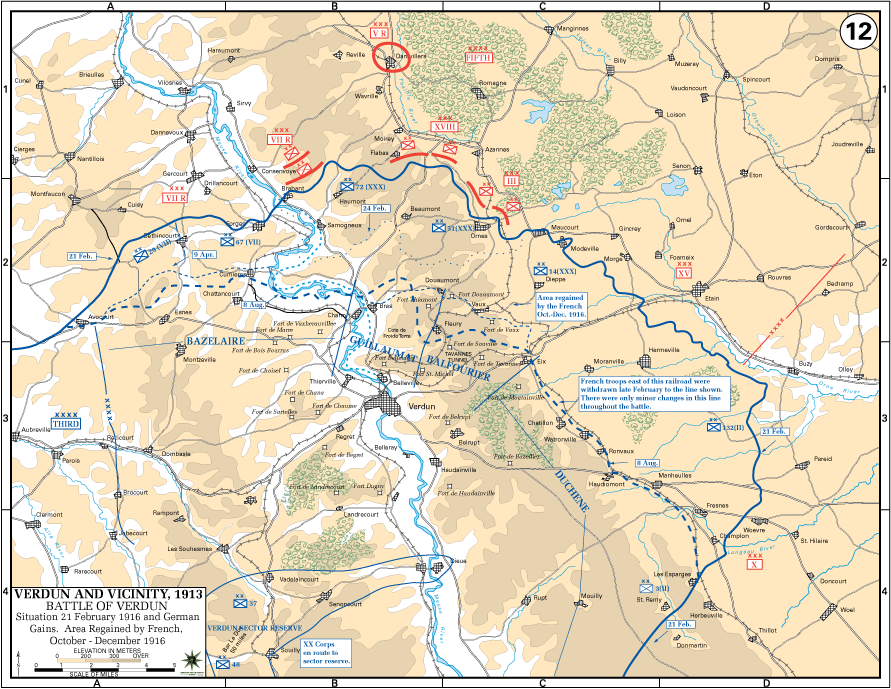
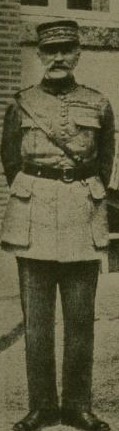


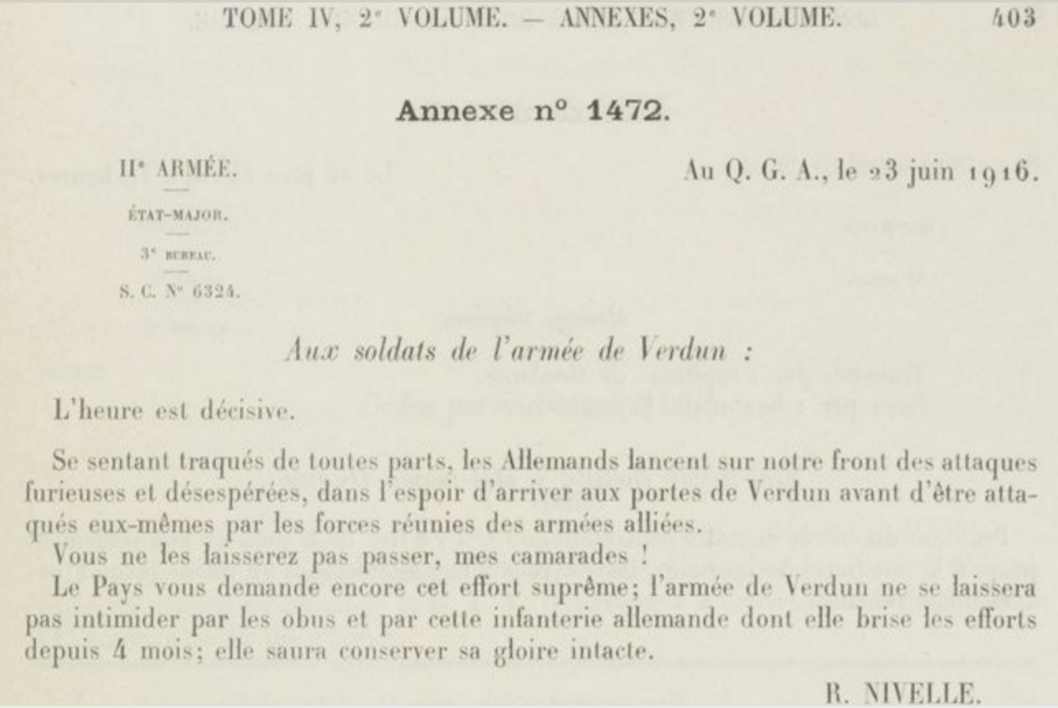
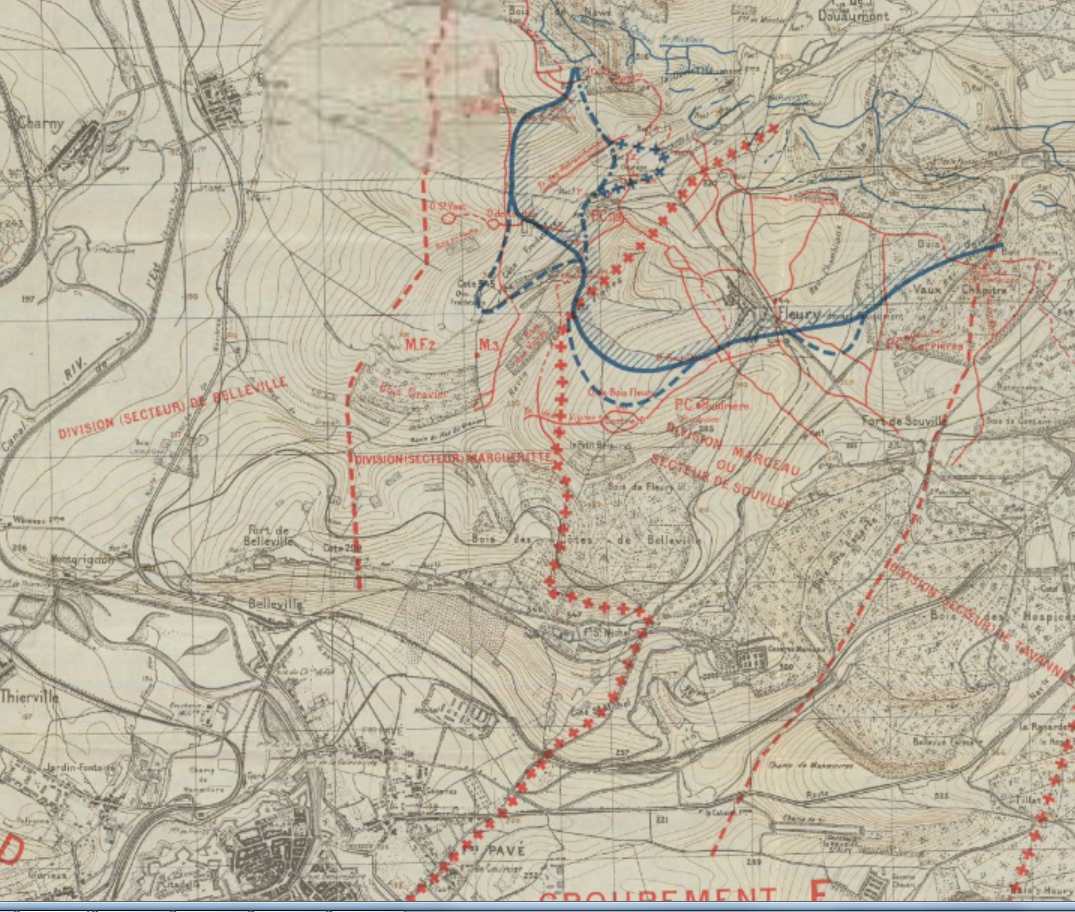

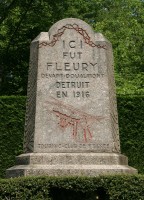


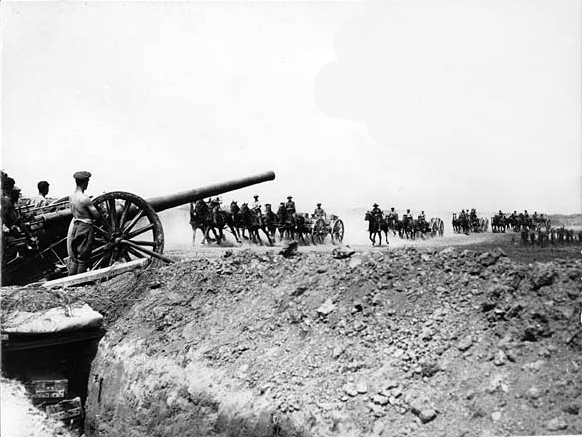
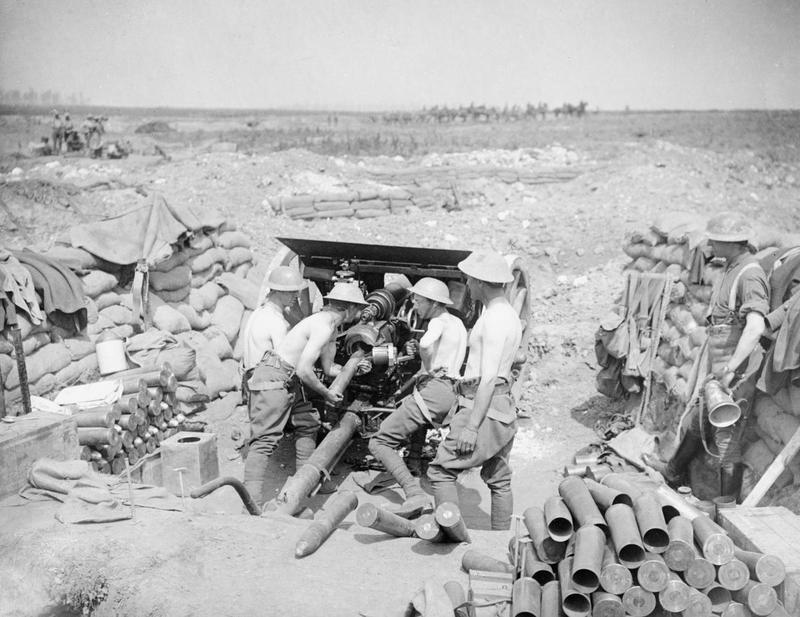
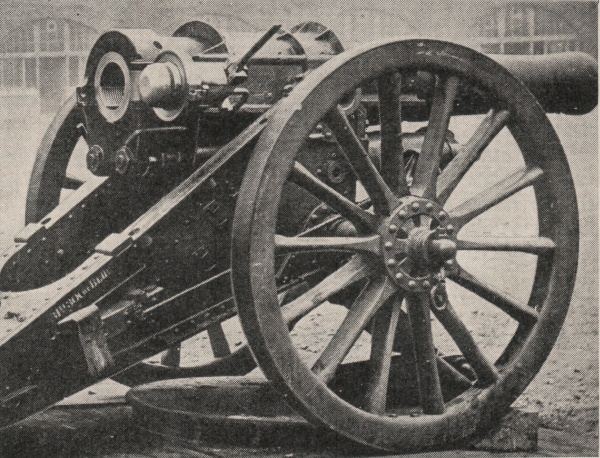
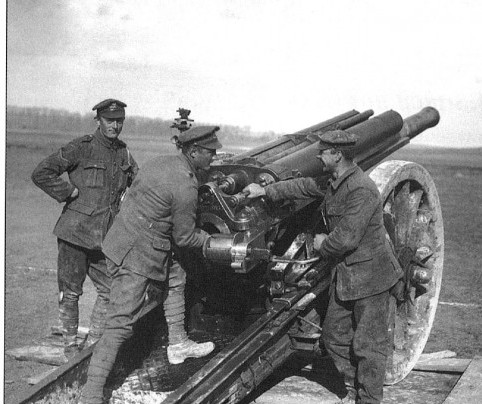


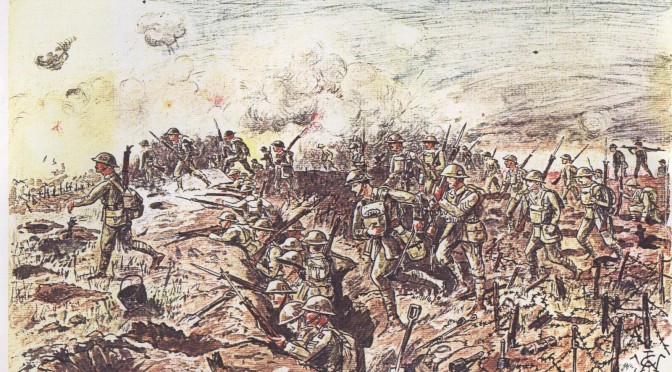

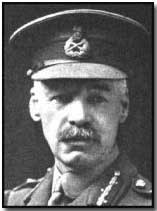
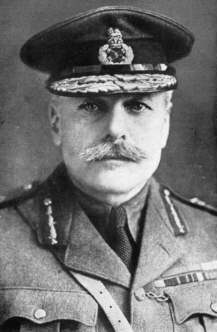
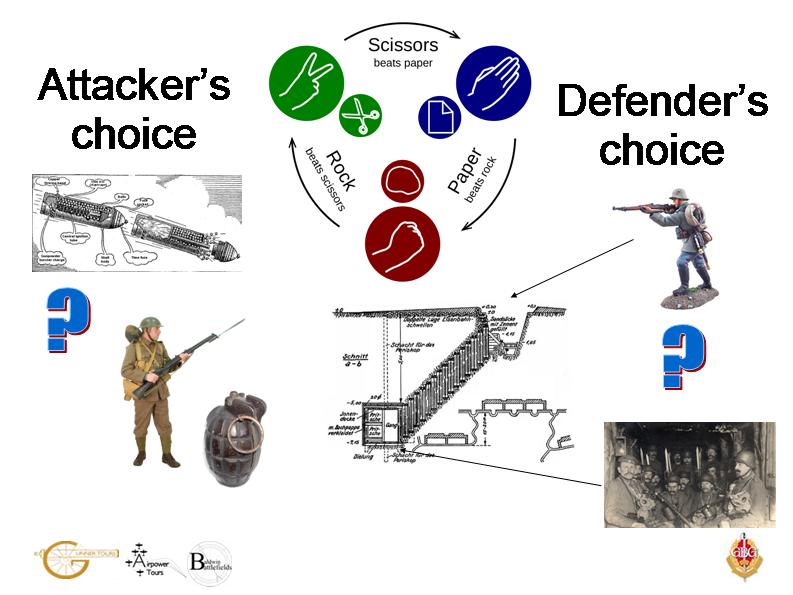


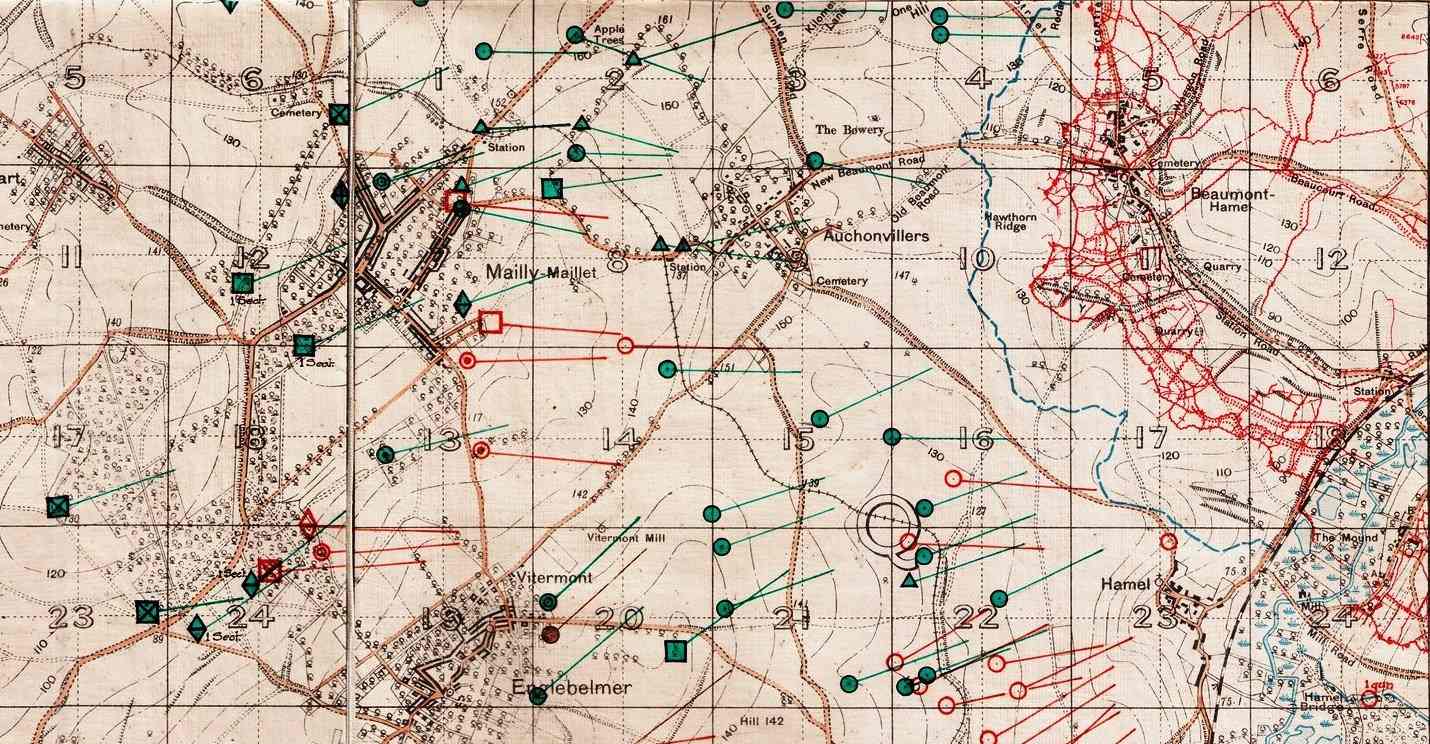
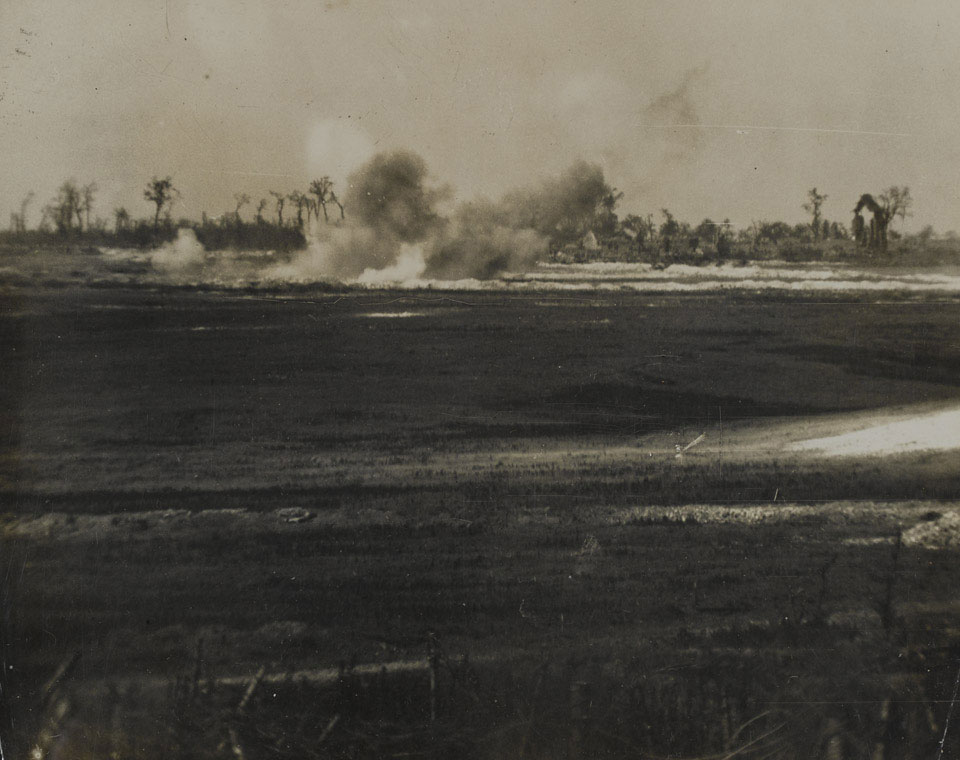
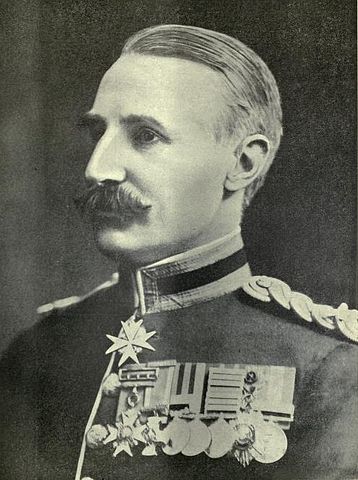

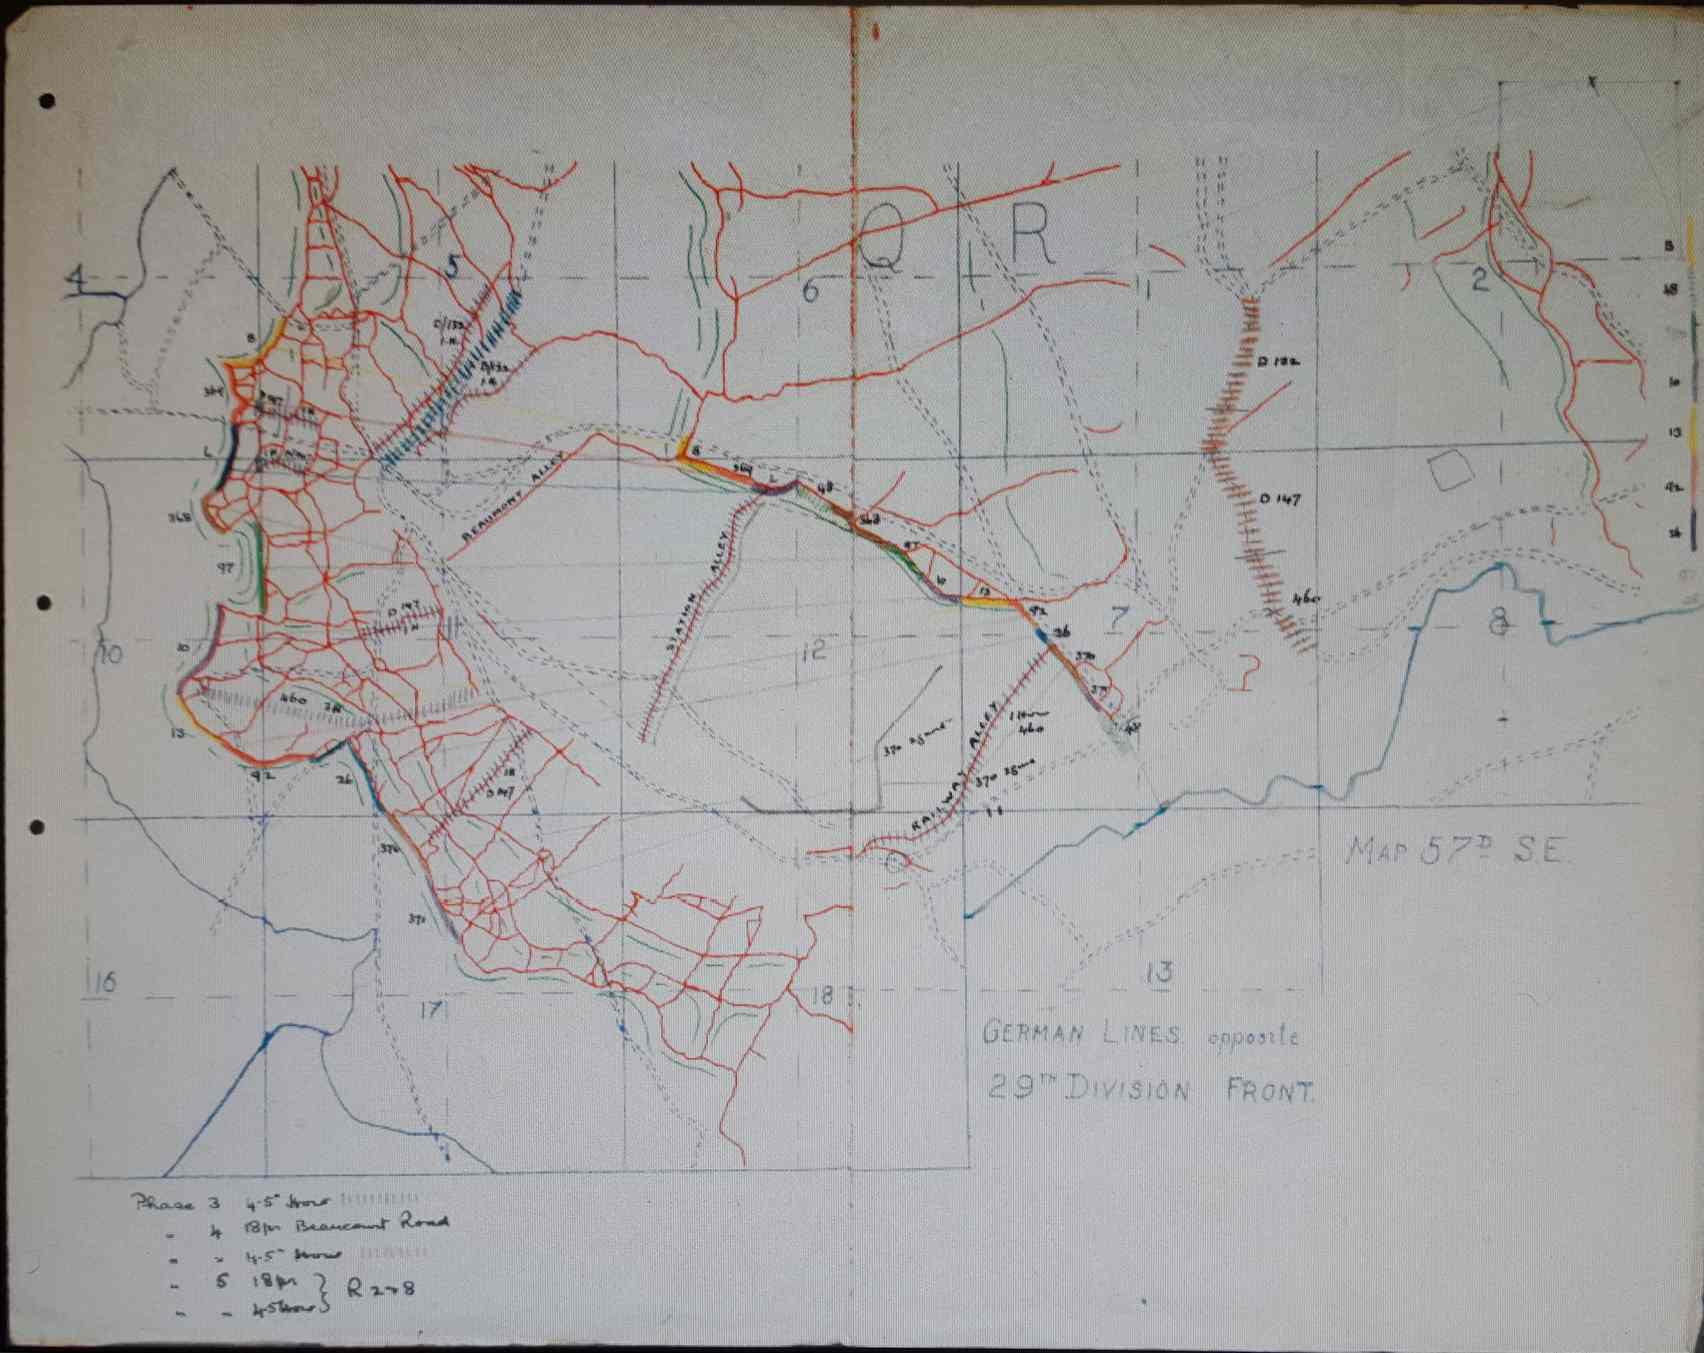

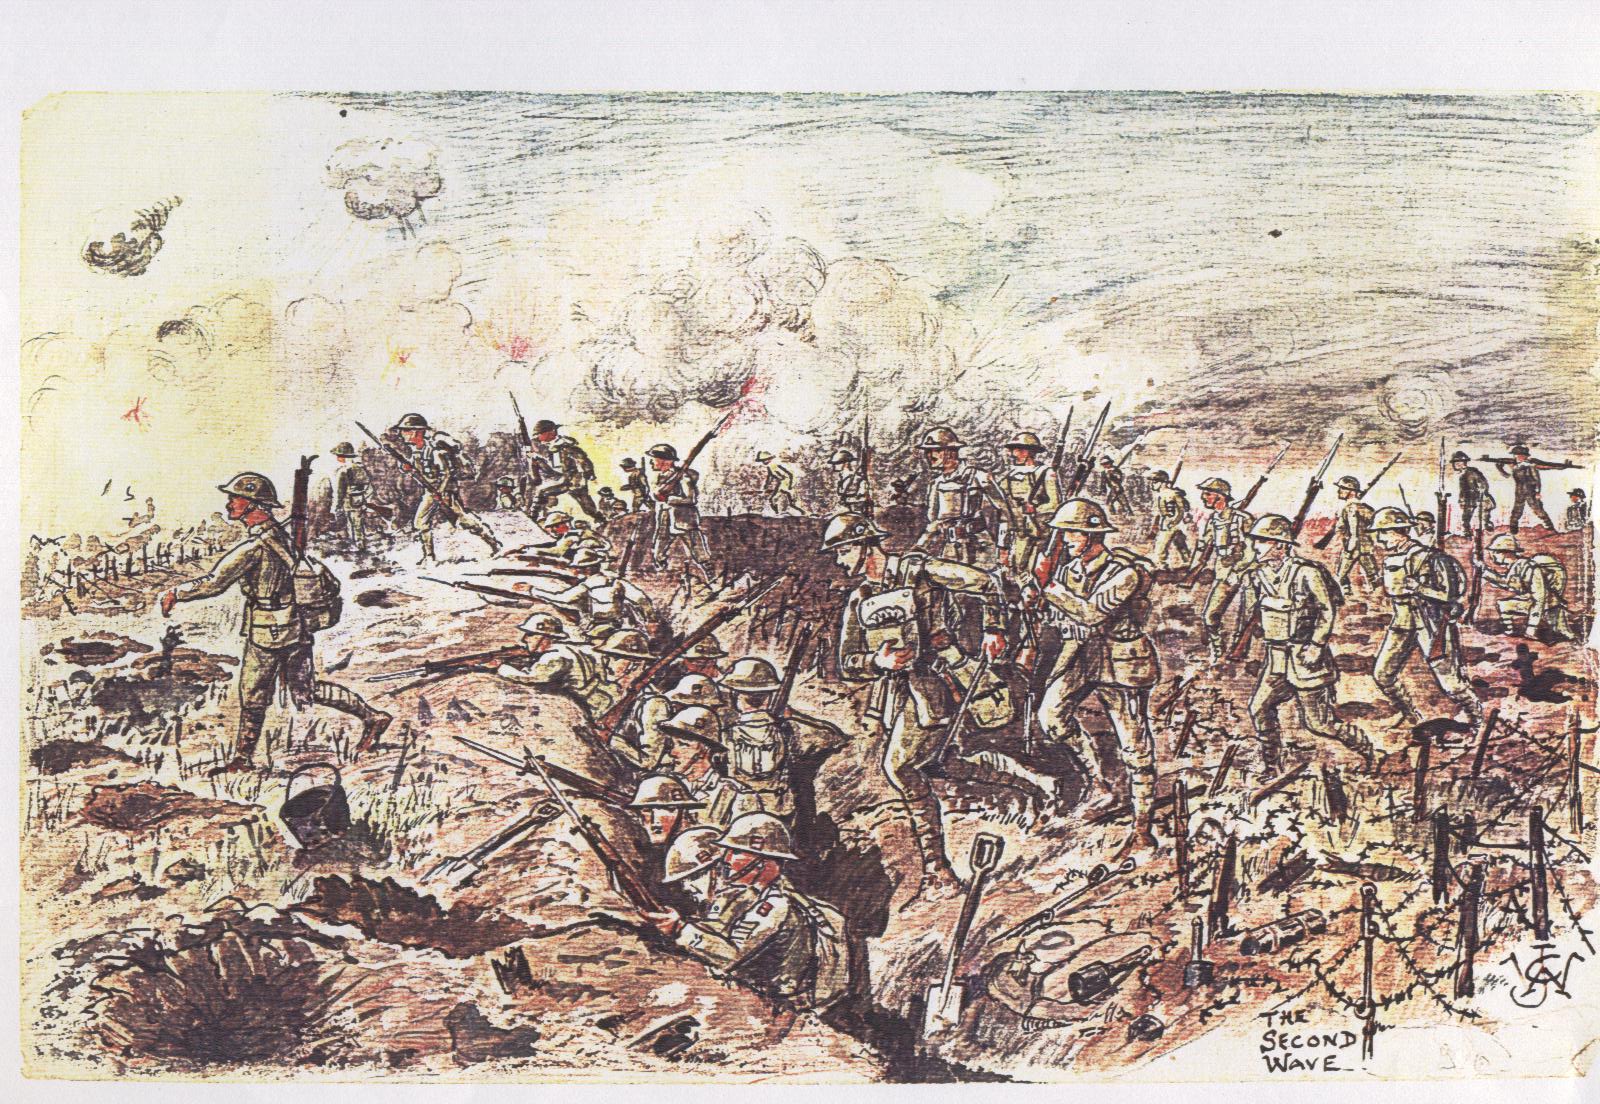
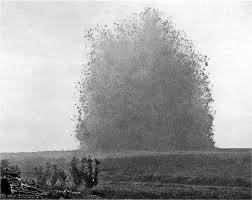
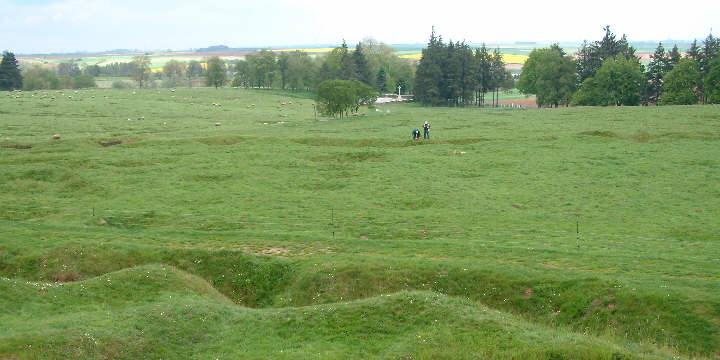
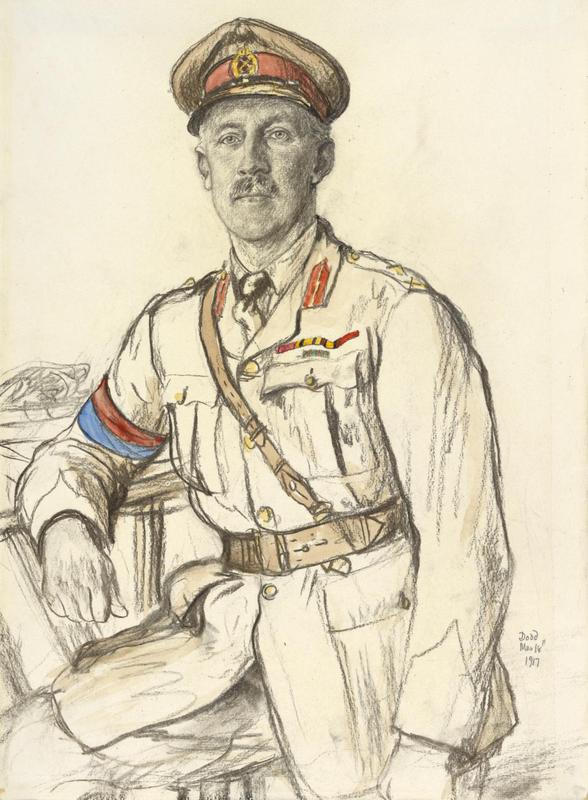

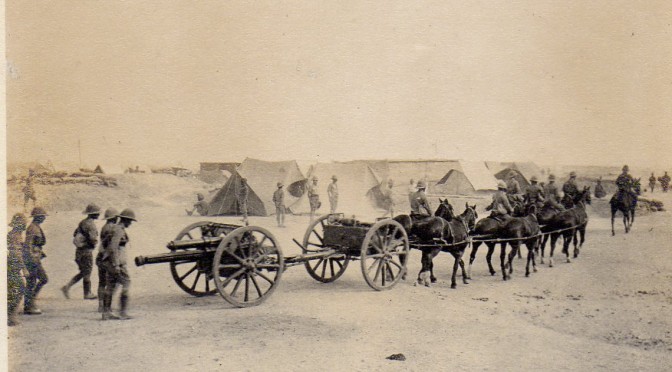
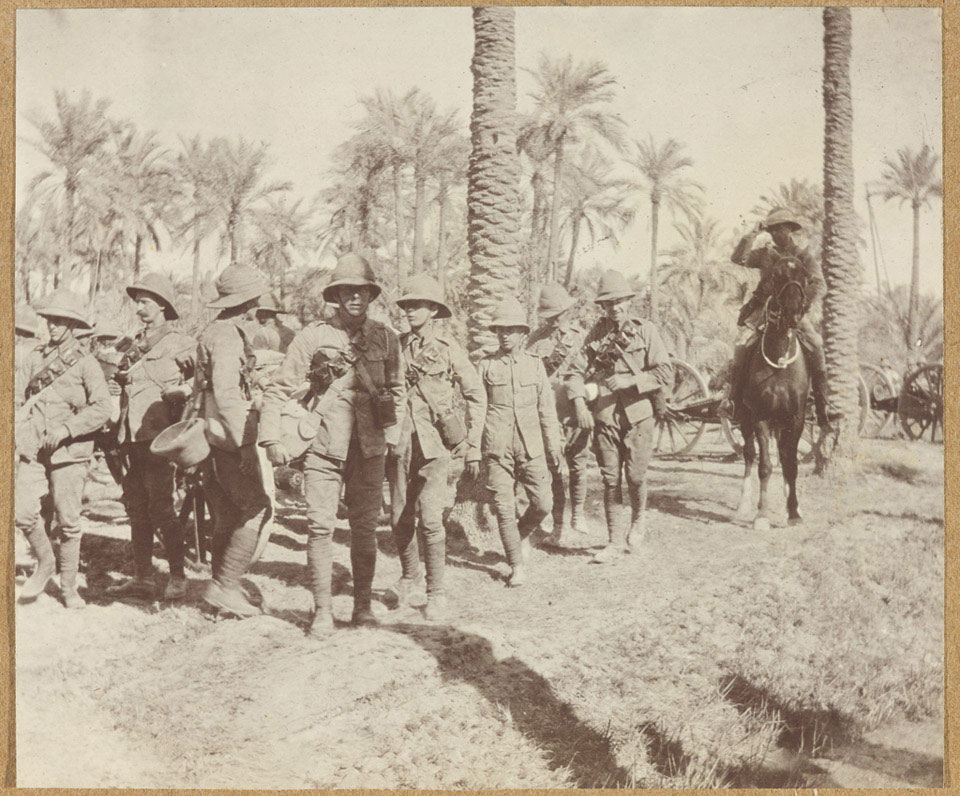

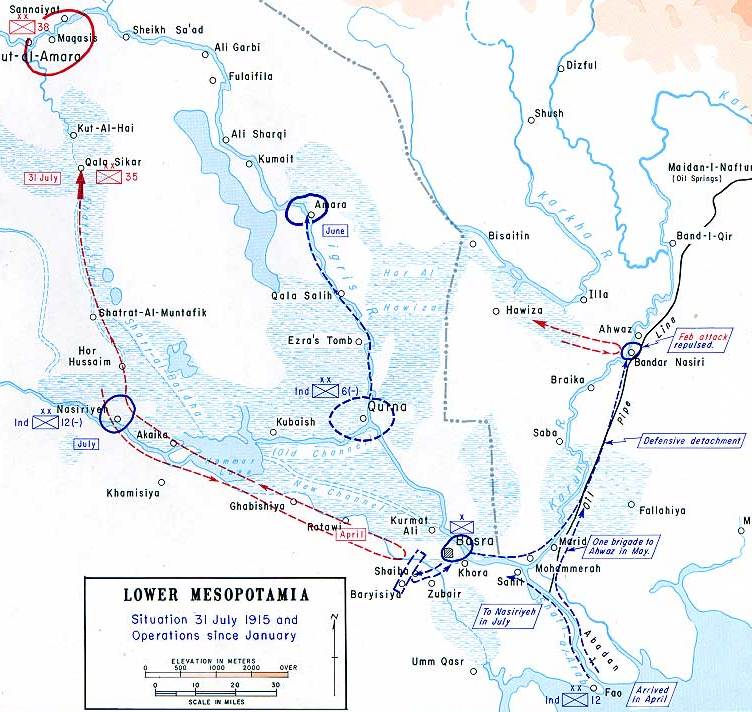

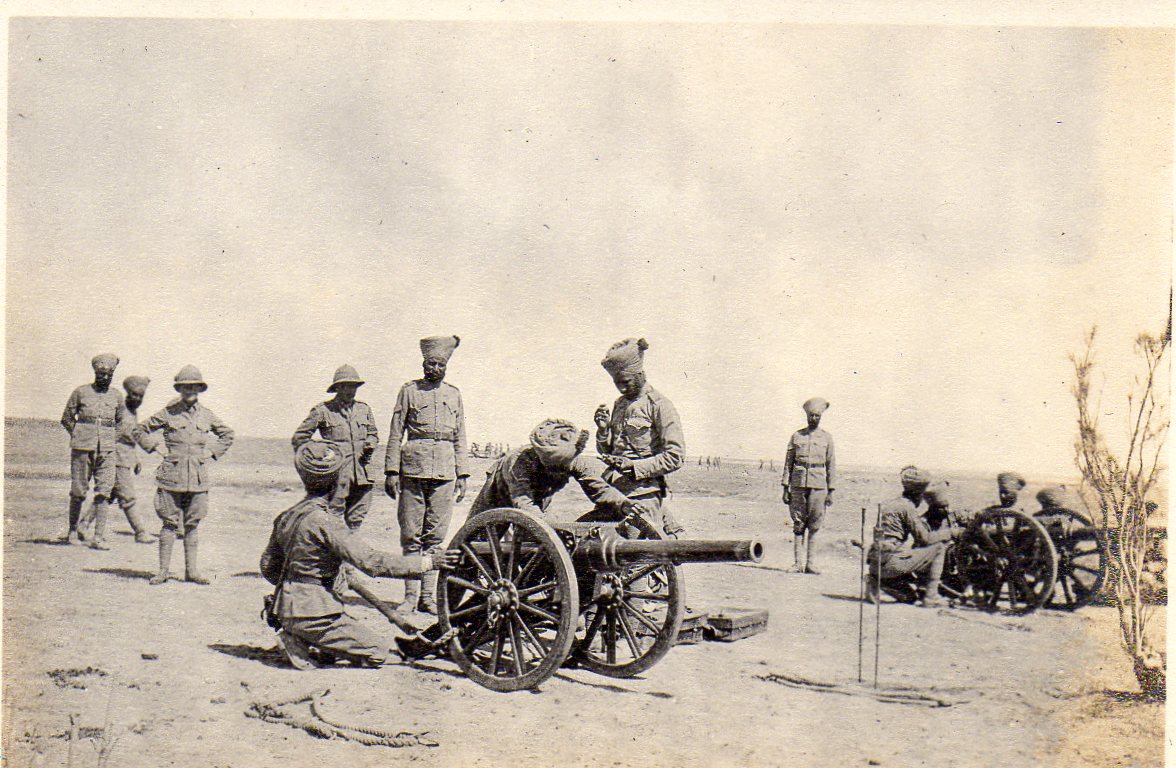
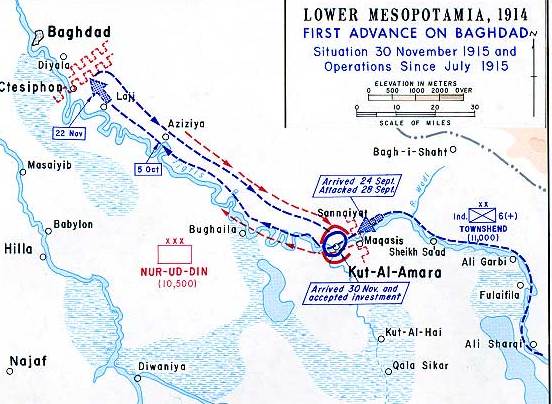

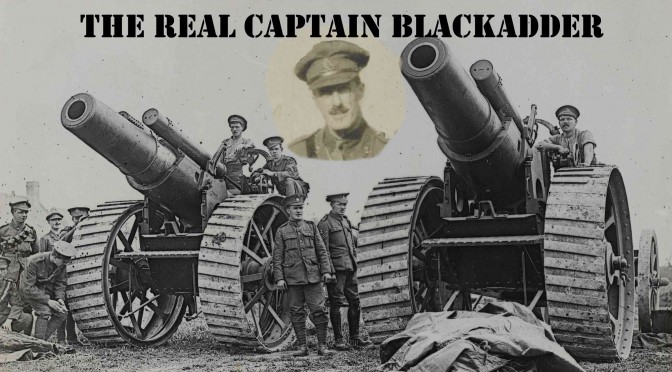
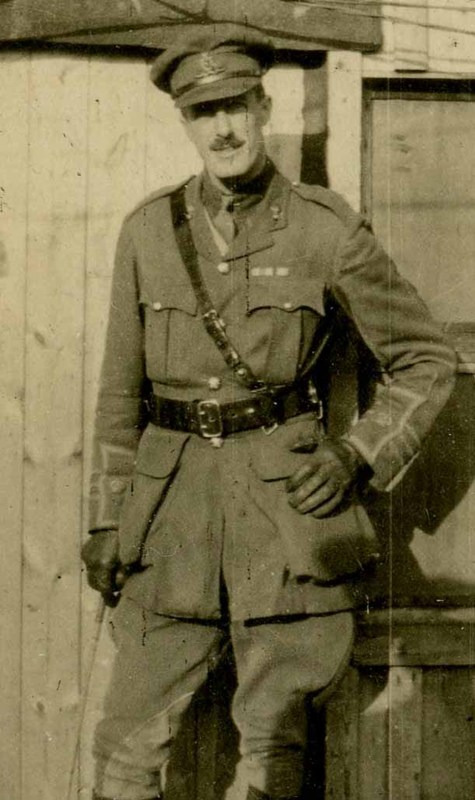

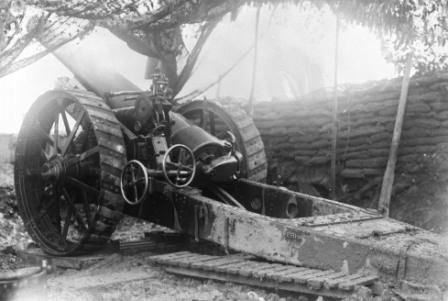

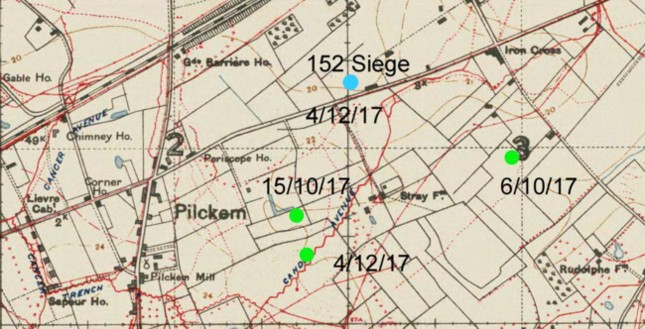

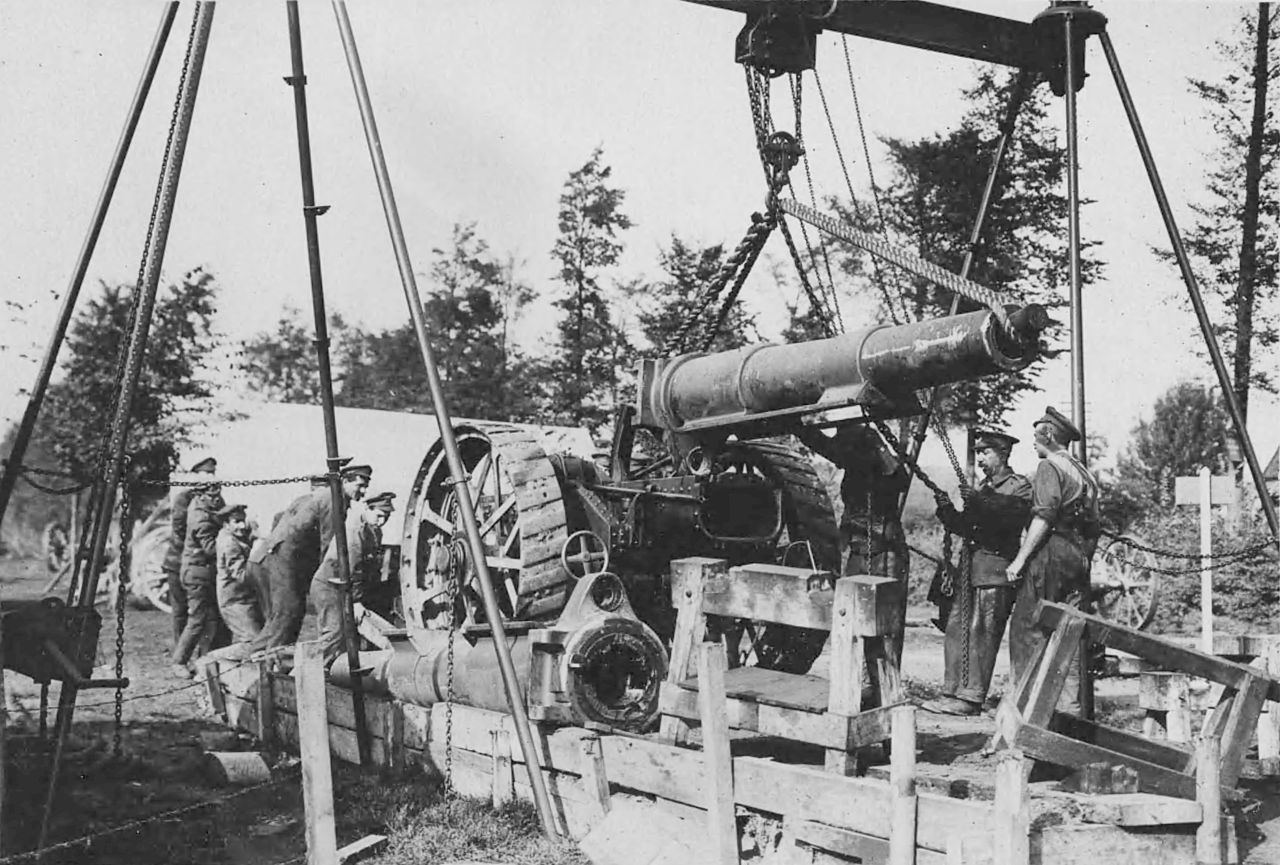

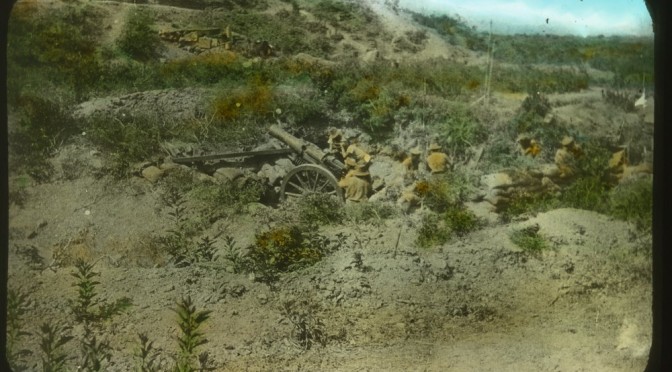
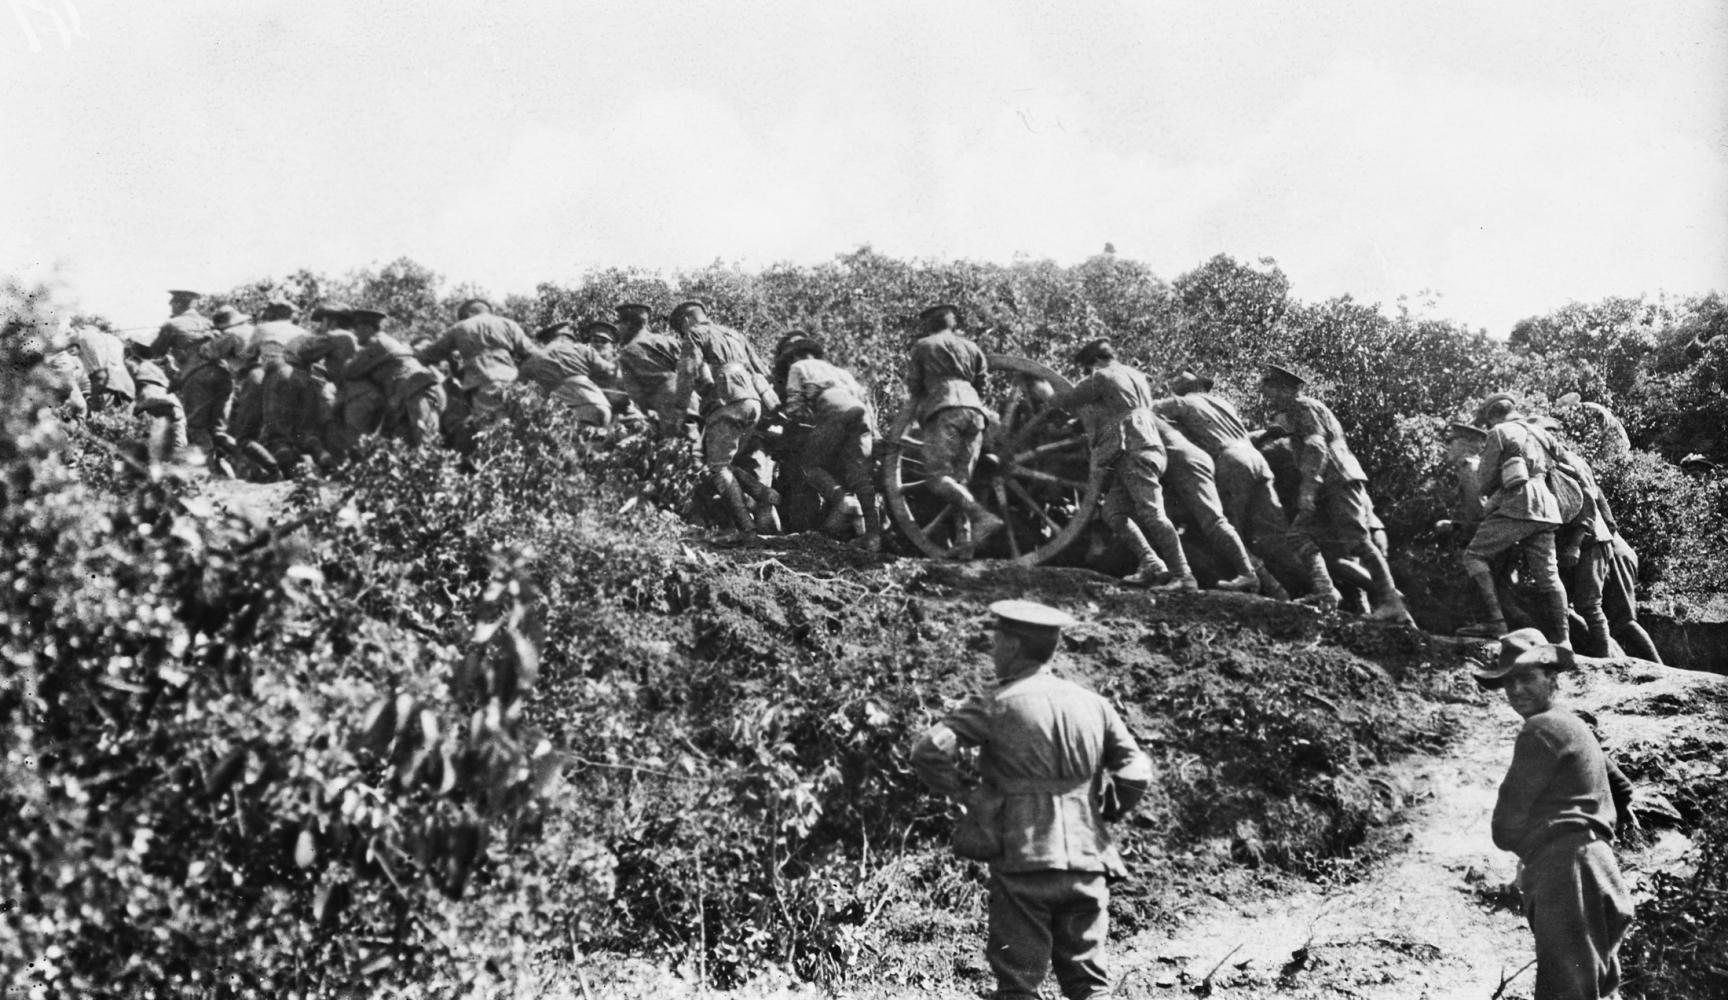
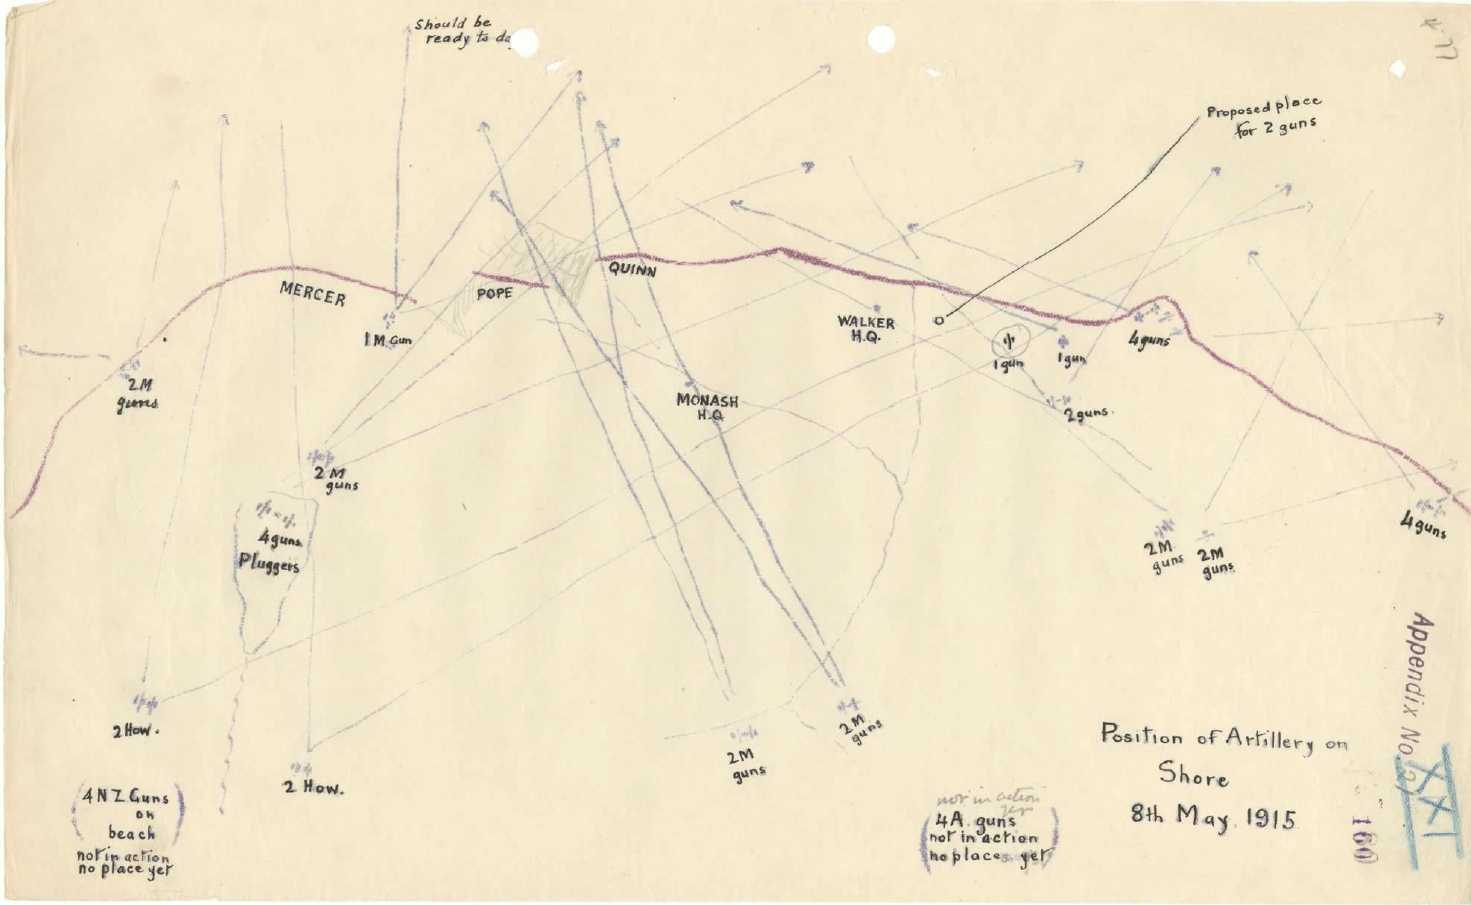
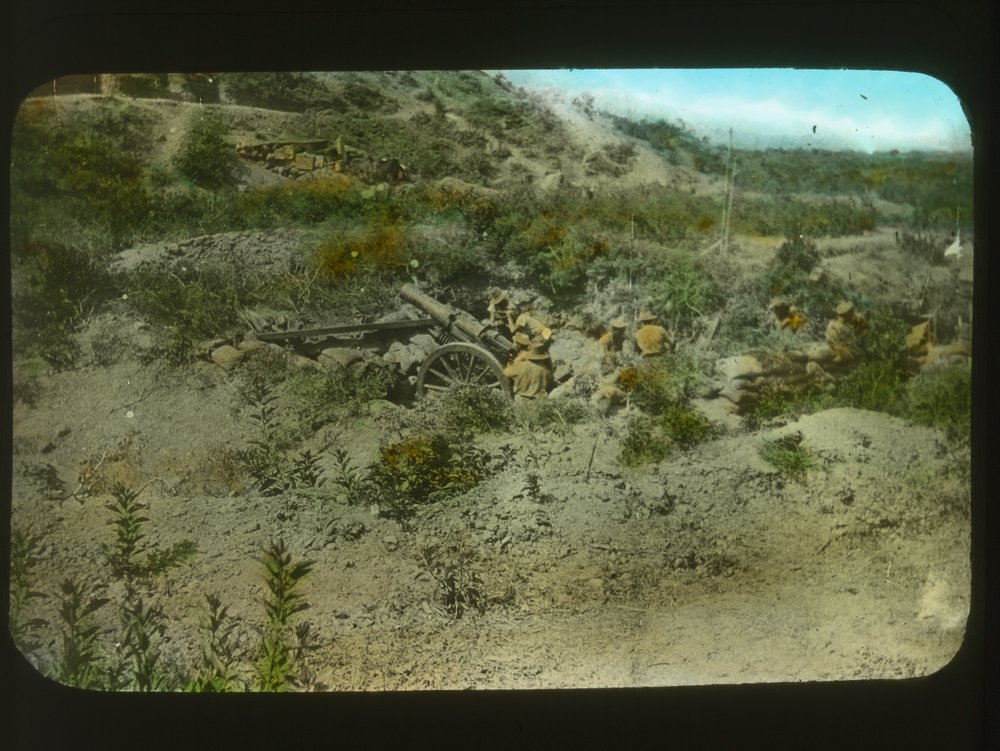
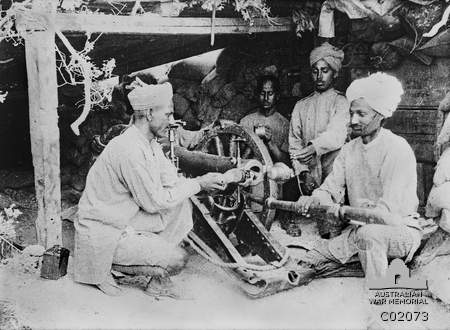
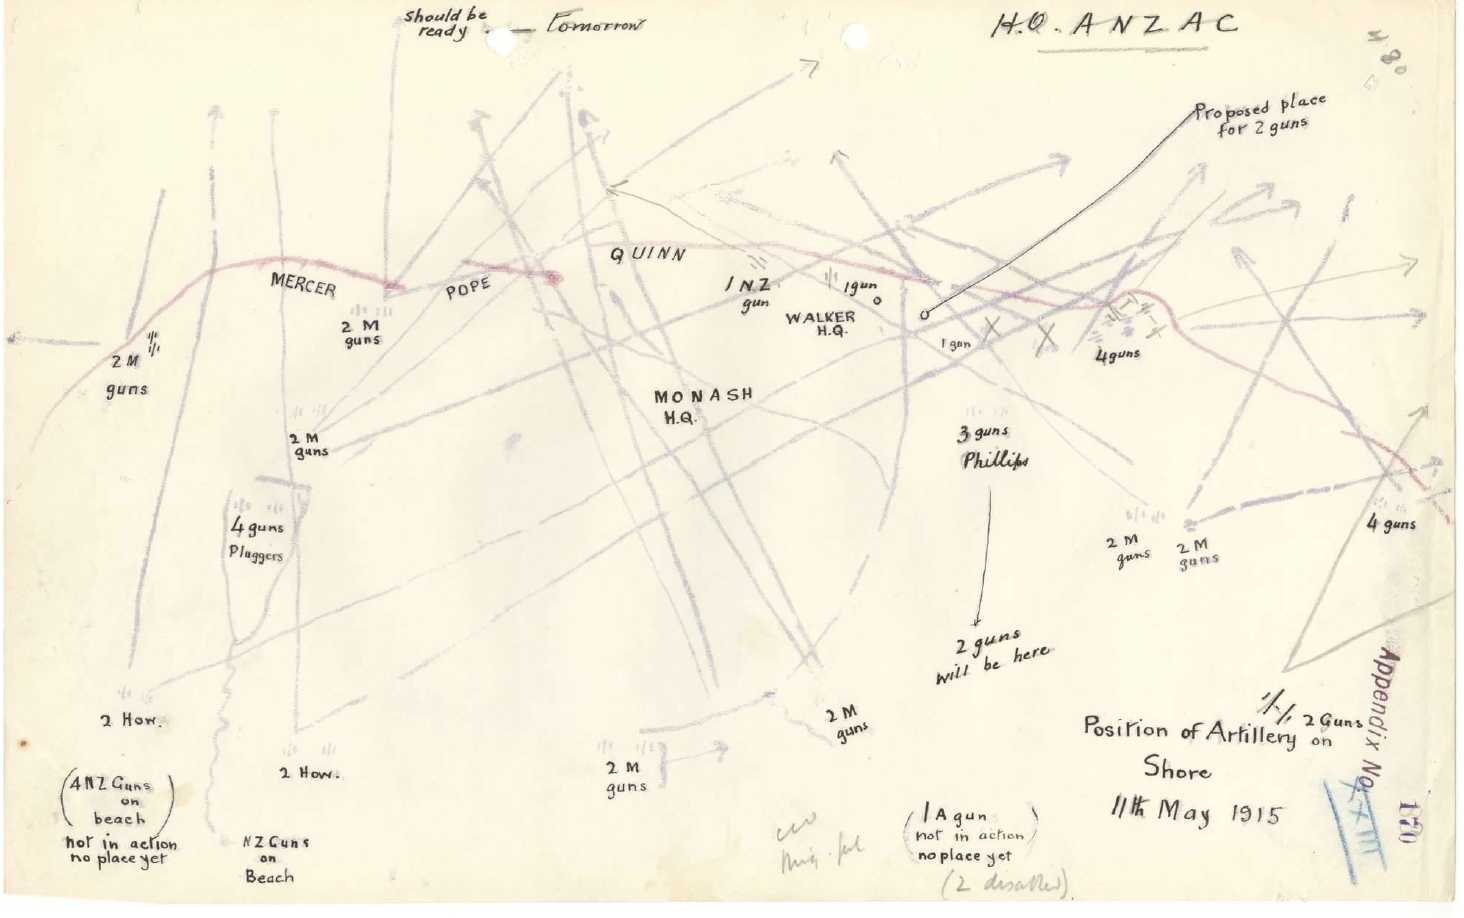
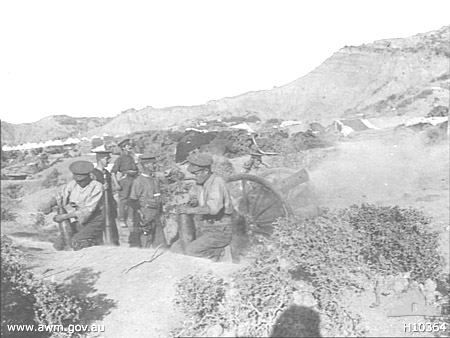

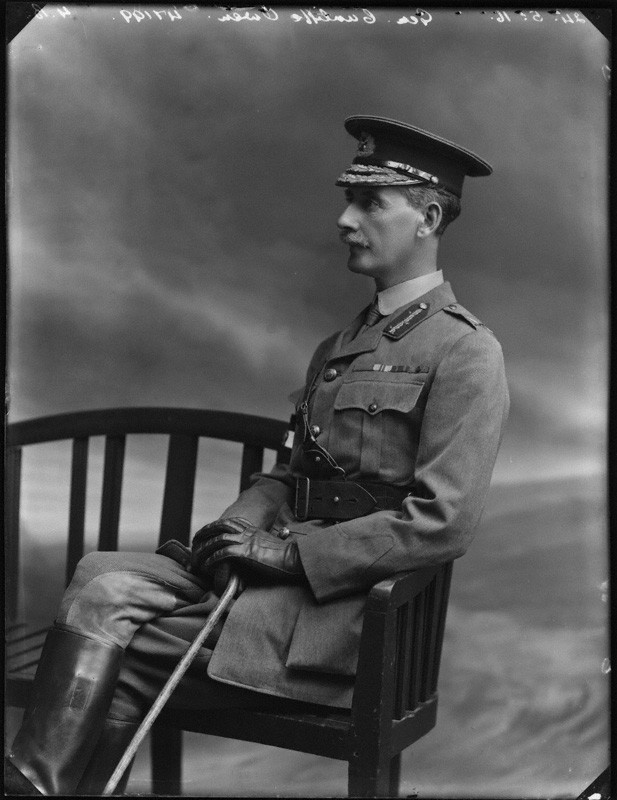


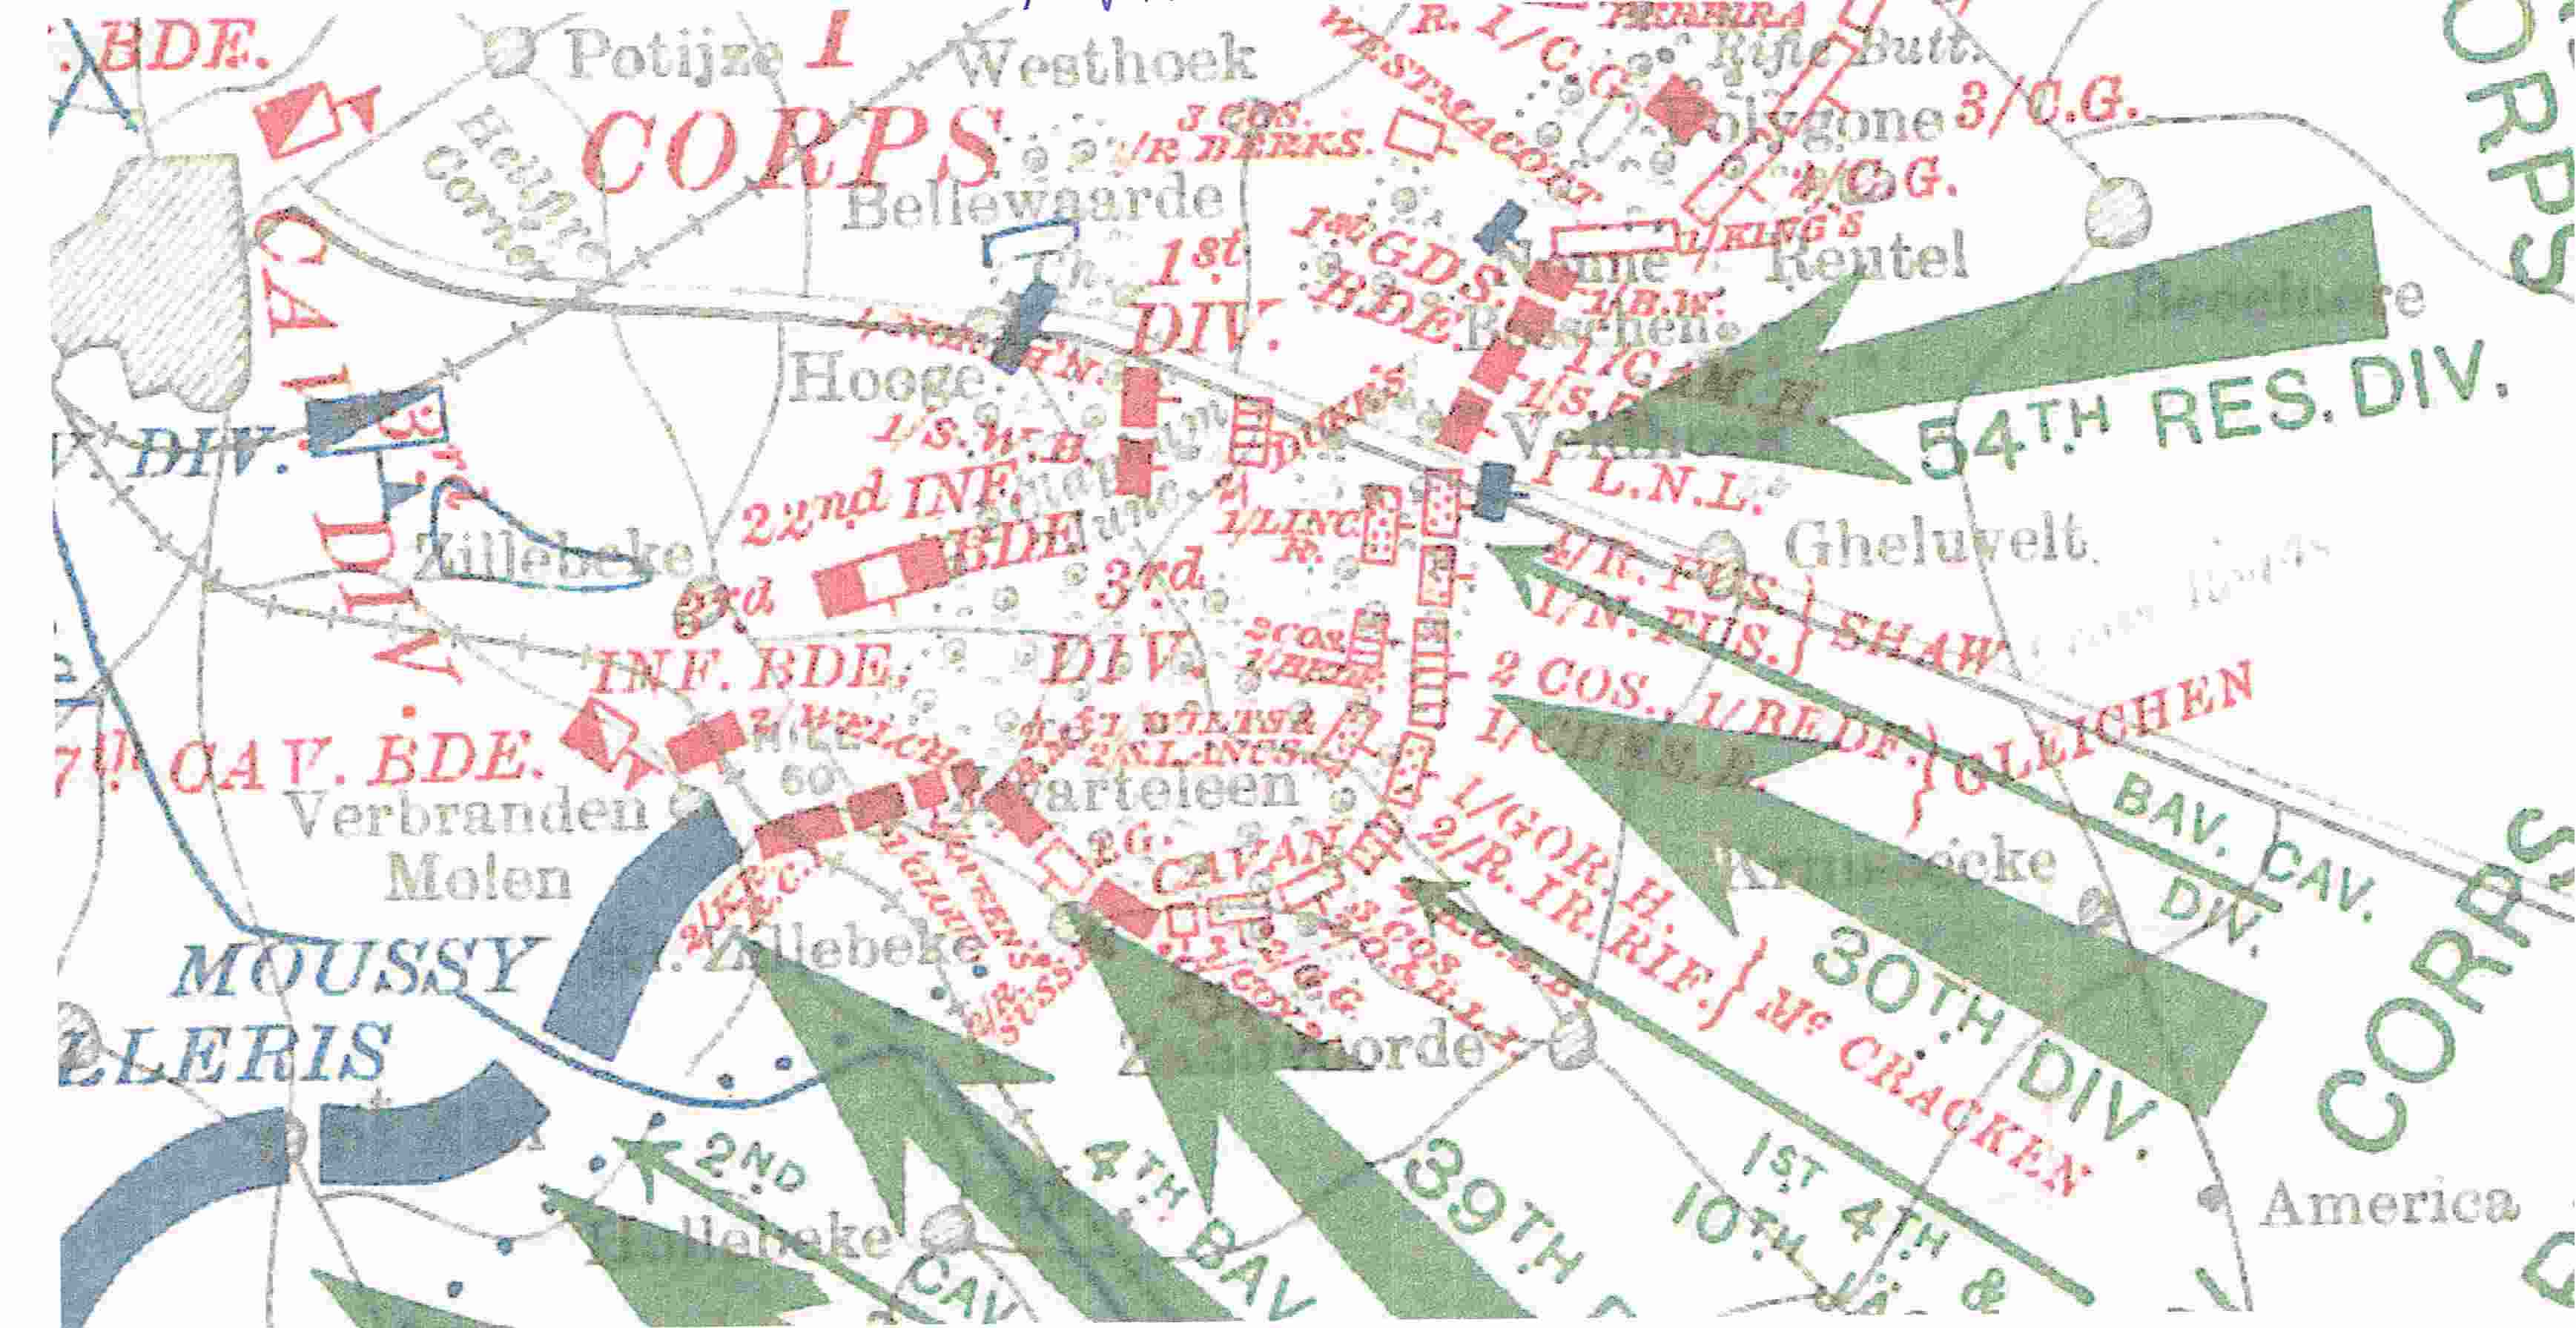


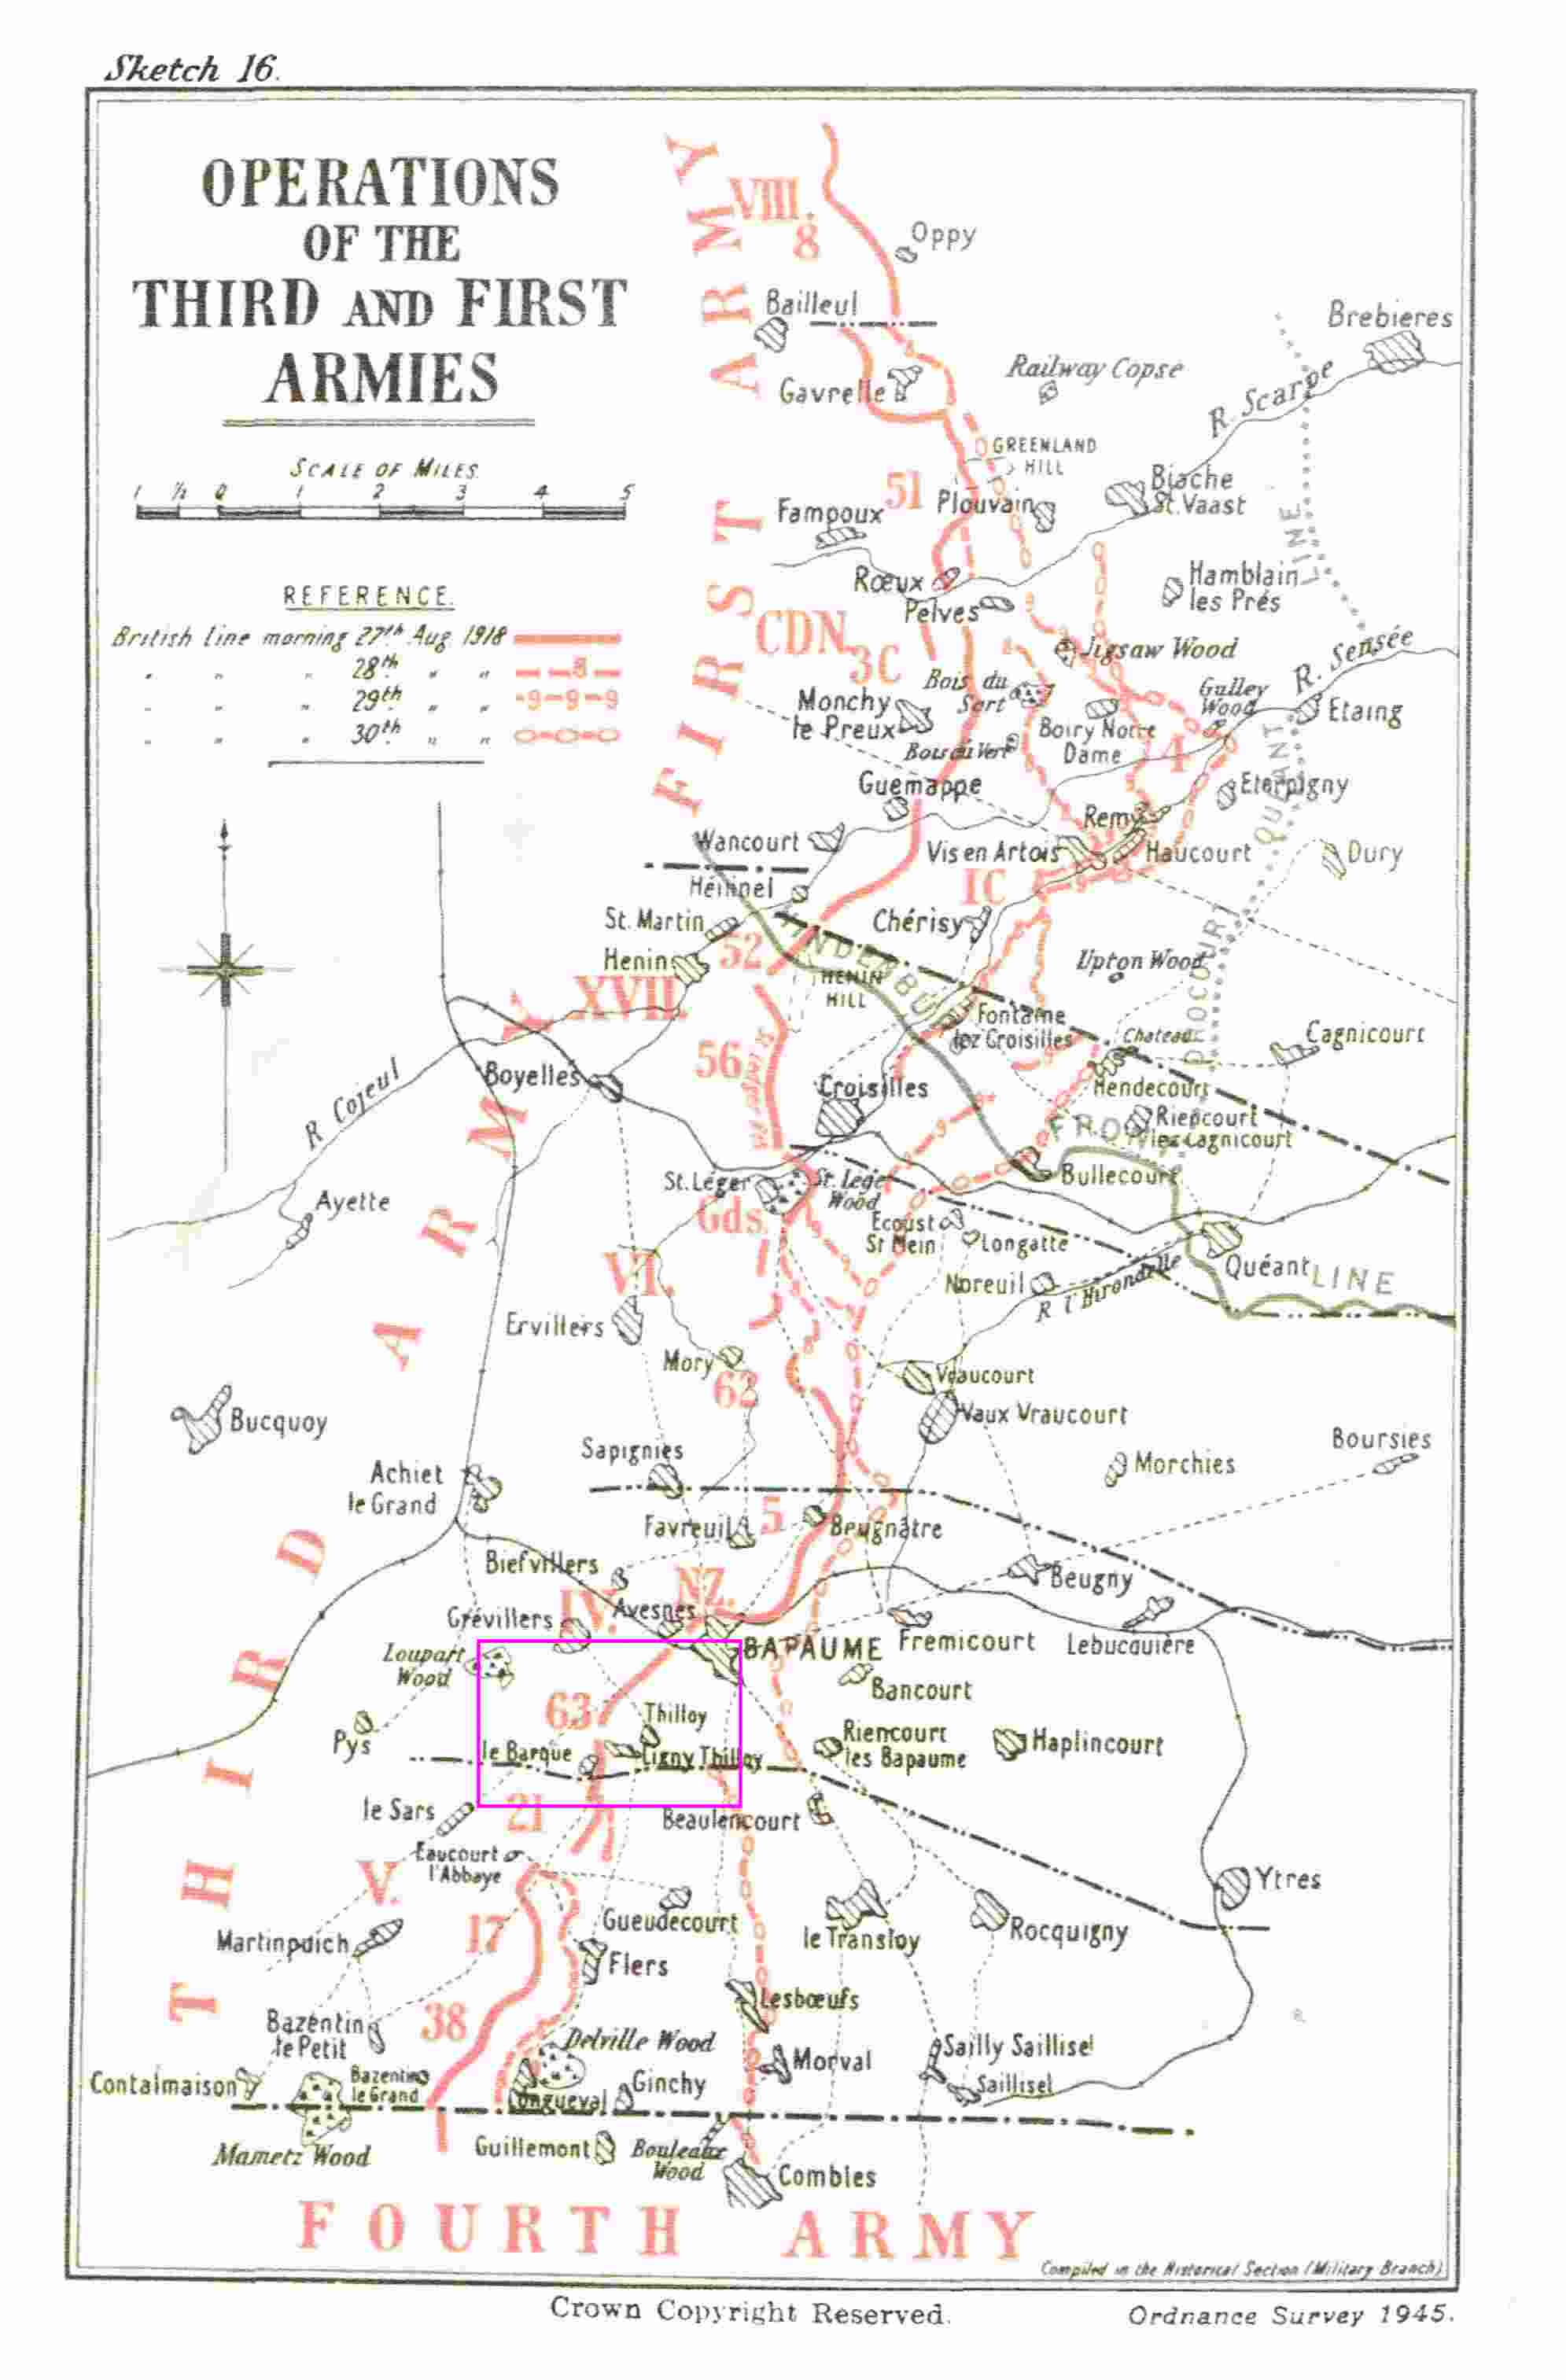
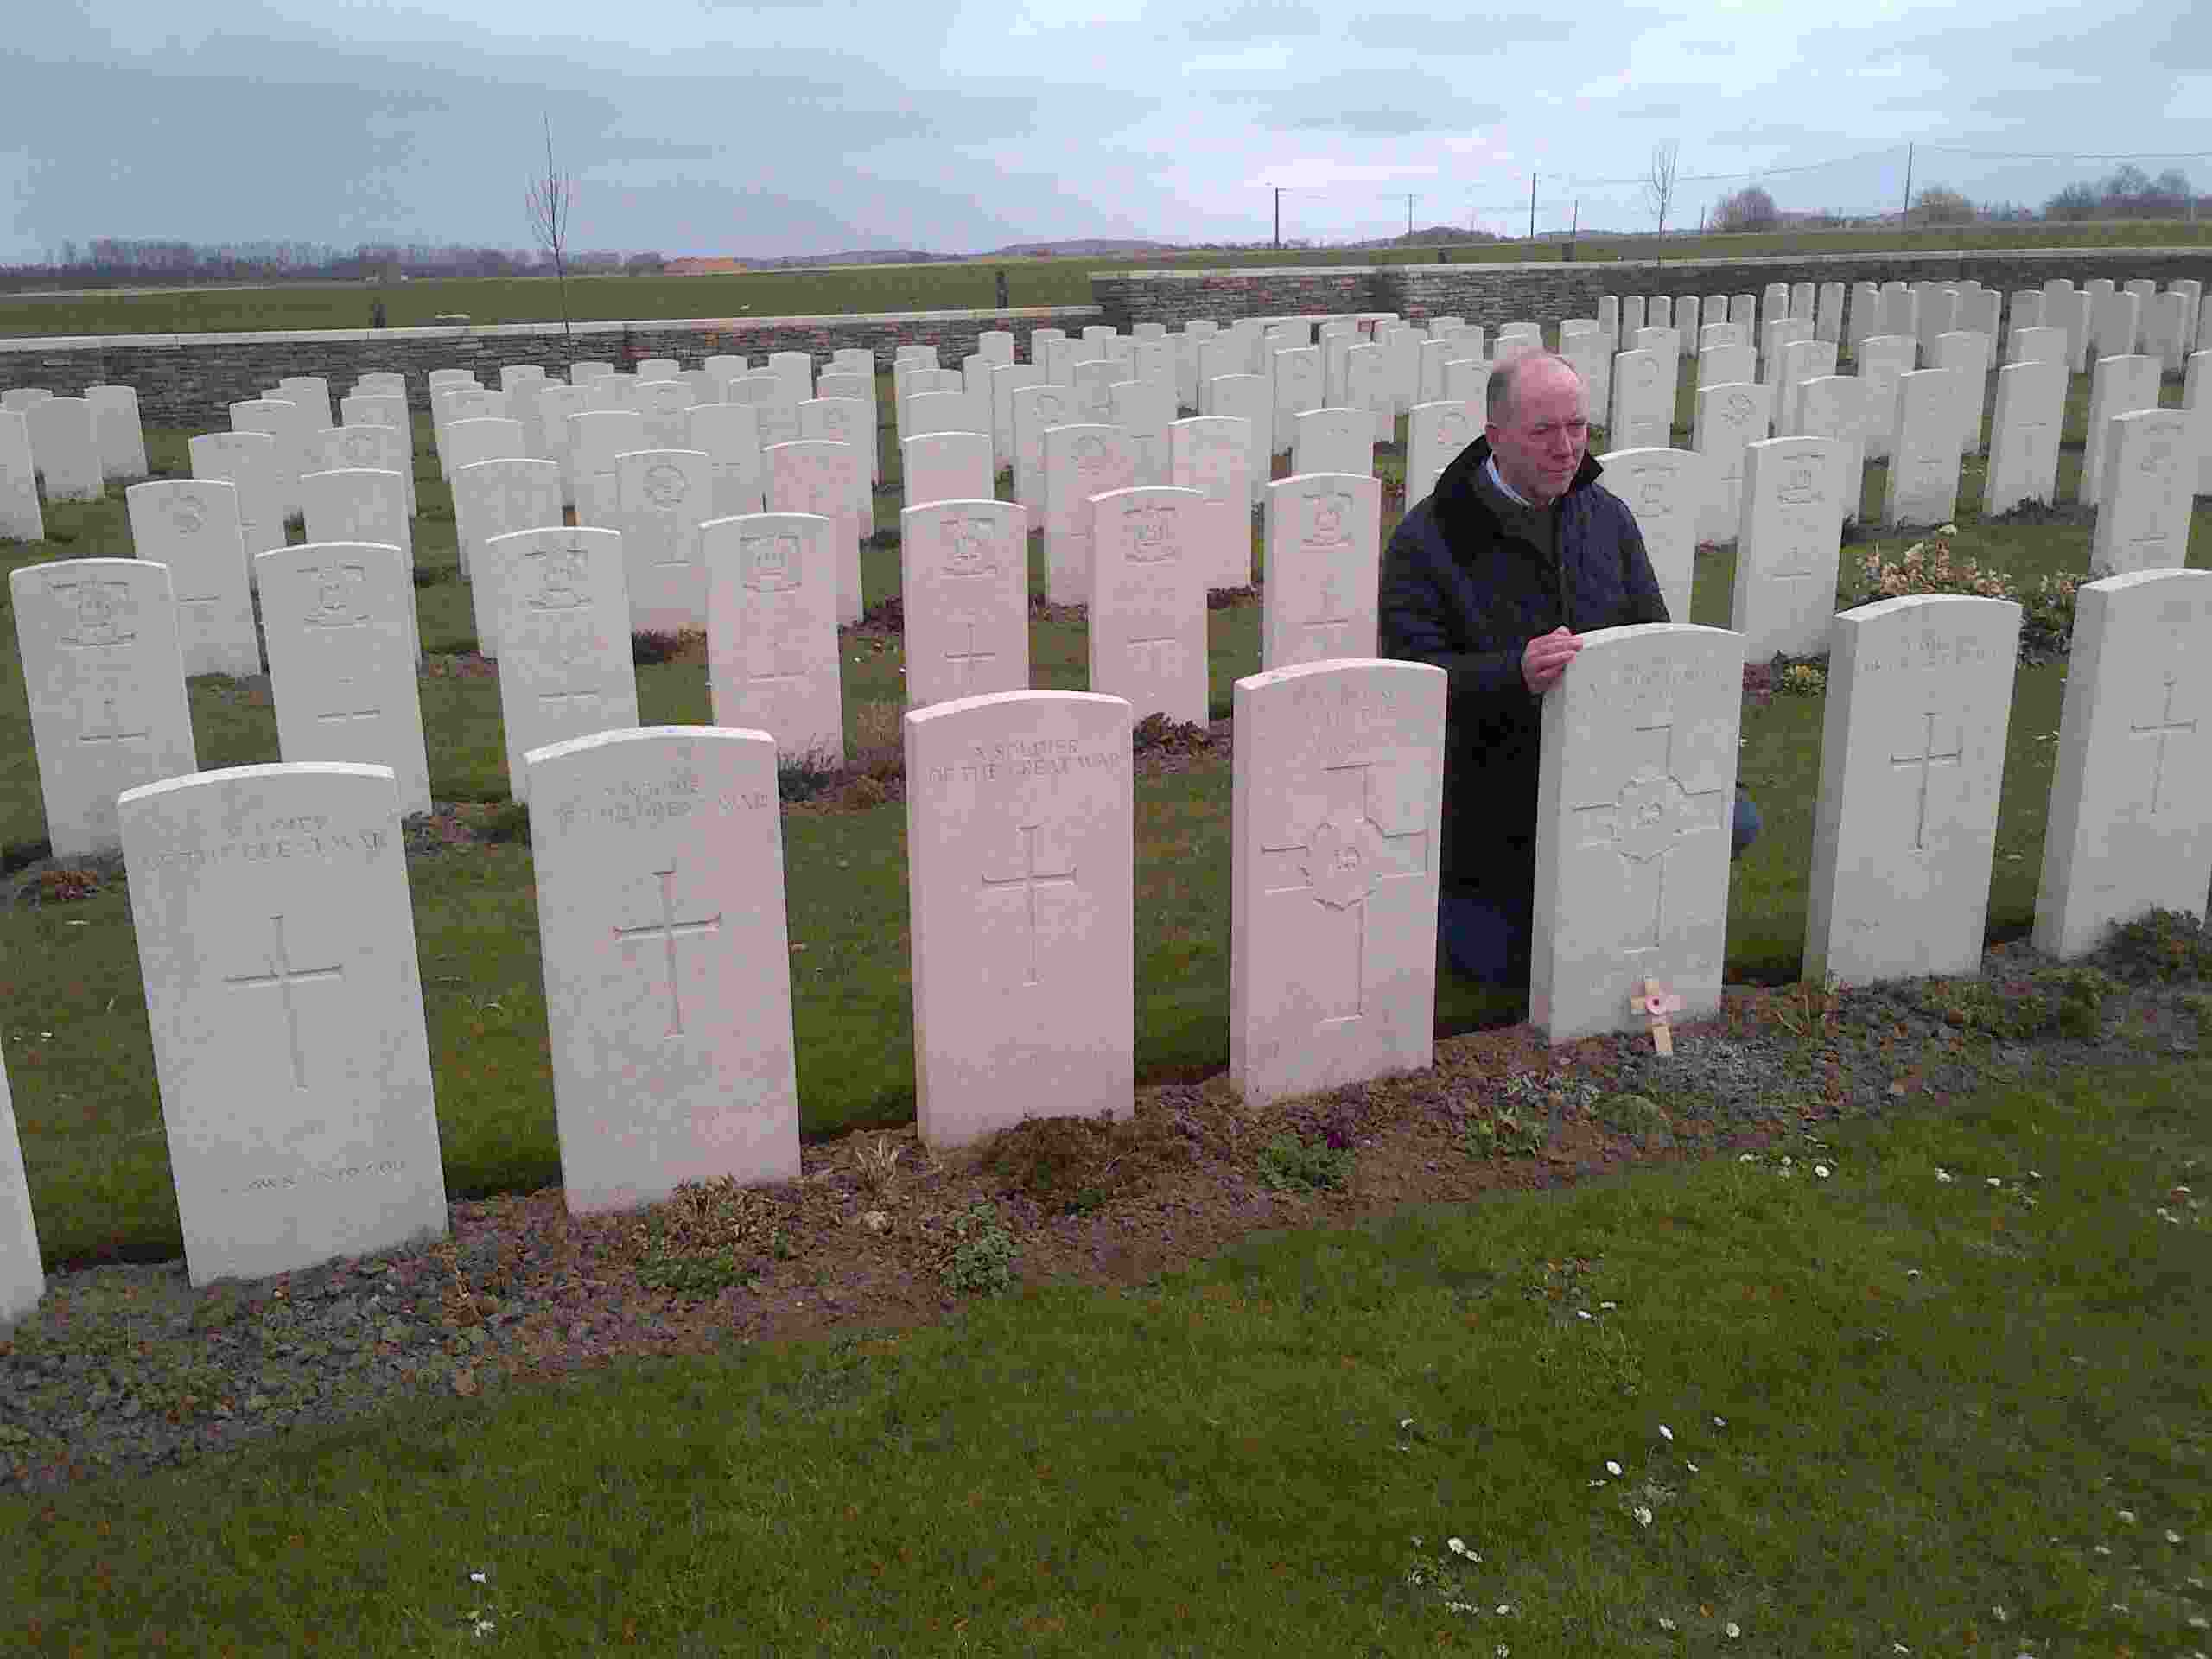


 ng weekend of four days