Forgotten battlefields of the Aisne

aisne departmental map
Great War Aisne Battlefields

The Aisne battlefields are in some ways a forgotten corner of the Western Front. Most British visitors to the Western Front tend to focus on the battlefields of Flanders and the Somme, or hurtle across it en route to Verdun, the iconic French battle. Yet the battlefields in the Aisne, the bordering department south of the Somme Region, play a significant part in the development of the Western Front, have a special place in the story of the British Expeditionary force and are the resting place of several thousand British soldiers.

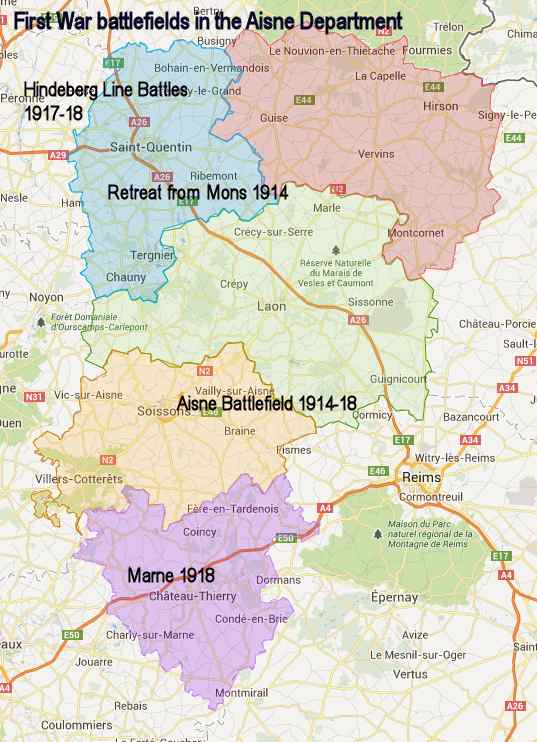
The Department of the Aisne forms an inverted triangle with St Quentin near the top left corner and the town of Château Thierry near the base. The northern half of the department is part of the Picardy plains. The southern half is much hillier and cut by the Oise, Aisne and Marne rivers flowing East to West. Battlefields tend to be determined by physical geography rather than administrative regions. Thus the department plays an significant role in several battlefields, only one of which takes its name from the department.

THE OTHER SOMME BATTLEFIELD

There are geographic and commercial reasons why British battlefield tourists tend to miss out the Aisne. The Somme is that bit closer, and even then most British visitors focus on the battlefields around Albert, the site of the dramatic and costly first day of the Somme, and popularised in literature from Siegfried Sassoon to Sebastian Faulks. There has also been a major investment in the Somme in heritage tourism, from the development of the Thiepval interpretation centre, to the establishment of the Museum of the Great War in Peronne, and there is the well organised support for British tourists and the tourist trade. There is a risk though, that the focus on that which is easiest to visit distorts our understanding of the history and what it means.

The Manchester Regiment captures a German Battery on Manchester Hill.

The Northern part of the Aisne department centres on the town of St Quentin. This area tells a different story of the battles we know as the Somme. The most obvious features are the remains of the Hindenburg line, the fortified line created due to the high cost to the Germans of the battle of the Somme. We don’t often see the 1916 Somme battle as a “victory”. The huge investment in developing the Hindenburg line and the spiteful destruction of everything of possible value in the land they evacuated indicates that the Germans saw the Somme as a defeat. This area included the sites of actions in the advance to the Hindenburg line in March 1917. The village of Francilly-Selency includes reminders of this in the monument to the 2nd Battalion the Manchester Regiment which liberated the village in March 1917, in the action during which one of their officers, the poet Wilfred Owen, was wounded.


Lieutenant Colonel Wilfrith Elstob VC

If we relied purely on popular culture, the Great war was not won but fizzled out in an Armistice, whether in a hail of bullets in no man’s land in Blackadder or with the tunnellers still under the static trenches in Bird Song. However, a visit to the Battlefields around St Quentin bears witness to the violent climax to the First World War on the Western Front. In March 1918, Manchester Hill, captured by Wilfred Owen’s battalion the previous spring, was occupied by the 16th Battalion the Manchester Regiment, understrength and exhausted from the Passchendaele campaign. This was one of the British redoubts isolated by German storm troops on the first day of the Kaiserschlacht and where its commanding Officer fought to the death, and was subsequently

Men of the 137th Brigade, 46th Division, being addressed by Brigadier General J C Campbell VC CMG DSO on the Riqueval Bridge over the St Quentin Canal, which formed part of the German's Hindenburg Line, broken on 29 September 1918.
Men of the 137th Brigade, 46th Division, being addressed by Brigadier General J C Campbell VC CMG DSO on the Riqueval Bridge over the St Quentin Canal, which formed part of the German’s Hindenburg Line, broken on 29 September 1918.

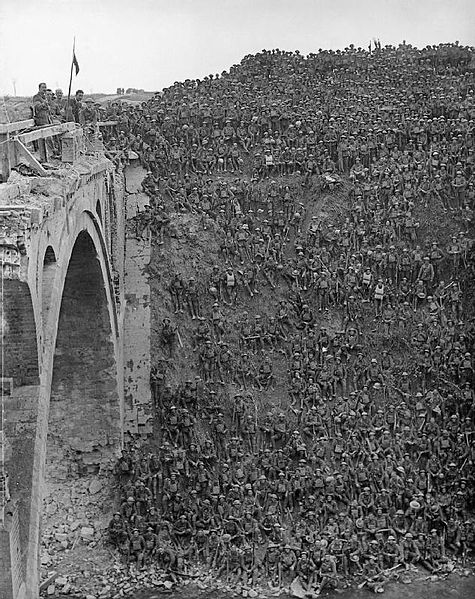
awarded the Victoria Cross. The Hindenburg Line positions north of St Quentin stormed by the British, Australian and American troops 28 September-3 October 1918, are still very visible and provide evidence of the story of the allied determination, skill and courage that overwhelmed the Germans in 1918. At this point the German defences were based on the Canal du Nord, a major obstacle protected by barbed wire and concrete bunkers. The tactical problem can be compared with the D Day landings. The bridge at Riqueval, seized by Captain Charlton and nine men can be compared to the capture of Pegasus Bridge on D Day. It is one of the most evocative places, and captured on a camera.

The fighting did not end at the canal. The concrete bunkers of the Hindenberg line are much better preserved than the earthworks of the Somme. The BBC TV Programme ”Who Do You Think You Are?” featured Matthew Davis the descendent of William Henry Johnson VC winner seeking the story of his ancestor. http://www.bbc.co.uk/news/magazine-23109590


Lance Corporal William Coltman VC

Close to here, at Mannequin Hill, N.E. of Sequehart, Lance Corporal William Harold Coltman, of 1/6th Bn, North Staffordshire Regiment, carried out the actions for which he was awarded the Victoria Cross. William Coltman, whose Christian beliefs would not allow him to kill another man was Britain’s most highly decorated serviceman of the First World War ( 1914-1918 ). In the last two years of the war he was awarded the Victoria Cross, Distinguished Conduct Medal twice, and Military Medal twice, acting as a stretcher-bearer.

THE AISNE – THE BIRTH OF TRENCH WARFARE

Aisne Valley
Aisne Valley
Sgt Ernest Horlock RFA VC "For conspicuous gallantry on 15th September, near Vendresse, when his Battery was in action under a heavy shell fire, in that, although twice wounded, he persisted on each occasion in returning to lay his gun after his wound had been dressed.—London Gazette 1915
Sgt Ernest Horlock RFA VC “For conspicuous gallantry on 15th September, near Vendresse, when his Battery was in action under a heavy shell fire, in that, although twice wounded, he persisted on each occasion in returning to lay his gun after his wound had been dressed.—London Gazette 1915

South of Laon is the area of the Aisne battlefields.  The department included the battlefield is bordered by the city of Soissons in the West and Berry au Bac in the East, and stretches as far south as the River Marne and the city of Laon in the North. The countryside is a little more alien for the British visitor. The Somme Battlefields are geologically similar to Southern England and the rolling countryside and large fields are similar to the landscape of Hampshire. Much of the fighting centred on the high ground North of the river Aisne. The heights are often referred to by the name of the road along the heights, the Chemin des Dames.

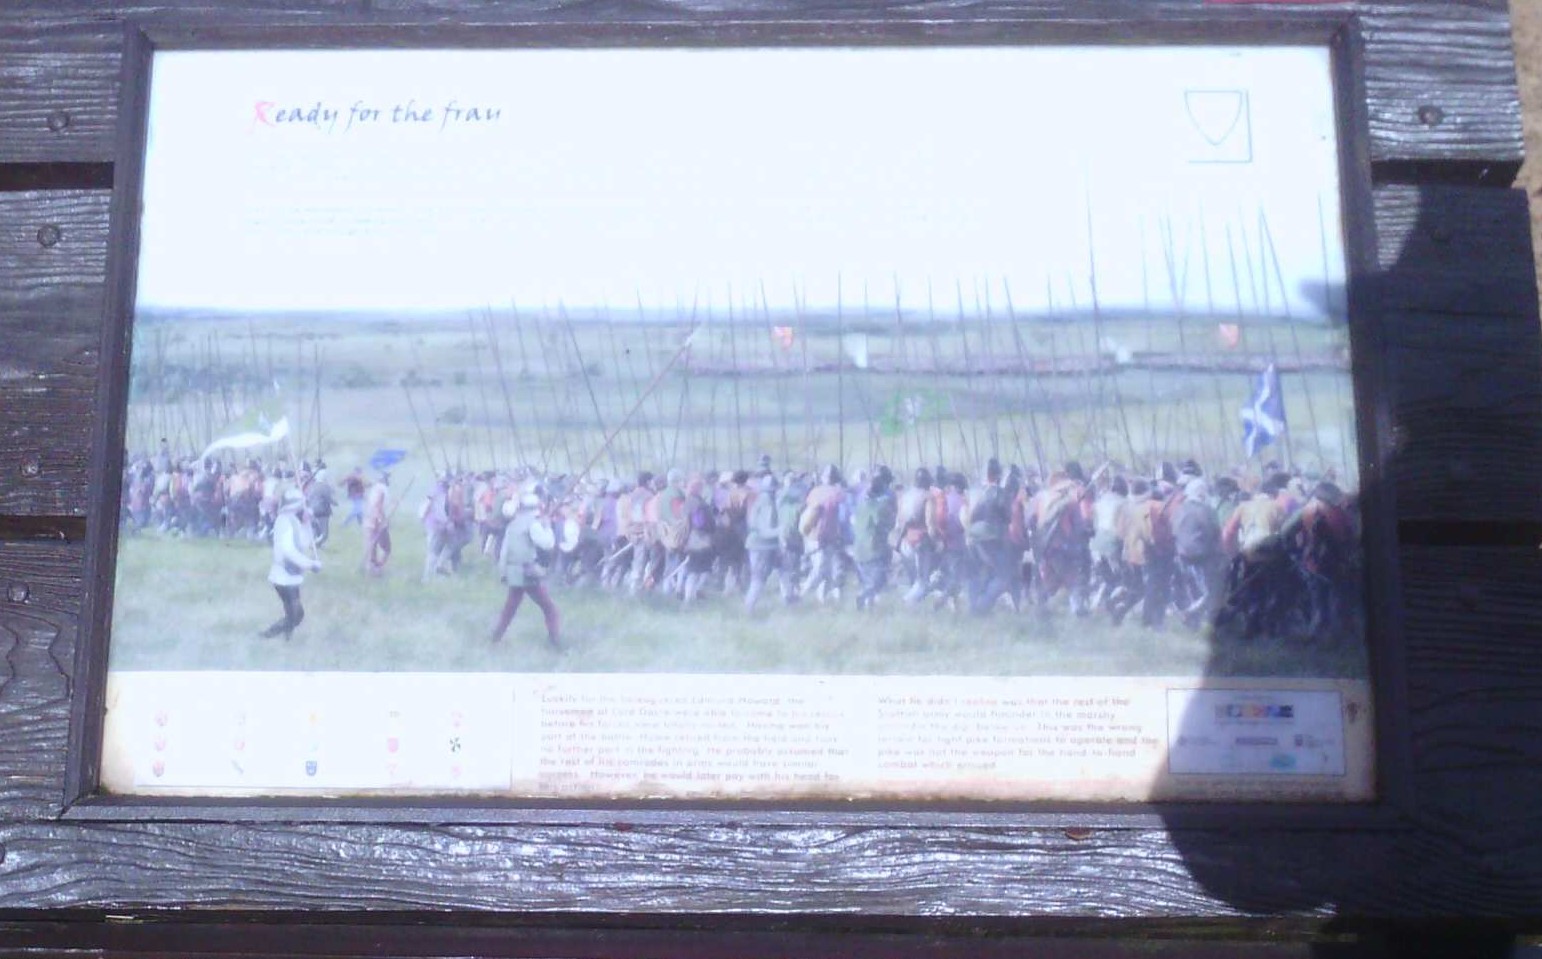
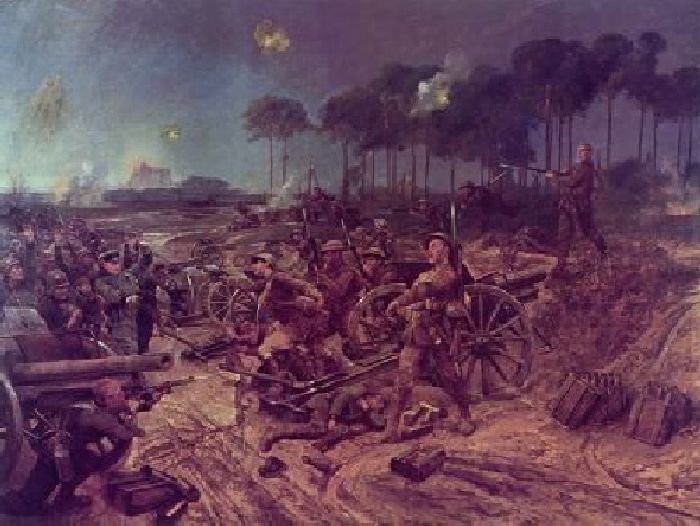
The War first came to the area in September 1914 as the French and British armies fell back south pursued by the Germans. The German Schlieffen plan finally unravelled in the battle of the Marne between 5-12th September 1914 and the Germans pulled back. When the allies advanced north many could be forgiven for thinking that this war was nearly over. There had been an advance, a big battle and now the invaders were in full retreat. But, when the British Expeditionary Force (BEF) crossed the river Aisne, they found the Germans dug in on the spurs on the high ground overlooking the rive Aisne and supported by plentiful artillery. Despite heroic efforts in over a week of fighting, the BEF were unable to dislodge the Germans and both sides had started to dig trenches. Field Marshal Sir John French, the commander of the BEF wrote to the king “I think the battle of the Aisne is very typical of what battles in the future are most likely to resemble. Siege operations will enter largely into the tactical problems – the spade will be as great a necessity as a rifle

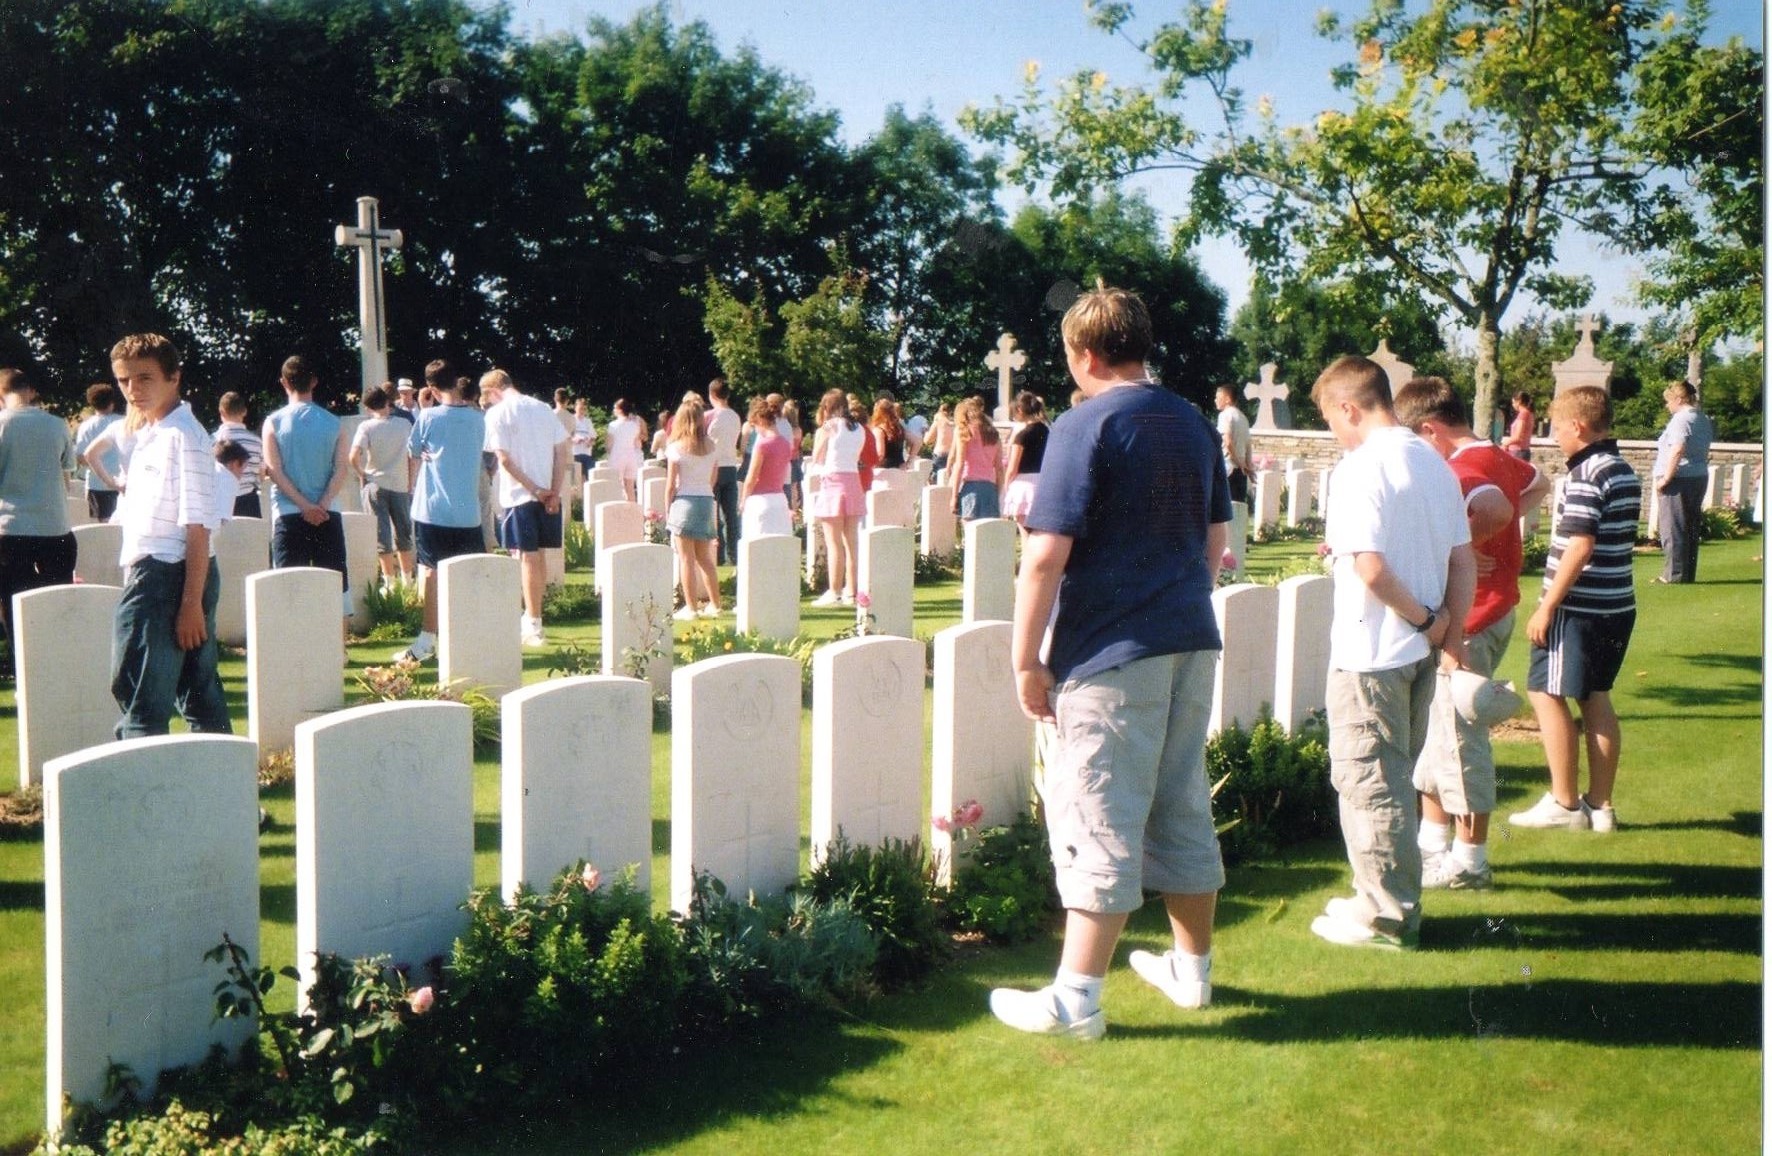
There is a lot to see in the area from the BEF experience on the Aisne. The ground itself is evocative, and much as it was in 1914. You can still see the bridging site where the Royal Engineers bridged the river next to the damaged bridge. The story of the BEF can be traced on the landscape and past the cemeteries with the reminders of the costs.

2013-08-04 10.34

THE CHEMIN DES DAMES –1917 THE CALVARY OF THE FRENCH ARMY

The Chemin des Dames area was the site of the disastrous Neville Offensive in May 1917. The newly appointed commander of the French Army, General Robert Neville, thought that he had discovered the secret of the offensive based on the experience of successful limited attacks on the Somme and Verdun. He massed hundreds of guns and the cream of the French army, including tens of thousands of African soldiers. Unfortunately for Neville and the French army, the Germans had tunnelled deep into the ground, developed defences in depth and found out when and where the attack would take place. After several days bombardment the attack started under atrocious weather conditions, for May. After 135,000 casualties the French troops had had enough. There were mutinies in several regiments. They were strikes really, with soldiers protesting about ill planned attacks, poor food and no leave.

The saviour of Verdun, General Petain was appointed as Commander in chief of the army. He is credited with restoring discipline and confidence to the French Army. He did so with a mixture of carrot and stick. He instigated improvements in pay and leave arrangement, and perhaps most significantly, he cancelled further major offensives. This allowed the French army to recover its confidence in its commanders through a series of carefully planned and executed limited offensives. One of these, in November 1917 took place in the area around Fort Malmaison on the Aisne and resulted in the Germans withdrawing from the Chemin des Dames, the objective on the first day of the Neville offensive. The other implication of the French Army mutinies was that the burden of warfare on the West would have to be borne by the British until the American army could be mobilised and brought to Europe.

1814 and 1914 memorial

Arguably the 1917 mutinies had another legacy, in the French army of the Second World War. There is a comparison with Verdun. Verdun is a story of determination and sacrifice characterised by “They shall not pass”. The Chemin des Dames is where the French army reached the limits of endurance. It can be characterised by the bitter words of the Chanson de Craonne. ” It’s in Craonne up on the plateau That we’re leaving our hides ‘ Cause we’ve all been sentenced to die. We’re the ones that they’re sacrificing.”

There is a lot to see on the Aisne battlefield from the 1917 battles. The battlefield itself, like much of the

The Battle of the Aisne May 1918: 8th Infantry Division dispositions

area around Verdun was deemed to be too devastated to be restored for agricultural use and designated a “Red Zone.” Although subsequently much agricultural land has been recovered, there are still tracts of the battlefield preserved as it was at the end of the First War, with the ruins of abandoned villages such as Craonne. There are also plentiful interpretive panels and panoramas relating the landscape of the battlefield. One focus for interpretation is the Cavern de Dragons, a quarry that became the scene of underground fighting. This contains an imaginative museum and guided tour.

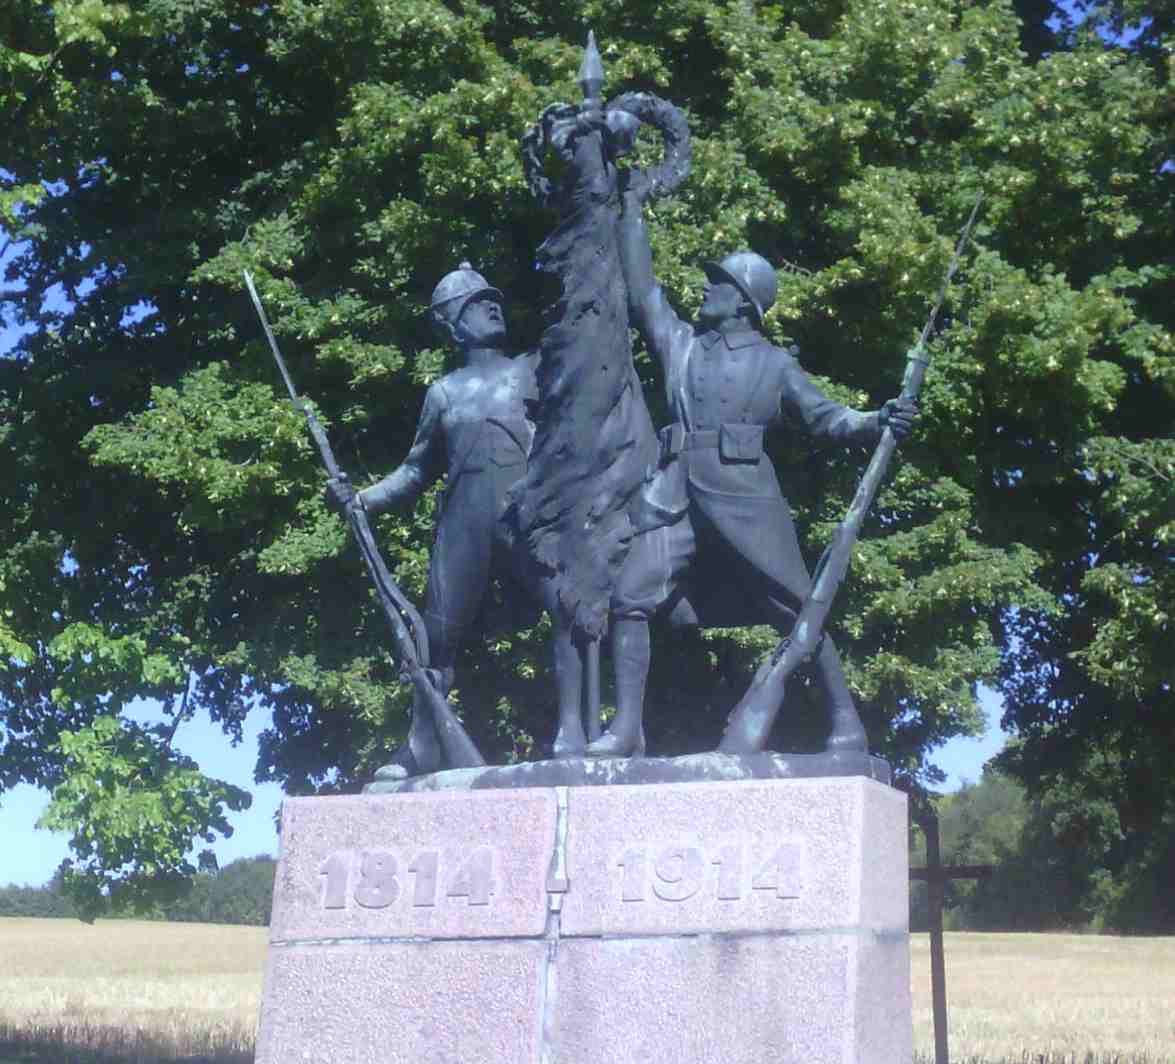
There are also some evocative memorials each of which tells something of the French army. One memorial has a statue of a French soldier of 1814 alongside one of 1914; a reminder that this was also the site of one of Napoleon;’s last victories.

A group of elegant dark statues represents the spirits of the African soldiers who suffered so heavily in 1917. There is also a memorial to the first use of tanks by the French Army at Berry au Bac.

THE BRITISH ON THE AISNE IN 1918

Last Stand of the 2nd Battalion the Devon Regiment at the Bois de Buttes May 1918: Willaims Barnes Wollen
Gibraltar_battery_Beret
5 Gibraltar Battery still wear the ribbon of the Croix de Guerre on their berets.

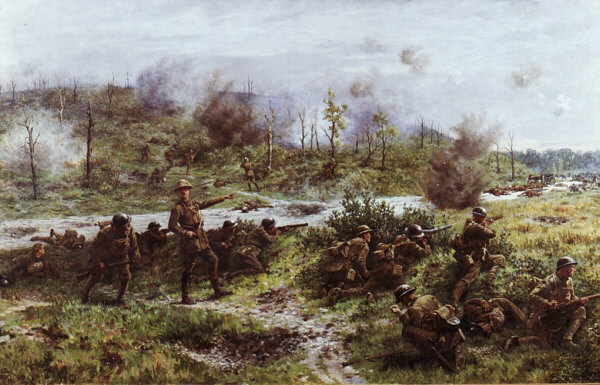
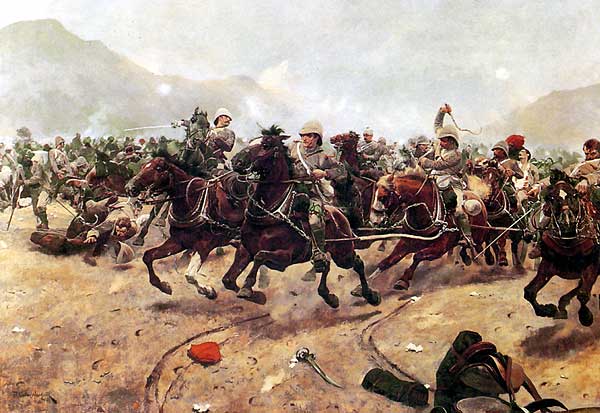
The troops that made up the Ninth British Corps were singularly unlucky during 1918. As mentioned earlier, the Germans launched a series of offensives to try to win the war before the American Army appeared in numbers. The first offensive was between St Quentin and Arras on 21st March and took the Germans to within a few miles of Amiens. The second, the battle of the Lys, in April took the Germans close to undermining the Britsh in Flanders. In these five weeks the British Army had taken over 230,000 casualties, about the same as in the four month Passchendaele campaign. Five of the most battered British formations were transferred to the Aisne front, which had been a quiet sector since 1917. And so when the Aisne became the target of the German “operation Blucher.”, the plateau of California and Craonne was defended by the 4th Battalion the East Yorkshire Regiment of the 50th Northumberland Division. The resulting battle saw the British and French pushed back 25 miles to the river Marne. The 2nd Battalion the Devonshire Regiment and 5 Battery RFA distinguished themselves by the heroic defence of the Bois de Buttes despite being attacked by storm-troopers supported by tanks. Both units were awarded the Croix de Guerre which now is worn by all soldiers in 5 Gibraltar Battery RA and the Rifles. One of the best accounts of the fighting on the Aisne is published as “The Last of the Ebb:The Battle of the Aisne, 1918” by Sidney Rogerson Greenhill Books/Lionel Leventhal

BIG CASTLES AND BIG GUNS

Concerete gun pits of 13" German heavy artillery
Concerete gun pits of 13″ German heavy artillery

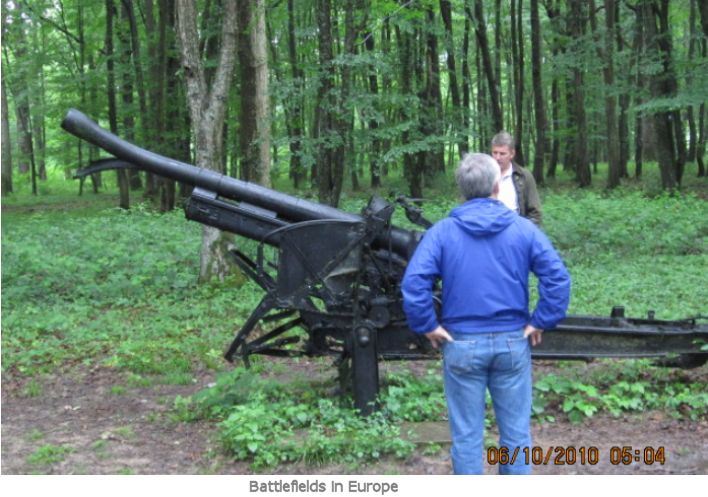
The hilltop village of Coucey has a particularly fine ruined château and the remains of town walls. But it’s ruin is a story of the First World War. Before 1914 the château of Coucey was the largest in France and a major tourist destination. But in 1917 it lay in the zone that the Germans were planning to abandon and was destroyed in what in retrospect seems spiteful vandalism. On the outskirts of Coucey is a different sort of structure. In the forest is a concrete emplacement for a giant gun used by the Germans for shelling Compiegne 20 km away.

Batlefields_Abroad1

THE 1918 BATTLEFIELDS OF THE MARNE – WHEN THE AMERICANS SAVED PARIS FRANCE AND WON THE WAR

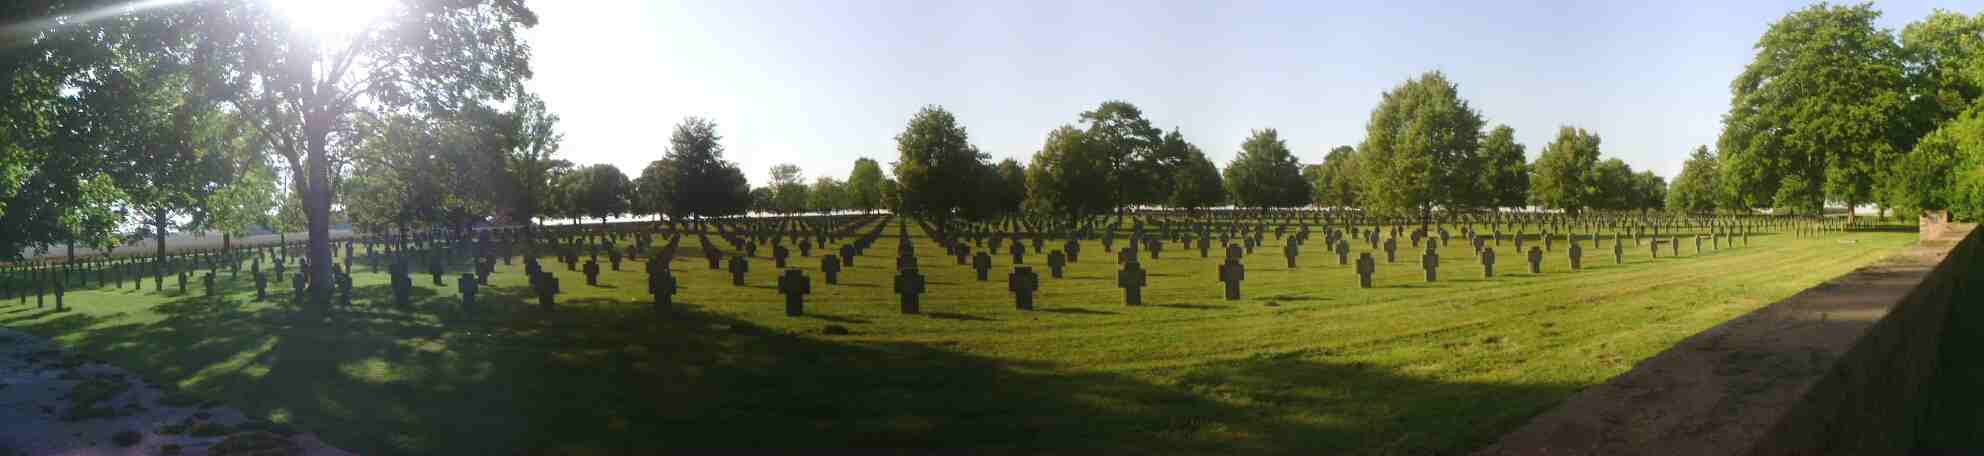
On two occasions in the First World War the Germans nearly reached Paris. It was the high point of the German advances in 1914 and in 1918. The battles which saw the repulse of these attacks are both known as the Battle of the Marne. The turning point was the deployment of American troops on the Marne in June and July 1918. The Americans played a big part in halting the Germans on the Marne at Château Thierry, which is home to the impressive US Châteaux Thierry monument. Not far away is Belleu wood, which is where the US marines attacked in 1918. This battlefield has been preserved and it and the neighbouring US American Battle Monuments Commission Cemetery and the German cemetery are reminders of the part America played in the First World War.

2013-08-02 17.50

Roy Suzuki and the British Nisei

The story of the Nisei Japanese Americans in the Second World War is quite well known. The USA had a sizeable Japanese minority, whose treatment after Pearl Harbour remains controversial. This community produced a Japanese American units which served with distinction in Italy and France. While Britain had a less diverse population in the 1940s than in the C21st, Britain was home to people from around the world, including immigrants from the Axis powers and their descendants.

My interest in LCpl Suzuki started when a fellow member of the Kentish Town Sports Centre, asked me why someone with a Japanese name might be in the British War Cemetery in Normandy. He wasn’t sure whether this was a British, Canadian or even American cemetery

But he was right. There are two men named Suziki on www.cwgc.org The first is Donkeyman K Suzuki, born in Japan, who died on 1st March 1917, aged 34, when the SS Munificant was sunk without warning 3 miles NNW of Cap Gris Nez, and commemorated on the Tower Hill Memorial London.

The second was Lance Corporal Roy Suzuki, of the 3rd/4th County of London Yeomanry (Sharpshooters) Royal Armoured Corps, (3rd/4th CLY) buried in Bannerville-la-Campagne War Cemetery, sited close to a road that a lorry driver might use en route for the ferry at Ouistreham. Roy was the son of Jukichi and Mable Ruth Suzuki of Islington London. He died, aged 23 on 18th August 1944. Checking the cemetery records, Roy Suzuki, is one of ten members of 3rd/4th CLY who all died on that day buried in row B of Plot IV in the cemetery along with a Rifleman from 2nd Bn KRRC. The ten include two lieutenants and a sergeant. It seems quite likely that LCpl Suziki buried in grave B17 was killed in the same actions as LCpl Cornish in B16, Trooper Bishop in B18, and 2Lt Pritchard B15, possibly even the same tank.

The 3rd/4th CLY had only been formed a month earlier, on 20th July 1944 from the merger of the 3rd and 4th CLY, a reflection of the heavy casualties of suffered in the Normandy campaign. The 4th CLY had take particularly heavy casualties in June when it was on the receiving end of an attack by Tiger tanks led by Michael Wittman at Villers Bocage.

C Sqn 3 CLY Firefly tank Normandy 1944

WHAT HAPPENED TO THE 3RD/4TH CLY ON 18TH AUGUST 1944?

18th August is close to the climax of the battle of Falaise Gap. At this time, the 3rd/4th CLY were part of the 4th Armoured Brigade, commanded by the 28 old Brigadier Michael Carver. 4th Armoured Brigade were attached to 53rd Infantry Division, part of XII Corps. XII Corps had been ordered to advance South from Falaise, protecting the right flank of the IInd Canadian Corps which was attacking South to close the Falaise pocket. (1) Michael Carver had persuaded the GOC 53 Division, who wanted to advance with a series of staged infantry brigade advances that at this stage of the battle it would be better for the armour to lead. (2) 4th Armoured Brigade would lead, supported by 71st Infantry Brigade, with their objective to press on down the Falaise- Argentan road to cut off the 19 German divisions in the Falaise pocket. Despite the Brigadier’s enthusiasm for armour to take the lead, the ground was described by one of the officers from 2nd KRRC as “damnably thick and close and anything but suitable for tanks. The German infantry are well armed with bazookas and enjoy knocking out tanks from ten yards range from thick hedgerows, orchards, lanes etc.”

Falaise Gap 16-21 Aug 1944 (Atkinson)

Between the 15th and 17th the Brigade advanced about five miles and by the 17th had captured the high ground South of Falaise. On the 18th the Sharpshooters took over as the leading Regiment in the Brigade.

Fal
Fal

The excellent Sharpshooters website (3) gives the following extracts from the War Diary of the 3rd/4th County of London Yeomanry (Sharpshooters) August 1944

18/8/1944 B Sqn led the advance and found enemy infantry mining the road – these were quickly dispersed. The leading troop was then fired on by A/Tk guns but no hits scored, and another troop was sent round to the East but was also held up by A/Tk guns. The country was too close for deployment so smoke was put down and the leading tanks moved forward and fired HE. This was successful – one gun knocked out and one abandoned – and the advance continued. A Mark IV special was seen and knocked out but shortly afterwards the two leading tanks were hit by A/Tk fire. The driver of one tank succeeded in driving his badly damaged tank back out of range and was able to rescue his wounded crew. Arty fire was brought down on the suspected gun positions and another attempt was made to go forward but the leading tank was immediately hit. Many attempts were made to find a way round and A Coy 2/60 KRR was sent into the village ahead to try and locate the A/Tk guns and clear the area of the enemy. At 1800 A Sqn succeeded in finding a way round and took up position South of the village of ROUFIGNY. B Sqn were then able to go forward and sent a troop into the village to assist 2/60th whilst the remainder of the Regiment were together further North. During the day C Sqn had taken up a commanding position on high ground and accounted for several enemy vehicles attempting to escape.

During the
Casualties:-
2 officers killed and 8 ORs killed.
4 ORs missing.7 ORs wounded.

And on the following day

19/8/44 C Sqn took the lead and continued to advance to the high ground South of ROUFIGNY and overlooking the escape road. A/Tk fire was soon encountered and 2 tanks knocked out. The fire came from the area of FRENAY LE BUFFARD 160624 and this was subjected to arty concentrations and was heavily smoked whilst the advance continued. In the afternoon the Regiment was withdrawn before the final objective was reached. Considerable quantities of enemy transport etc. were accounted for both by the tanks and B Bty 4th RHA and a number of guns were destroyed in the village of ROUFIGNY by the 2/60th KRR.
Claims for 18th & 19th Aug:-

2 Mark IV special tanks
1 Beetle Tank
2 Mark IV SP
5 75mm A/Tk guns
1 Mark III SP
1 50mm A/Tk gun
1 Tank (unidentified)
2 Half tracked vehs
1 88mm A/Tk gun
2 A/Tk guns (unidentified)
1 French SP
Sundry lorries and cars
Casualties:- 1 OR wounded.

1:50,000 map showing movement of B Sqn 3rd/4th CLY 18th Aug 1944
Viewpoint  1 (Google Streetview)
Viewpoint 1 (Google Streetview)


Viewpoint  2 (Google Streetview)
Viewpoint 2 (Google Streetview)
Viewpoint 3 (Google Streetview)

The ten men in row B of plot IV in Banneville-la-Campagne were killed in the frontal attack on Roufigny. This village was in a hollow down the escarpment, quite a tough task for an armoured unit. B Squadron, seem to have been unlucky on the 18th, losing ten dead and ten wounded from the five tanks knocked out, while C Sqn suffered one wounded from the two tanks knocked out on the 19th.. The mortality rate of casualties was around 25% for the campaign as a whole, so ten dead from 20 casualties may reflect some catastrophic events such as two tanks brewing and incinerating their crew – a horrific prospect.

This operation was a success for 4th Armoured Brigade. Besides the CLY claims listed in the war diaries, the brigade captured 3,000 prisoners.

3rd/4th CLY tank with German Prisoners August 1944

The War Diary of 4th Armoured Brigade’s gunners, 4 RHA is evidence of the artillery fire-power inflicted on the Germans. (4)

“Aug 18 The 2IC went at once to Bde and got the form that the Bde was to push down the road running SSE frm Falaise to join in a general beat up of enemy tpt retreating east. Canadians, Poles, French and Americans were also to take part. The Regiment came into action about two miles south of Falaise and immediately had some wonderful shooting. OP s were continually calling for regimental and higher targets. We also had an Air OP up who had very good observation indeed, and there was so much to shoot at that it was difficult for him to choose one target from another. The 2IC, who was at Tac 4 Armd Bde, also had two reps (one from a fd regiment and one from a medium regiment sitting with him and he managed to wear out two medium guns. At one time there were three shoots going over the regimental frequency at the same time.
Aug 19 Another good day with plenty of observed and predicted shooting
Regt fired 800 rpg during these two days.”

The role that the British Army played in the Falaise Pocket is often ignored as the battle tends to focus on the impact of the air forces and they the controversy about whether the British did enough to prevent more Germans escaping. Roy Suzuki and his comrades in row B Plot IV are a testimony to the keenness of Carver to push on, the willingness and competence of the Germans to defend the flanks of the pocket and the difficulties of removing determined well armed men in good defensive terrain. They are also a reminder that arrows on tactical maps translate into handfuls of weary men faced with moving forwards towards a series of ambushes.

I’d like to know more about Roy Suzuki. I don’t know when he joined the army and whether there were any obstacles placed on the children of Japanese as there were the Germans and Italians. Maybe he joined up before Pearl Harbour. When I mentioned the Japanese British to Gordon Corrigan yesterday at the Battlefields Trust lunchtime lecture yesterday he told me that he know of at least one other. This man served in the Dorset Regiment he was the son of a Japanese musician who was travelling and working in Britain at the outbreak of war. He joined up when everyone else did. How many other Japanese or Anglo Japanese served in the British forces in the Second World War?

References

1. 12 Corps G War Diary August 1944 Appendix B HS/WD/NWE/159/1/H quoted in: Cabinet Papers: Liberation Campaign In North West Europe Phase 4 The Break Out And The Advance To The Crossing Of The Seine 16 June -29 August 1944
2. Patrick Delaforce: Monty’s Marauders
3. http://www.sharpshooters.org.uk/news/item.aspx?id=27
4. 4 RHA War Diary August 1944
5. http://www.mapmanusa.com/images/book-maps/rick-atkinson-guns-at-last-light-falaise-pocket.jpg

More about battlefield tours to Normandy here

gunner tours logo white on brown

Frank Baldwin holds Badge No 8 of the Guild of Battlefield Guides

In Praise of Panoramas

Just how well can you describe what you are looking at to someone else? Telling a story about the landscape is at the heart of battlefield guiding. But how sure can guides be that this audience has understood exactly what they are talking about? Just because the audience nods sagely when the guide asks if everyone understands doesn’t mean they all do. But, unless the members of the audience all know what the guide is talking about, they will go home with an inaccurate picture.

On a recent Introduction to Battlefield Guiding course we conducted an experiment to see how easy, or difficult it is for guides to identify exactly what points on the ground they are talking about.  A panorama of the battlefield of Flodden was projected onto a screen. Students were asked to point out some of the locations to an audience relevant to telling the story of the Battle of Flodden. Each student was given a sheet of paper with a copy of the panorama and asked to mark on the panorama where they thought the locations being described were.   The results are shown in the illustration 1.

Illustration 1- the results of the experiment. The markings in pink are the locations the guide was indicating and those in yellow or black are where the audience marked them.

The overall results are shown in Illustration 1. The students describing the locations lettered A-F were given a sheet with one of the pink lines. The yellow,and black letters A-F show where other students positioned these points. This is a bit crowded, but as you can see, there is quite a bit of variation in almost each location.  Some locations are easier to describe than others.  We should not be too critical of our experimental subjects.  The task might have been easier if the audience members had a map in front of them. However, not everyone can read a map and relate it to the ground.

Although the task of indicating positions on the ground is a common and obvious task for a guide, it asks a lot of the collective brains of the guide and audience. We are asking someone to look at a visual image and describe it in words which the audience then uses to construct their own image. (See Illustration 2.)  If we want to understand what some artist such as Constable saw it is far easier to look at the Hay Wain than to visualize the work from a description. Visual and verbal communication are processed in different ways, and even by different parts of the brain. Words may have a different meanings for audiences with a range of linguistic skills and vocabularies.

Explaining a visual image in words is a complex task for the speaker and the audience, however well chosen the words.
Illustration 2 Explaining a visual image in words is a complex task for the speaker and the audience, however well chosen the words.


The answer may lie in making more use of panoramas, i.e. an annotated  sketch of the landscape from  the observer’s position.   A  couple of hundred years ago, when armies were starting to become professional, field sketching was a key skill for officers. The current issue of the Sandhurst Foundation’s “Wishstream “ magazine has an article about the staff of the Royal Military Academy in 1813. Until Ordnance survey maps became common, a sketch was the norm for pointing out the ground. The National Army Museum has a water-colour that is claimed to have been used on the battlefield of Waterloo.

Sketch map used on the field of Waterloo (National Army Museum)


In the Second world war it was not unknown for senior officers to practice the art.

Panorama drawn by Brigadier H J Parham  BRA 2nd Army from GR 013705 on the high ground North of Caen at 12.30 on 10th July 1944.
Panorama drawn by Brigadier H J Parham BRA 2nd Army from GR 013705 on the high ground North of Caen at 12.30 on 10th July 1944.


and even 1980s Cold War warriors were expected to draw an OP panorama.


Panorama's still expected of Gunner Forward Observers in the 1980s.   The OP's own less than artistic efforts on Munsterlager South Ranges from Wincklershohe scrapes (GR 7005 6535) on 2nd April 1984
Panorama’s still expected of Gunner Forward Observers in the 1980s. The OP’s own less than artistic efforts on Munsterlager South Ranges from Wincklershohe scrapes (GR 7005 6535) on 2nd April 1984


There is a secret behind Illustration 2 which means that the local guide, Clive Hallam Baker, shown addressing the Battlefields Trust Annual Conference  in April 2013, can be happy that his audience know the ground as he describes the ground.  The battlefield of Flodden has excellent interpretation boards showing panoramas illustrating the battle.

Panorama from the centre of the Scots position. These help excellent interpretation panels mean that visitors to the battlefield itself are rarely as confused as in our experiment.

So perhaps battlefield guides should consider using panoramas as visual aids.   On most occasion guides know where they will wish to stop and talk. Modern cameras, mobile phones and tablets can capture panoramas; and Google street view allows for a “Virtual recce”.  The problem posed our experimental subjects would have disappeared if the audience had been given a panorama like this one, generated in 20 minutes.

Flodden panorama

If you would like to find out more about training for battlefield guides check the services I offer

Frank Baldwin holds Badge No 8 of the Guild of Battlefield Guides

baldwin battlefields logo

The Battlefields Trust at History Live: Kelmarsh 2013

The Observation Post dropped into Kelmarsh on Saturday 20th July.  The Battlefields Trust were there in force.   Their stand in the main exhibition tent was well staffed and very busy throughout the day.  Well done to all the team who were busy signing up new members of the Trust.

2013-07-20 11.05_LR
Development Officer Julian Humphries and the Trust’ Shop: Books and toys for boys and girls of all ages!
Mike Ingram's Interpretation of the Battle of Bosworth.
Mike Ingram’s Interpretation of the Battle of Bosworth, based on the findings from the Battlefield Trust’s Archaeological project 2006-2010.


Alan and Nichola Turton (Wessex Region)  with some of their collection of civil war and other archaeological finds.
Alan and Nicola Turton (Wessex Region) with some of their collection of civil war and other archaeological finds.


More about the Battlefields Trust here link

btlogo_bigger


Where has Napoleon’s Observatory at Waterloo Gone?

Print on sale in various US Fine Art Suppliers attributed to Kelly 1815


Extract from sketch map made on the field of Waterloo 1815 (National Army Museum)

I spent yesterday in the National Army Museum looking for material which would be of interest to the City Lit Summer school I am tutoring on the Battle of Waterloo. The collection is fascinating. It is one thing to read the accounts in books. Its another to hold in your hands the letters and diaries of the soldiers of the time; or to see the some of the paintings in their reserve collection, and the preliminary sketches of the battlefield by the artists.

One intriguing object is a water colour sketch map, with the inscription “used on the battlefield”. The archive staff had no information about the provenance of the item, which had once been framed. The sketch map shows some of the key terrain features visible from the Anglo-Dutch position, including the village of Mont St Jean, the farm of the same name, the villages where the Anglo Dutch Army deployed, Hougoumont, Mon Plaisir and La Haye Sainte and the ridge lines in the French positions. Intriguingly, the map did not have some of the terrain features that appear on battle maps to explain the course of the battle. So the village of Placenoit is not marked. Nor is the track running across the front of the Anglo Dutch position, the famous sunken road. So maybe this map was one produced by Wellington’s staff on the day for orientation purposes. ( “The farm in the dip a couple of hundred paces in front of us is called La Haye Saint and the chateau on our right about a mile away on the right hand side of the walled garden is Hougoumont”)   One distinctive feature shown is an observation tower south of Hougoumont and East of the Mont Plaisir Farm.  Its an obvious feature, and one that also appears in some of the pen and ink sketches made by the painter Richard Dighton of the battlefield after the battle.

Location of Observatory on Craan's map of Waterloo 1816
Location of Observatory on Craan’s map of Waterloo 1816

 This tower also appears on the map drawn up by the Dutch Surveyor Willem Benjamin Craan in 1816 as the “Observatory” (1) and in Wagner’s maps (2) it’s function is labelled as “telegraph”, which may explain its function as part of an optical telegraph system. The tower is also described as 35 feet tall.

This tower ought to be tactically  

Extract from Wagner's Map

Extract from Wagner’s Map

significant. One of the ingredients of Wellington’s success was his use of a reverse slope to hide his deployment from the French. But a man standing on the observation tower above the 135m contour would be at an elevation of around 150m, 15m higher than the crest of the Mont St Jean Ridge. This should have enabled Napoleon and Ney to have seen some way down the reverse slope. Obviously once the battle started the visibility would have been obscured by smoke, but before the battle started Napoleon could have had a much better idea of Wellington’s deployment at the start of the battle than many historians would have us believe.01AGMP83

Besides the sketch map in the National Army Museum, there are several documented mentions of the observatory in a manuscript held by the British Library and in the documents published by Booth as a semi official record.(3) The testimony of Jean Baptise De Coster, a local guide for Napoleon mentioned how he did not see Napoleon make any use of the observatory. A foot note to this account mentions that Napoleon had spent an hour up the tower and that it had been constructed by Dutch engineers six weeks before the battle. A British Visitor to the Battlefield of Waterloo on the 16th July 1815 describes, how after dining at the farm of La Belle Alliance, he “Went to the Observatory, it is thirty -six feet high; I nailed on the pinnacle the Royal Arms of Great Britain” (Booth: Additional Particulars: P 121) I recall seeing this tower depicted in a print distributed in the old Battle of Waterloo Jackdaw. It seemed a very fanciful depiction of the battle with an Observation Tower and the trail of rockets like V2s streaking overhead. The tower doesn’t seem to appear in many of the more modern depictions of the battle. It isn’t mentioned in Andrew Uffendall’s “On the fields of Glory” (4) Nor In Atkins’ otherwise excellent Waterloo Companion,(5) although his panorama from the Lion mound does appear to show a mobile phone mast in roughly the same direction, there is no tower on that site now.  

Napoleon's observation post at Ligny
Napoleon on the observation post erected by sappers at the Bussey Mill

There are several un-answered questions about the tower.  

Who built it?  Was it built by Napoleon’s Sappers?  Napoleon did order sappers to build an observation platform for him at Ligny, but pictures show the observation post at Ligny as scaffolding  around a windmill.  Or was it by the Dutch, as in the footnote to the memoirs published by Booth in 1817?     

Is there any evidence that Napoleon made use of the tower, except for the foot note in Booth contradicting De Coster?

What could a French Observer have seen of the Anglo Dutch positions from the Tower?

Why hasn’t this Tower been mentioned in any recent military histories of Waterloo?   It made enough of an impact on the British for the Tower to feature in the accounts.

(The origins of this post are in the Waterloo Campaign City Lit Summer School.  The class visit to the National Army Museum revealed the sketch map drawn on the battlefield possibly for use during the battle.) 

References:

  1. Craan, W. B. Plan of the battle of Waterloo or Mount St. John [cartographic material] : reduced from the large plan of the same battle, made up and published in 1816
  2. August Wagner’s Plane der Schlachten und Treffen welche von der preussischen Armee in den Feldzügen der Jahre 1813, 14 und 15 geliefert worden, 4 volumes (Berlin: G. Reimer, 1825.)
  3. John Booth, The Battle of Waterloo also of Ligny, and Quatre-Bras, described by the series of accounts Published by Authority, with Circumstantial details. By a near Observer. Printed for John Booth 1817 together with  “Additional Particulars of the Battle of Waterloo etc”   available to download here
  4. Andrew Uffindell and Michael Corum. On the Fields of Glory: The Battlefields of the 1815 Campaign   Greenhill Books, 1991
  5. Mark Adkin, The Waterloo Companion;  Stakpole 2001

Will archaeology confirm Crécy (1346) as the first honour title of The Royal Artillery?

Battle of Crecy an Illustration from Froissanrt's chronicles
Battle of Crecy an Illustration from Froissanrt’s chronicles (wikipedia Commons)

The battle of Crécy (1346), alongside Agincourt (1415) has gone down in history as the triumph of the English foot soldier armed with the longbow over the French Knights. It has been known for a long time that Edward III had four cannons with his army, but their role on the battlefield has been dismissed, as having no effect beyond announcing that fire-power had arrived on the battlefield. However, in a speech to the Battlefields Trust, Professor Michael Prestwich argued that we should re-examine our interpretation of the Battle of Crécy and that Edward III’s cannons had a much bigger impact than as a mere gimmick of alchemy.

Edward III’s unexpected victory over the French at Crécy-en-Pontieu near Abbeville overturned the presumption that knights would ride down foot soldiers. This established the Longbow as an important weapon, the yeoman archers of England as heroes, and demonstrated the fighting power behind Edward III’s claim to the French throne which started the Hundred Years War.

King Edward III landed in Normandy in July. Having captured Caen he moved East to cross the Seine and then headed North along the coast, pursued by a larger French Army under King Philip VI of France. Edward crossed the Somme after winning the Battle of Blanchetaque on August 24. Tired from their marching and fighting the English army encamped near the Forest of Crécy. Philip raced towards Crécy with his men, keen to defeat the English and angry that he had failed to trap them between the Seine and Somme.

It is generally accepted that Edward deployed his men along a ridge between the villages of Crécy and Wadicourt and divided his army into three divisions. The right division was assigned to his sixteen-year old son Edward, the Black Prince. The left division was led by the Earl of Northampton, while Edward, commanding from a vantage point in a windmill, commanded the reserve. These divisions were comprised of dismounted men at arms supported by large numbers of archers equipped with the English longbow. The English improved their position by digging ditches and laying obstacles in front of their position. The baggage train was in the rear of the English position. Sometimes accounts mention that four cannons were positioned in the front line.

The leading parts of Philip’s army, advancing North from Abbeville arrived near the English around mid-day on August 26. The French started the battle before the whole French army had arrived on the battlefield. The French advance was led by several thousand mercenary Genoese crossbowmen, followed by thousands of French knights organised into divisions under the leading nobles, while King Philip commanded the rearguard.

Battle_of_Crécy,_26_August_1346When the Genoese crossbowmen approached close enough they fired a series of volleys at the English. These proved ineffective compared to the English response which was devastated the Genoese and forced them to retreat. This in turn provoked some French Knights to cut down the retreating Genoese as for their cowardice. The failure of the Genoese is attributed to several factors. A brief thunderstorm before the battle had wet their bowstrings. The decision to start the battle early, meant that they fought without their pavise’s wooden shields behind which they could shelter while reloading. Also, the rate of fire of a longbow was far in excess of a crossbow, with a longbow-man loosing thre or four arrows to each crosw-bow bolt.

The French knights fell into confusion as they collided with the retreating Genoese. Continuing the attack, the French knights were forced to negotiate the slope of the ridge and the man-made obstacles. Cut down in large numbers by the archers, the felled knights and their horses blocked the advance of those to the rear.EarlyCannonDeNobilitatibusSapientiiEtPrudentiisRegumManuscriptWalterdeMilemete1326

At some point in the battle Edward received a message from his son requesting assistance. This King Edward refused, stating “I am confident he will repel the enemy without my help,” and “Let the boy win his spurs.” As evening approached the English still held their position after repelling sixteen French charges, and felling their attackers with arrows. This was a huge English victory.

But, this interpretation is based on conflicting and fragmentary sources surviving from medieval records. Michael Prestwich pointed out the accepted interpretation is largely based on a selective choice about which sources to accept and which to reject. Even the location is uncertain. Geoffrey le Baker, refers to the field of Crecy, while Froissart writes that battle took place near a wood, somewhere between Crécy and La Broie, (five miles apart) and the king was on the mound of a windmill, at the rear of his army. While another source, Henry Knighton mentions another place name, Westglyse, identified as Watteglise, which is to the north-east.

Michael Prestwich also drew attention to Italian sources which give a very different version of the battle from the English and French, and for work done by Richard Barber in an as yet unpublished work on Crécy. These accounts are dismissed as being written at third hand and in a third country. But there were large number of Italian Genoese present at the start of the engagement. One of these accounts, by Giovanni Villani, who died in 1348, “stressed above all the English encampment of carts. The whole army, he said, in three battalions, was enclosed in a ring of carts, with a single entrance. Bombards were placed under the carts, and the archers shot from them, their arrows stacked in barrels.” The same account also includes a description of the effectiveness of the artillery “The English guns cast iron balls by means of fire…They made a noise like thunder and caused much loss in men and horses…The Genoese were continually hit by the archers and the gunners…[by the end of the battle] the whole plain was covered by men struck down by arrows and cannon balls.”

English_gun_used_at_Crecy

Professor Prestwich also quoted a second Italian account which dates from about 1360, and thanked Richard Barber for this. According to this account “Edward surrounded his army with iron chains, fixed to posts, in a horseshoe plan. Carts were then placed outside the chains, tipped up with their shafts in the air. Ditches were dug to reinforce the defences. Archers were hidden in the woods and cornfields – the author noted that as it was very cold in northern France, corn was not harvested until September, and in Crécy it was still standing (the battle was 26 August). The Genoese had to climb a slope to approach the English position. They could not shoot their crossbows and were mostly cut down. The English archers, advancing through the corn, shot at the French cavalry and did so much damage that the battle was lost. There is a telling detail in this account. The Genoese crossbowmen’s problem was not that their bowstrings were damp – this account explains that the difficulty was that the ground was so muddy and soft that they found it impossible to put the crossbows down and hold them there with the stirrup for reloading. “


Leonard da Vinci´s organ gun (wikipedia Commons)

These Italian accounts are usually discredited because it is hard to reconcile the accounts of the carts with known practices of the time.

But perhaps the Genoese were describing something they had not seen before and could not understand. What they may have been looking at is the vehicles needed to support a gun battery – the worlds first wagon lines. Guns need a lot of vehicles, to transport the pieces, protect the ready use ammunition from the elements, carry ammunition and all the services to support the men who serve the guns. Edwards battery may have needed the ability to cast or carve their own shot, carry and possibly manufacture gunpowder. Edward’s army was on the move. It had prepared to fight at Crecy and it may have made sense to retain the ammunition and stores needed for the guns close by rather than banishing them to the baggage train.

As artillery evolved all the vehicles were held in the wagon lines where they would be protected from enemy fire. But at Crecy there was no enemy artillery fire, and contrary to Hollywood, flaming arrows were not a normal medieval battlefield weapon. A separate wagon lines would be additional risks to an English army marching through hostile territory and faced with a superior mounted enemy. And the wagons and carts might also have provided cover for archers.


English Organ Gun C15th illustration (wilkipedia Commons)

Edward’s army may have been accompanied by more than the four bombards. According to Michael Prestwich, Edward had ordered 100 small guns, known as ribalds, in October 1345. These had, it seems, wheeled carriages, and were probably multi-barrelled.

So maybe the battle of Crecy was the worlds first battle where artillery played a significant part in the battle. So far this is a bit of speculation based on an after dinner speech by an eminent historian and information sources hiding in plain sight on the Internet. But the early gunpowder era is interesting for lots of reasons, not least because modern archaeological techniques have been able to establish new facts about medieval battlefields from the evidence that gunpowder weapons leave. In the last couple of years Glenn Foard rediscovered the battlefield of Bosworth from the cannon balls. Perhaps it is time to start a project to search for cannon balls from Crecy that may have sunk in the wet soil.


gunner tours logo white on brown


Battles of the 19th Century – CityLit Summer School Course Programme

CityLit, the London based centre for Adult Learning is offering a series of summer school one day courses on the battles of the Nineteenth Century.  The story of 19th century battles is is a story of technology and tactics, culture and Clausewitz. For two hundred years from 1600 warfare was a matter of cannon, horse and musket, with either bayonet or pike. The industrial revolution brought rapid changes in technology, with dramatic changes affecting almost every aspect of warfare. Weapons became more accurate, with longer ranges and more lethal effects. The steam age revolutionised transport and logistics. The changes in communication and culture affected how wars were fought and perceived by the public. This inquisitive era saw an explosion in the study of warfare and of military history, by figures such as Clausewitz, Jomeni and du Picq,

The soldiers of this era probably experienced more change than at any time in history before or probably since. Some of the men who fought in the Waterloo campaign took part in the campaigns of 1793-4 alongside and against men who had served in the wars of Frederick the Great. Some of the men who fought in the Victorian Imperial small wars in South Africa and Afghanistan lived to contemplate the Great War in 1914-18, with its trenches, aeroplanes and tanks. Lt Smith-Dorrien, survived the Assegais of the Zulus at Isandlwana to command an Army Corps in the BEF in 1914-5 against the machine guns and poison gas of the Kaiser’s army. Lord Roberts of Kandahar, the British hero of the 1879-80 Afghan war, had been commissioned under the Duke of Wellington, was awarded the Victoria Cross in the Indian mutiny and died in the field in Flanders in 1914.

The series of one day courses covers a range of battles from Waterloo in 1815 to Maiwand in 1880, including Waterloo, Gettysburg, Sadowa/Königgrätz, Sedan, Isandlwana and Maiwand.  The courses last between two hours and six hours  each at a modest cost. £11-21 full  Senior £6-12 and Concession £3-7.  I am the tutor for all apart from Sedan.

10th Hussars at the Batle of Waterloo Denis Dighton (wikipedia commons)

The Waterloo Campaign in mid June 1815 is the climax of the Napoleonic wars. Its a coda to Napoleon Bonaparte’s career. Its also the only occasion when Napoleon faced Wellington and has given rise to bridges, railway stations roads and Eurovision winning songs. This day will include a visit to the National Army Museum and draw on some of their unique resources, including the famous model by Captain Siborne. More details here

Pickett's Charge. at Gettysburg, taken from "Hancock at Gettysbug" by Thure de Thulstrup, Restoration by Adam Cuerden. (wikipedia commons)
Pickett’s Charge. at Gettysburg, taken from “Hancock at Gettysbug” by Thure de Thulstrup, Restoration by Adam Cuerden. (wikipedia commons)

This July is the 150th anniversary of the battle of Gettysburg, 1-3 July 1863. This is the iconic battle of the US Civil war. Not only was it the largest battle in the war and indeed, the Western hemisphere, and a turning point in the war. Abraham Lincoln’s address at a remembrance ceremony on the battlefield in 1863, is one of the greatest political speeches of all time. More details here

Cavalry battle between Imperial and Royal Hussars and Prussians Cuirassiers at the battle of Königgrätz (Alexander von Bensa, 1866).

The Seven Weeks war of 1866 culminated in the battle of Sadowa, also known by Germans as Königgrätz, 3rd July 1866. This was one of the defining battles of the era, establishing the success of the Prussian military machine and the dominance of Prussia over Austria as the leading German state. It was the first campaign won by the genius of Von Moltke and the first battle fought with infantry armed with bolt action breech loading rifles. More details here

Napoleon III Surrenders his Sword after the Battle of Sedan (wikipedia Commons)

The battle of Sedan in 1870 marked the defeat of Napoleon III and the end of his Empire, and a decisive moment in the Franco-Prussian War. This war was the first in which both protagonists had breech loading bolt action rifles, rifled artillery and saw the first use of the machine gun on a European Battlefield. More details here

Battle if Isandlwana 1879 by Charles Edwin Fripp  (wikipedia Commons)
Battle if Isandlwana 1879 by Charles Edwin Fripp (wikipedia Commons)

Isandlwana 22 January 1879 and Maiwand 27 July 1880 were two setbacks suffered by the British Empire in the last quarter of the the Nnineteenth century. Isandlwana, was the first battle of the Anglo-Zulu war and resulted in one of the biggest defeats for the British army for a generation. Maiwand was a dramatic episode in the Second Afghan War, a controversial part of Disraeli’s foreign policy. Both of these battles captured the public imagination and have been the subjects of art, literature and film. During this day we will visit the National Army Museum and look at some of their collections and archives relating to these battles. More details here

"Maiwand: Saving the Guns" by Richard Caton Woodville.(wikipedia commons)
“Maiwand: Saving the Guns” by Richard Caton Woodville.(wikipedia).  

baldwin battlefields logo

Details of how to visit these battlefields – to follow.

However, visitors specifically interested in the battlefield of Maiwand and other sites of the Second Afghan War are advised to contact their nearest  Army Careers Office for details of their expeditionary packed tours which offer good value but rather inflexible terms and conditions.

Travel to Overseas Battlefields can now be part of First World War Centenary Projects

Print

The Heritage Lottery Fund (HLF) scheme for small community projects for the First World War Centenary announced on 16th May 2013  can be used to support travel to battlefields and memorials outside the UK.

This was not highlighted in the launch announcement nor in the newspaper reports. However, it is clear from the Heritage Lottery Fund’s own website that projects which meet certain criteria will be eligible for for HLF funding. The HLF recognises the value of travel to battlefields and memorials in deepening people’s understanding of the war and its impacts. However, any visit must be linked to activities in the UK, must enhance peoples experience and learning, while not being the main focus of a project. HLF also expects a bidder to demonstrate that the cost of the activity abroad is as reasonable as possible, that there is a genuine need for the funding, and that travel will deliver outcomes in proportion to the funding requested.

Here are the relevant paragraphs from the HLF Q&A  page .  (Note this page has been replaced and briefing information is now here  )

Can our application include costs for travel and activity outside the UK?

Yes, if your project is based in the UK.

 We will fund the cost of travel and activity outside the UK (including the cost of bringing people to the UK) if there is a clear rationale for it in the project, it contributes to outcomes for heritage, people and communities in the UK and offers value for money.

 What costs can you cover outside the UK?

We can consider any costs that are associated with your project activities – this could include for example, travel, accommodation, insurance, or activities in museums or heritage sites involving people from the UK.

We ask that you explore how you can make the cost of your activity abroad as reasonable as possible. For example, you could send a small group of people to explore the heritage on a research trip who could then come and feed back to the rest of the group, or you could pay to bring people to the UK to share their expertise and insights. In order to fund travel and activities abroad, you will need to demonstrate that there is a genuine need for the funding, and that the additional outcomes achieved are in proportion to the funding requested. Some questions we might ask are:

  •  

    To what extent does the travel outside the UK enhance people’s understanding and learning, or broaden their perspectives of the war?

  • Could this level of understanding be achieved in a lower-cost way?
  • Will the travel and activity abroad enhance the long-term outcomes of the project? For example, will it result in long-term relationships which will result in new understandings of the war and its impacts?
  • Are you contributing any partnership funding?

Can we get a grant to take a group to visit the former battlefields and cemeteries in Europe?

 We recognise the value of visiting a site, and that this can deepen people’s understanding of the war and its impacts. You should show that a visit is linked to activities in the UK, and that it will enhance people’s experience and learning. The visit should not be the main focus of a project.

 If the main activity and cost in your project is visit abroad, then the project is unlikely to offer good value for money.

 Can HLF provide funding for projects outside the UK?

 No. Money raised through the National Lottery can only be invested in projects based in the UK.

This is very welcome news and should enable communities to draw on the battlefields themselves as a resource for the centenary commemorations. The Observation Post has been making the case for this funding ever since the Great War Commemorations were first discussed in 2011 and established the Men Behind the Memorial project to draw attention to the potential of the battlefields to develop our understanding of the War and its context.

Baldwin Battlefield Tours is developing a Centenary Advisory Service to support Community Groups with military historians and other resources to enable them to make the most of the Battlefields as part of their First World War Centenary Projects.

Logo

City Lit “Introduction to Battlefield Guiding” Summer School Course 6th &13th July 2013

The London based adult education organisation CityLit are running 1 two day “Introduction to Battlefield Guiding” course as part of the 2013 Summer School. The course tutor is Frank Baldwin, owner of the weblog www.theobservationpost.com who put forward the course. It is aimed at anyone who is interested in becoming a battlefield guide.

Battlefield Guiding Local History:  Battlefield Walk at the Battle of Barnet (1471)
Battlefield Guiding Local History: Battlefield Walk at the Battle of Barnet (1471)

What sort of people are interested in becoming battlefield guides? Historically battlefield guides have either been veterans, historians or a sub set of professional tour guides who specialised in military destinations. But this is no longer true. There are lots of people inspired by military historians such as Richard Holmes and Dan Snow. Since the 1980s military history has become a popular subject in Britain both with the public and as an academic subject. A lot of people are interested in military history. (About 35% of men and 10% of women if research commissioned in 2006 is to be believed)

Tourism is one of Britains’ largest export industries. We are good at this more and more travel is geared towards heritage and cultural tourism. In a life time of work which we now expect to extend to the full three score and ten this is an activity that allows someone to make money from a hobby. For most guides it is something that can be more than a hobby but less than a career. It fits well with a portfolio career.

We are also likely to need more guides too. There is a lot of potential interest generated by interest in the Great War, in particular from people and groups who will be seeking to know more about what happened to particular soldiers www.menbehindmemorials.com rather than a tour of the edited highlights of the Western Front. Britain’s own battlefield and military heritage is under developed. There hundreds of sites of battles, sieges , skirmishes and military installations with fascinating stories behind them , just waiting for a good story teller to bring them to life.

Battlefield Guiding for Remembrance:  Royal British Legion Pilgrimage, Mohne Dam 2008 (Photo: Keith Wiseman)
Battlefield Guiding for Remembrance: Royal British Legion Pilgrimage, Mohne Dam 2008 (Photo: Keith Wiseman)

Heritage tourism is a serious industry and battlefield guides are expected to provide a professional service. Customers expect high standards from all aspects of the service they receive in an industry which is regulated to protect the public. Anyone delivering a service to the public has legal obligations, which could be painful in our litigious world. Anyone seeking to employ a guide needs to know that the guide knows their subject matter, can present information well and knows how to look after the customer, and by implication the interests of an employing tour operator.

Someone wishing to be a professional tour guide in the UK is advised to become a Blue Badge guide via the scheme managed by the Institute of Tour Guiding. This involves two years of study of the culture and heritage of particular regions through organised instruction, followed by examinations which qualify the guide to be listed as a Registered Guide, and costs around £5,000 in tuition and examination fees. While this is excellent preparation for taking visitors around the sights of Britain, it is less useful if the purpose of becoming a guide is to lead tours to the battlefields of the World Wars. It is also overkill for someone who just wants to be able to lead visitors to a local battlefield on behalf of the Battlefields Trust or a local battlefield society.

Battlefield guiding as part of vocational training.  British Soldiers discussing the lessons of the Siege of Lichfield (1643). (Image copyright Frank Baldwin)
Battlefield guiding as part of vocational training. British Soldiers discussing the lessons of the Siege of Lichfield (1643). (Image copyright Frank Baldwin)

Ten years ago, in 2003, a group of battlefield guides, under the patronage of Richard Holmes and John Hughes Wilson, set up The Guild of Battlefields Guides (GBG). The aims of the Guild are to analyse, develop and raise the understanding and practice of battlefield guiding, provide an environment to meet fellow guides and share information, expertise and knowledge. Guild members seeking to demonstrate their competence as a guide undertake series of practical and written assignments that form a validation system developed by a team headed by educationalist and military historian Dr Chris Scott. Guides who pass the standard set are awarded a badge that shows that they have demonstrated their competences in military knowledge, presentation skills and customer care to their peers.

The GBG members have chosen not to seek accreditation for the GBG Validation programme by an academic body, in order to minimise the costs to members. The Guild does not provide training in the Guiding competences. It was established to validate the standard of working guides. Guides will be expected to undertake self study or develop their skills and knowledge through their work either as battlefield guides or through related skills derived from military service or academic research.

For people seeking to become a battlefield guide this presents a Catch 22 problem. How is a guide expected to gain experience? – Through work. How does a guide obtain work – though demonstrating their experience. Many prospective guides will already have a lot of the relevant knowledge and competences. However, even with good knowledge of military history, good communication skills and customer services experience, it helps to understand the terminology and the nuances of the trade.

Battlefield Guiding to support learning outside the classroom:  School tour to France. (Photo Frank Baldwin)
Battlefield Guiding to support learning outside the classroom: School tour to France. (Photo Frank Baldwin)

The City Lit Course is intended as an introduction to becoming a battlefield guide. It takes far longer than two days to learn the professional knowledge or develop the practical skills expected of a competent guide. It will give prospective guides an idea of the standards expected and an opportunity to assess their own training needs and prepare a plan to aquire the skills they need, through personal study or by undertaking some further training.

The course does not form part of the Guild of Battlefield Guides Professional Development Programme. Please direct any questions about the course to CityLit via the details on the course programme here

Frank Baldwin holds Badge No 8 of the Guild of Battlefield Guides


What the Godwin Sands Dornier 17 can tell us about the Battle of Britain

Formation of Do17Z Bomber Aircraft in 1940 (wikipedia Commons)

If asked to name some famous aircraft from the Battle of Britain,  most people would think of Sptifires, Hurricanes, Messerschmits, Heinkels and Stukas  The announcement of the plans to raise   Dornier Do 17Z Werke nr. 1160 from the  bottom of the English Channel has thrown the spotlight on a duel between a pair of aircraft.  This duel touches on the controversy within the RAF about the best way to fight the battle of Britain. It also illustrates the link between the Battle of Britain and the night bombing of Germany.  Hidden in the landscape too are the places that tell this story.

The Dornier 17Z being recovered by the RAF Museum is the only example of its type in the world. This aircraft is also a particularly significant part of our battlefield heritage. It is not simply an example of a mediocre military aircraft from the mid 20th Century. This is a German bomber shot down by the RAF on 26th August during the Battle of Britain; a dramatic episode in our history, ranking alongside 1066, 1588 and 1805. This is on a par with say, a suit of armour worn by a French noble at Agincourt or by one of Richard III’s followers at Bosworth. The project needs support from donors and you can donate here https://support.rafmuseum.org/dornier-17-appeal

According to the information sheet written by Andrew Simpson and provided by the RAF Museum,

Dornier Werke nr. 1160 was 7/KG3 (7 Staffel (Squadron), III Gruppe of KG.3 with fuselage codes 5K+AR, which was based at St Trond in Belgium on 26th August 1940. This source says that this aircraft was part of a combined formation of Dorniers from KG2/3 despatched to bomb Debden and Hornchurch airfields. Seven aircraft of the 7 Staffel started to bomb an aerodrome, probably Debden, causing some damage.

No 264 Squadron Defiants in formation (Wikipedia Commons)

Accounts of its loss vary from source to source; The original PoW Interrogation Report states that before reaching the target, when flying above clouds this aircraft seemingly became separated from the rest of the formation and lost its bearings. It was attacked by fighters, probably one of the RAF Hornchurch, Essex based Boulton Paul Defiants of No.264 Squadron RAF led by Flt Lt Banham, from their forward base at RAF Manston, Kent, which hit both engines and the cockpit as one,  of between one and six, as again published accounts vary – Dorniers brought down by the Defiants, who lost three of their number to defending Bf109s. At around 13.40 hours the aircraft force landed on Goodwin Sands off the eastern Kentish coast at low tide. Of the four crew, two (Wounded Pilot Feldwebel Willi Effmert, and Bomb Aimer Uffz Hermann Ritzel) became Prisoners-of-War in Canada and two (27-year old Wireless Operator Unteroffizier Helmut Reinhardt and 21-year old Bomb aimer Gefreiter Heinz Huhn) were killed, their bodies being recovered later and buried in Holland and the UK (Cannock Chase German cemetery) respectively.

Map showing the locations of the actions on 26th August 1940.  (New Zealand Official History)
Map showing the locations of the actions on 26th August 1940. (New Zealand Official History)

This air battle has some important consequences for the Battle of Britain,and is part of a

Dornier17Z bomber formation with the coastline behind them. (wikipedia commons)

controversy which has continued ever since. 26th August is roughly half way through the Battle of Britain, at the height of the Luftwaffe attacks on the RAF Fighter Command Airfields. On this day the Germans would lure the RAF forwards to fight in an air battle over Kent and then send in a bomber force to try to knock out Fighter Command Airfields at Debden and North Weald and North of the Thames in Essex. These airfields were beyond the range where the bombers could be escorted by the singe seat Me109 fighters.

No 11 Group RAF, under the command of Keith Park was responsible for defending London and the South East and bore the brunt of the Battle of Britain. Their squadrons were directed towards incoming raids using the sophisticated integrated air defence system developed under Hugh Dowding. Their own airfields would be defended by squadrons from the neighbouring No 12 Group under Trafford Leigh-Mallory. On 26th August this did not work. The cloudy conditions of the day helped the Germans to remain hidden from the RAF, and Debden airfield was bombed at 15.20 hrs killing several servicemen and causing damage. This was one of the incidents which triggered the conflict between Keith Park and Leigh Mallory, the respective commanders of No 11 and No 12 Groups, the debate over the “Big Wings”, and the side-lining of both Dowding, the Commander of Fighter Command  and Park. This is a controversial episode in the story of the RAF which still makes ripples today, and is a fascinating case study of leadership and management which still offers lessons.

The RAF Museum information sheet leaves some questions about the relationship between Dornier Do 17Z Werke nr. 1160 and the raid on Debden. This aircraft appears to have crash landed two hours before the raid on Debden took place and may have been the result of some other engagement. According to the RAF Official History,(1) there were two major day raids on Monday 26th August 1940, not one raid as is the impression given by the information sheet. The first raids took place between 11.35-13.40 and took the form of a series of air raids on towns and airfields in Kent. The raiders included aircraft from III/KG3, and were intercepted by aircraft from, five squadrons including 264 Squadron. 264 Squadron, equipped with Defiant fighters and No 56 Squadron with Hurricanes sighted a formation of twelve Do17s near Deal before noon. The German bombers were flying at 13,000 ft and protected by thirty to fifty Me109s. The seven Defiants succeeded in getting at the bombers and claimed to have shot down six of them. However, the Me109s harassed them continuously shooting down three Defiants. This is the action which appears to fit the circumstances of the loss of the Dornier of No 7 Staffel of III/KG3 as it took place close to the Godwin Sands, a gliding distance from East Kent. The timings don’t quite fit either, but might make sense if the time of the crash was reported by the Germans using French/German time an hour ahead of the local UK time.

The loss of this Dornier to a Boulton and Paul Defiant has a certain historical irony. The connection between these aircraft is an interesting case study in the development of military technology.

The Boulton and Paul Defiant from "Britain's Wonderful Fighting Forces" (1941)
The Boulton and Paul Defiant from “Britain’s Wonderful Fighting Forces” (1941)

The  1930s was a period of technological change in military aviation. New engine designs and the potential of aluminium stressed skinned air-frames offered the potential to fly much faster than possible with fabric and braced struts and stronger structures than could be destroyed by the twin machine guns of contemporary fighter aircraft. The Dornier 17 was specified in 1932 as a “mail carrying aeroplane” but intended for reconnaissance. The resulting aircraft was faster than most biplane fighters and won an speed award in a 1937 air show in Switzerland, its top speed of 255mph was faster than French or Czech fighters. But by 1940 Do 17Z Werke nr. 1160 was already obsolescent. Fighter design had caught up and the Do 17 was slower than the RAF single seat fighters. Its bomb load was much smaller than the Ju88 and He 111 and new versions of the aircraft had already been commissioned. Although KG3 continued to fly this type of aircraft through the Blitz of 1940-41, from May 1941 the Wing converted to the Ju88. III/KG3 was the last to convert, in the following winter returning from the east front to Guetersloh in Germany.

The Bolton and Paul Defiant is often ignored completely in popular accounts of the Battle of Britain, and when mentioned it is usually as an example of a failed aircraft design. Any internet search of “ten worst aircraft of WW2” will find the Defiant high on the list. Yet the idea behind the aircraft had a lot of merit.

The power operated Fraser Nash Turret in this No 264 Squadron Defiant  contained a battery of four .303 browning machine guns, each with 600 rounds of ammunition.(wikipedia Commons)
The power operated Fraser Nash Turret in this No 264 Squadron Defiant contained a battery of four .303 browning machine guns, each with 600 rounds of ammunition.(wikipedia Commons)

No one knew how aerial warfare might be possible with the 1930-40s generation of aircraft. The aircraft of the Great War flew at the same sorts of speeds achievable by a fast sports car, and needed to close to within 50m to achieve a kill. Twenty years later aircraft could fly two to three times faster, raising questions about whether aerial combat would possible at all.   In the 1930s the major threat as perceived by the RAF was of German bombers attacking Britain from Germany. The thinking of the time envisaged aerial bombardment by explosive and chemical weapons which might cause thousands of casualties. This was the era when it was believed that the bomber would always get through. To its credit the British Government and the RAF invested in developing technology to defeat bombers, which paid dividends in 1940. One of the major problems was overcoming the difficulty of deflection shooting with the high speeds of WW2 era aircraft. One solution was to develop a large battery of guns in the wings of a single seat fighter, as adopted with the Hurricane and the Spitfire.

Another solution was for the fighter to fly a parallel course and eliminate the need for deflection shooting. The Boulton and Paul Defiant, like the Hurricane and Spitfire was a monoplane fighter powered by a Rolls Royce Merlin engine. However, the Defiant had a crew of two with a gunner in a Fraser Nash power operated turret to provide a battery of four 303 calibre machine guns which could shoot down a bomber by engaging it from any angle, ideally from some blind spot where the bombers could not engage. The RAF hedged their bets in defensive technology. Alone of all combatants in 1939, it had developed aircraft like the Defiant and the similar Blackburn Roc to use this method of fighting, as well as single seat fighters like the Spitfire and Hurricane.

One of the assumptions made at the time the Defiant was specified was that a German attack would be launched from Germany, outside the range of any single seat fighters. No one predicted that France would fall and the air attack would be from France and within range of single seat fighter escorts, which would find the slow and heavy Defiant easy prey. Although the Defiant could spring a nasty surprise on a German fighter which misidentified it as a Hurricane, the limitations and vulnerability of their aircraft had been identified before the Battle of Britain started. 264 Squadron had taken heavy losses in May over Dunkirk and had been withdrawn to the Midlands beyond the range of German single seat fighters. The fact that this squadron was in the air over Deal on 26th August 1940 shows the limits to which Fighter Command had been stretched.

The Bravest of the Few?   A group of aircrew from No 264 Sqn, the  unit with the highest aircrew mortality in Fighter Command during the Battle of Britain. (wikipedia Commons)
The Bravest of the Few? A group of aircrew from No 264 Sqn, the unit with the highest aircrew mortality in Fighter Command during the Battle of Britain. (wikipedia Commons)

This air battle on 26th August is one of the few occasions where the Defiants were used against a bomber formation.  According to the 264 Squadron records the Squadron shot down seven Do17s for the loss of three Defiants.

The Commonwealth War Grave Commission records show that on that day two sergeants from 264 Squadron died. 26th August was a relatively good day for the Defiants as a total of fourteen men died between 24-28th August 1940, just under half the number of aircrew established for the Squadron, and more than lost by single seat fighter unit in the battle. One of the advantages the RAF had over the Germans in the Battle of Britain was that many RAF aircrew could bail out of a stricken aircraft and return to the fight, while any Germans shot down would be a prisoner of war.  The RAF reported 324 single seat fighter lost in August for the loss of 126 of the pilots killed. Just under two thirds of the pilots parachuted to safety.  That isn’t the case with the Defiants of 264 Squadron who appear to have lost two aircrew for each aircraft.  There are enough first hand accounts of the experiences of “The Few”, to know of the fearful experience of being attacked by a German fighter with only the armoured seat for protection and then bailing out from a crippled and burning machine falling from the sky. How much harder was it for a Defiant gunner, unprotected by armour to survive an attack, or to bail out of a Fraser Nash Turret if the power failed or the mechanism was damaged by cannon splinters?  RAF losses for August. I wonder too, whether the presence of a crewman inhibited Defiant pilots from jumping rather than stay with their  stricken machine to try to maintain control for as long as possible?

Two days after the action on 26th August, 264 Squadron were withdrawn from No 11 Group to No 12 Group and were tasked with operating as night fighters. The although the Defiant was heavier and less manoeuvrable aircraft to fly than either the Spitfire and had a landing speed over 100mph, it was a stable aircraft which made it more suitable as a night fighter. In Autumn 1940 the RAF had no means of finding the enemy other than the Mk1 eyeball and 264 Sqn struggled in this role through the Blitz. In 1941 they received Mk II Defiants which included a Mk VI Airborne interception radar operated by the pilot This seems less efficient than an arrangement allowing the pilot to concentrate on flying the aircraft and keeping visual look out while a second person on board operated the radar, as in the Beaufighter and Mosquito night-fighters. 264 Sqadron soldiered on with the Defiant until 1942 when the Squadron was converted to the Mosquito, a much better night fighter and the air gunners were posted out and replaced by navigator radar operators.

This isn’t quite the end of the story. In the mean time the Germans had found themselves

Prey Turned Hunter.  Dornier 17Z fitted with SN2 airborne Interception radar. Lieutenant Ludwig Becker used an aircraft like this fitted with the prototype of this radar to shoot down five bombers in August 1941.
Prey Turned Hunter. Dornier 17Z fitted with SN2 airborne Interception radar. Lieutenant Ludwig Becker used an aircraft like this fitted with the prototype of this radar to shoot down five bombers in August 1941.

considering the defence of the Reich from nocturnal air attacks. An interest sharpened by the raid on Berlin on the night of 25-26th August and whose raiders would be tucking into their breakfast about the same time that 7./KG3 would be waking up to theirs. Night air defence was low on Luftwaffe priorities and the night fighter force used the aircraft they could. Given that the Do 17 was becoming obsolete as a day bomber, the German night fighter force started using the Dornier as the basis for a night fighter. It had a sufficient margin of speed over the RAF’s Hampden,Wellington and Whitley bombers. Replacing the perspex nose with a fairing with a 20mm cannon and three machine guns and, or a gun pack under the nose gave the Do 17 as much fire-power as a day fighter. On 2nd October 1940 a Do17Z of NJG 1 (Night Fighter Wing 1) command by Lt Ludwig Becker made the first successful German radar controlled interception on 2nd October 1940, shooting down a Wellington Bomber.  The Germans too were developing airborne radar, and in August 1941 the same Lt Becker using the prototype Lichtenstein BC (FuG 202) airborne interception radar shot down five British bombers. Over the next two and a half years the Do17 and its redeveloped versions the Do 215 and Do217 were one of the mainstays of the German night fighter force, until replaced by better machines, such as the Ju88 R1, a faster machine.

Junkers_Ju_88_RAF_Hendon
This Ju88 R1 was flown to England by a defecting crew, on 9th May 1943 bringing with it the secrets of the SN 2 (Fu202) airborne Interception radar.

The RAF Museums JU88R-1 W/Nr 360043, served with IV/NJG.3, coded D5 + EV is anachronistically  displayed in the Battle of Britain Hall, as it is part of the story of the air offensive on Germany told alongside the RAF Bombers it once stalked in the Bomber Hall.  While this aircraft is a version of the Ju88 which flew in the Battle of Britain, it is the sleek fighter version without the bulbous crew crew compartment or the glazed “beetle Eye” nose of the bomber version, and antennae sprout from its nose.   This is also a very special aircraft with a provenance which gives the same significance as, say a machine flown on the dams Raid. This is an aeroplane which made an individual difference to the war, and saved many allied lives. The Ju88 R1 is not the bomber version which flew over Britain in 1940. but a night fighter variant with a sleek shallower fuselage and a crew of three rather than four, equipped with a battery of 20mm cannon, an average of ten shells from which would destroy a heavy bomber like a Lancaster or Halifax. Most important this version has a fairing covered in radar aerials of the production version tested by Lt Becker.  This particular aircraft was obtained by the RAF when a Luftwaffe night-fighter crew defected to England, on 9th May 1943 bringing with it the secrets of the Lichtenstein SN2 airborne interception radar, enabling the British to develop counter-measures. 

The Germans too thought about the problems of deflection shooting at night. British heavy bombers like the Wellington, Sterling Halifax and Lancaster all had a power operated Fraser

Diagram showing the  installation of two 20mm cannons to fire obliquely above the cockpit of an Me110G2.  The  Me110 G2  anachronistically displayed in the RAF Museum Battle of Britain Hall is fitted with this Schräge Musik  "Jazz Music" for shooting down RAF night bombers.
Diagram showing the installation of two 20mm cannons to fire obliquely above the cockpit of an Me110G2. The Me110 G2 anachronistically displayed in the RAF Museum Battle of Britain Hall is fitted with this Schräge Musik “Jazz Music” for shooting down RAF night bombers.

Nash rear turret mounting four machine guns, and manned by a gunner whose warning could initiate evasive manoeuvres which could throw off an attacker. Some Germans thought about the idea of oblique fire, approaching a bomber from underneath. Ober Leutentant Schoenert, a 23 kill “experten” from from NJG 1 had a Do 217 modified to include two upward pointing 20mm cannons. With this machine he achieved the first German kill using this technique in May 1943. The technique was widely adopted by the German night fighter force. So the technique which the RAF dropped, was adopted by the Luftwaffe and became a great success under different operational circumstances. Thus the Do17 became the hunter rather than the prey. 264 Sqn’s Air gunners left the squadron in mid 1942. I do not know what happened to them, but it would be an unfortunate irony if the RAF had posted these experienced air gunners as rear gunners in the Bomber squadrons,

There is a lot to see relating to the events of the Battle of Britain and the battle on 26th August. Of course the RAF museum has a lot of the aircraft involved, including the only surviving Bolton and Paul Defiant and at some point in the future, Dornier 17z. Here are some other places associated with the stories in the battle:-This could be the focus for people with an interest in wider aviation heritage.

  • Bentley Priory Museum (Currently being redeveloped) where the information from different sources was filtered and passed to Groups as plots of raids.
  • No 11 Group Command Bunker Uxbridge, where the Group Controller made the decision to commit No 264 and 56 Sqns to intercept 7./KG3.
  • RAF Northolt Restored Sector Control Room, the only No 11 Group Control Room in existance.
  • The reconstructed Sector Control room at the Imperial War Museum Duxford IMW, is where the No 12 Group aircraft were scrambled to intercept the raiders at Debden – but arrived too late.
  • The underground control room at Dover Castle, where the AA defences on that day were controlled.
  • RAF Debden, the target for the raids in the afternoon is a very well preserved Battle of Britain airfield, but is now Carver Barracks and home to No 33 Regiment Royal Engineers.
  • RAF Manston, the airfield where 264 Sqn used as a forward base on 26th August 1940 is now Kent International Airport, and there an RAF Manston History museum next to the Spitfire and Hurricane museum at Kent International Airport.
  • RAF Hornchurch, where 264 Squadron were based for their costly week in No 11 Group is now Hornchurch Country park. Most of the administration and technical areas of the airfield are now a housing estate. It was the subject of a Tv archaeology programme in the “Two men in a Trench” series. Some buildings have been preserved, includign the Offciers Mess, now a medical centre. The local pub, the Good Intent, which served airmen from the base has in recent times had a collection of photographs.
  • St Trond Airfield became a Belgian Airforce Base after the Second World War. It is now Limburg Regional Airport.
  • Gefreiter Heinz Huhn is buried in Cannock Chase German Military Cemetery alongside about 5,000 other German and Austrian war dead from the World Wars.
  • The names of the eight of the fourteen men killed flying for No 264 Squadron whose bodies have never been recovered are commemorated on the Runnymede Memorial for the missing, overlooking London. A fitting place to remember and reflect.

Contact Air Power tours if you would like to find out more about visiting the sites associated with this air battle.

Airpower tours logo_R131_G202_B255

Military history, Battlefield heritage and Touring