Category Archives: Gunners

Health and Safety and the First Day of the Somme


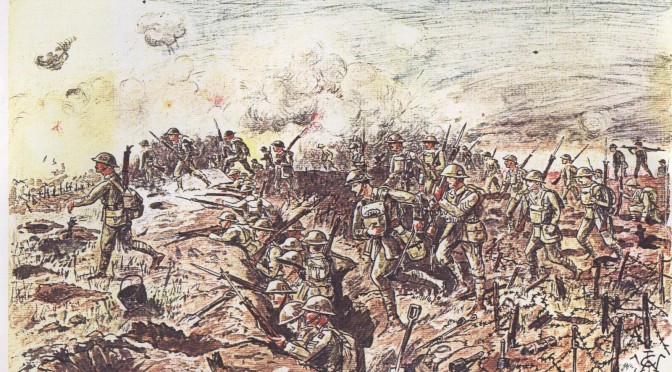
The first day of the Somme is best known for 57,000 casualties suffered by the British Army; the largest in a single day, and the event that supports the idea of British generals as “Butchers and Bunglers.” Yet, paradoxically, it was concern for safety which led to disastrously high casualties and failure of most of the attacks.

Somme map first day
Attacks on the British Sector of the Somme

The battle of the Somme originated from a decision taken in December 1915, that the Entente powers, Britain, France, Italy and Russia would all launch an attack as soon as possible in 1916. The Somme was selected as the site of the Anglo French offensive because it was the junction between the two armies. It was originally envisaged that the French Army would take the lead. However, the German offensive at Verdun, started in February 1916 cost the French and Germans armies over 200,000 casualties each. By June 1916 not only would the British have to take the lead at the Somme, offensive but the bear This had two consequences, there were fewer French troops available which meant that the British would have to take the lead. Furthermore, the attack of the Somme was imperative to take pressure from the French at Verdun.

rawlinson
Sir Henry Rawlinson, commander of the Fourth Army. His initial plan for a methodical advance was rejected.

The British Army had limited experience of offensive battles, and had never planned an operation of the scale of the battle of the Somme. In March 1915 the British had launched a successful breach into the German lines at Neuve Chapelle, supported by a concentrated barrage by the artillery of the British Expeditionary Force. During other attacks in 1915 a shortage of artillery ammunition had prevented the British from repeating this level of fire support. However, by 1916 British industry had geared up to supply the vastly expanded British Expeditionary force swelled by millions of volunteers who Kitchener’s New Army recruited in 1914-15.

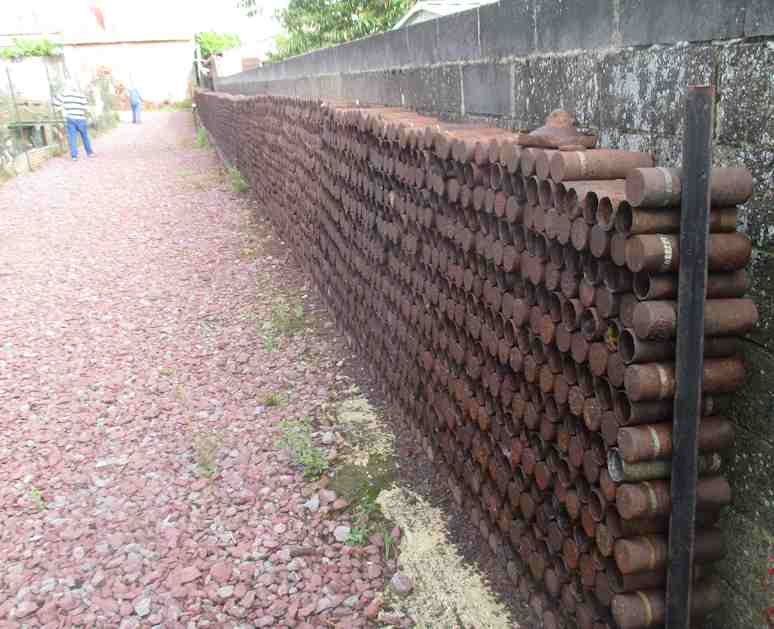
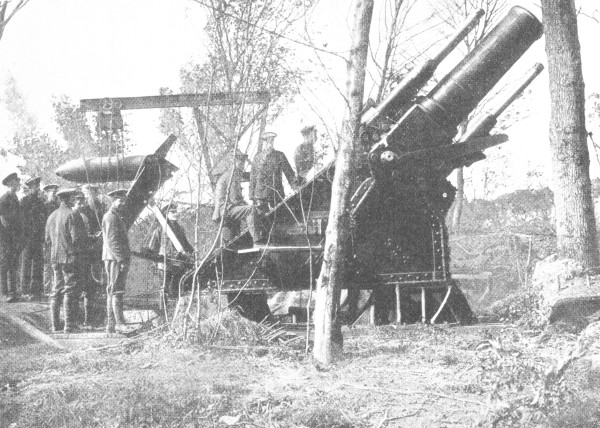
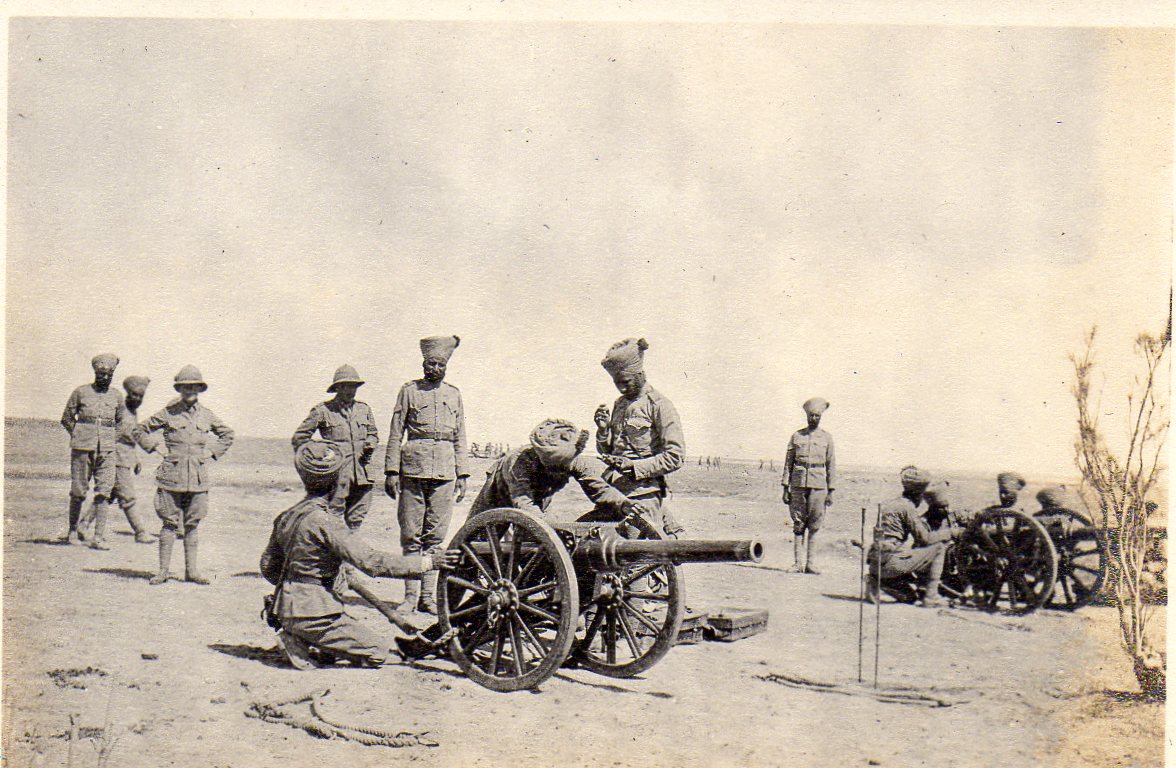
The largest ever British Army would be supported by the huge quantity of artillery pieces,  1072 light and 442 medium and heavy guns

GHQ issued no special instruction on the co-operation of infantry and artillery as, in the words of the official history, this main feature of the theory of the assault was well understood. In summary, towards the the close of the bombardment, shortly before Zero, the artillery would put down an intense barrage on the enemy front trenches; at Zero this would be lifted and dropped on the next trench, from which it would be lifted at a fixed time. Before each lift, the infantry under cover of the barrage was to creep to within as close assaulting distance as the barrage permitted. This was around 100 yards from the enemy’s front parapet and the infantry was to assault as soon as the barrage lifted.”

Douglas_Haig
General Douglas Haig. He applied pressure to spread the artillery very thinly

It was impressed on all, at conferences by both Haig and Rawlinson that “nothing could exist at the conclusion of the bombardment in the area covered by it.” Owing to this optimism, the problem of evicting the Germans from the labyrinth of trenches was seen just as one of assault only. It was not seen as a race for the parapet between the attackers across no man’s land against the defenders in the their dug outs. Instead it was seen as something that could be done at leisure.

Not everyone shared this assumption. “Some Regimental officers suggested that the infantry might creep even nearer to the barrage, as was done later on and in at least one instance on the 1st of July. Forty yards was suggested instead of a hundred but it did not receive official approval. (1)

rock-paper-scissors
The race for the parapet: lethal game of rock-paper-scissors

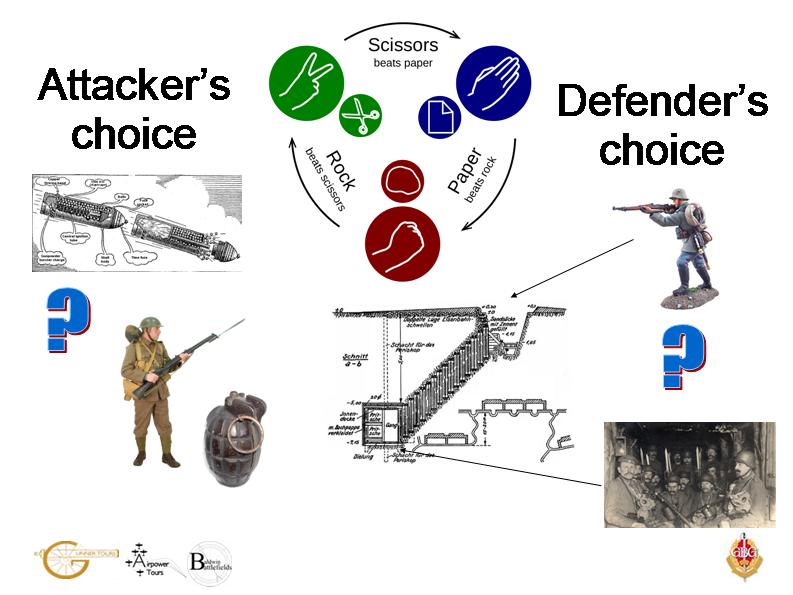
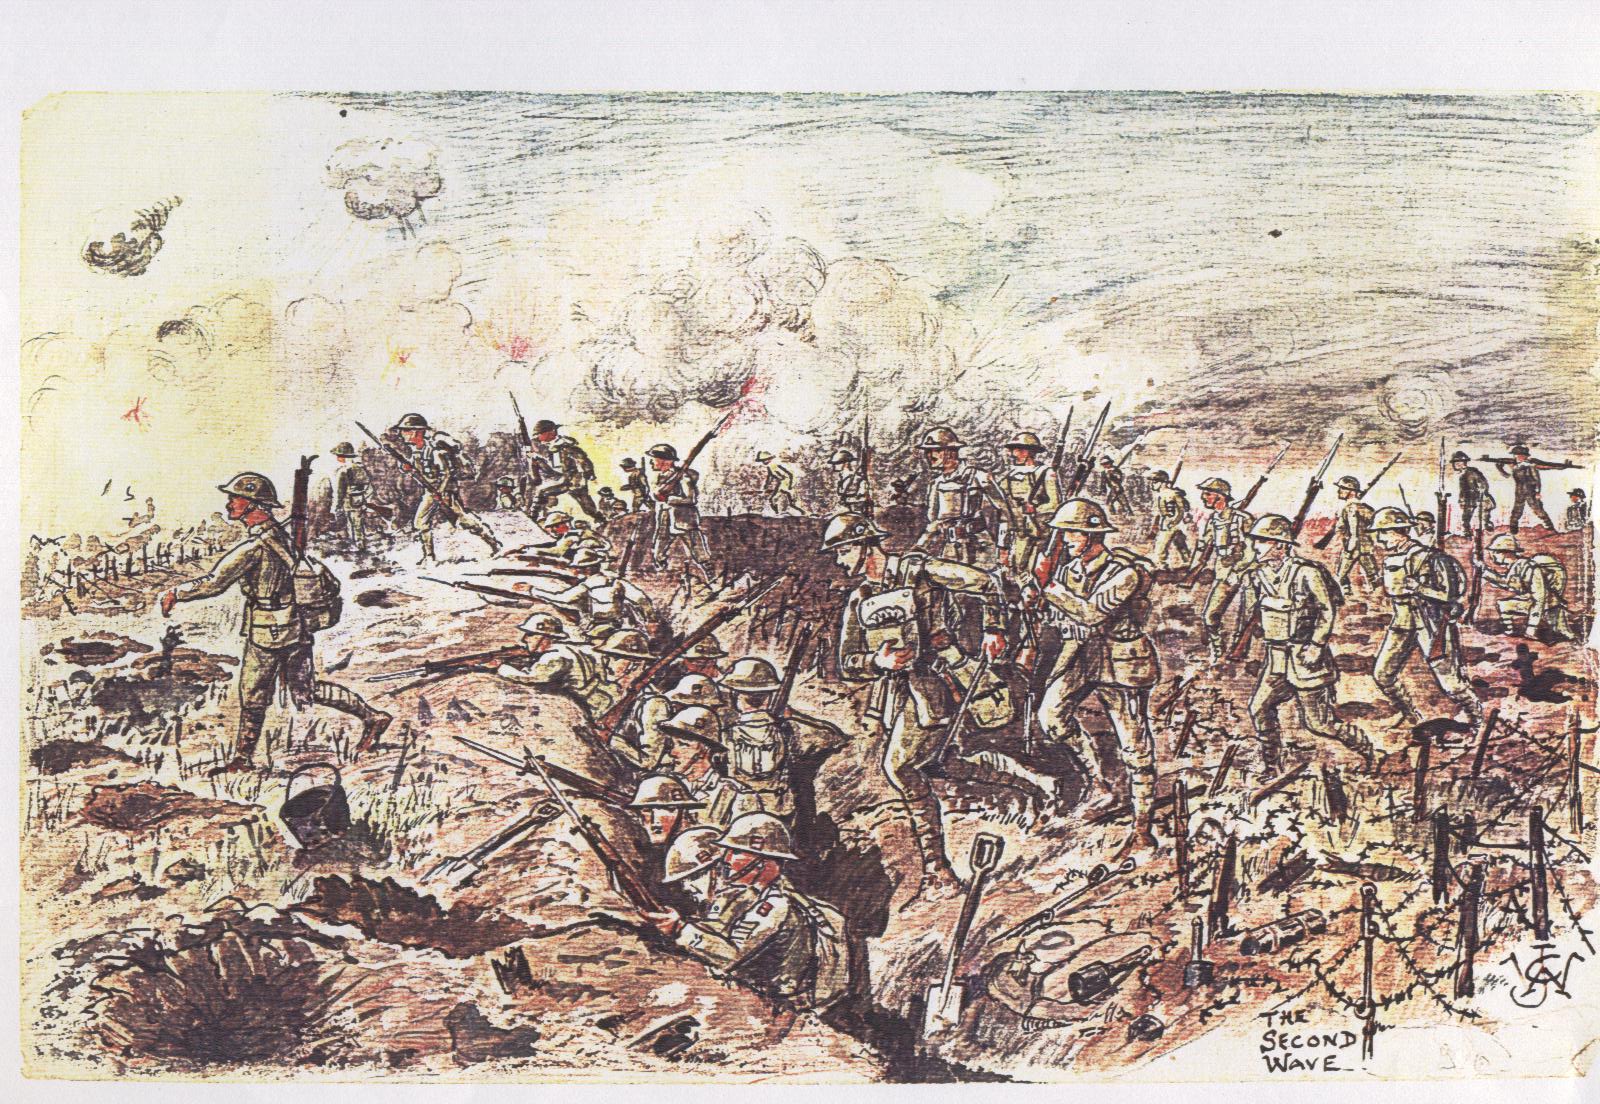
The race to the parapet was the essence of attacking a trench. It can be envisaged as a rather deadly form of ‘rock-paper-scissors’. The defenders can either be in their dugouts or manning the trenches. The attackers can either send artillery rounds or infantrymen. Defenders lining trenches would slaughter attacking infantry but were vulnerable to artillery fire. Defenders would be reasonably safe in their dugouts, but could do nothing if the attackers were waiting at the top of the dugout steps. The key was for the assaulting infantry to be so close to the artillery barrage that the defenders had no time to react.

Shrapnel Barrage
Infantry could advance close behind the directional shrapnel barrage.

The shrapnel shells from the British 18 Pdr Field gun were highly directional, and ejected forwards, like the blast from a shotgun. In the Boer war the British found that infantry could advance to within 50 yards with some safety. Japanese troops had also used these tactics in the Russo-Japanese War, as had the French in their costly 1915 offensive in Champagne. The “dapper and charismatic” artilleryman Robert Nivelle had developed a creeping barrage (le barrage roulant) 80-100m ahead of the leading infantry. (2)

HE splinters
Shell splinters for HE shells could fly hundreds of yards laterally, making it dangerous for friendly troops to approach closer than 200 metres.

The trouble with this tactic was that it had a fatal cost. Artillery rounds do not all land in the same place, but are scattered in a cigar shaped pattern, through variation in the propellant and further dispersed by variations in the wind and of temperature and human error in laying the piece. So “getting close to the barrage” inevitably meant “in a place likely to be struck by shrapnel from a shell that fell shorter than most”. Indeed the rule of thumb, later in the war, was that unless the infantry were taking casualties from their own artillery fire, then they were not close enough.

So the commanders faced a dilemma. The men lost to artillery fire would usually be far lower than the casualties suffered from the machine guns of alert defenders. However, if the artillery preparation was going to leave the defenders unable to resist then would it be right to expose the infantry to friendly fire casualties?

Artillery Dispositions 26th June 1916 behind Newfoundland Park
British (and some French) Artillery positions behind 29th Division of VIII Corps at Beaumont Hamel

To make matters worse, the gunners firing the barrage were mostly Kitchener’s Army men. Their gunners, technicians and officers had limited training and experience, and were Artillery Key
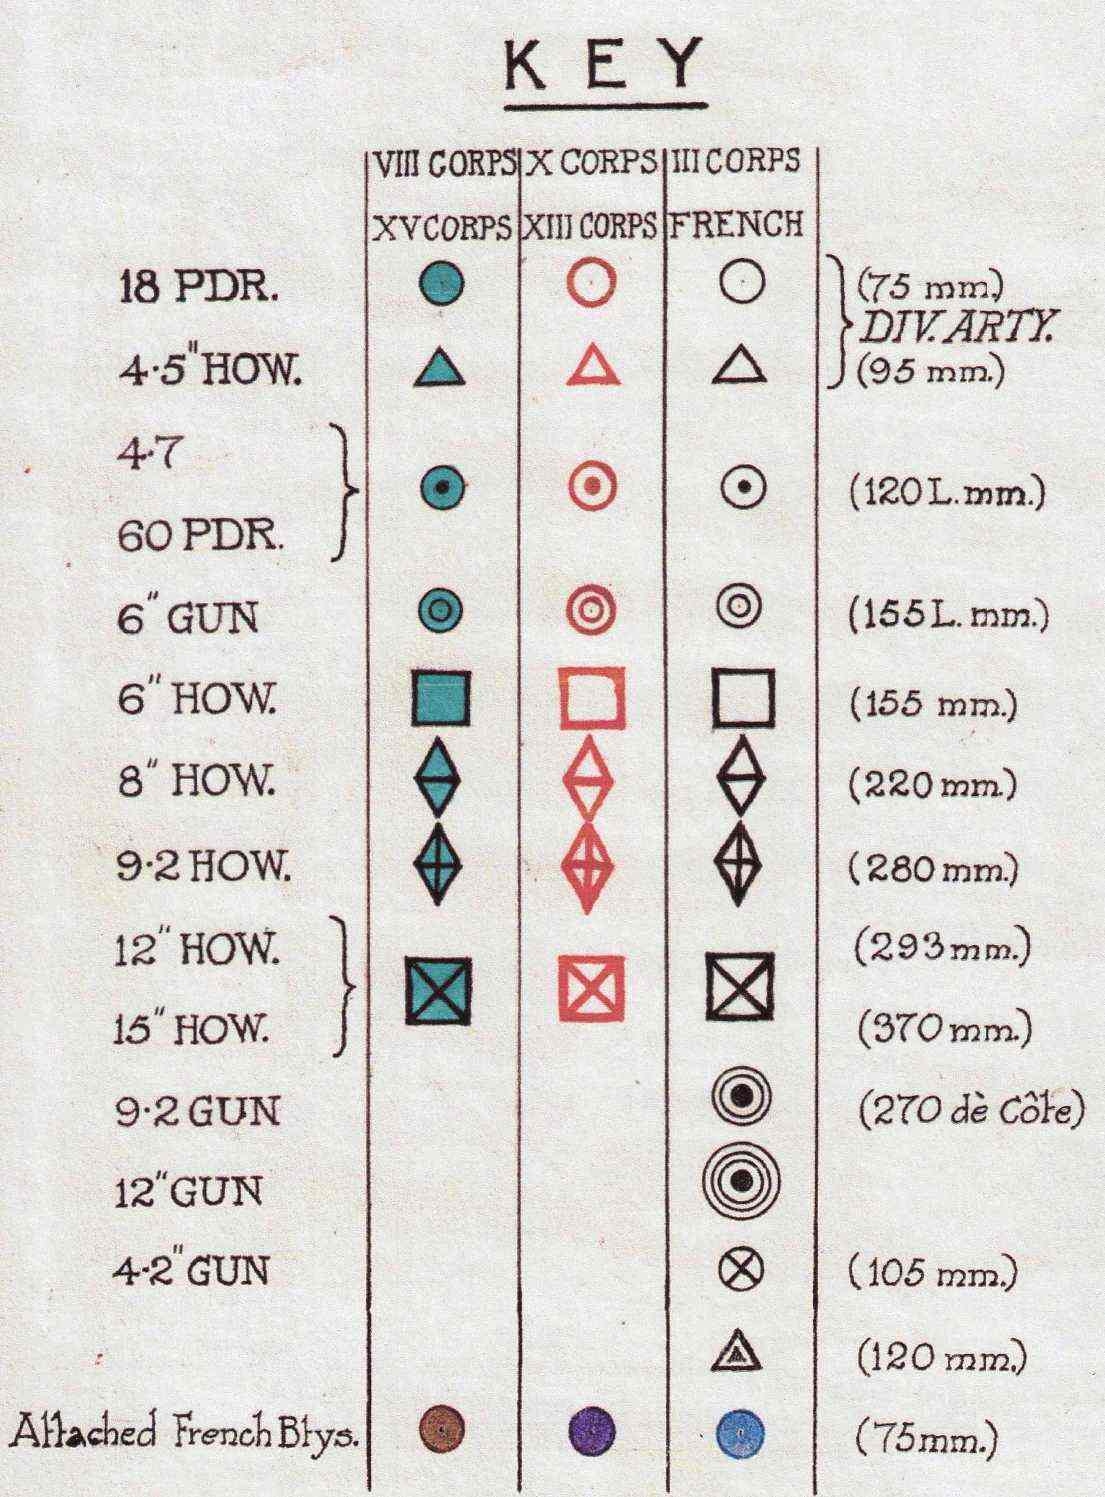
using ammunition and guns produced by newly expanded or hired suppliers. It might have been sensible to apply nn extra safety margin. The plans for the 1st July seem to bear this out.

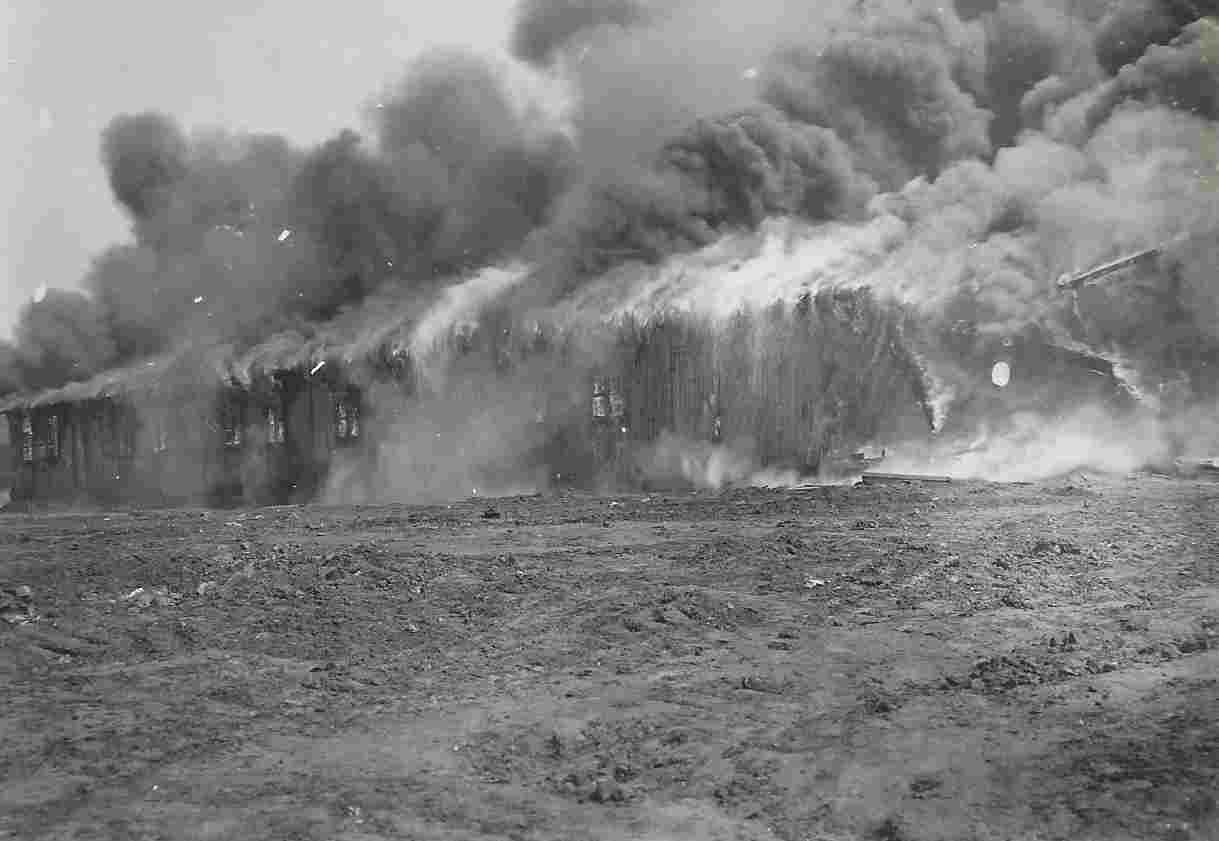
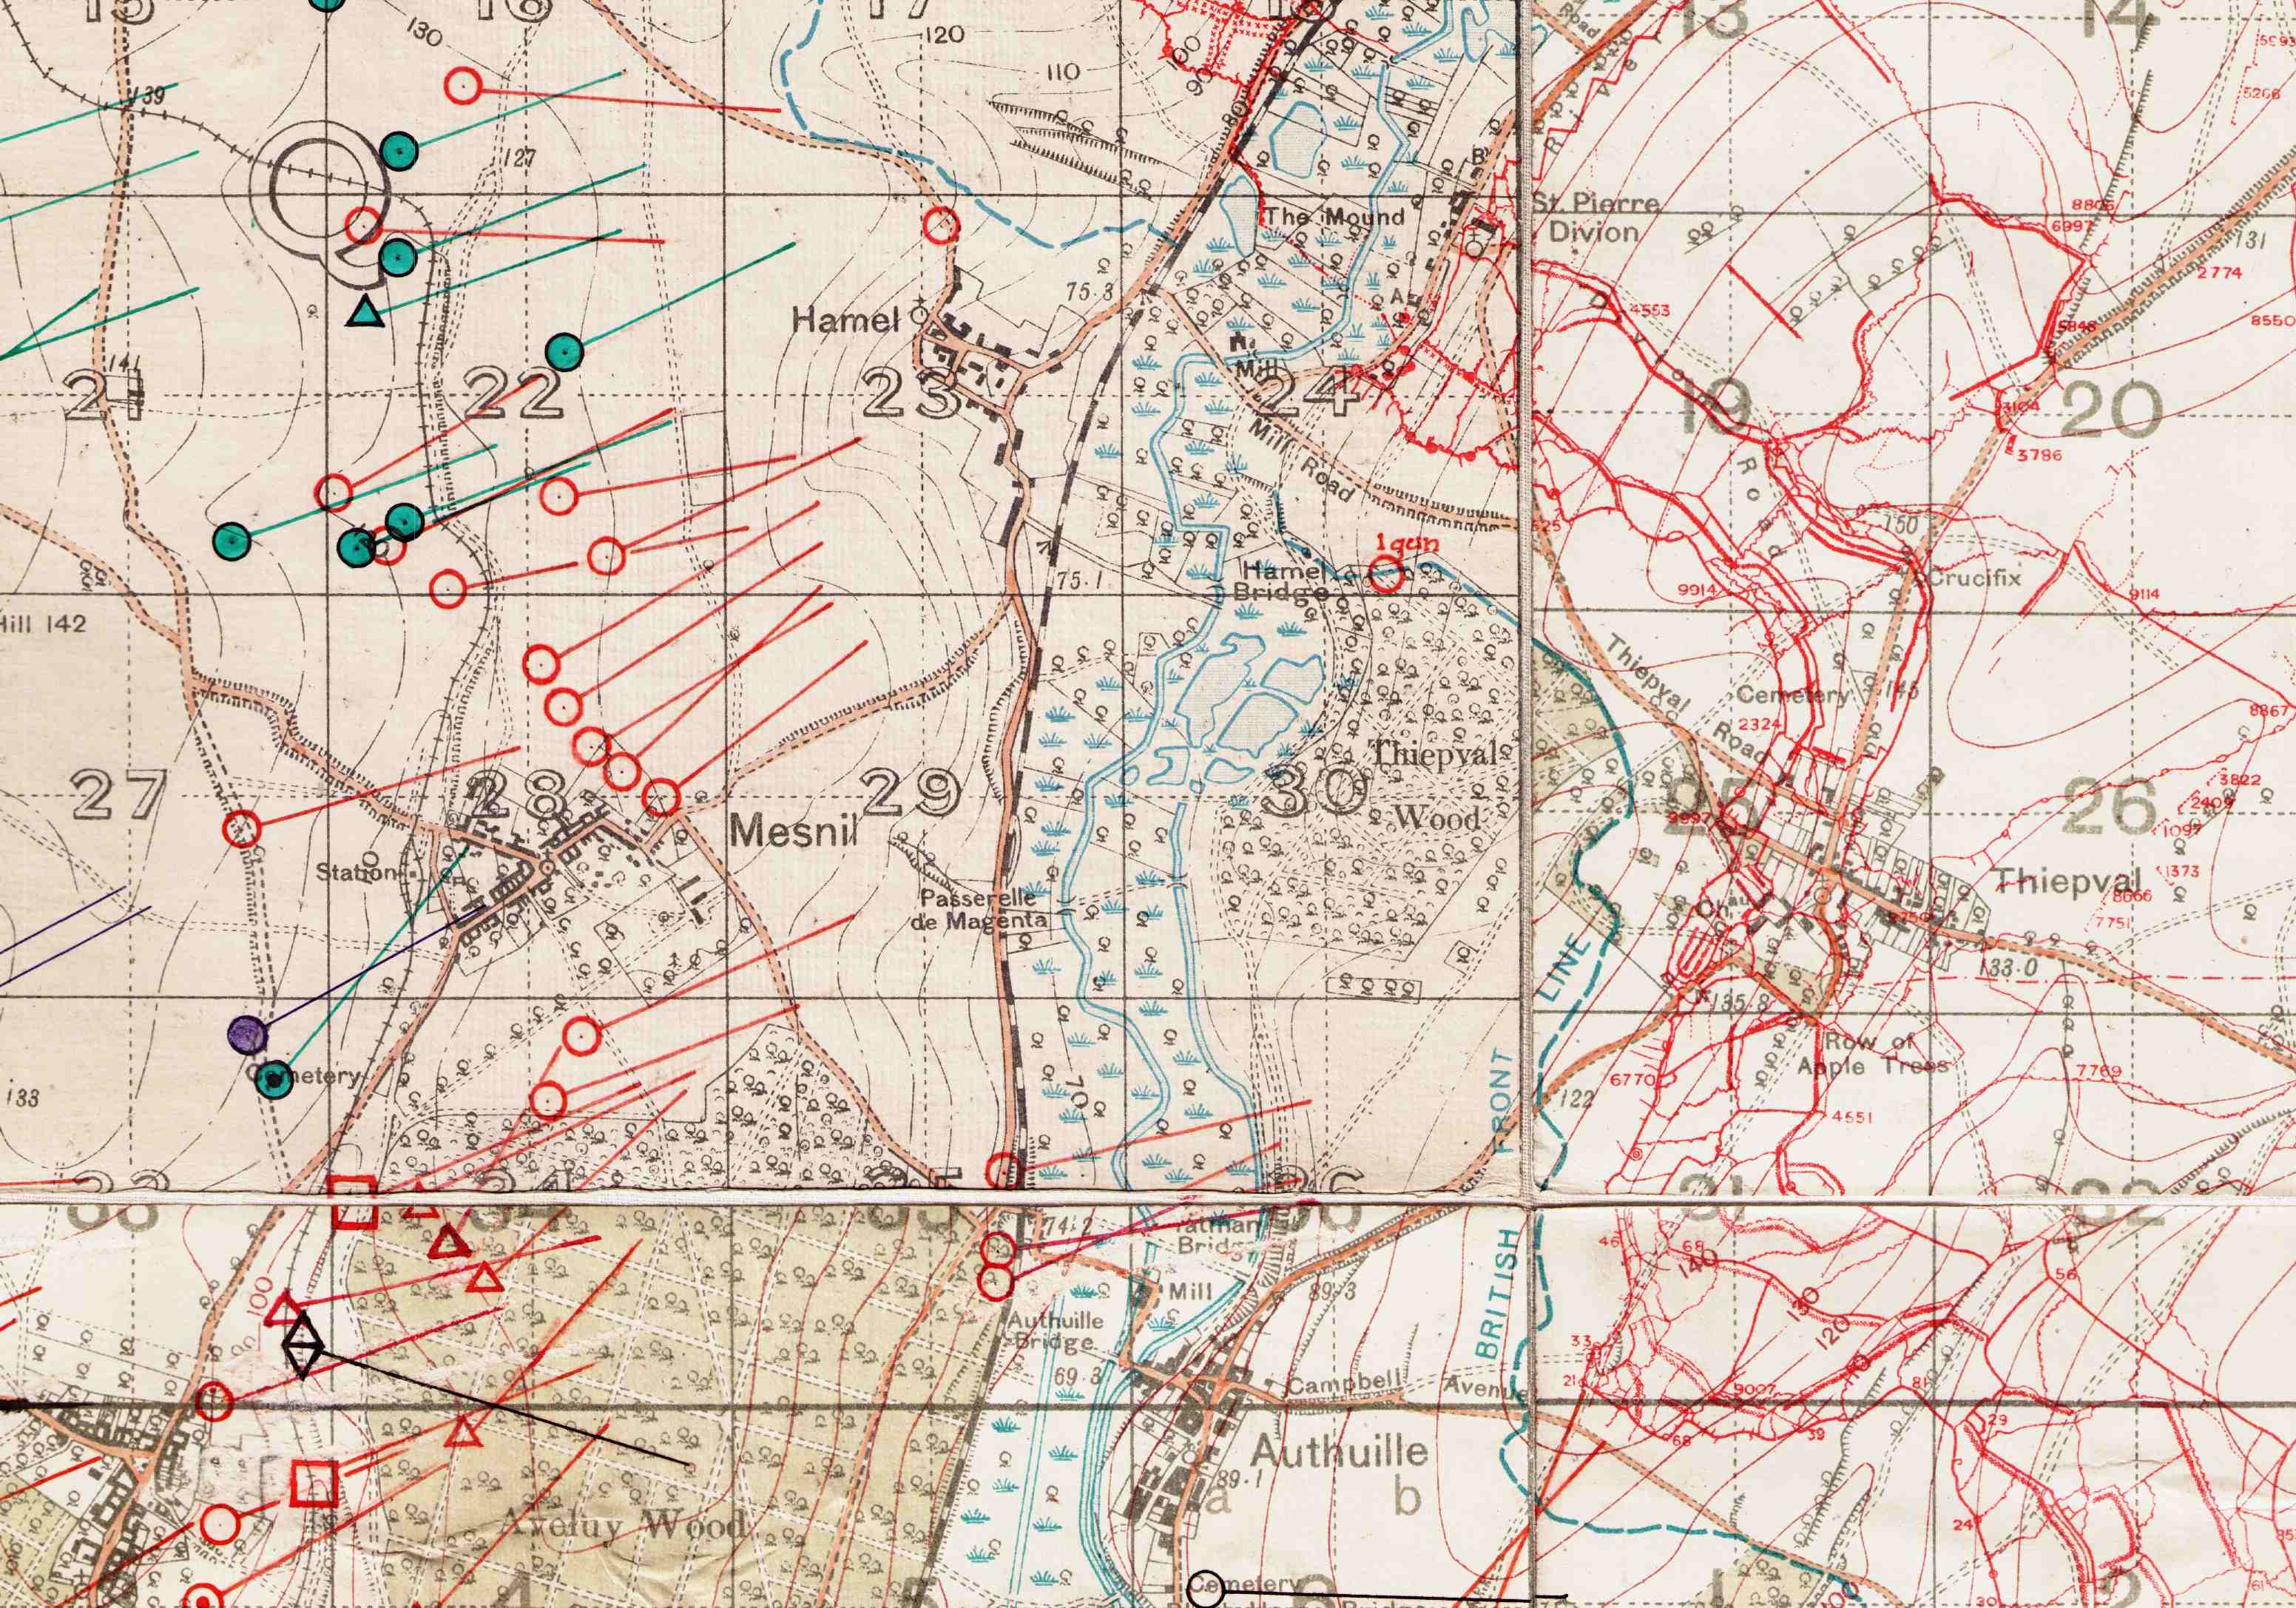
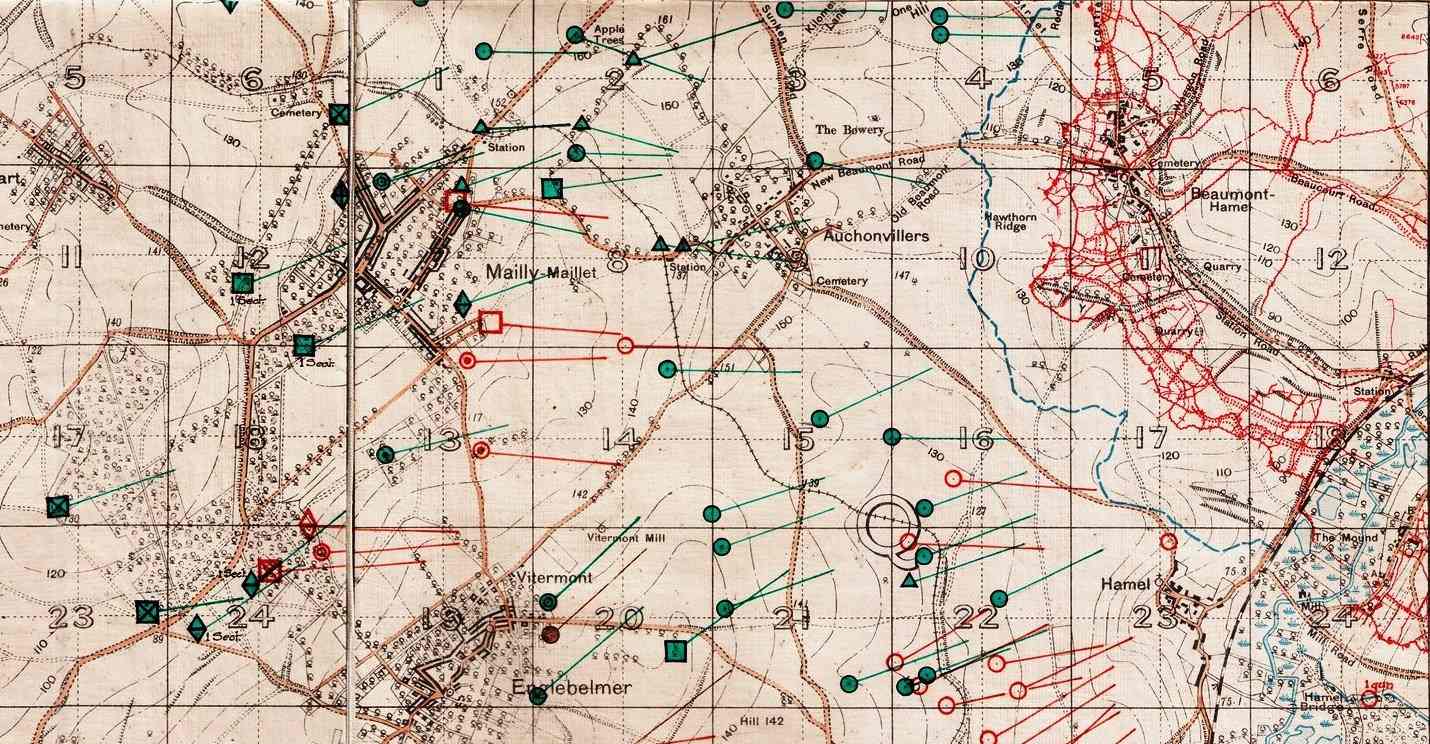
The fire plan for the first day of the Somme specified an artillery barrage that would lift from the German front line trenches at zero hour, even though the distance between the British and German Trenches was much wider – from 200-800 metres across most of the assault frontage. Some British units left their trenches before zero hour, and worked their way as close as possible to the German trenches. Where they did, the British succeeded in capturing the German front lines; the Ulstermen at the Schwaben redoubt, the Highland Light infantry at the Leipzig redoubt and the 30th Division near Maricourt. Elsewhere, success was more illusive and on much of the front the assaulting infantry faced fully manned trenches.

Beaumont Hamerl 1916 NAM 59353
Artillery Bombardment Beaumont Hamel Somme 1916

The excessive safety distance between the starting barrage and the infantry wasn’t the only reason that casualties were so heavy and the gains so slight on the 1st July.  There needed to be enough breaches in the German wire. Where the wire was intact, the advance stopped. It helped if the defenders were crushed in their dugouts  or demoralised by the barrage. There were more, and heavier guns, and the dug outs were less deep south of the Albert-Bapaume.   The Germans had to be prevented from bringing down their own defensive barrage preventing movement across no mans land.  There were fewer German guns  south of the Albert Bapaume Road, and the British could call on the more numerous French heavy guns for counter battery .

By F. A. Swaine - http://www.archive.org/details/cu31924088057223, Public Domain, https://commons.wikimedia.org/w/index.php?curid=2494174
Lieutenant General Sir Aylmer Hunter-Weston By F. A. Swaine – http://www.archive.org/details/cu31924088057223, Public Domain, https://commons.wikimedia.org/w/index.php?curid=2494174

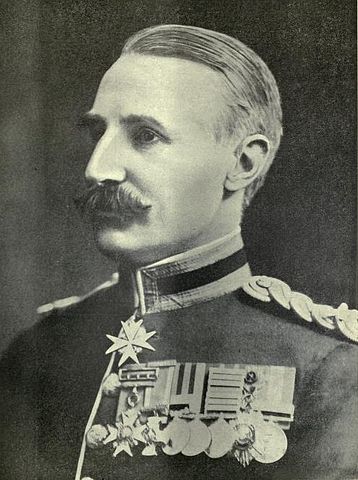
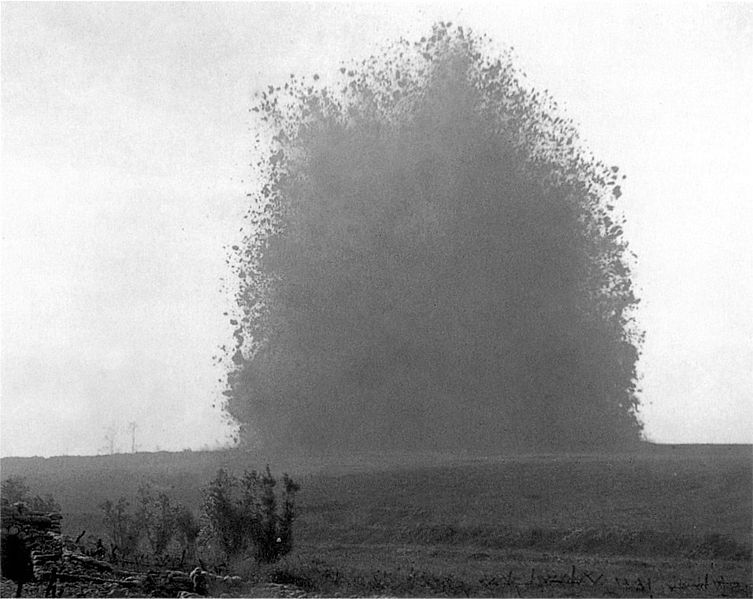
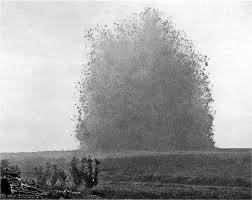
The worst losses and least success was on the frontage of the VIIIth corps where a “safety factor” played a grotesque part in the tragedy that unfolded. A number of a mines had been dug under the German trenches. Almost all were scheduled to be detonated at 07.28, on the 1st July, two minutes before zero hour. This would allow two minutes for the debris to fall before the British infantry assaulted the crater. One of these was under the Hawthorn redoubt near the village of Beaumont Hamel. The commander of VIII Corps, Lieutenant General Sir Aylmer Hunter-Weston wanted this to be fired some hours before the attack, so that the redoubt could be occupied before the assault, but sufficiently in advance that any general alarm would have died down by zero hour. This was vetoed by more senior commanders, but as a compromise the mine would be fired at 07.20, ten minutes before Zero.

2015-06-23 18.52.16_wire cxutting
Barrage map for 29th Division at Beaumont Hamel showing wire cutting tasks for 18 pdr batteries (blue) and trench mortars (brown) and preparation targets for 4.5″ Howitzers (yellow)

This allowed for a plan to occupy the crater early, but it required the heavy artillery bombardment of the redoubt and adjacent trenches to lift during the assault. However, instead of fire lifting only from the immediate area, all of the VIII Corps heavy artillery was ordered to lift at 7:20 a.m. and the field artillery to lift at 7:25 a.m. A light Shrapnel barrage fired by the divisional field artillery, was to continue on the front trench until zero hour but in the 29th Division sector, half of the guns were to lift three minutes early.

2015-06-23 18.52.30_barrage map 2
Barrage map for 29th Division Artillery showing the sections of front line trench and final lines for each battery.

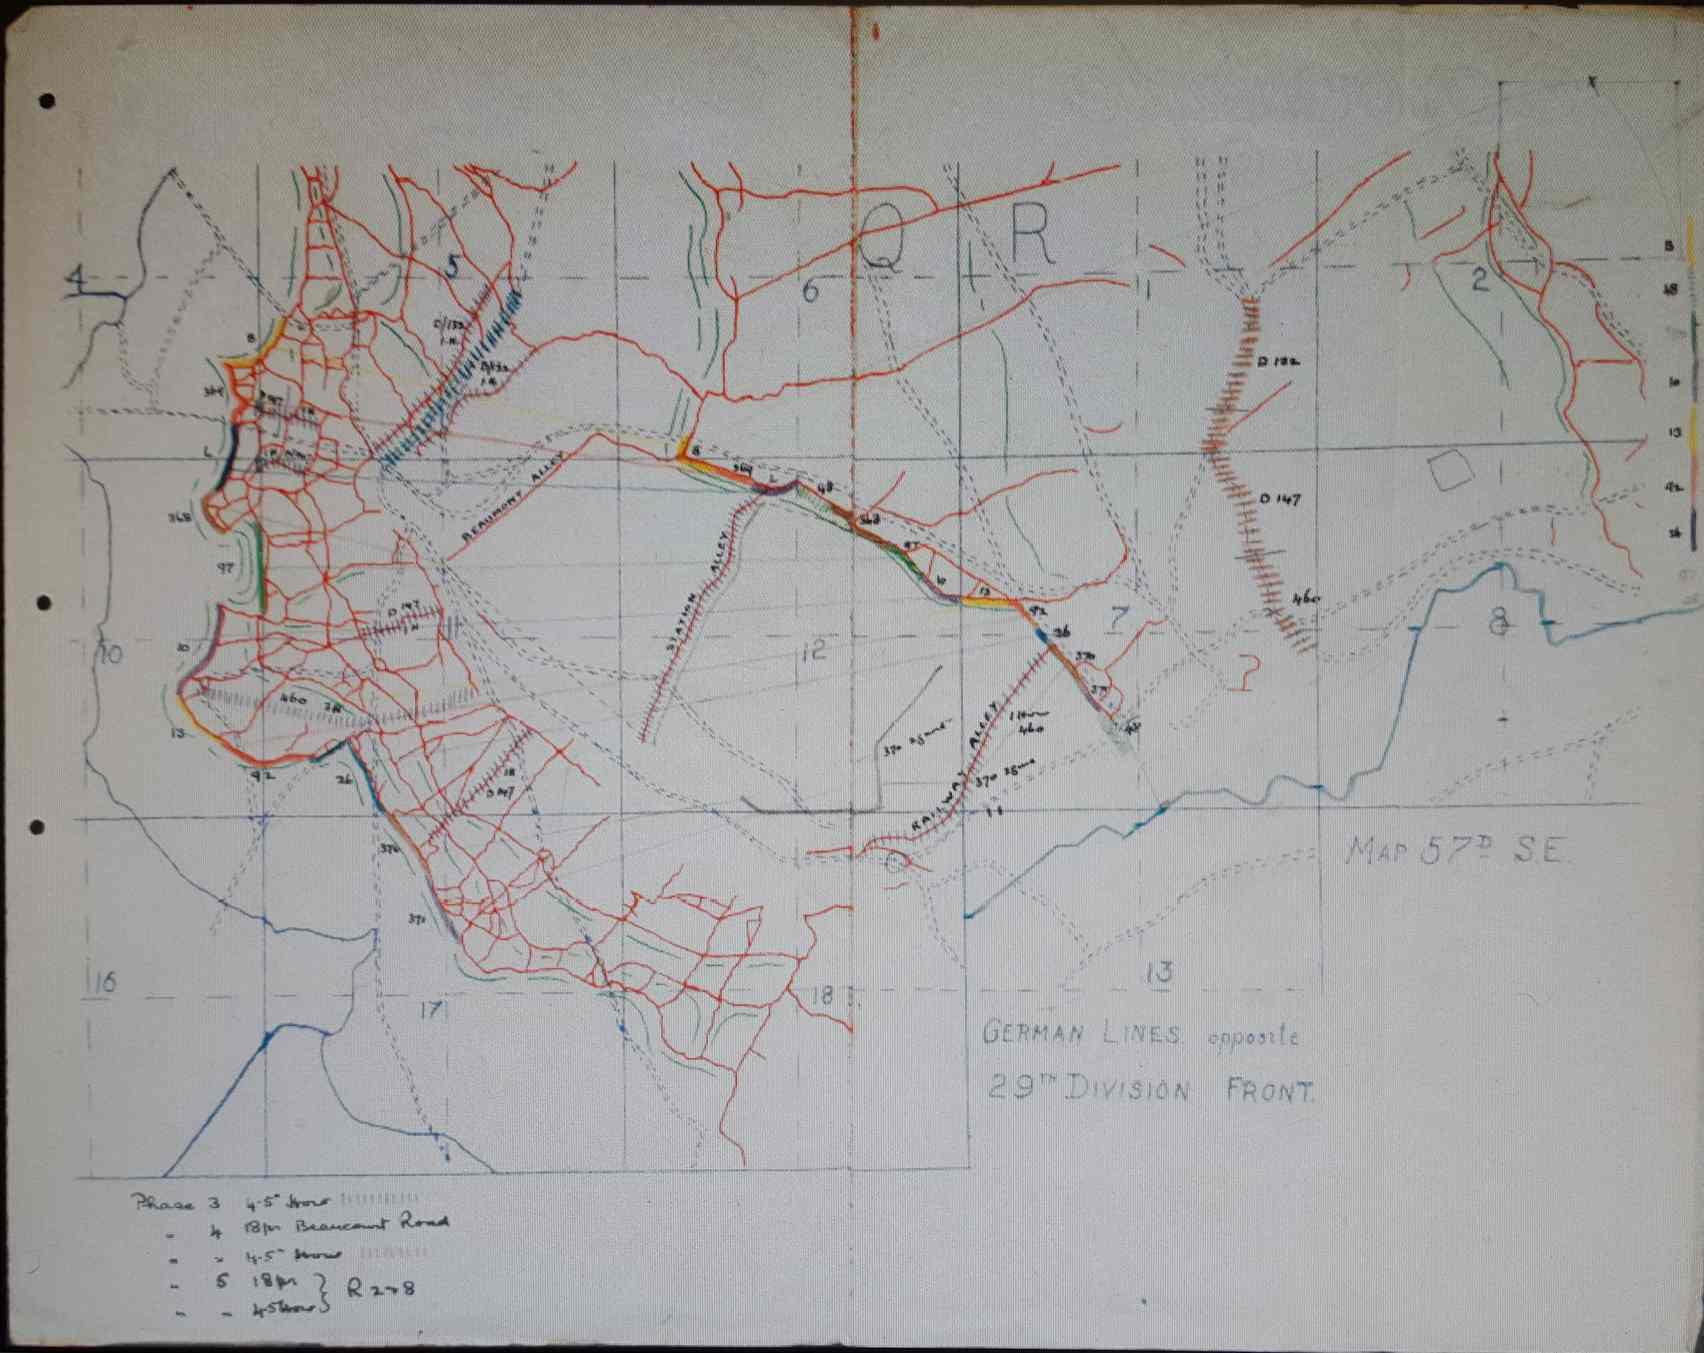
This allowed the German defenders ten minutes notice of the impending assault and condemned the infantry from three divisions to heavy casualties and failure across the breadth of their front. It did not matter how well the wire had been cut or whether the infantry crept out into no man’s land. One of the attacking battalions lost all its officers before zero hour.

So why did the seemingly responsible commanders, who were professional experienced soldiers, get this decision so wrong?

shrapnel shells_LR
7,000 shrapnel shells, enough for a divisional creeping barrage

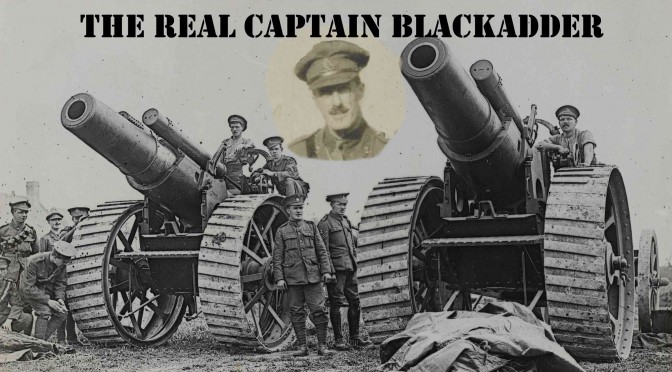
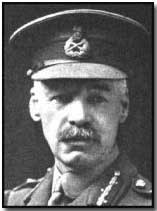
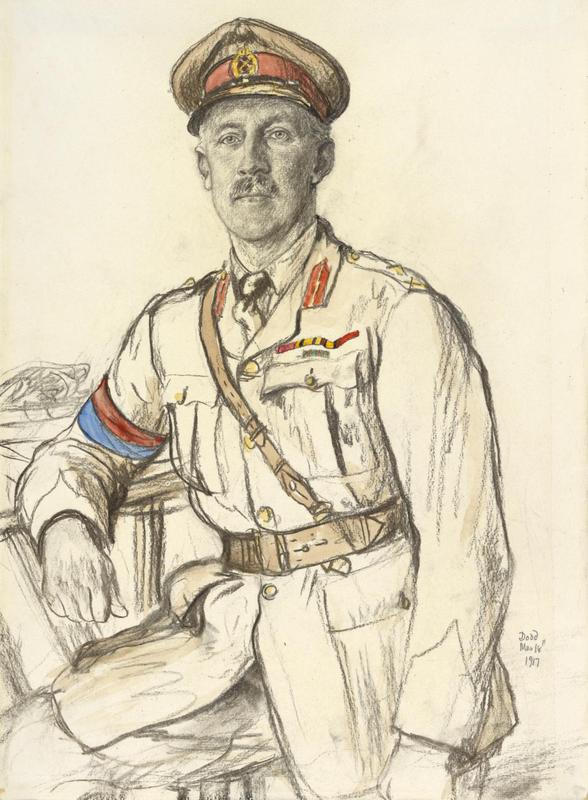
One simplistic, but popular explanation is that the commanders were incompetent “butchers and bunglers”iii. Professor Norman Dixon in the Psychology of Military Incompetence (4) argued that there was something about military training which led to poor decision making. Indeed, the performance of General Sir Aylmer Hunter Weston is hard to describe as anything less than incompetent. “Hunter-Bunter” was a strange man with a command style reminiscent of that of the monstrous Blackadder creation General Sir Anthony Cecil Hogmanay Melchett. The disastrous decision to lift fire early across the VIII Corps front was very much in keeping with his micro-management and idiosyncratic decision-making. He had a history of over compensating for the risks of friendly fire in Gallipoli. He was found out on the first day on the Somme. Afterwards, although he retained his command, he was never entrusted with command in an offensive and only employed on quiet sectors. Could he have been removed earlier?  To be fair to Rawlinson and Haig, Hunter-Weston was new to the Western Front. He had commanded the 29th Division and then the VIII Corps at Cape Helles in Gallipoli and arrived with his corps as an experienced commander and a reputation of relatively competent performance.

secondwave
The Second Wave: Colonel Walford’s Impression of an attack on the Somme, following the barrage shown on the left

Elsewhere in the BEF the disastrous decision about fire plan timings resulted from agreements between groups of people, commanders and subordinates and their staffs.

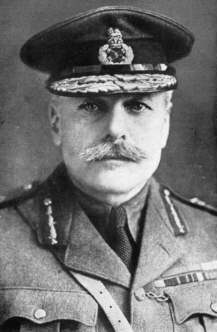
In the first instance, the senior commanders were not looking at this problem. The correspondence between Rawlinson and Haig shows a focus on the problems of exploiting success. In earlier battles such as Loos and Neuve Chapelle the British infantry had taken the German first line wherever they had adequate artillery support.

The plan for the Somme was a bad compromise. Rawlinson, commander of the fourth army, put forward a plan for a phased advance, initially taking just the first German line, which he and his staff thought was within the capabilities of the resources available. Haig did not think this was ambitious enough. He rejected the plans and insisted that an attempt should be made to breach both the front line and the second line to ensure that any opportunity for a breakthrough was not missed.

By F. A. Swaine - http://www.archive.org/details/cu31924088057223, Public Domain, https://commons.wikimedia.org/w/index.php?curid=2494174
Hawthorn Redoubt mine. By F. A. Swaine – http://www.archive.org/details/cu31924088057223, Public Domain, https://commons.wikimedia.org/w/index.php?curid=2494174

On this occasion Haig was able to impose his will on Rawlinson, despite reservations about the artillery being spread too thin made by the newly appointed artillery adviser at GHQ, General Birch. Birch and Rawlinson, having expressed their opinions in private, then issued orders and expressed their confidence in them.

As the Official History notes, not everybody assumed that the enemy would be flattened by the preparatory barrage. There seems to have been sufficient internal criticism for Rawlinson to include the following in the Fourth Army tactical notes;

“it must be remembered that all criticism by subordinates of their superiors, and of orders received from superior authority, will in the end recoil on the heads of the critics and undermine their authority with those below them.” (5)

60
The battlefield today. Part of the 29th Division sector in Newfoundland Park.  The barrage on the German trenches at the far side of the patk was provided by 13 battery of  XVII Field Brigade, which is still in the Royal Artillery as part of 28/143(Tombs Troop) Battery an AS 90 battery in 19 Regiment.

This was hardly the atmosphere in which to challenge the fundamentals of the plan. The late, great professor Richard Holmes remarked in the episode on the Battle of the Somme in the Western Front BBC series that the generals of the first world war were stronger in physical than moral courage.
It should be said that the BEF was very quick to learn and the next major attack, on the 14th July, less than two weeks after the first day, was conducted with a much greater concentration of artillery fire and with the infantry following a creeping barrage.

Major-general_James_Frederick_Noel_Birch,_Cb_Art.IWMART1784
Major General J F N Birch CB, Haig’s senior Gunner argued that the artillery was spread too thin

There is a modern relevance of the battle of the Somme. This was a major high profile project into which much had been invested and expected. The resources available weren’t enough to deliver the hoped for results. At the heart of the plan were flaws that, could have been spotted and rectified but were not. The plan required subordinates to achieve “stretch targets”, “do more with less”, and “sell the party line” within an organisational culture that inhibited internal criticism.

The safety margin dilemma occurs frequently across all walks of life. If anything, the compensation culture makes it harder to choose to take risks. It is very hard to imagine the modern British Army willingly encroach on safety distances even if was the only way to win a battle.

We may not face machine guns and un-cut wire, but we often make important business and other decisions against a back ground of pressure from peers and superiors to agree to deliver uncertain commitments as part of a team effort. Many of us are under pressure to support decisions that have been made and face severe personal and career sanctions for whistle blowing. What is it that we can do to be more effective both as leaders in these situations and followers?

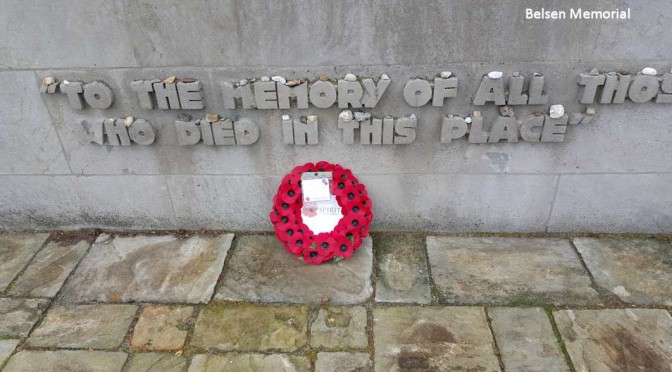
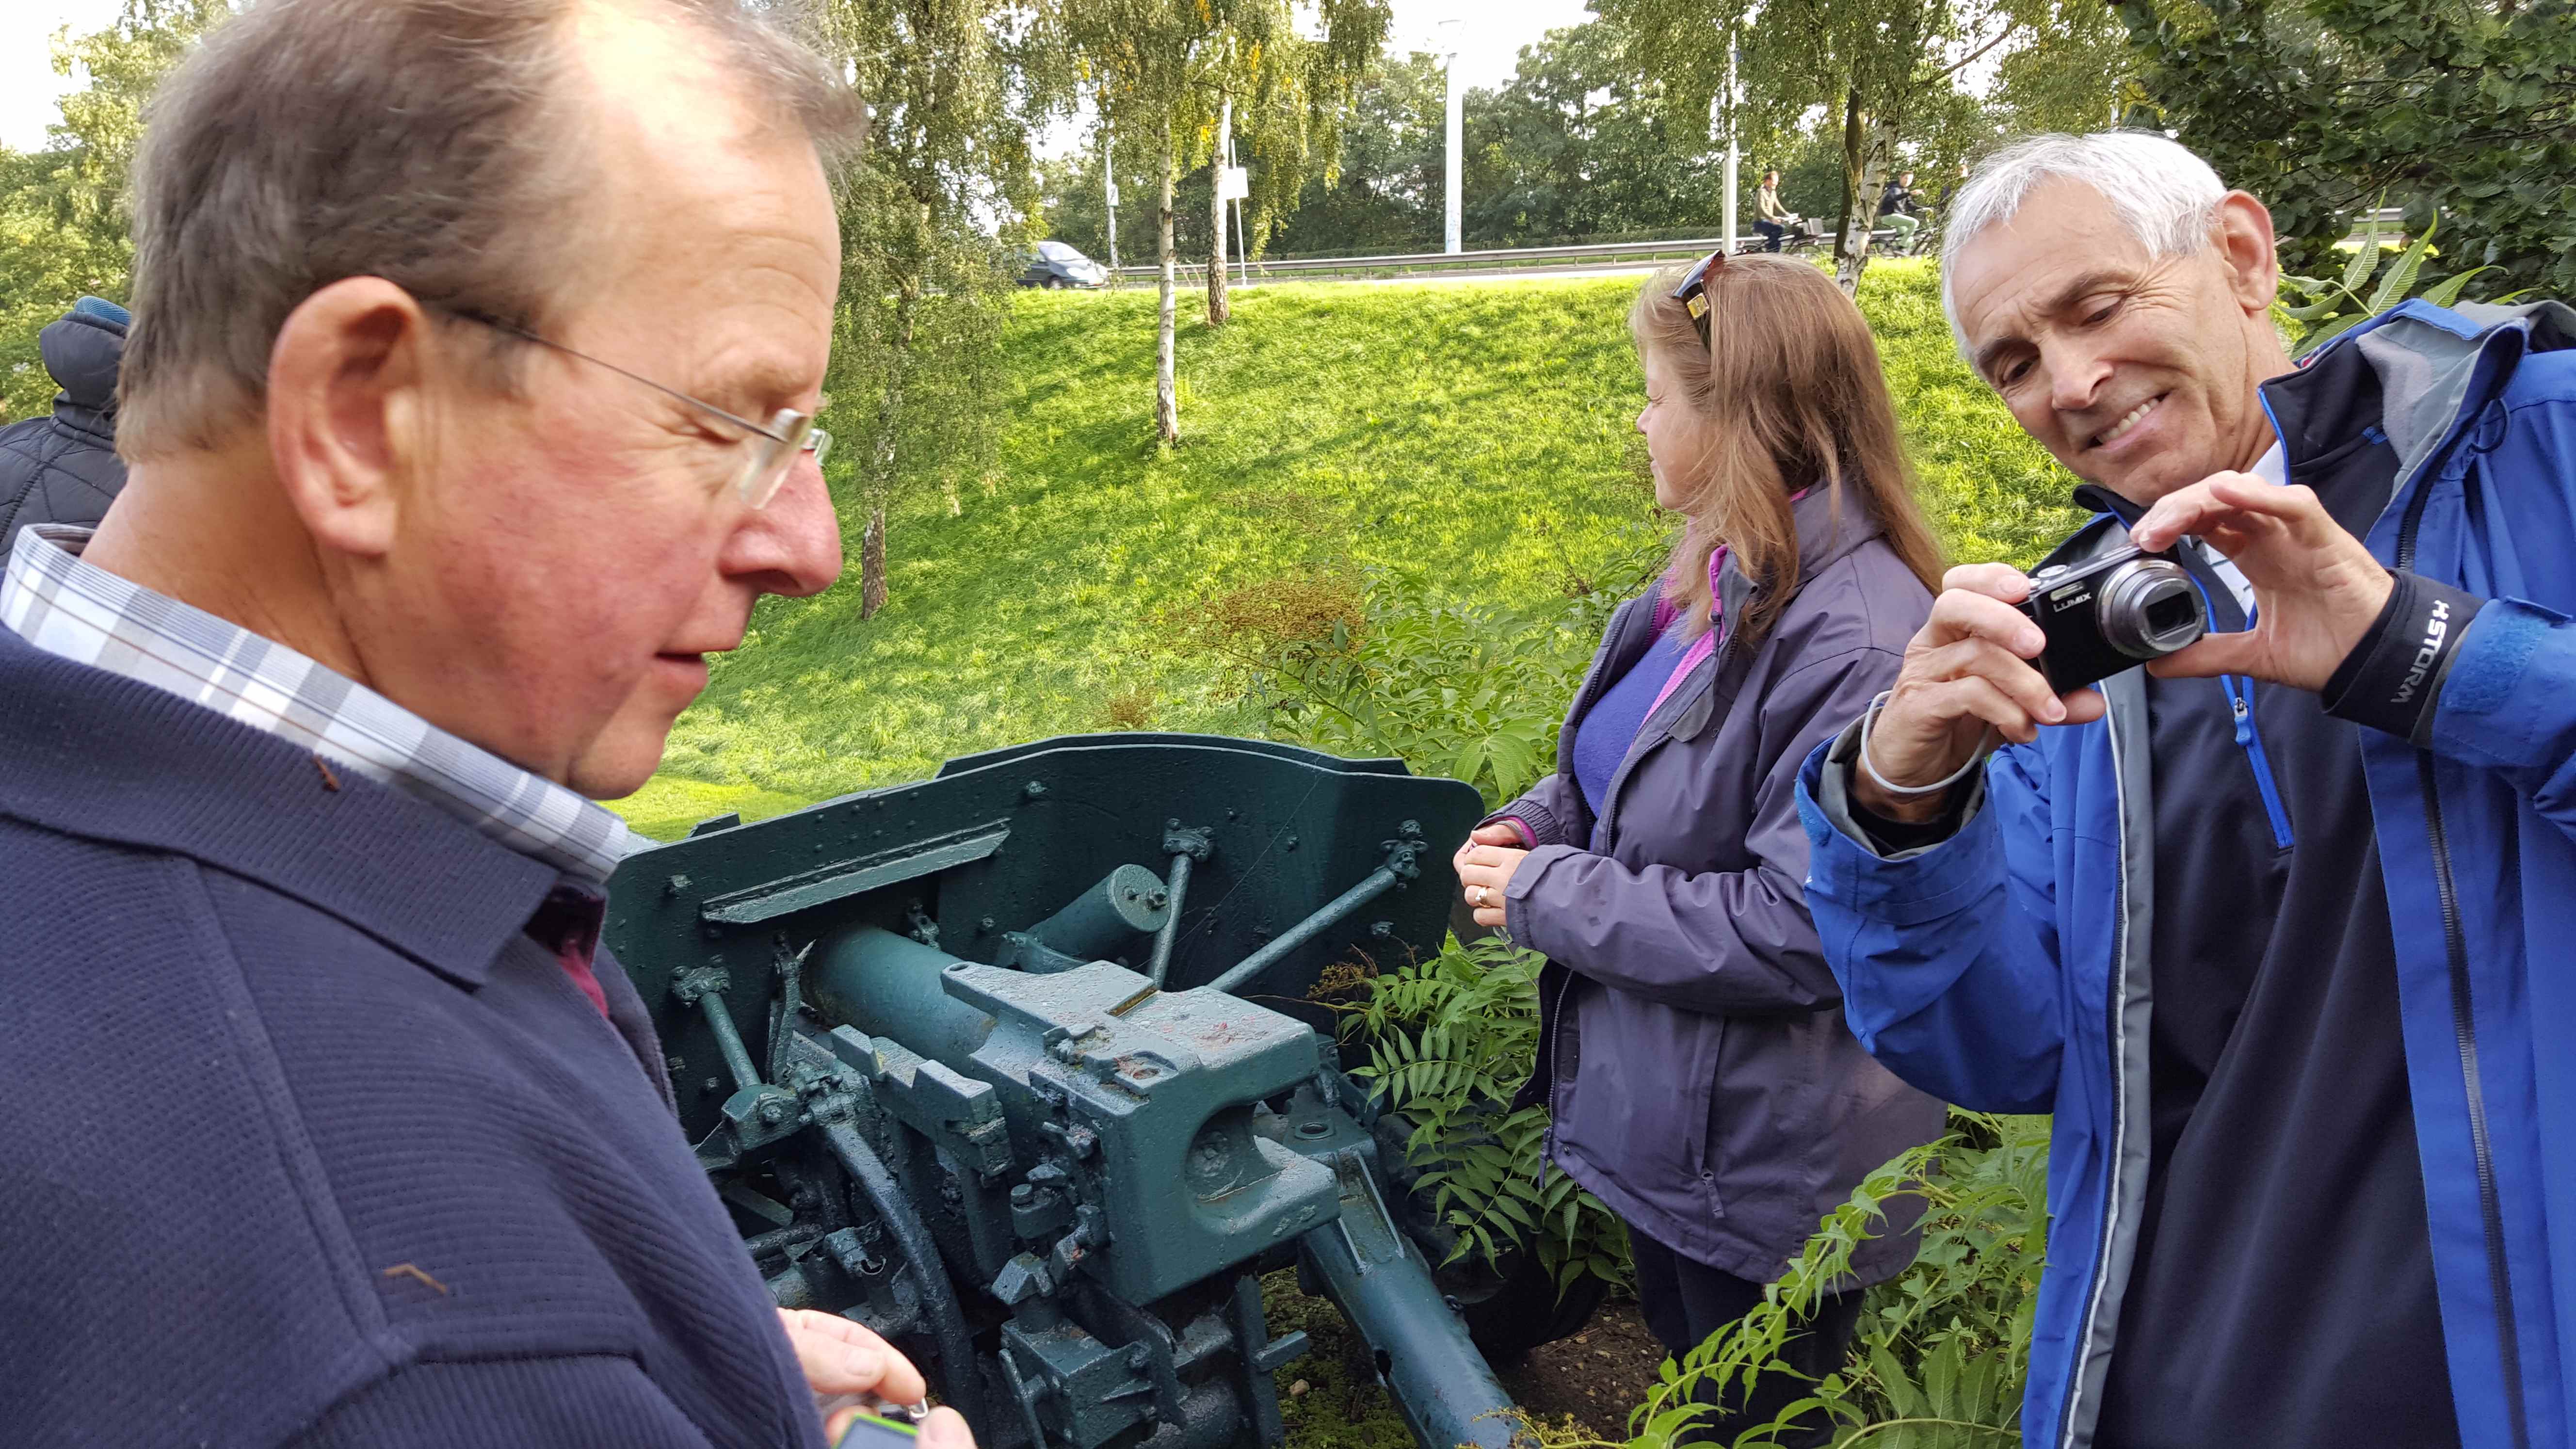
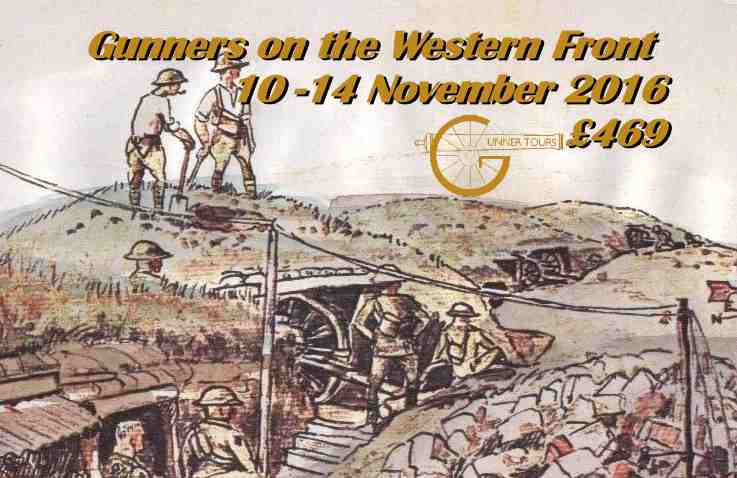
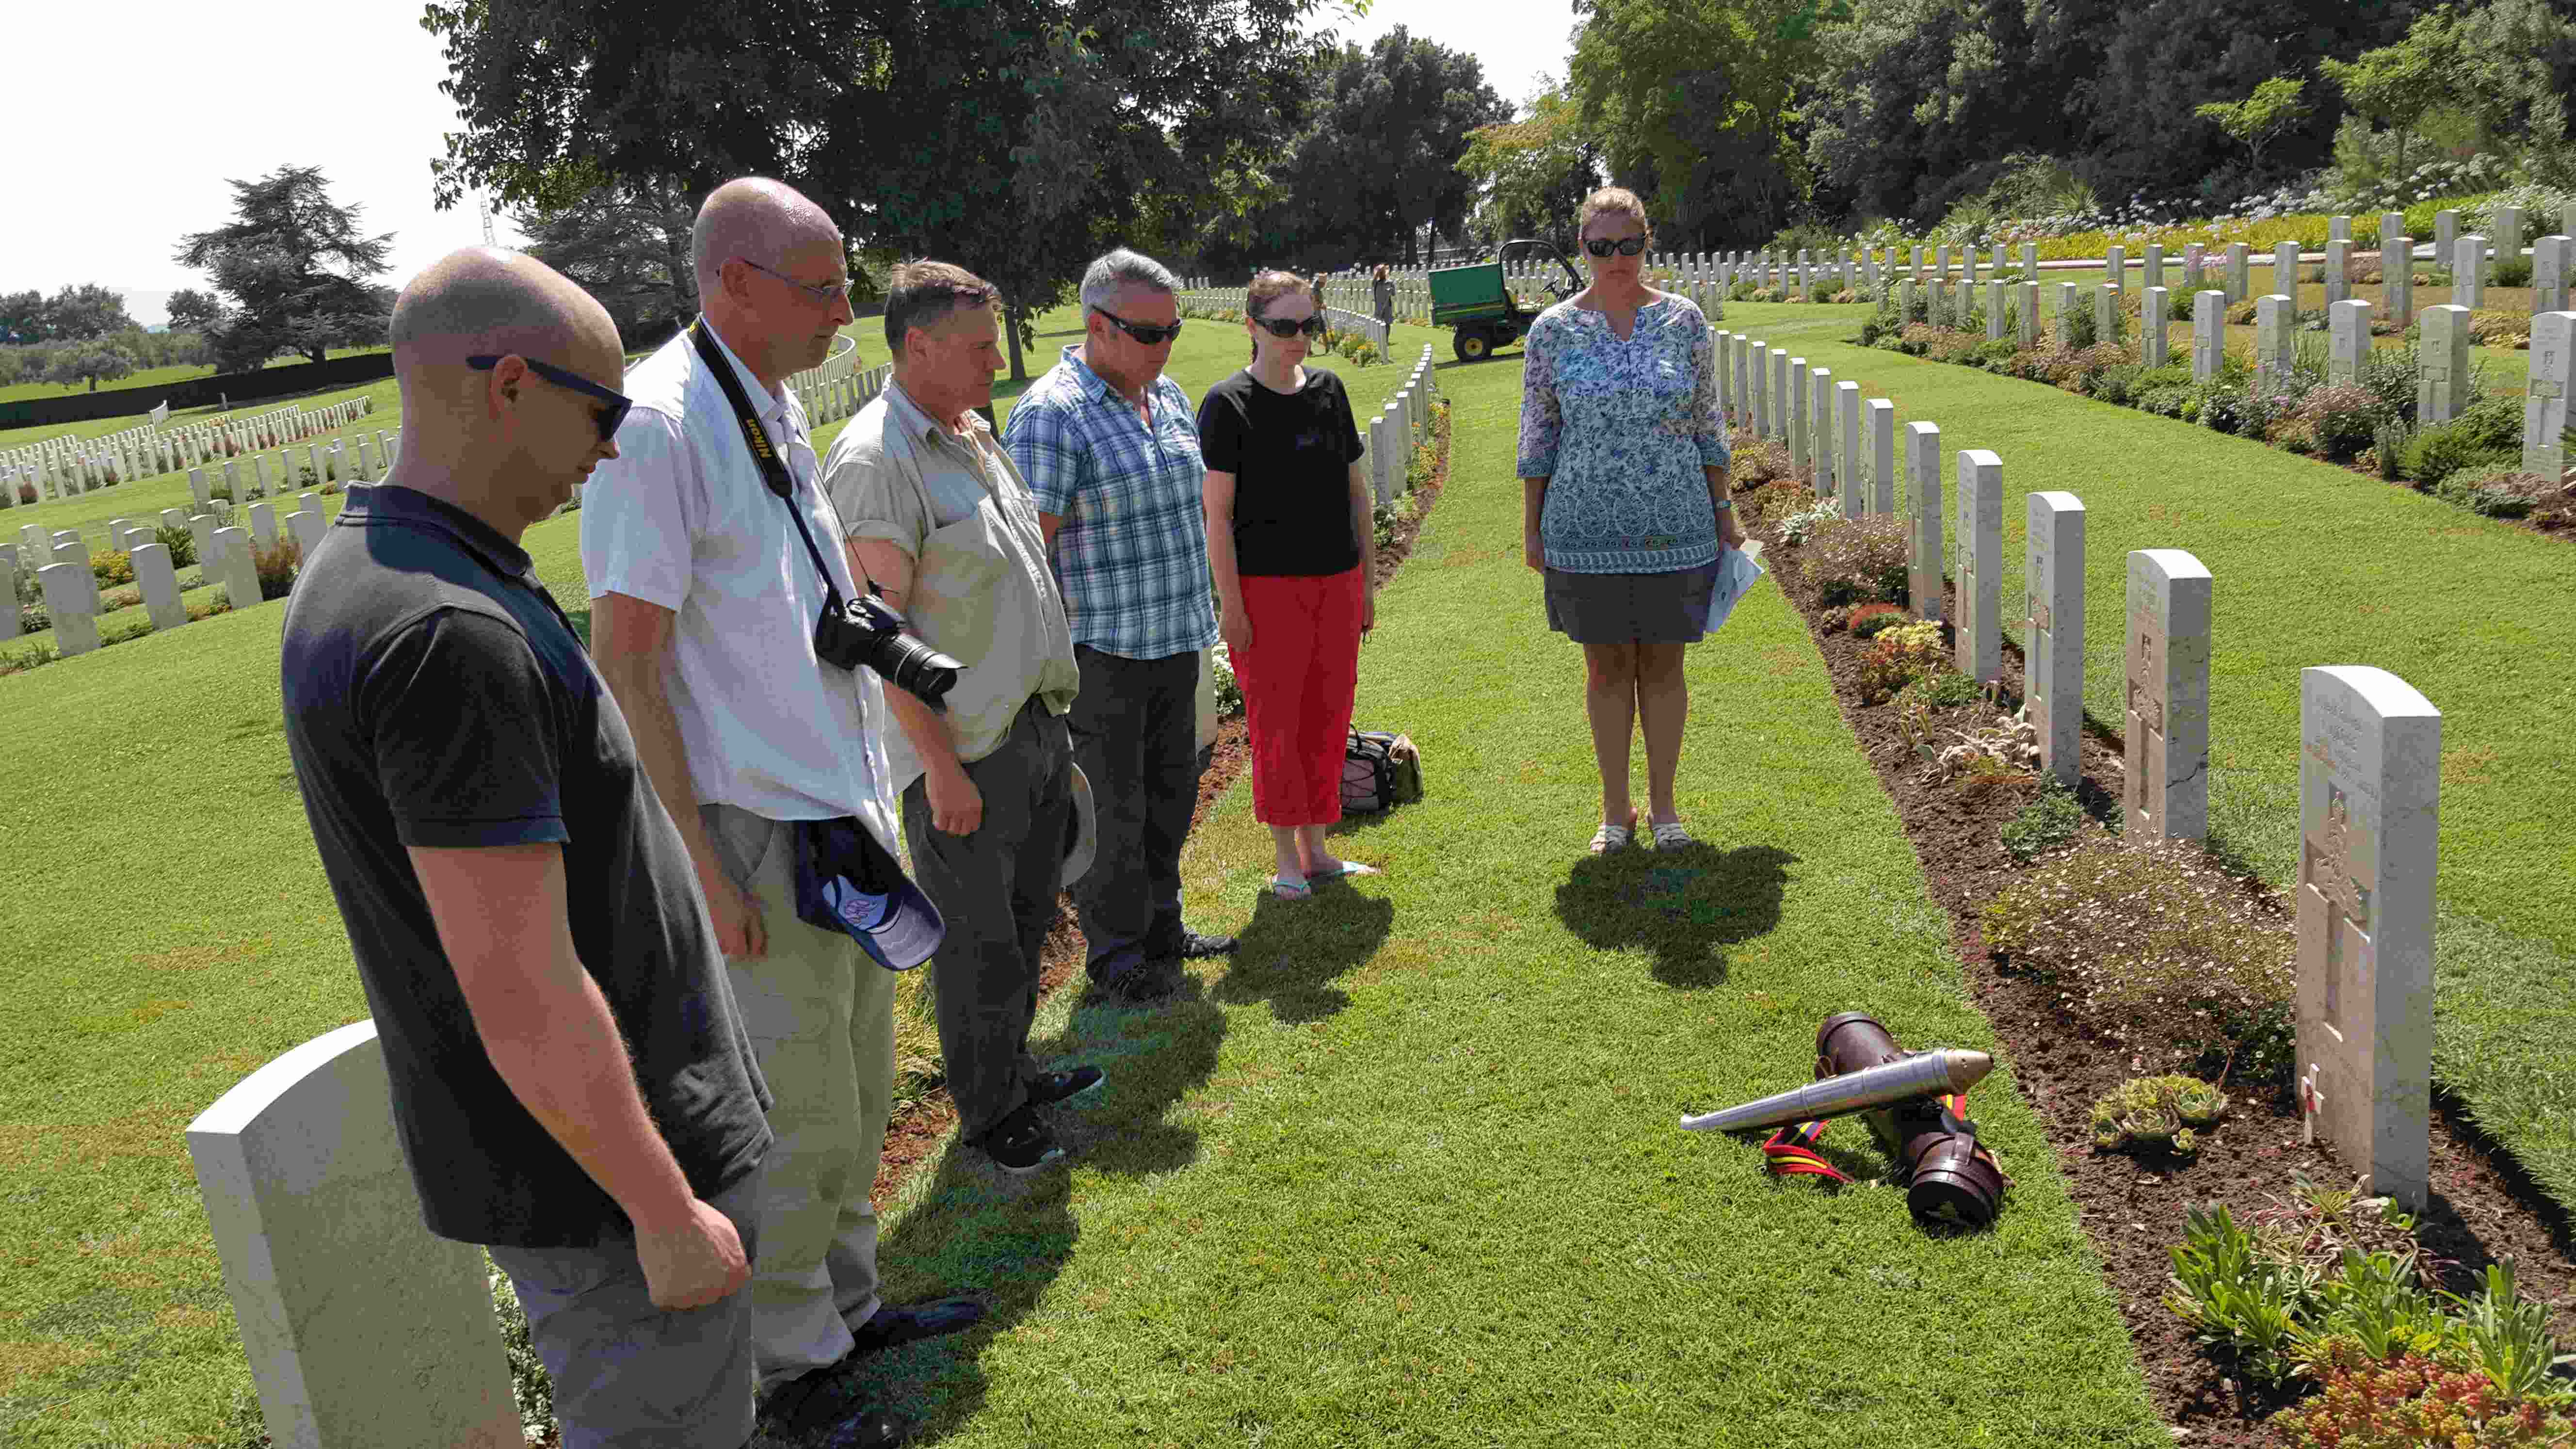
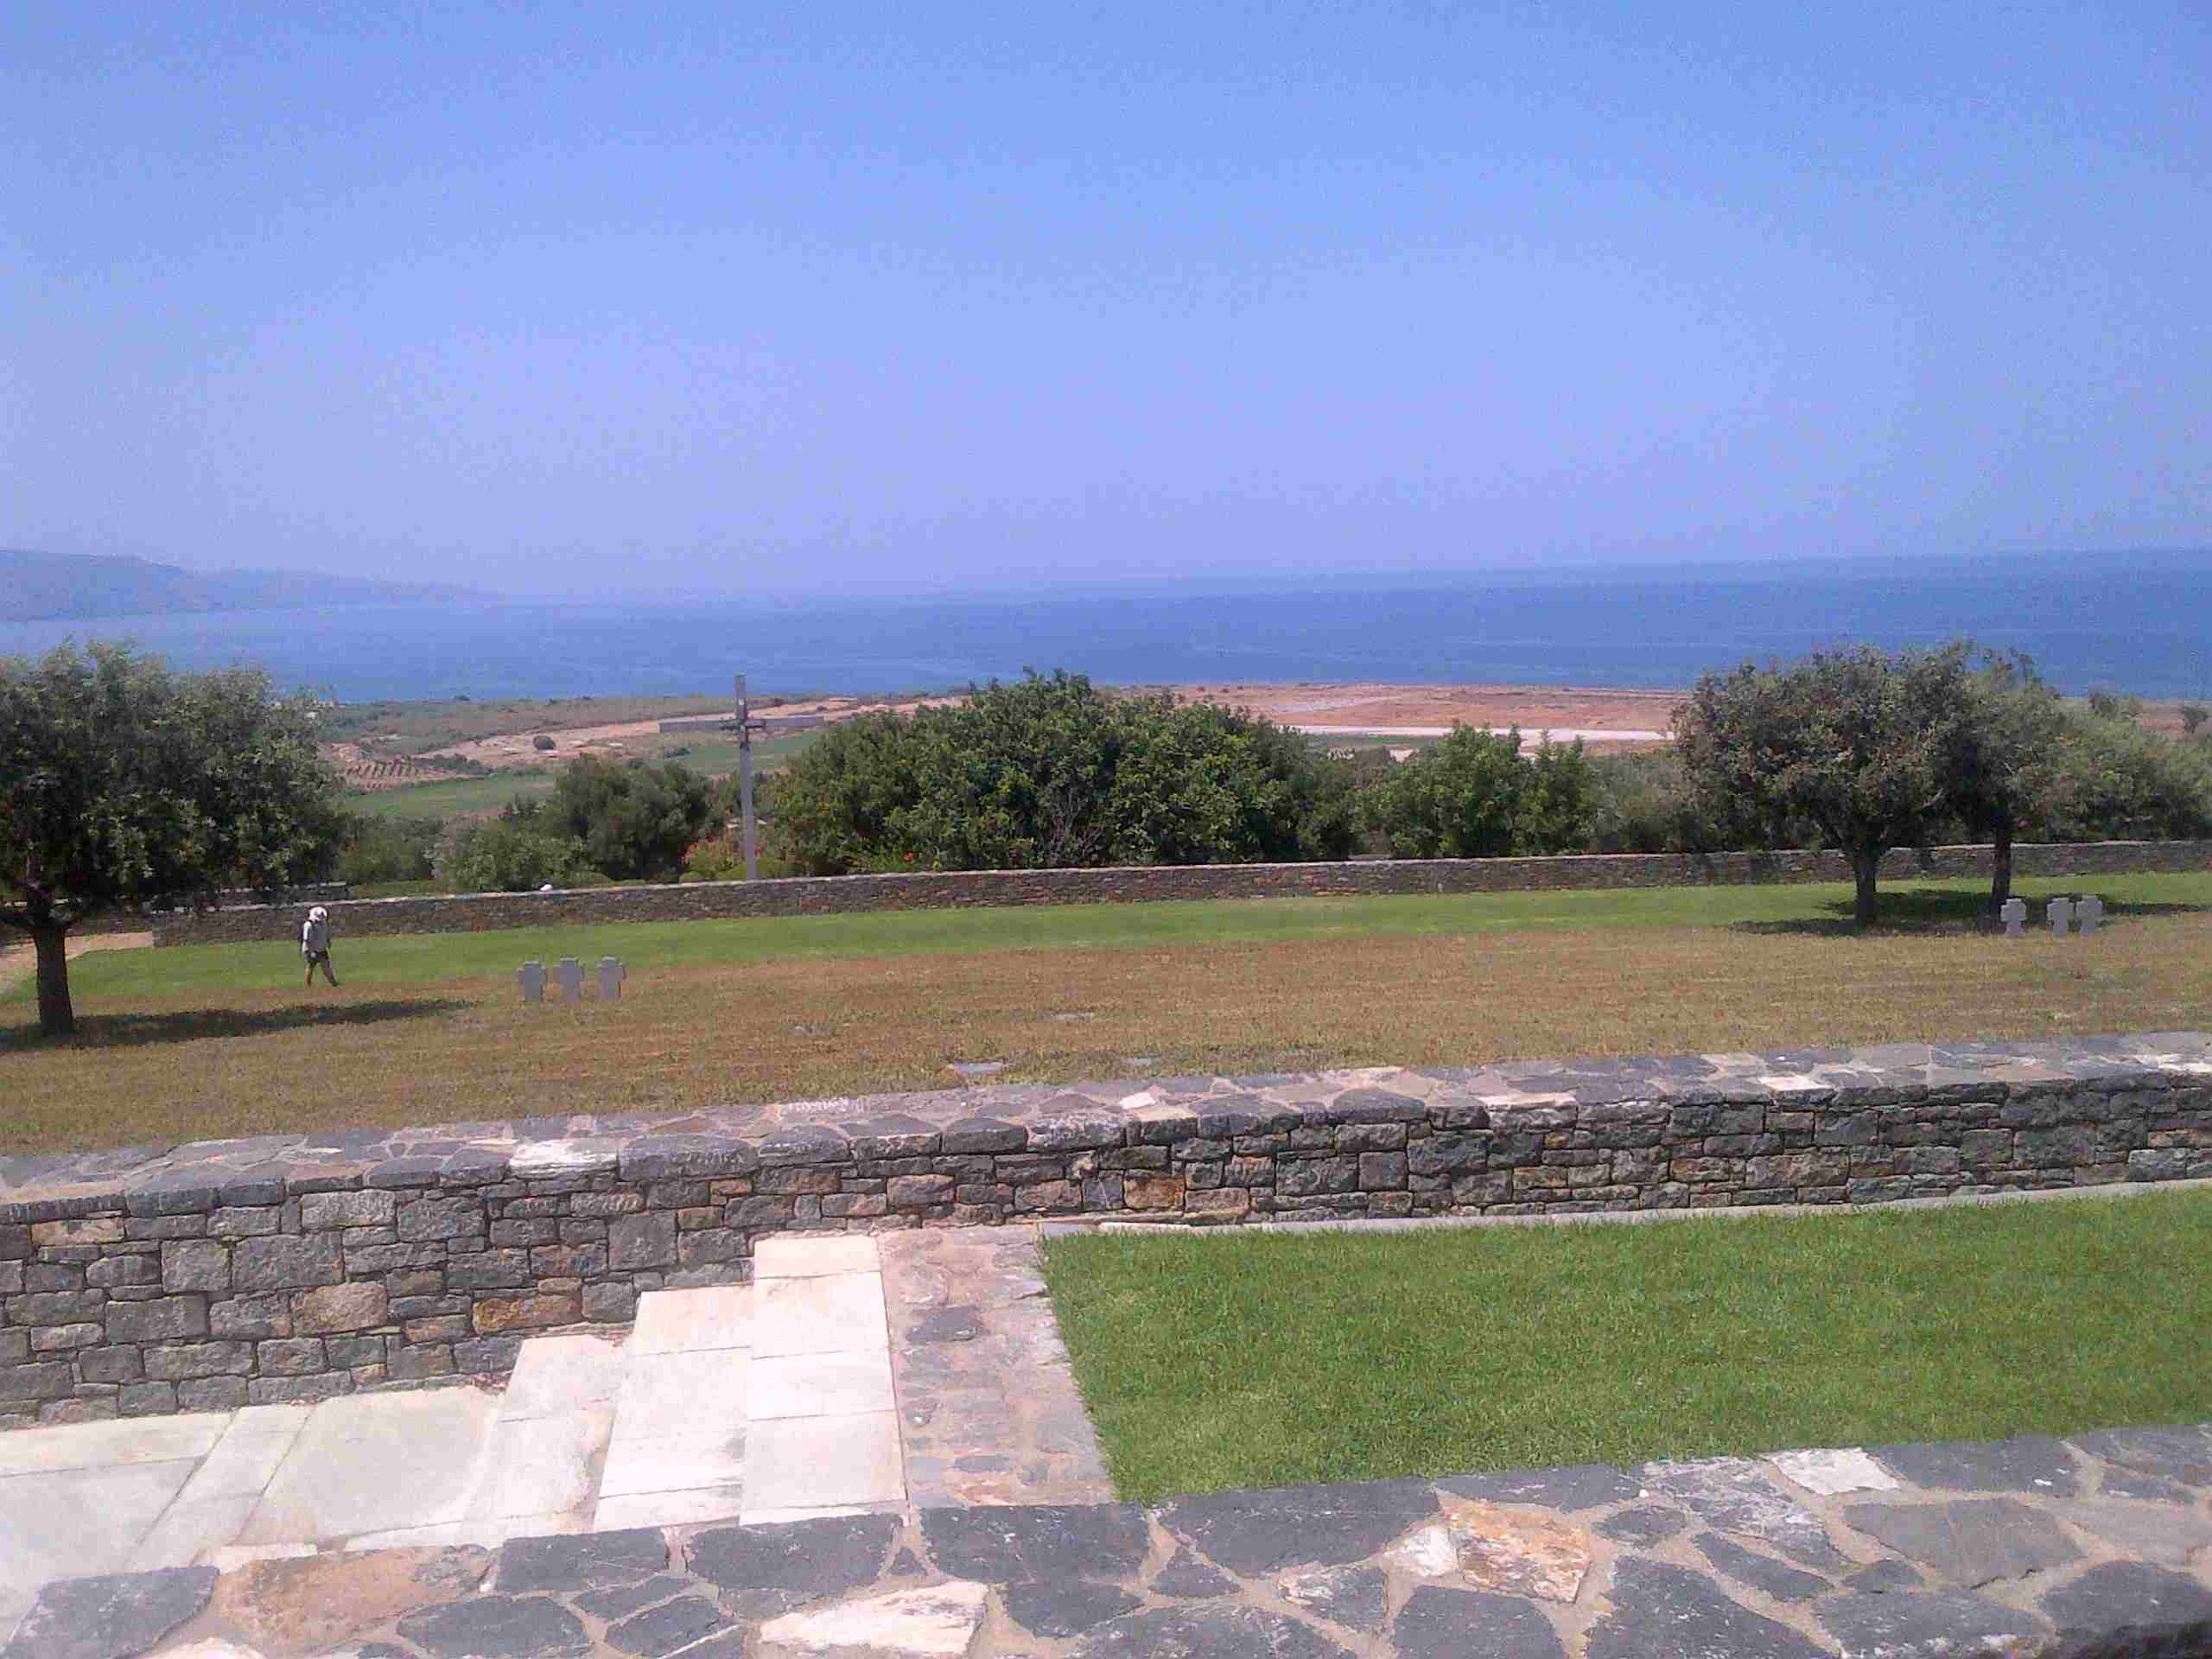
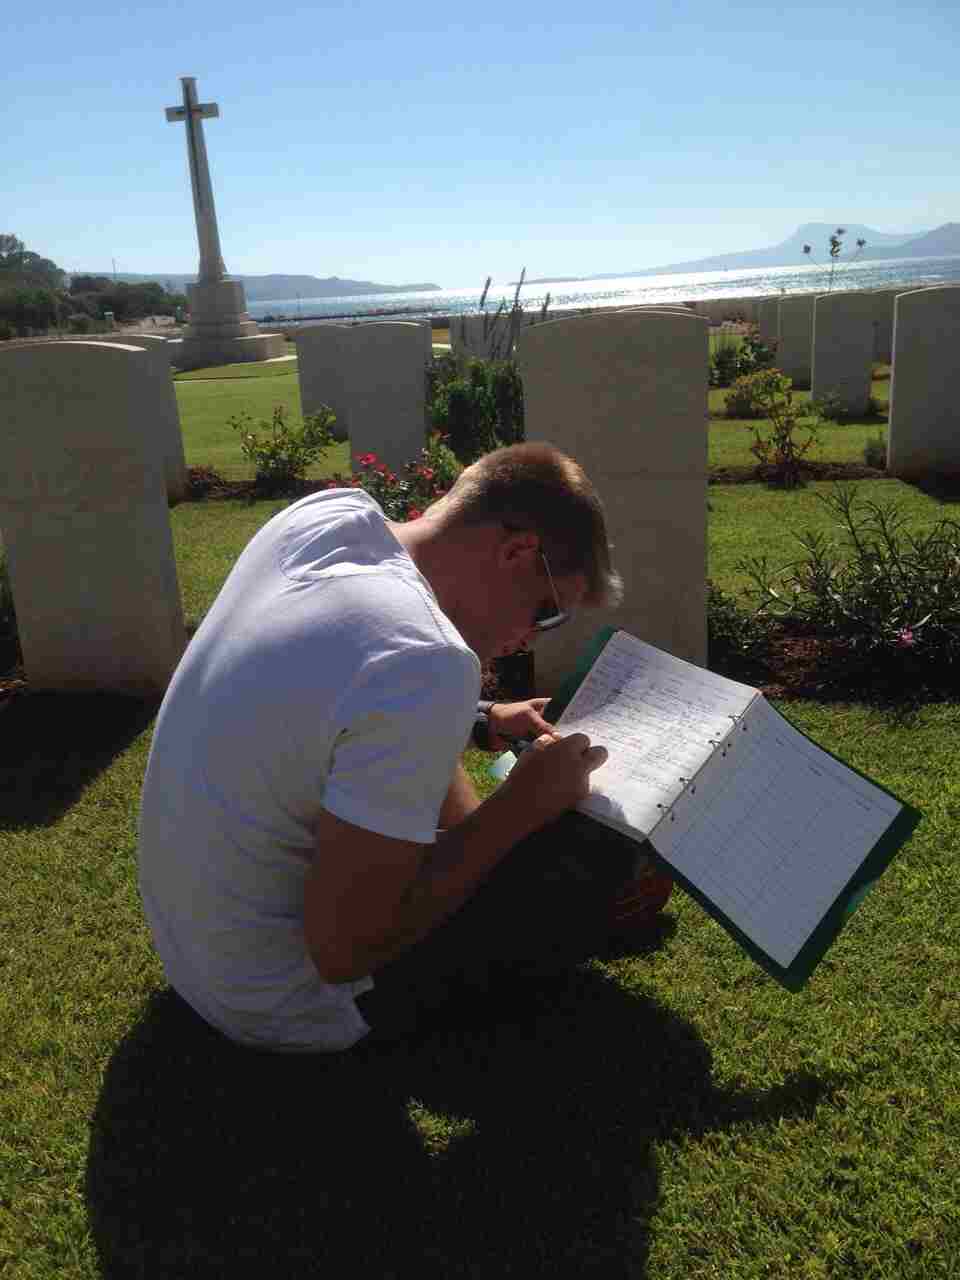
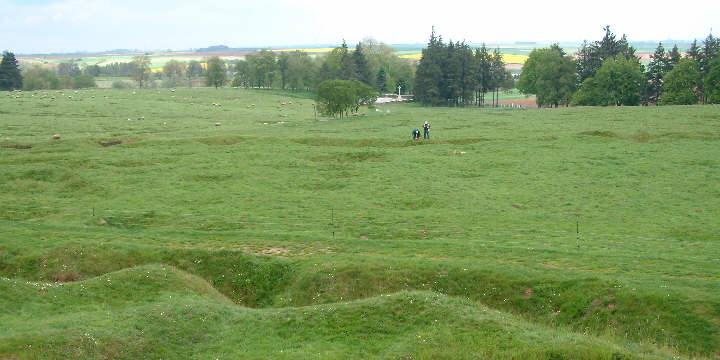
If you would like to visit the Somme and see the story of the artillery on the Somme join Gunner Tours on the Somme  Centenary tour. info@gunnertours.com

Somme_centenary


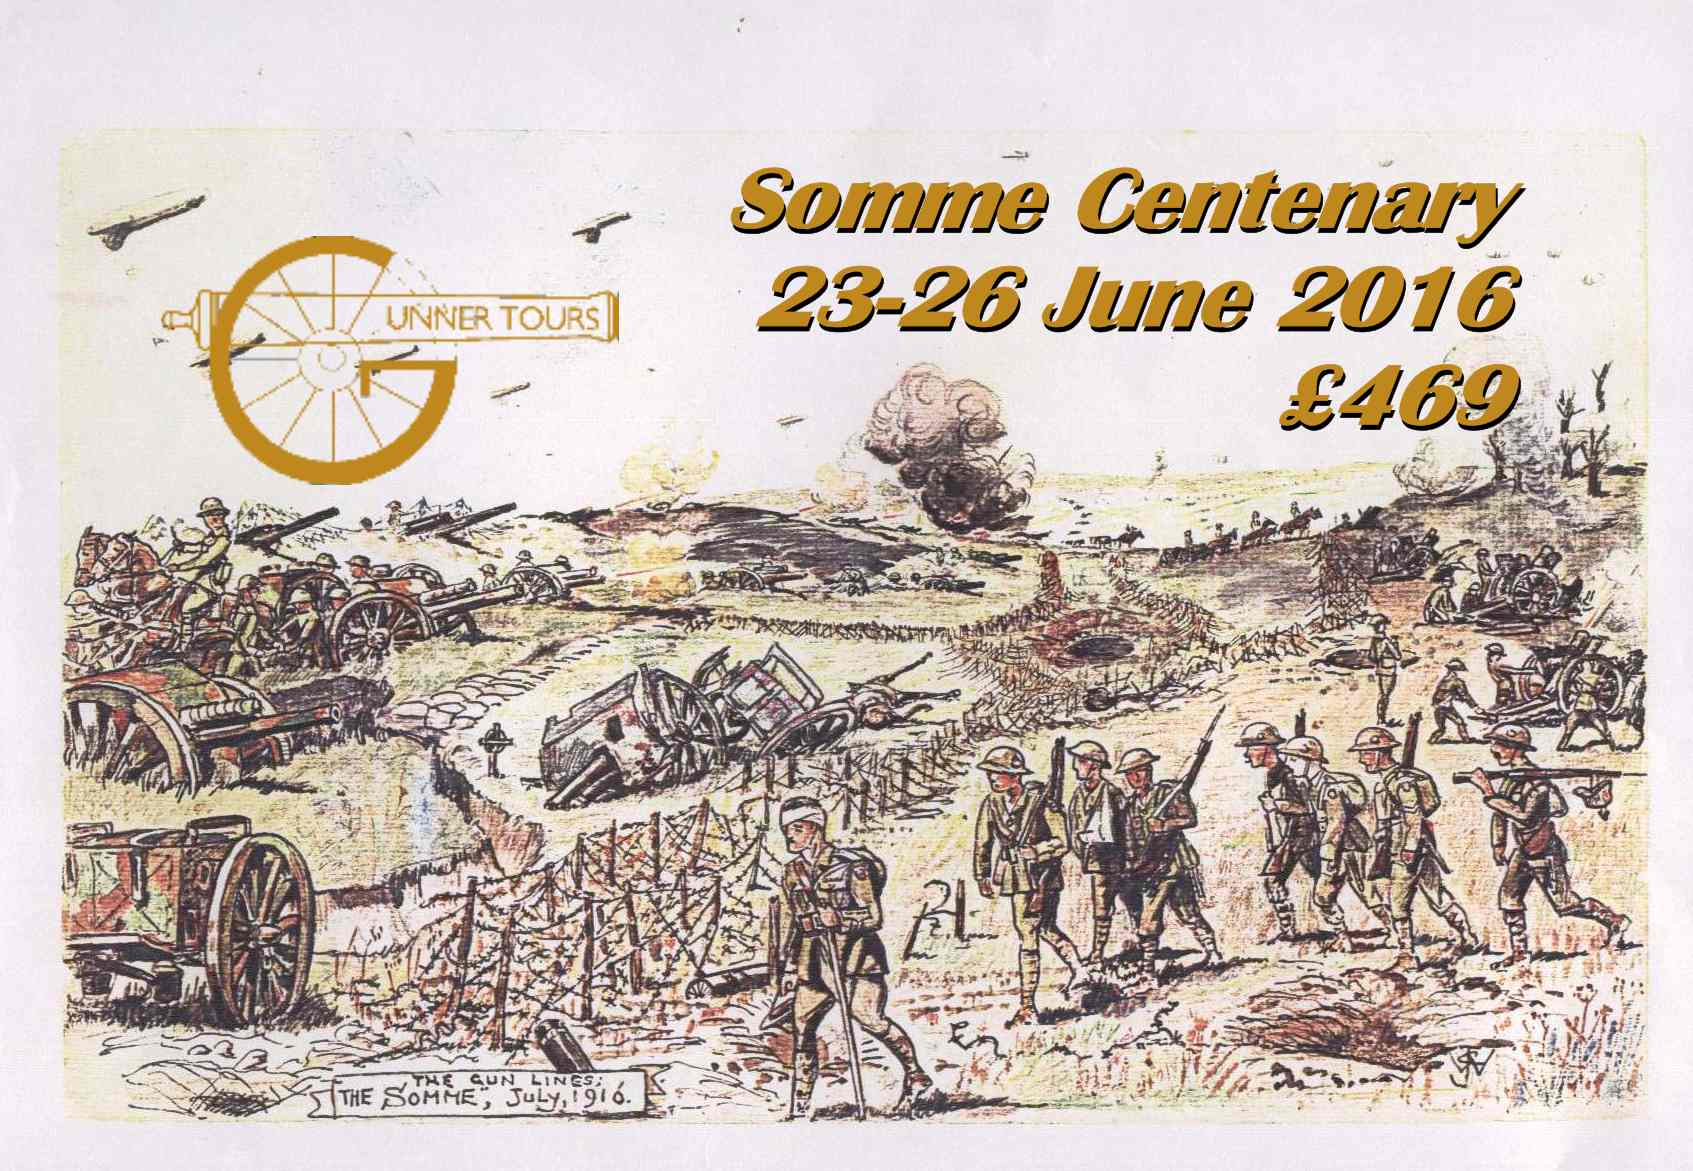
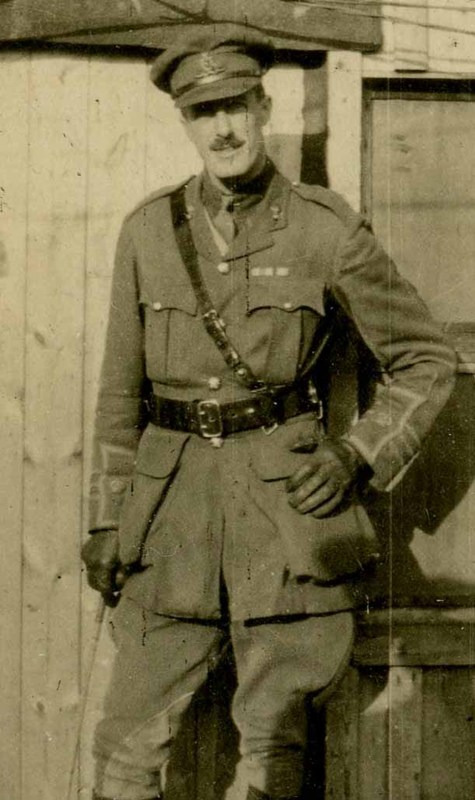
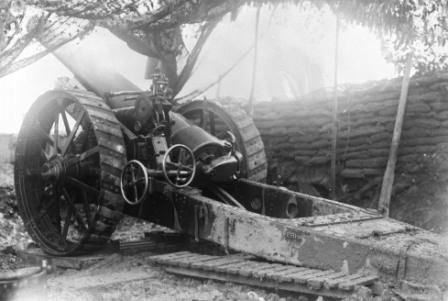
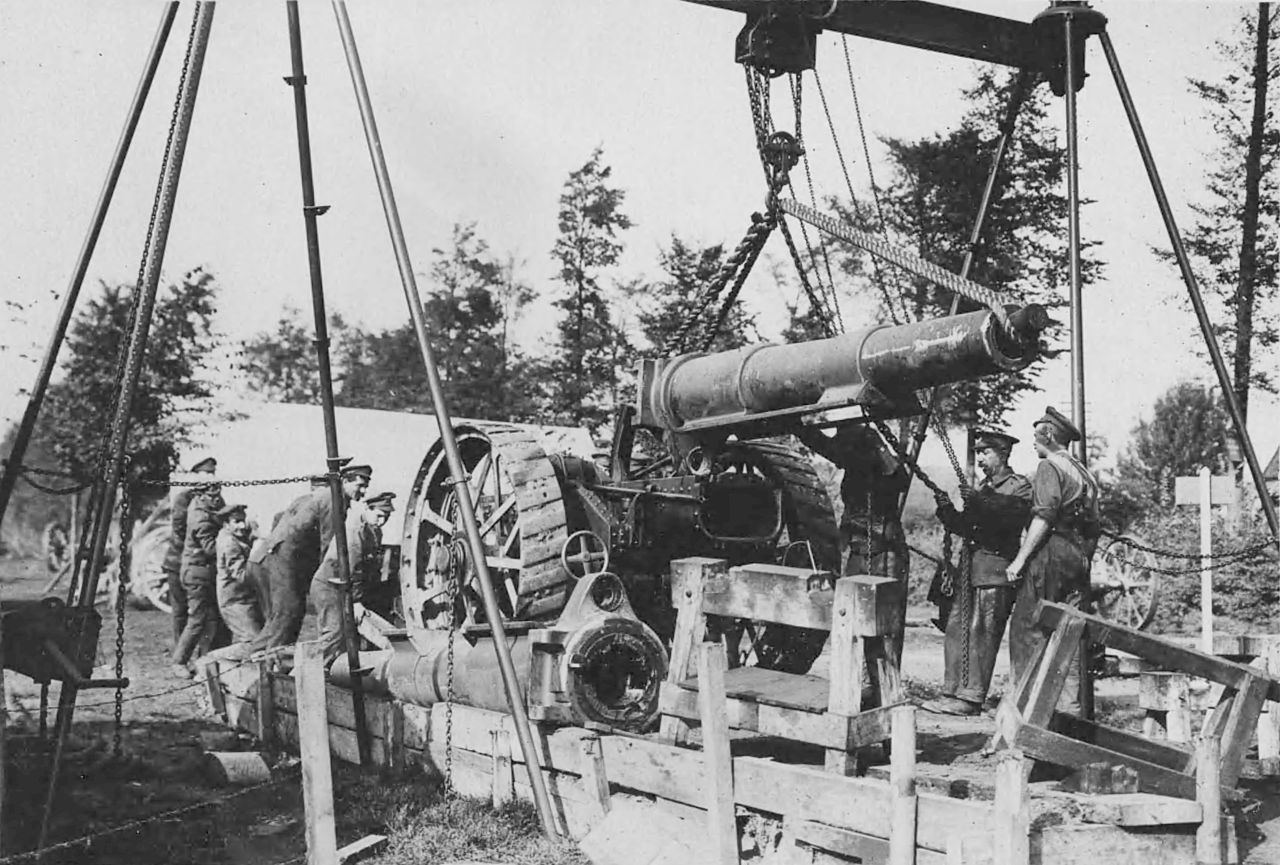
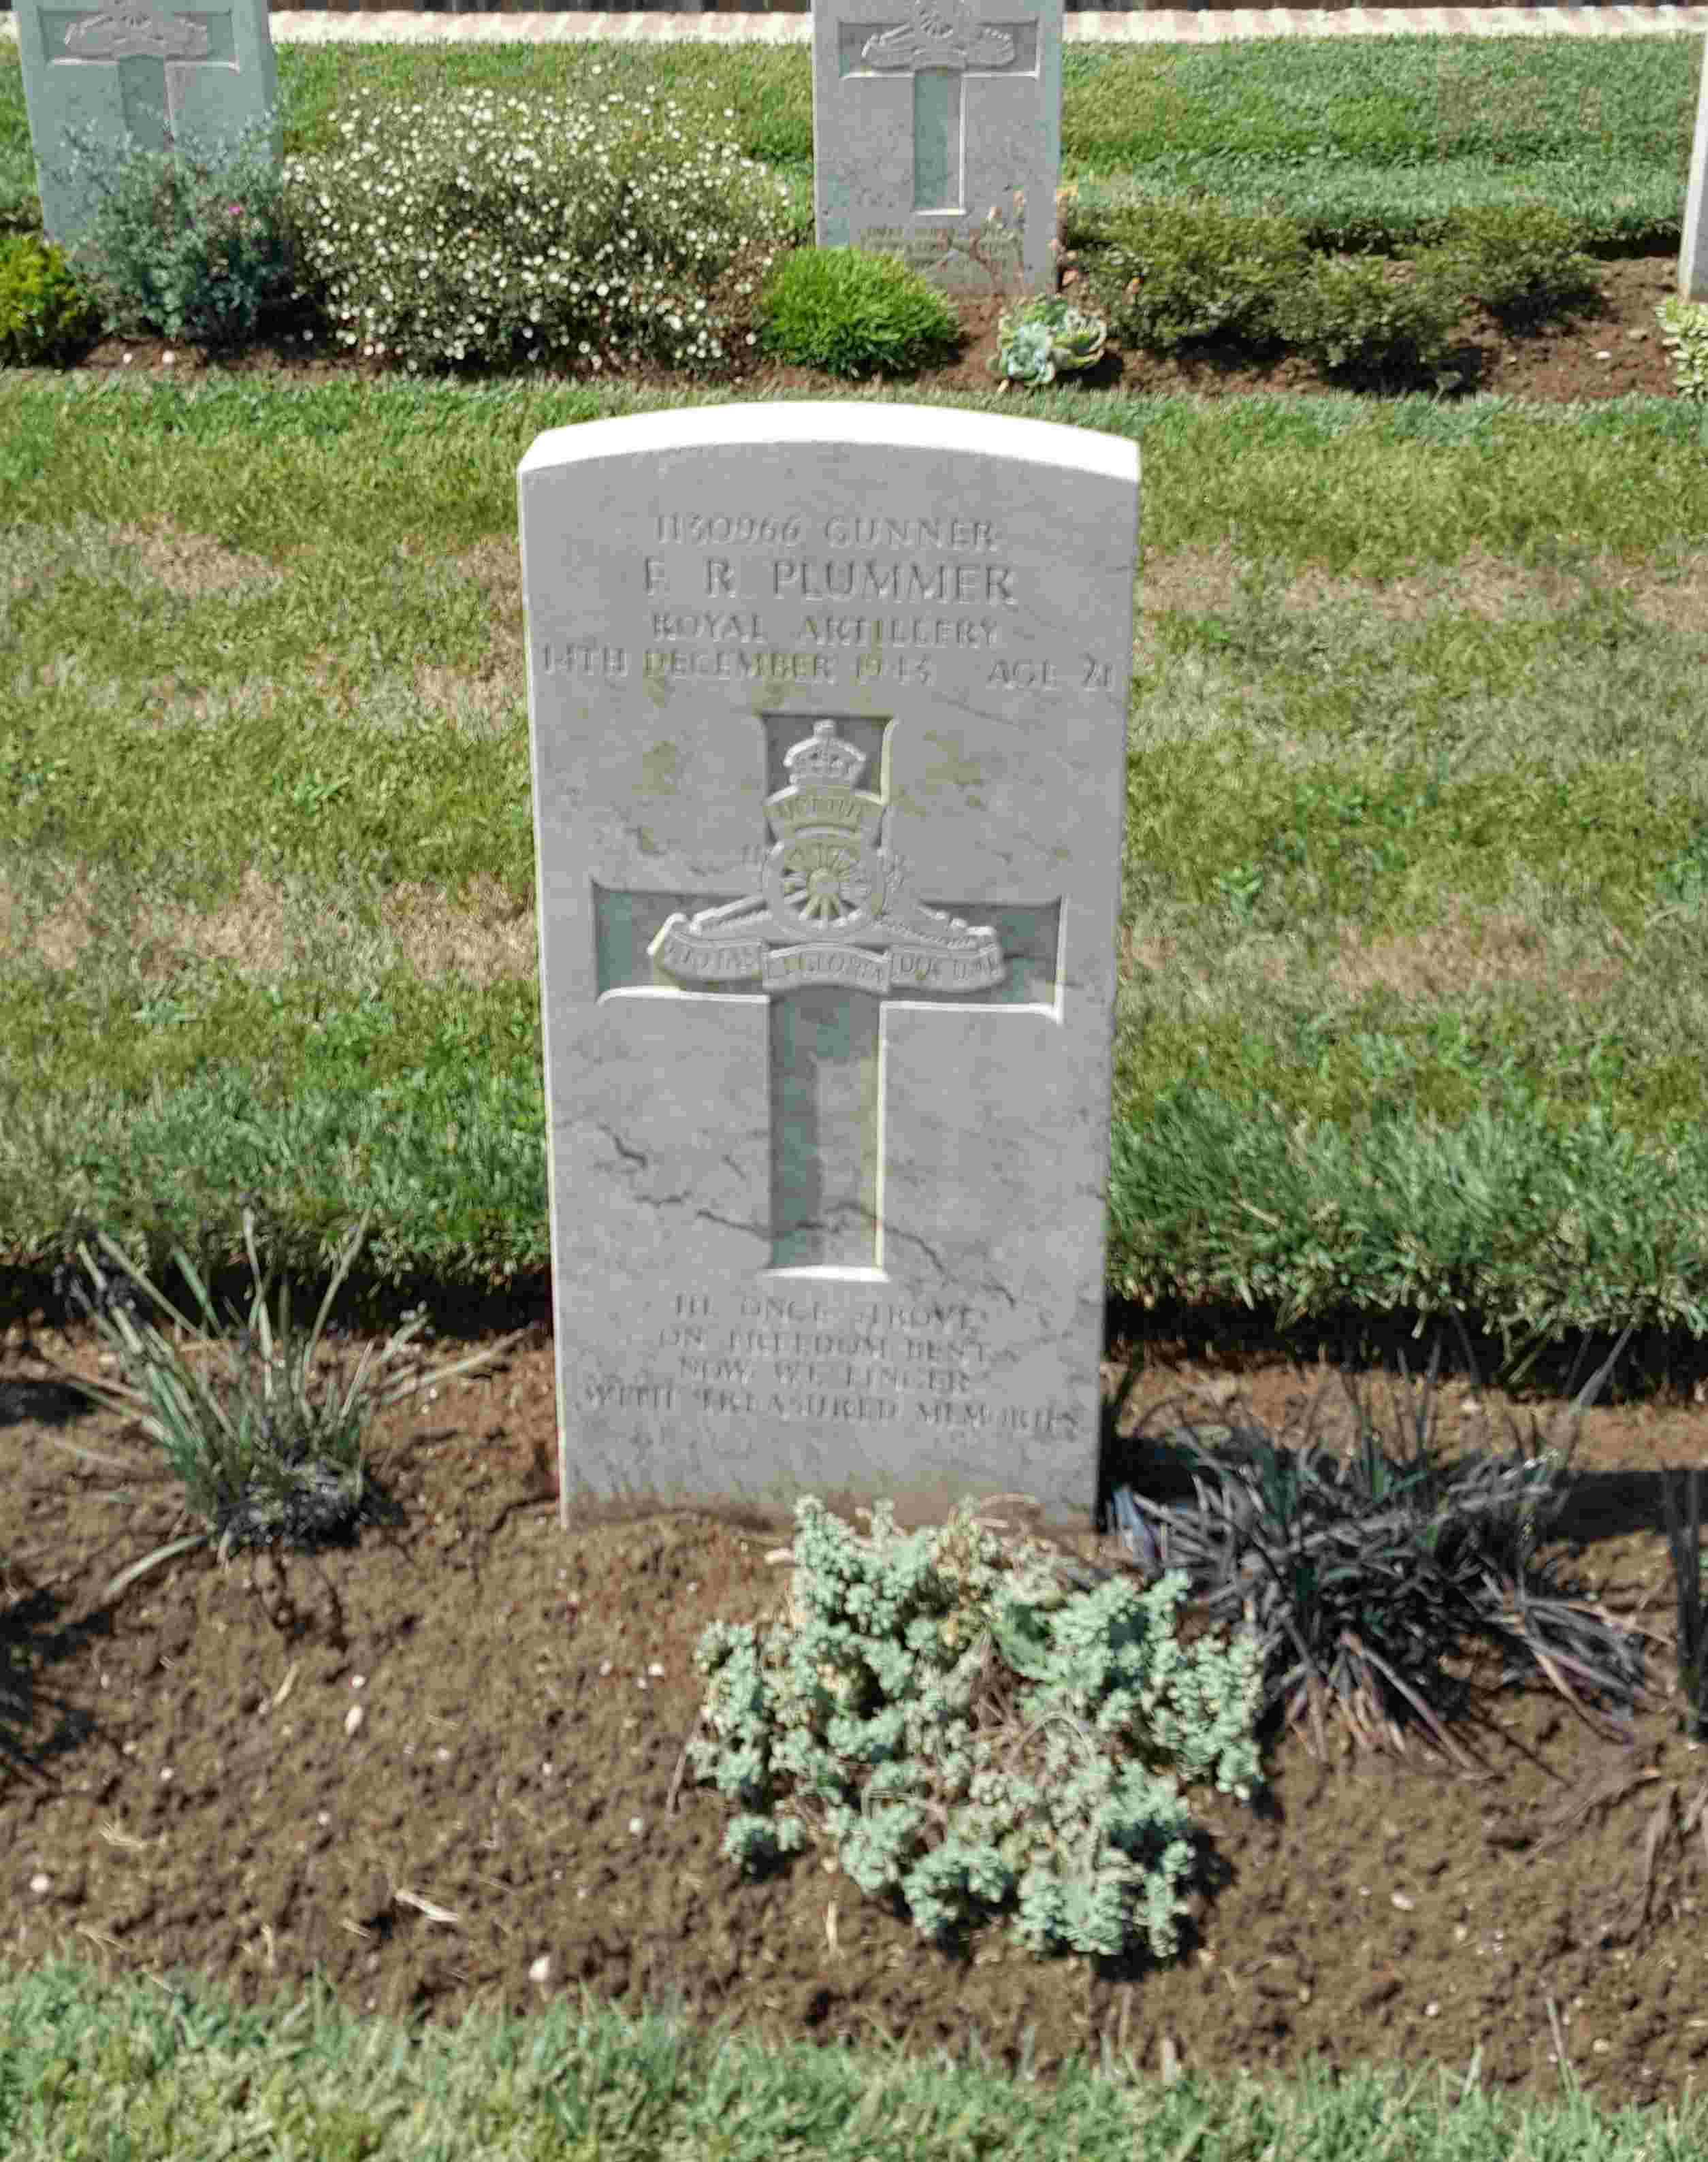
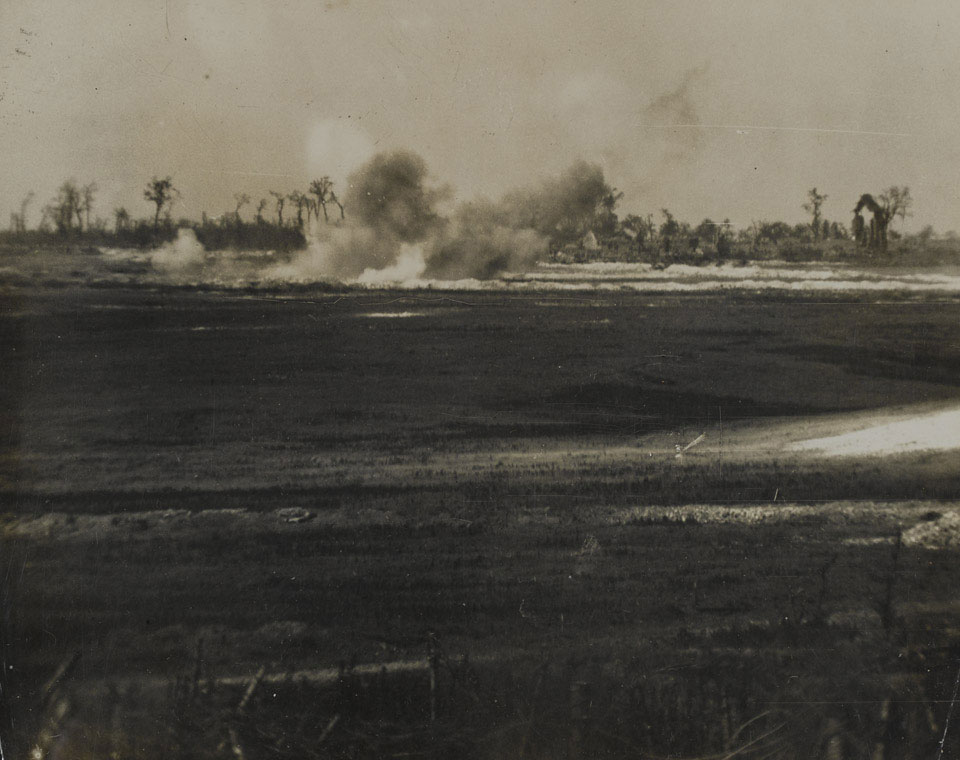
The centenary of the battle of the Somme, which took place between June-and November 1916, has a special significance in Gunner history. This was the largest battle fought by the British army, costing 400,000 casualties. While public interest in the battle centres on the infantry who went 'over the top' on the first of July, the Gunner battle started a week earlier with the opening bombardment by the largest number of guns assembled.

The Somme was essentially an artillery battle, with the guns the only weapons capable of clearing wire, destroying and neutralising defences and artillery. This was an awesome responsibility, and the success or failure of the infantry was down to the effectiveness of the fire plan. The story of how the Royal Artillery learned during the campaign is one of successful innovation, and a matter of pride to Gunners.

It is also a human story. We will see where Gunner staff work made a difference; where Gunners went over the top with the infantry and where . Gunners worked to the point of exhaustion in the service of the guns.

This tour will tell this story at the places where this largest artillery battle took place 100 years after the opening barrage was fired.

 Notes:

(1) Brigadier-General Sir James E. Edmonds; Military Operations: France and Belgium, 1916, Volume I: Sir Douglas Haig’s Command to the 1st July: Battle of the Somme,, 1932

(2) Strong P and Marble S, Artillery in the Great War

(3) John Laffin;s polemic “Butchers and Bunglers of World War one” is the publication which is most associated with the term.

(4) Dixon N F, On The Psychology Of Military Incompetence, Basic Books, 1976

(5) Fourth Army Tactical Notes

From the Beachhead to Belsen: The Humanitarian Mission of 113 Light AA Regiment RA

Belsen-survivors3What did you do in the war daddy? Gunners from 113 Light Anti Aircraft Regiment could truthfully answer – “We helped to save tens of thousands of lives.”

113 Light AA Regiment Royal Artillery was originally raised as 2/5th Battalion the Durham Light Infantry, converted to a Searchlight battalion RE before the Second World war, and then to a Light AA Regiment in 1941.

In June 1944 it landed in Normandy as part of 100 AA Brigade and defended the bridges over the Caen Canal, including Pegasus bridge and the gun areas north of Caen. In September 1944 it took part in Operation Market Garden, taking over responsibility for defending the Bridge at Nijmegen. After a cold winter in the Netherlands and Belgium it provided air defence for the bridge over the Rhine at Xanten.

2015-09-18 09.50.09 2015-09-18 10.11.09 2015-09-18 14.01.18By 16th April 1945 German air effort was weakening and the Regiment came out of action into a concentration area near Haldern East of the Rhine. The Allied spearheads were rapidly advancing through Germansy and the Red Army had surrounded Berlin. It might reasonably expect to have little to do until demobilised. 113 LAA the Regiment’s service was not untypical of any Light AA Regiment It had done its bit.

But things changed with the orders the next day to move to administration duties at Belsen Concentration Camp (42 miles North of Hannover) under command 10 Garrison, taking over from 63 Anti tank Regiment.

Belson .1Captain Pares, the Adjutant of 113 LAA wrote the following:-
“On 12 April 1945 following the break-through of Second Army after the Rhine crossing, the German Military Commander at Bergen-Belsen (Chief of Staff 1 Para Army) approached 8 Corps with a view to negotiating a truce and avoiding a battle in the area of Belsen Concentration Camp.

In occupation of the area were 800 Wehrmacht, 1,500 Hungarians with their wives and families, and certain SS Prison Guards. In the concentration camp were known to be 45-55,000 internees of whom a very large number were reported to be suffering from Typhus, Typhoid, Tuberculosis and Gastro-Enteritis. The electricity and water supply had failed: there was no bread and very little food.

The camp area consisted of the concentration camp and ½ mile North a large tank training centre with very extensive barrack buildings, a small PW camp attached in which were 800 Russians, and a military hospital.

In the interests of our own troops and the internees, and from the point of view of preventing, the spread of disease, a truce was granted on the following terms.

The German Military Authorities were to erect notices and white flags at all the road entrances, marked ‘Danger – Typhus’ on one side and ‘End of Typhus Area’ on the reverse, with a disarmed German post at each notice. German and Hungarian troops would remain at their posts armed, wearing a white arm-band on the left sleeve. The Hungarians would remain indefinitely and were placed at the disposal of the British for such duties as might be required. The Wehrmacht were to be released within 6 days and conveyed back to the German lines with their arms, equipment and vehicles. SS Guard personnel were to be removed by 1200 hrs 13 April and any remaining to be treated as PWs. SS Admin personnel would (if the Wehrmacht could prevent them running away) remain at their posts, carry on with their duties, and hand over records. When their services could be dispensed with, their disposal was left by the Wehrmacht to the British authorities, i.e. the Wehrmacht ‘sold’ the S.S.

About 50% of the inmates were in need of immediate hospital treatment. All of them had been without any food for 7 days, and prior to that living on the normal concentration camp semi-starvation scale of diet.

There were about 10,000 typhus-infected bodies, mostly naked and many in an advanced stage of decomposition, lying around the camp, both inside and outside the huts, which required immediate burial; and the daily death rate was 4/500.

The living conditions were appalling – people were sleeping 3 in a bed, mainly treble-bunk beds, and huts which would normally accommodate 60 were housing 600. There were no sanitary arrangements, and both inside and outside the huts was an almost continuous carpet of dead bodies, human excreta, rags, and filth.

There were some 50,000 persons to supply and feed, but the cooking facilities were totally inadequate. There were 5 cookhouses of varying size equipped with a number of large boilers, and the only containers available to distribute the food were a few large dustbins A large proportion of the occupants were bed-ridden, and many were incapable even of feeding themselves.

The inmates had lost all self-respect and been degraded morally to the level of beasts. Their clothes were in rags and teeming with lice; they had no eating utensils or plates, and at the time of the food distribution they behaved more like ravenous wolves than human beings.

There were 49 SS male and 26 female prison guards under close arrest and a Wehrmacht Hospital with 2,000 sick and convalescent German soldiers.

The electricity which came from Celle was cut off and the wiring sabotaged; the water supply which depended on it for pumping had consequently failed.

To prevent spread of Typhus and the other diseases it was necessary to keep all the internees within the Camp, yet the Hungarian guards were grossly lax and made little effort to prevent them from filtering out.”  More of Captain Peres Account here.

Over the next month 113 LAA took over the Wehrmacht barracks at Bergan-Belsen, which would become Bergen-Hohne Camp.   The typhus epidemic meant that the the concentration camp inmates could not be allowed to leave. They built cook-houses, buried the dead transferred the living to clean accommodation, guarded the SS men, and disarmed the Hungarians. Their soldiers can be seen in the newsreel shots. The War Diary entry for 26th April comments that over 8,000 bodies had been buried since their arrival in the camp.  The SS Guards interviewed for the newsreel seem to have lost the  SS Runes from their uniforms. These seem to have fallen into possession of the Gunners.

Victory march1On VE Day 9th May the Regiment paraded through Hohne Camp,. Starling at the corner of the Belsen Concentration Camp past British, US Soviet and US Senior officers who took the Victory march 3salute to the sports pitch where the 54 guns of the Regiment fired ten rounds single shot and ten rounds automatic to celebrate victory and peace in Europe.

At this point their work was only half complete. The last huts of Belsen Camp were burned with as short ceremony on 23 May 1945.

Belson 2
Last hut burning May 1945

After the traumatic work, 113 LAA Regiment were given ten days leave beside the Baltic and issued 6000 bottles of beer.

A tour for Spirit of Remembrance Image1baldwin battlefields logo

Gunner Tours 2016 Programme

The biggest commemorative battlefield event in 2016 will be the Centenary of the Battle of the Somme. Our tour commemorates the start of the battle, which was the opening barrage  24 June.  We are also offering a proven Normandy and West Front tour that tells the Gunner side of these

The Somme Centenary, 23-26 June 2015 £469

Somme_centenaryThe Battle of the Somme began on 24 June 1916 – known as U Day. It was a dull day, low cloud and heavy rain, following thunderstorms the day before.It is a myth, showing much misunderstanding of a First World War battle, to believe it began with the infantry attack on 1 July.

Picture 1 shrapnel_for_one Divisonal attack
This wall is built from 7,000 shrapnel shell cases fired by 18-pounder field guns. This is how many shells were fired in support of a single division in an attack in August 1916.

The Battle of the Somme is an iconic event in British memory of the First World War. But the Gunner side of the story tends to be overlooked. The Gunner Tout top the battlefield will visit places ignored by many visitors and tell stories not often told. This is the story of the Royal Artillery in the Somme battles of 1916.

The main public interest in the battle is the staggering losses suffered by the volunteers of Kitchener’s Army on the first day. As one “Two years in the making. Ten minutes in the destroying. That was our history.”- the description of one Pals battalion.

Picture 2 753px-Hawthorn_Ridge_mine_1_July_1916
This mine explosion, captured on film was followed up by an infantry attack supported by B Battery RHA, who lost two men from the FOO party whose job it was to lay line across no mans land on 1st July 1916.

The Gunners don’t come out too well from the short version of the battle of the Somme. The largest ever concentration of British Artillery firing the largest ever barrage was supposed to cut the barbed wire in front of the German trenches, destroy German bunkers, defences and guns and keep the Germans heads down while the infantry advanced. But, over about eight out of thirteen miles of the front line attacked this did not happen, resulting in tragedy. We will show you why, and something of the efforts and sacrifices made by the Gunners to deliver the impossible,.

Picture 3 Haig_map extract
A section of a map showing the gun positions. The 15“ BL Guns are shown as green squares.

The tour has been based on research inspired by a project started by the late Will Townsend. It is based on research from original documents in the National Archives, Firepower Archives, the Historial de la Grande Guerre Château de Péronne and RUSI. We have brought together anecdotes and stories from a wide range of published and unpublished accounts by and about Gunners. We will have fire plans drawn by the future Field Marshall Lord AlanBrooke.

Picture 4 BL15InchHowitzerAndShell
Around half of the shells from these 15 “ guns did not go off, but even dud one ton projectile would collapse a German dugout.

We will look at the French and German artillery too. Few Britons are aware of how closely the British and French artillery worked. Nor is the German experience well known- even thought the most enduring German memory of the Somme was probably how their trenches were stamped into the ground by the British guns.

We are going to travel the week before the national commemoration because that is when the battle started for the Gunners, and we will have a better opportunity to get around the battlefield.

The tour is four days and three nights and for more information follow this link.

D Day Beaches and Landing Sites, 2-5 September 2015 £389
dday_and landing grounds

A visit over a long weekend to the D Day beaches and landing sites. There is a gunner story on each beach and landing site. We will see the strength of the German defences and see where and how the Gunners helped to overcome them. We will explore the stories of the Gunners who took part, the planners, commanders and soldiers, heroes, poets and those who fell.
£389 per person sharing single supplement £75
Details Here

BEF Western Front 10-14 November 2016 £469

BEF Western frontFive days and four nights, covering the sites of the major battles of the British Expeditionary Force from Mons in 1914 to victory in 1918 over Remembrance day 11 November.
£469 per person sharing single supplement £110
Details here

How an Overlooked Rebellion, and the last English battle led to the Royal Artillery

2015 has been a big year for centennial anniversaries; 100th of Gallipoli, 200th of Waterloo and the 600th of Agincourt among others. Yet one of the most significant for the history of the Gunners has been largely overlooked.

Battle_of_Sheriffmuir12-13th November were the 300th anniversaries of two battles at Preston (12-Nov 1715) in Lancashire and Sherrifmuir in Scotland (13 Nov 1715) that decided the fate of the 1715 Jacobite Rebellion. On the death of Queen Anne in 1714 the crown of Great Britain passed to her second cousin George Elector of Hannover, a protestant rather than to her half-brother James, a catholic, exiled in France.

On 8th September John Erskine, Earl of Mar raised the standard at Braemar in the name of King James VIII of Scotland and III of England. By 22nd October his army of nearly 20,000 men had captured most of Scotland North of the Firth of Forth. Mar was indecisive and lacked any experience of campaigning. He hesitated and gave the Hanoverians under John Campbell 2nd Duke of Argyll time to increase the strength of his forces. The armies met at Sherrifmuir North East of Stirling on the 13th November 1715. Despite Mar outnumbering Argyll by perhaps as much as three to one the battle was inconclusive.

Preston1715aMeanwhile, in England Jacobite supporters in the West of England and Northumberland prepared to rise for the House of Stuart, led by three peers and six MPs. The government arrested the leaders and deployed troops to Bristol Plymouth and Southampton to prevent these ports falling into Jacobite hands. The rising ion Northumberland did take place, supported by several peers, and joining forces with a force of Scottish Jacobites from the Borders moved into Lancashire, where they hoped to find support. Government troops caught up with this force in Lancashire and attacked them around the town of Preston on 12th November, with the main attack along Fishergate. The Jacobites had the best of the first day, inflicting heavy losses on the government troops, in what is probably the last battle in England. However, after reinforcements arrived, the majority of the Jacobite army surrendered.

Artillery did not play a significant role in either battle. At the time, there was no peacetime artillery organisation, and an artillery train was organised for each campaign from the gunners in the Tower. It took so long to find men to man the artillery train that the rebellion was over before the train was ready to march. This was a dangerous weakness and the Duke of Marlborough, obtained a Royal Warrant to form a permanent regiment. Accordingly, the Royal Regiment of Artillery was created in 1716.

Both battlefields are accessible. Sherrifmuir is still moorland. Although Preston has grown and sprawled over the centuries, the road layout remains the same. If you want to visit either, contact us.

More information

https://en.wikipedia.org/wiki/Battle_of_Sheriffmuir
https://en.wikipedia.org/wiki/Battle_of_Preston_(1715)

Books
Stuart Reid: Sheriffmuir 1715
Daniel Szechi 1715: The Great Jacobite Rebellion
Jonathan Oates, The Last Battle on English Soil, Preston 1715

Bragg’s Buttocks – the only Gunner Nobel Laureate

100 years ago this autumn a visit to the lavatory by a Gunner Subaltern led to a breakthrough in military science. Archimedes had his inspiration sitting in the bath. Lieutenant William Lawrence Bragg, while sitting on the lavatory .

Captain William Lawrence Bragg RHA

In 1915 William Lawrence Bragg was a 25 year old subaltern borne in Adelaide Australia. He had joined the Territorial Army while a Cambridge under graduate. when war broke out was a Second Lieutenant in the Leicestershire RHA. He was a brilliant mathematician and physicist who discovered in 1912 what is known as Bragg’s law of X-ray diffraction; the basis for the determination of crystal structure. In September 1915 he was awarded the 1915 Nobel Prize for Science, jointly with his father, William Henry Bragg. He is still the youngest ever recipient of the prize.

In 1915 Bragg was working on a key problem facing the artillery on the Western front. How to locate enemy artillery. One of the most promising technologies was to use the sound of the gun. But it was not easy to pick out the sound of the gun firing from the shock wave of the shell breaking the sound barrier, the crack from the thump. Nor did they know how much of the energy generated by a gun firing was transmitted as low-frequency sounds, too low to be audible.

The breakthrough came when Bragg was in the lavatory in his billet in Flanders. This was a a small room, with a door, but no window. When the door was shut, the only connection to the outside world was the pipe leading from under his toilet seat. There was a British six-inch gun about 400 metres away. When it fired, his bare bottom was actually lifted off the toilet seat by the inaudible infra-sound energy, even though he could often hear nothing at all. So now he knew there was enormous energy in the inaudible infra-sound.

It took a second eureka moment to solve the problem. Corporal W S Tucker, another physicist in Bragg’s team was accommodated in a tar paper hut. There were a couple of holes near his bed space. He noticed that even on a day with no wind or sound, annoying puffs of air would blow onto his face. He and Bragg compared notes and they deduced that these were the result of low frequency sound from artillery. He made a detector out of a wooden ammunition box, which became known as the Tucker microphone.

This led to the development of microphones to record the inaudible frequencies making it possible to develop sound ranging as a way to locate enemy guns to within 50metres. The same technology, applied in a slightly different way made it possible to measure the the muzzle velocity of individual guns, which made it easier to predict fire. Together these technique was used to devastating effect from 1917 onwards. For example at Cambrai 20 November 1917 a barrage of 1000 guns fired a predicted fire plan and hitting enemy guns located by sound alone. Bragg shared the results of his work with his father. Bragg senior was working for the Admiralty on acoustic detection and the result was ASDIC, an echo locating system to detect submerged submarines.

Bragg ended the war with an OBE, MC and three mentions in dispatches. He went on to have a very distinguished scientific career, including the announcement of the discovery of DNA. Bragg is probably the only serving soldier to receive the Nobel prize for Science.

http://www.abc.net.au/science/articles/2015/03/10/4188332.htmhttp://www.europeana1914-1918.eu/en/contributions/18653
https://en.wikipedia.org/wiki/Sound_ranging

www.gunnertours.com

gunner tours logo white on brown

Ctesiphon – the Turning Point in the 1915 Mesopotamia Expedition

162424
Camp of 1/5th Hampshire Howitzer Battery at Makina Masus near Basra, 1915 (NAM. 1987-01-70-42)

This photograph in the National Army Museum Collection shows the men of the 1/5th Hampshire Howitzer battery in Mesopotamia, modern Iraq in 1915. It was a Territorial unit, with many men from the Isle of Wight. Around half of the battery and three other batteries from the Regular Xth Field Brigade which served alongside them, would die during the war. This November is the centenary of the fateful events which lead to these units being doomed to suffer some of the highest proportional losses of any Gunner units losses in the Great War.

8700399030_58b1be8d1e_o
Turkish Prisoners

The 1915 campaign in Mesopotamia is over-shadowed by the Gallipoli expedition. After the Ottoman (Turkish) Empire joined the war on the side of Central Powers the British send a small expeditionary force “Indian force D” based on the 6th (Poona) Indian Infantry Division to secure the oil refinery at Abadan, important for fuel oil for the Royal Navy. In addition to the 1/5th Hampshire Howitzer battery, the artillery included the Xth Brigade Royal Field Artillery, (63,76 and 83 batteries) The 1st Indian Mountain Brigade, 23rd and 30th Batteries),  a Territorial Army unit and S Battery RHA

Meso-WW1-2The Mesopotamian campaign started well and by April 1915 had secured its limited objectives. After landing at Fao on the 6th November 1914, the expeditionary force defeated the Ottoman defenders in battles for Basra and Qurna in 1914. At the battle of Shaiba 12-14 April 1915, the British defeated an Ottoman attempt to evict them, the last time that they would threaten Basra. But what next?

Kut1915The strategists in London wanted to scale the operation back, in favour of the Western Front and other theatres. Those in India saw an opportunity to exploit success and capture Bagdad given the light, defeated opposition. This was to be achieved with the resources in theatre.

So on a logistic shoestring, General Townsend with a force of around 11,000 men of the 6th Poona Division was ordered to advance up the River Tigris, supported by river gunboats as far as Kut-al- Amara and , if possible Bagdad. On 29 September the British defeated the Ottomans south west of Kut after an night march and dawn attack.

Mespot Album - 4 - Mountain GunsBy 21 November the 6th Division was approaching the next line of Ottoman defences on a six mile front at Ctesiphon 26 Km South East of Bagdad. The Turkish commander had entrenched his troops across the valley. The British plan was to form four infantry columns and attach the Turk positions at dawn on the 22nd while a flying column manoeuvred around the right, Eastern flank. Much of the fire-power to support the attack was to be from gun boats on the River Tigris. The Turks concentrated their artillery fire on the gun boats and by the end of the 22nd each side had suffered close to 50% casualties in a very bloody battle. Both commanders ordered their men to withdraw. Townsend had only a few thousand unwounded men, not enough to capture and hold Bagdad, and thousands of wounded. He fell back to Meso-WW1-3Kut. The suffering of the wounded was pitiful. Townsend entrenched his men at Kut and waited for relief. The Turks brought up reinforcements, defeated relief efforts and in April 1916 Townsend and his Army surrendered. Prisoners of War were not well treated by the Turks and around half of the British and Indian soldiers who fell into their hands died in Mesopotamia or on a forced march to Anatolia or in the harsh conditions there.

Among them were the men of the 1/.5th Hampshire Howitzer Battery and the three batteries of the Xth Brigade RFA (63,76 and 82). The Commonwealth War Graves records lists 442 dead from these units, which had an establishment of around 800.

Two batteries of the current day 106 Regiment are based in Hampshire are continue the traditions of Hampshire volunteer artillerymen, even though 457 and 295 batteries draw on the traditions of the Hampshire Yeomanry. The regular batteries were reformed, but none survived the post WW2 reorganisations.

One other battery which took part as Force D is still in existence. The 23rd Peshawar Mountain battery (Frontier Force) was transferred to the army of Pakistan in 1947. https://en.wikipedia.org/wiki/23rd_Peshawar_Mountain_Battery_(Frontier_Force)

Camp of 1/5th Hampshire Howitzer Battery at Makina Masus near Basra, 1915.

Photograph, World War One, Mesopotamia (1914-1918), 1915.

1/5th Hampshire Howitzer Battery landed at Basra on 23 March 1915 and joined 6th Indian Division which had arrived in November 1914.

It fought in the Battle of Shaiba (April 1915) and took part in the advance towards Baghdad, including the Battle of Es Sinn, capture of Kut (September 1915) and Battle of Ctesiphon (November 1915). The battery was captured by the Turks following the British surrender at Kut in April 1916.

gunner tours logo white on brown

Captain Blackadder – A Gallant Scottish Gunner Officer

51CVAPG2VCLBlackadder goes Forth was the final series of the Blackadder BBC TV comedy programme. “The series placed the recurring characters of Blackadder, Baldrick and George in a trench in Flanders during World War I, and followed their various doomed attempts to escape from the trenches to avoid certain death under the misguided command of General Melchett.” The six programmes in this series were a satirical comedy set in the trenches of the Western Front. The characters were grotesque and funny, but the series ended with the poignant death of most of them in a hail of bullets in 1917, in slow motion with a final scene  cutting into a shot of a field of poppies.

Major R J Blackadder MC

This was the “Oh What Lovely War” version of the First World War, with a heavy handed moral slant, but it is also glorious comic satire. And being funny is one of the core values of the British Army.  Not the official Core Values of the British Army , which are  Courage, Discipline, Respect for others, Integrity, Loyalty and Selfless Commitment. All worthy ideals but they do not round out the character of the British Army. There are at least three other unofficial core values –“ Sense of Humour”; “BS Baffles Brains” and above all “Don’t get Caught” all come to mind.

post-9366-1215345788
This photograph advertised on e bay was captioned as showing soldiers from 152 Siege Battery RGA

There is a grain of truth in each episode of Blackadder Goes Forth. Starting with the existence of a Captain Blackadder in the Royal Field Artillery, as reported by the Radio Times in 2014.     The Imperial  War Museum (IWM) has a copy of his  diary.  This is listed as providing details of his service in 151 Siege Battery Royal Garrison Artillery. However, Peter Hart and Nigel Steel, both senior staff members of the IWM, record his unit as the 152 Battery – so I am not sure which is right. Both of these batteries were raised in Scotland, equipped with four 8″ Howitzers and deployed to France in August 1916.   Blackadder took part in the major battles from the 1916 battle of the Somme to the end of the war and his observations are a primary source for these battles. During this  time he rose from lieutenant to major and decorated for gallantry for organising the withdrawal of his guns , ammunition and stores under heavy fire.

The real Blackadder, with his accounting background looks a little more like Tim McInnerny’s  Captain Darling.

Canadian_Siege_Gun_Jan_1918._MIKAN_No._3395340
8″ Howitzer of the type used by 151 and 152nd Siege Batteries

However, the extracts from his diary from summer 1917 in the 3rd battle of Ypres make it clear that he was far from a pen pusher with a paper-clip fetish.

The road to the new position is a mere apology for a road and as we are taking down the first gun at night the road surface collapses and the gun sinks to its cradle. It has lain there for three days now and we have not been able to shift it — two caterpillars failed to move it. Now we have had heavy rain so it is very doubtful if we will get the guns to their new place at all. The result of three nights’ work is to get one gun into a hole and another off to a workshop. Tonight I am to get the gun out of the ditch and another to the workshop if possible. The Hun shelled the battery all afternoon, broke another limber and badly damaged the road  again. About midnight he again shelled and set off more ammunition but all the men got clear. I got the gun out of the ditch with two engines and into the new position. It was difficult to get the gun away to the workshop owing to the road being cut up but we succeeded without mishap about 3 a.m.”


8 inch gun o  move somme 1916 IWM (Q 4322)large
8″ Howitzer towed by a Holts Tractor IWM Q 4322 These are the “Caterpillars” mentioned by Blackadder
post-6041-1215438872
A location for 152 Siege Battery on the road from Bosinge to Langemark – whether Blackadder was with this battery is less certain

29 July (1917) At night, about 11 p.m., the old Hun began to strafe us and all around. The guns got it first of all so I ordered all to clear out. Then he worked up towards the fighting post, a concrete erection left by the Hun. Several of the gunners had come up here for shelter some very badly shaken. The shells were falling very near now, the concussion putting out the lights several times, then, all of a sudden, a tremendous crash and all darkness and smoke almost suffocating us — a direct hit on the post! We lit the candles again, but could hardly see for the smoke.

large
Conditions in the field in Flanders. This 18 Pdr is much smaller than the 8″ Howitzers in Blackaddder’s battery.

After ascertaining all were untouched I tried to get out, the shelling having moved to the guns again, but found the entrance blocked with debris. All wires had been broken too so we were out of touch with the guns and headquarters.  We soon worked a passage out and set to work to get into communication. Meantime some of the ammunition on No. 3 gun had been set on fire and the limber and stores were burning merrily: I got this gunner to come with me to put the fire out, this we did without mishap and returned to the concrete post. About 2 a.m. the shelling stopped and at dawn we reckoned up the damage done. Casualties, nil, material destroyed, very little. The fighting post was only slightly damaged and will stand many more hits thanks to the excellent work of` the Hun.”

NLS_Haig_-_Repairing_one_of_our_guns_for_use_in_the_continued_advance
A gun under repair.

Once again, it is ‘Der Tag’ and again we are nibbling at the Bosche line. Our Battery is busy closing up the Hun guns and during the day in addition to carrying out our programme during the attack, we received many calls from aeroplanes who saw Hun guns active. The Hun strafed the Battery area just before zero hour and broke all the communications to the guns, but we got these put right just in time. He did little damage though he hit No. 2 gun pit twice. During the day too, he endeavoured to neutralise the Batteries about our area with shrapnel and high velocity guns, but we got off with no damage.

Lieutenant Robert Blackadder 152nd (sic) Siege Battery Royal Garrison Artillery. (Steele and Hart Passchendaele: The Sacrificial Ground)

If you want to visit the area where the real Captain Blackadder fought, or hear the  gunner side of the First World War, contact Gunner Tours www.gunnertours.com  info@ Gunnertours.com

gunner tours logo white on brown

Sources :

1. Steele and Hart Passchendaele: The Sacrificial Ground – on e of the best histories of this battle, drawing heavily on personal accounts and one of the few that tells the story from the Gunner’s perspective.

2. https://livesofthefirstworldwar.org/lifestory/366252   The entry credited to Paul Evans look like the work of Firepower’s archivist

3.http://1914-1918.invisionzone.com/forums/index.php?showtopic=101508    The pictures of 152 Seige battery, triggered by someone’s family research.


Wartime Wanderers Revisited

2015-07-21 22.46.10_origianl goslin grave
Harry Goslin’s Original Grave (Courtesy W Goslin)

Last week, as the historian and guide for 103 Regiment (V) I took part in a special battlefield study to Italy, in the footsteps of the Bolton and Manchester Artillery on the battlefields of the Sangro and Moro Rivers and Monte Cassino, as part of Ubique 300. 53 (Bolton) Field Regiment were the nearest thing in the Second World War to the pals or sports battalions of Kitchener’s Army raised in 1914. In March 1939 Hitler reneged on the Munich agreement and invaded Czechoslovakia. The following weekend the team captain of Bolton Wanderers football club, Harry Goslin addressed the crowd and called for supporters to join the TA. It was not enough to deplore what was going on in the world. Hitler would need to be stopped. He and the team were joining up.

The story of what happened to Harry Goslin is told in an earlier post, written close to the 70th anniversary of his death. It was mainly based on general histories of the battle and material available on line.

Italy1100000Lanciano_with_markings
Map showing the attack by the 8th Indian Division on 14 Dec  1943, updated to show the attack from the South . (1) The “Impossible” Bailey bridge, built from the enemy side. (2) Position secured before the attack (3) 17th Indian Brigade attack (4) Canadian attack on Casa Beradi on the same day.

updated to show the

updated to show the

A visit to the National Archives and the war diary of 53 Field Regiment revealed more details about the story and the experience of the soldiers.

We can interpret documents such as fireplans.  Harry Goslin, the Bolton Wanderers fotball team captain was killed as an artillery forward observer in this battle
Fireplan Trace overlaid on 1943 1:50,000 map sheet.

The maps in the general histories portray the attack mounted by the 8th Indian Division on 14th December as an arrow from Villa Rogatti west north west to to Villa Caldari. The fire plan in the 53 Rd Regiment War diary shows a barrage by the divisional artillery supporting an attack north from the road between these villages, which curves first west then north. When superimposed on the 1:50,000 map the first line of the barrage is 50 yards north of the candy stripe road, an obvious start-line. 52 and 116 Field Regiments fired the lines of the barrage. 53rd Field Regiment fired a flanking barrage, three lines of shells fired at right angles to the main barrage to protect the left flank of the attack, exposed to enemy fire from the lateral road. All points calculated by hand in damp, cold dug out command posts.

members of 209 (Manchester) Battery pay respects to a Manchester Gunner in Sangro War Cemetery
Major T J Fox BC and members of 209 (Manchester) Battery, and the Captain General’s Baton  pay respects at the grave of a fallen Manchester Gunner in Sangro War Cemetery

The war diaries referred to the abysmal quality of the maps, with features up to 500 metres from their true location. It wasn’t much easier to find locations on modern maps. It is hard to find maps with more detail than 1:200,000 and the information on different publications can be contradictory, and at variance with the features on the ground.

2015-07-22 14.50.40_cropped LR
After the ceremony, Major A J Gledhill, BC and members of 216 Battery pose behind Harry Goslin’s Grave photographed by Philip Mason Chaplain of Bolton Wanderers FC

But the 53 Field Regiment gun positions seemed obvious. Plotting the battery locations on the 1944 map showed East of the road between S. Vito Chietano and Lanciano. west of Treglia The best fit of the 1944 map with Google maps put the gun positions just to the side of what is now a road through the edge of a village. This made sense. The fire plans called for hundreds of rounds of ammunition per gun per day. The weather in December 1943 was bad with the fields and tracks reduced to mud. The War diary noted that it was difficult to extract the guns from their old positions and that it took six hours before two of the batteries were ready after moving a couple of miles. Gun positions would need to be close to the driest ground. An old lady remembered, “yes. The guns were just over there”. What is now an olive grove was a field in 1943.

Grave of Gunner Plummer, a 53 FGiled Regiment OP Signaller who fell on the same day as Harry Goslin.
Grave of Gunner Plummer, a 53 Field Regiment OP Signaller who fell on the same day as Harry Goslin.

There were also some VIPs. Harry Goslin’s son Bill and grandson Matt came to make a visit, their first to Harry’s grave, and to find out about what happened to him. Lieutenant Harry Goslin was mortally wounded as a forward observer, a task usually carried out by a captain troop commander. Harry’s normal role should have been on the gun position, either in a troop or battery command post or as a gun position officer. The command post officers were responsible for supervising the soldiers who calculated what direction the guns should point to hit any given target. This was difficult and tiring work, but not as dangerous as accompanying the infantry, with the higher risks from bullet, shell or mortar bomb.

Major John Young in the "Dorway to Valhalla"  The entrance to the German War Cemetery Caira
Major John Young in the “Dorway to Valhalla” The entrance to the German War Cemetery Caira

The 53 Field Regiment War Diary provides evidence of the pressure on the officers and soldiers who served at the sharp end. On1st December, after a week long battle on the Sangro Rover one battery commander had been evacuated with exhaustion The nearby 1st Canadian RCHA attacking on the right of the Indians lost four out of six FOOs over four days. Officers and signallers from the guns would have to take their turn at the OP. It was as a stand in OP Officer that Harry Goslin crossed the start line.

The Rapido Valley looing towards Cassino from Caira German War Cemetery

The attacks along the Adriatic coastal plain halted a month later on the next river line, the Arielli, with winter snow.  Four months later, the 8th Indian Division with the 52nd Manchester Artillery and 53 Bolton Artillery crossed the Apennine mountains  in secret to deploy South of Cassino.   Here the allies had tried battering a way through what was the strongest part of the German defences between December 1943 and March 1944.

2015-07-23 17.11.28_36 Texas Div Memoiral LR
Memorial to the 36th Texan Division which suffered heavy losses attempting to cross the River Gari in January 1944. Four months later the 8th Indian Division, supported by the 52 nd and 53rd Field Regiments crossed the river near here.

The allies concentrated both of their armies to break through the German army on the front facing Rome.  This time the allies assembled a force of 1600 guns, including those of 52 (Manchester) Field  and 53rd  (Bolton) Field Artillery Regiments. These blasted a path across defences which had stopped the allies over the preceding months. Not without a hard fight or losses. The commonwealth War

Down time in the Adriatic sea., close to the mouth of the River Sangro

Graves Commission records list 184 members of the Royal Artillery who died in Italy during May 1944. 110 are buried or commemorated in the Cassino War Cemetery. Twelve of the dead served in the 52 (Manchester) or 53 (Bolton) Field Regiments.gunner tours logo white on brown

26 Regiment, BAOR and the Cold War

The Inner German Border
26 Regiment RA at the Inner German Border; once a death strip covered by mines and automatic shotguns, now part of a European Green-way. Note the Captain General’s Baton to the right of the sponsor’s banner.

In June 2015, a  party from 26 Regiment, based in Guetersloh,   Germany, carried out Exercise Mansergh NorthAG,  a battlefield study of the Cold War   battlefields of Western Germany and Berlin. This was their leg in Ubique 300 taking the Captain General’s Baton everywhere the Royal Regiment of Artillery served in the past three centuries.

Overlooking  Lutter-am-Barenberg, two officers give their terrain analysis of the Hainberg feature north of the Harz mountains
Overlooking Lutter-am-Barenberg, two officers give their terrain analysis of the Hainberg feature north of the Harz mountains

Fortunately,  the armed forces of NATO and the Warsaw Pact never came into armed conflict, but for nearly 50 years this is where armies planned to fight at short notice. The North IMG_1210German Plain is one

of the few places where it is possible to study how the Britain and its allies would fight against a modern well equipped army.  It is sobering to consider how chemical and tactical nuclear weapons might have been used, and how and why they were replaced by more effective precision weapons.

26 Regt Gun No1 describes how he would deploy AS 90 in the villages around the Bockenem bowl

There were casualties including fatalities. Hundreds of Germans died trying to escape Eastern Germany in addition to servicemen and women injured in training.  The marks of the divided city of  Berlin are evidence of the human and economic cost and a reminder of the psychological and intelligence war that took place throughout these decades.

It was fascinating and impressive to see how the soldiers of the modern army explored the past, considered the lessons for the current day and how to apply them in the future.

Ferry site across the Weser, It featured heavily in exercises but was an alternative crossing had the Soviets captured or destroyed other crossings.
Ferry site across the Weser at Grossenwieden.  This featured heavily in exercises, as can be seen in the video from Ex United Shield 2008.  

In wartime it would  have been an alternative crossing had the Soviets captured or destroyed other crossings.

39 Heavy Regiment Veteran of Ex Iron Hammer talks about service in the Cold War in the village of Bierbergen  on the North German Plain "Pin Table" east of Hannover. The Zur Linde has a photo on the wall of the landlady as a young woman sitting on the back of an RTR Chieftain tank.
39 Heavy Regiment Veteran of Ex Iron Hammer talks about service in the Cold War in the village of Bierbergen  on the North German Plain “Pin Table” east of Hannover. The Zur Linde has a photo on the wall of the landlady as a young woman sitting on the back of an RTR Chieftain tank.

It is a forgotten battlefield, not least because the mainly classified documents associated with the Cold War were destroyed as part of the peace dividend in the 1990s.

 It was only possible to assemble the information to carry out the study with support from many retired soldiers and officers who taxed their brains to retrieve what were once state secrets. Many thanks to Generals Mungo Melvin, Jonathan Bailey and John Milne and to the various RA Regimental associations, in particular the 50 Missile Association.

The Brandenburg Gate - the symbol of a divided city

The Brandenburg Gate – the symbol of a divided city

Major Simon Fittock, the exercise director, gave his view:-

“I requested Frank’s assistance to deliver a battlefield study, based on the ‘Functions in Combat’ that was designed to look at the Cold War and specifically the multinational Northern Army Group (NORTHAG) centred around the North/Central area of Hannover, West Germany. The tour also visited Berlin to continue its studies of the Information and Intelligence Wars.

Model of the Stasi buildings inside the old Stasi HQ

Right from the off Frank’s engaging style kicked in. His impromptu introduction on the coach during the journey to our first stand set the context fantastically,

An aircraft of the Berlin airlift

bringing the scenario to life and immediately putting the troops in the era and whilst relating his own memories to our current dispositions and our approach to the very high readiness lifestyle that those in the 70-80’s lived through.

IMG_1200His insight into the era, having lived through exercises and deployments, combined with an acute ability to translate the issues into modern day language and engage with all ranks worked fantastically.

I cannot recommend him highly enough and will certainly be using him again in the future.”

One of the results of this exercises is that we have assembled a useful collection of information and documents about the Cold War. If anyone is interested in studying this period either in Germany or the UK contact Gunner Tours.

gunner tours logo white on brown

Airborne Gunners In Crete

Crete_TOP_7
Following in the footsteps of thousands of allied troops down the 8 km evacuation route of the Imbros Gorge to Hora Sfakia.

8 km

53 Louisburg Battery’s Exercise Louisburg Pegasus took place in Crete with aims that encompassed developing an ethos and a pride in the air assault role, understanding information, surveillance and  target acquisition.

STAND 1 (MALEME)   Questions: Syndicate A: Discuss the attacker's problem in an air assault, using the 6 tactical functions. Syndicate B: Discuss the defender's problem in an air assault, using the 6 tactical functions. Syndicate C: Maleme was in many respects a "soldiers' battle".  Nonetheless, the three most fundamental components of fighting power (physical/conceptual/moral) played a part even at the lowest level; discuss. Syndicate D: What are the similarities/differences between the actual action and how we would tackle it today?
Stand 5 – The Abduction Of General Kreipe.
Airborne Ethos.  The graves of German Fallschirmjaeger are on the vital ground overlooking Maleme Airfield.
Airborne Ethos. The graves of German Fallschirmjaeger are on the vital ground overlooking Maleme Airfield.

One of the most impressive aspects of this exercise was the way that the unit had organised planned syndicate discussions on doctrinal concepts. The exercises used the German invasion and occupation of Crete in the Second World War as a vehicle for introducing all ranks to doctrinal concepts.

“Stand 5” was the site where the British and Cretan Resistance abducted general Kreipe, the German Commander of the Island.   His vehicle was stopped at gun point and he was driven away in his own car. When he was in command he was known for responding to challenges by sentries with “Don’t know who you know who I am?” A policy he might have regretted when held at gun point in the back of his staff car while Patrick Leigh Fermor wore his cap.

These are the questions considered by the syndicates:-.

Syndicate A: Sometimes, effect can be achieved by minimal tactical engagement (eg through influence or strategic SF ops). Discuss the similarities and differences between the approach here and the way in which it would be conducted now (mentioning LOAC if needs be).

Crete_TOP_6
One of the Bofors guns abandoned in 1941

Syndicate B: Security and surveillance in a cluttered and contested battle-space: how might events such as this be avoided?

Syndicate C: The German COIN problem: the similarities and

Suda Bay Commonwealth War Cemetery

differences between their approach and our own experience (post Boer War, Malaya, Afghan…).

Syndicate D: Planning and executing an abduction…how would you go about executing this operation?

The intellectual discussion didn’t take place at the crossroads, but over an ice-cream and a lemonade in nearby Archanes.

gunner tours logo white on brown