IN THE FOOTSTEPS OF A COUNTY REGIMENT IN NORMANDY


cap badges
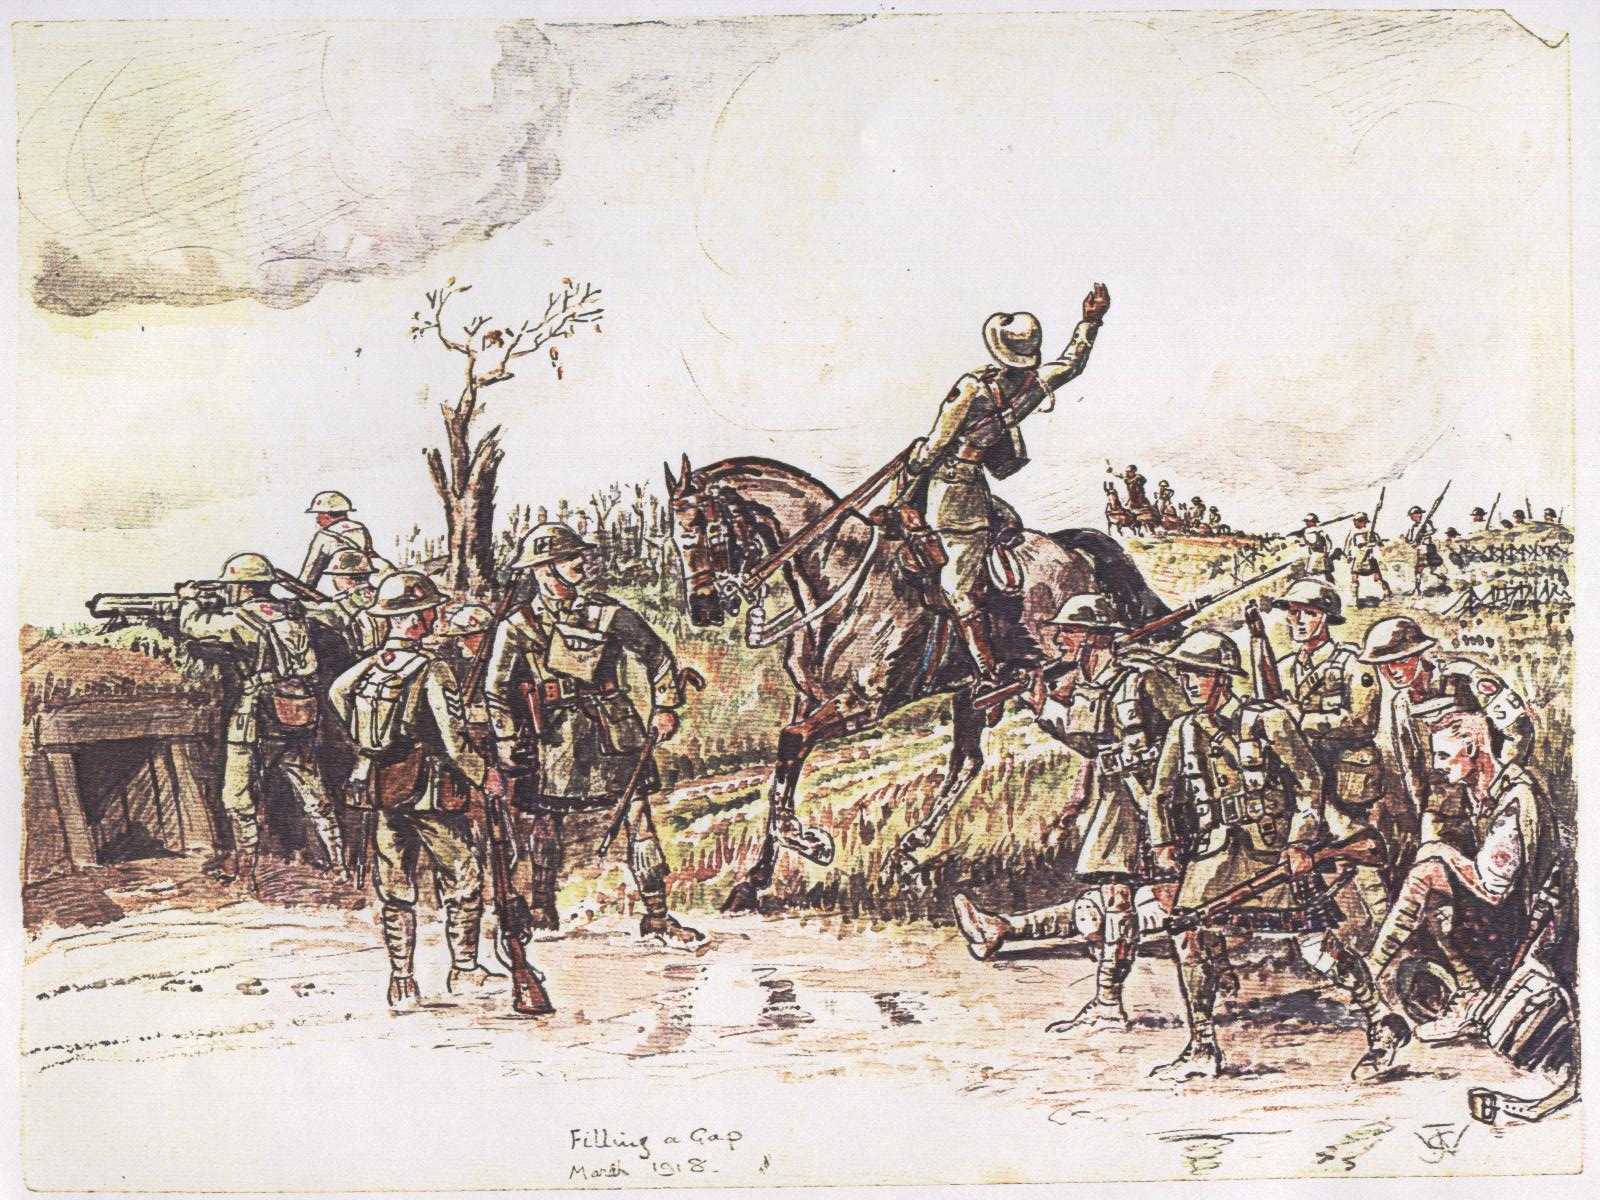
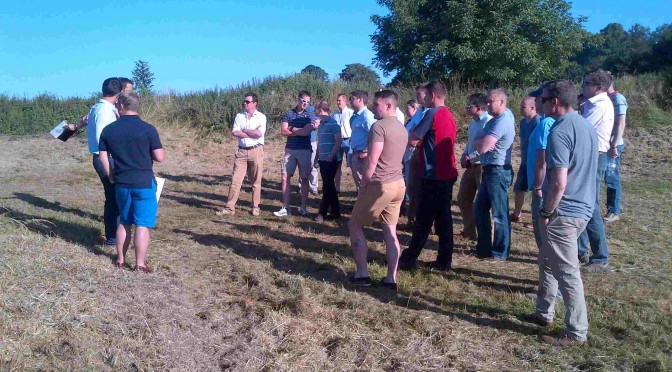
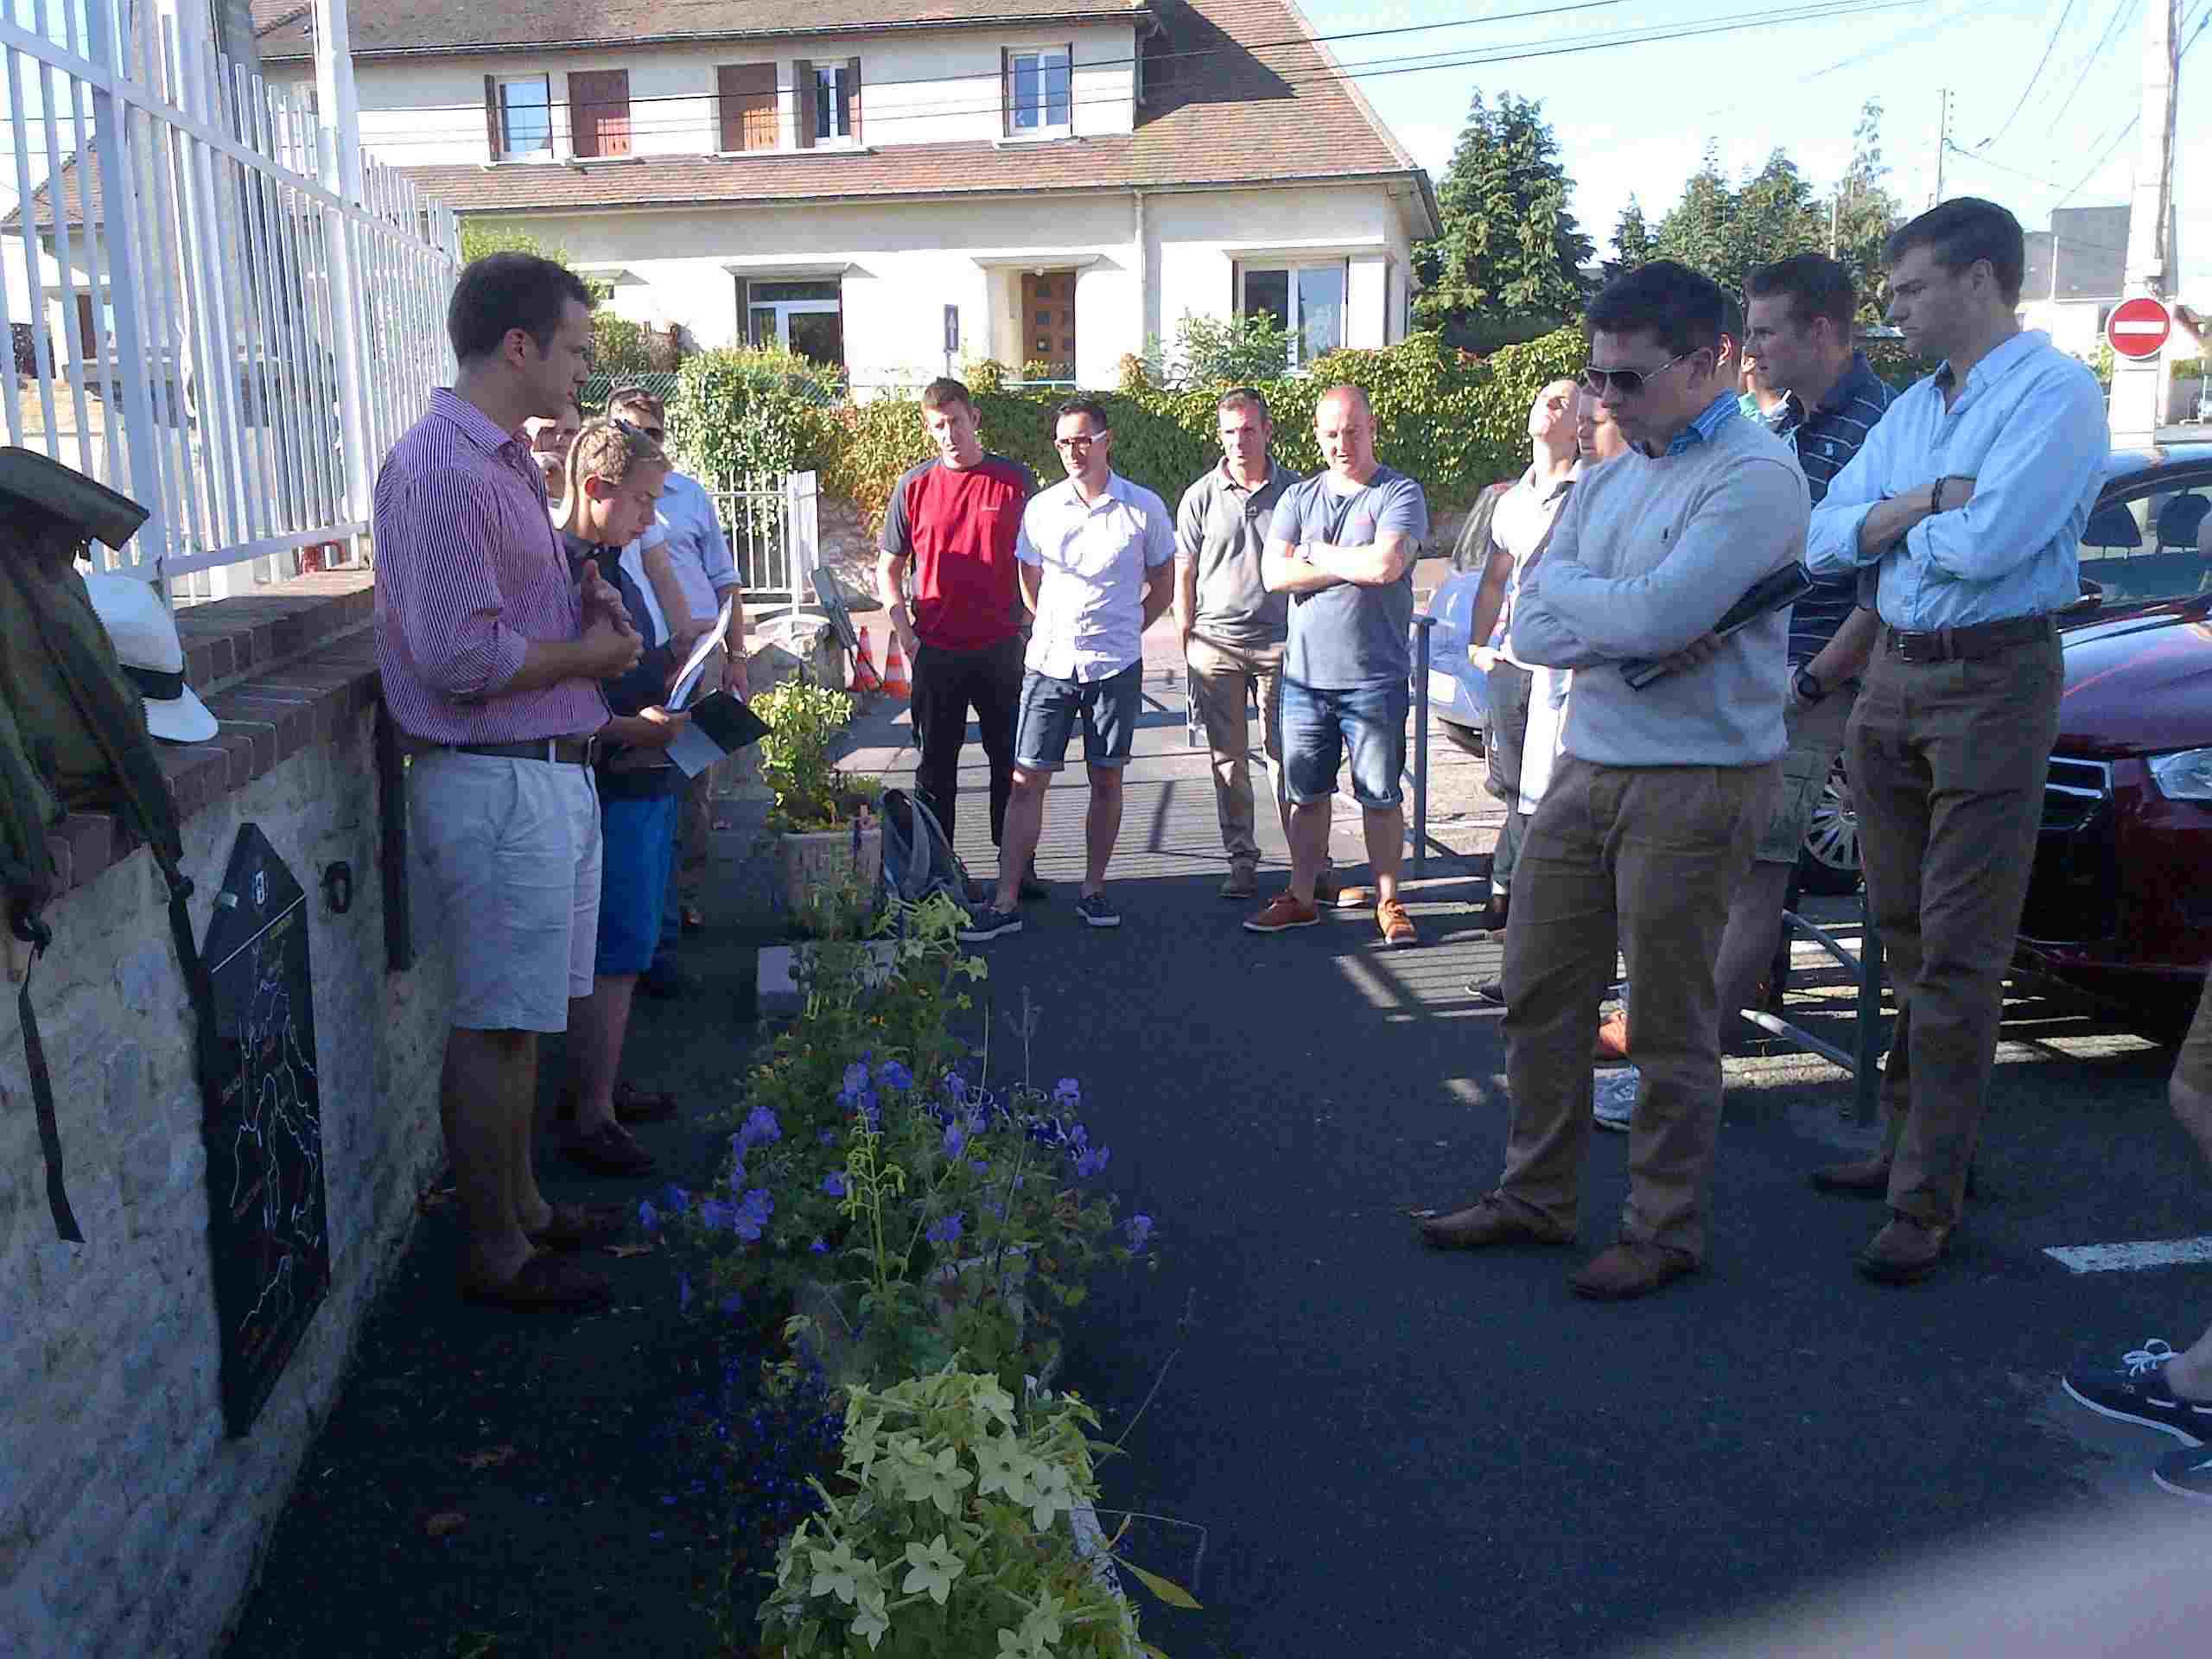
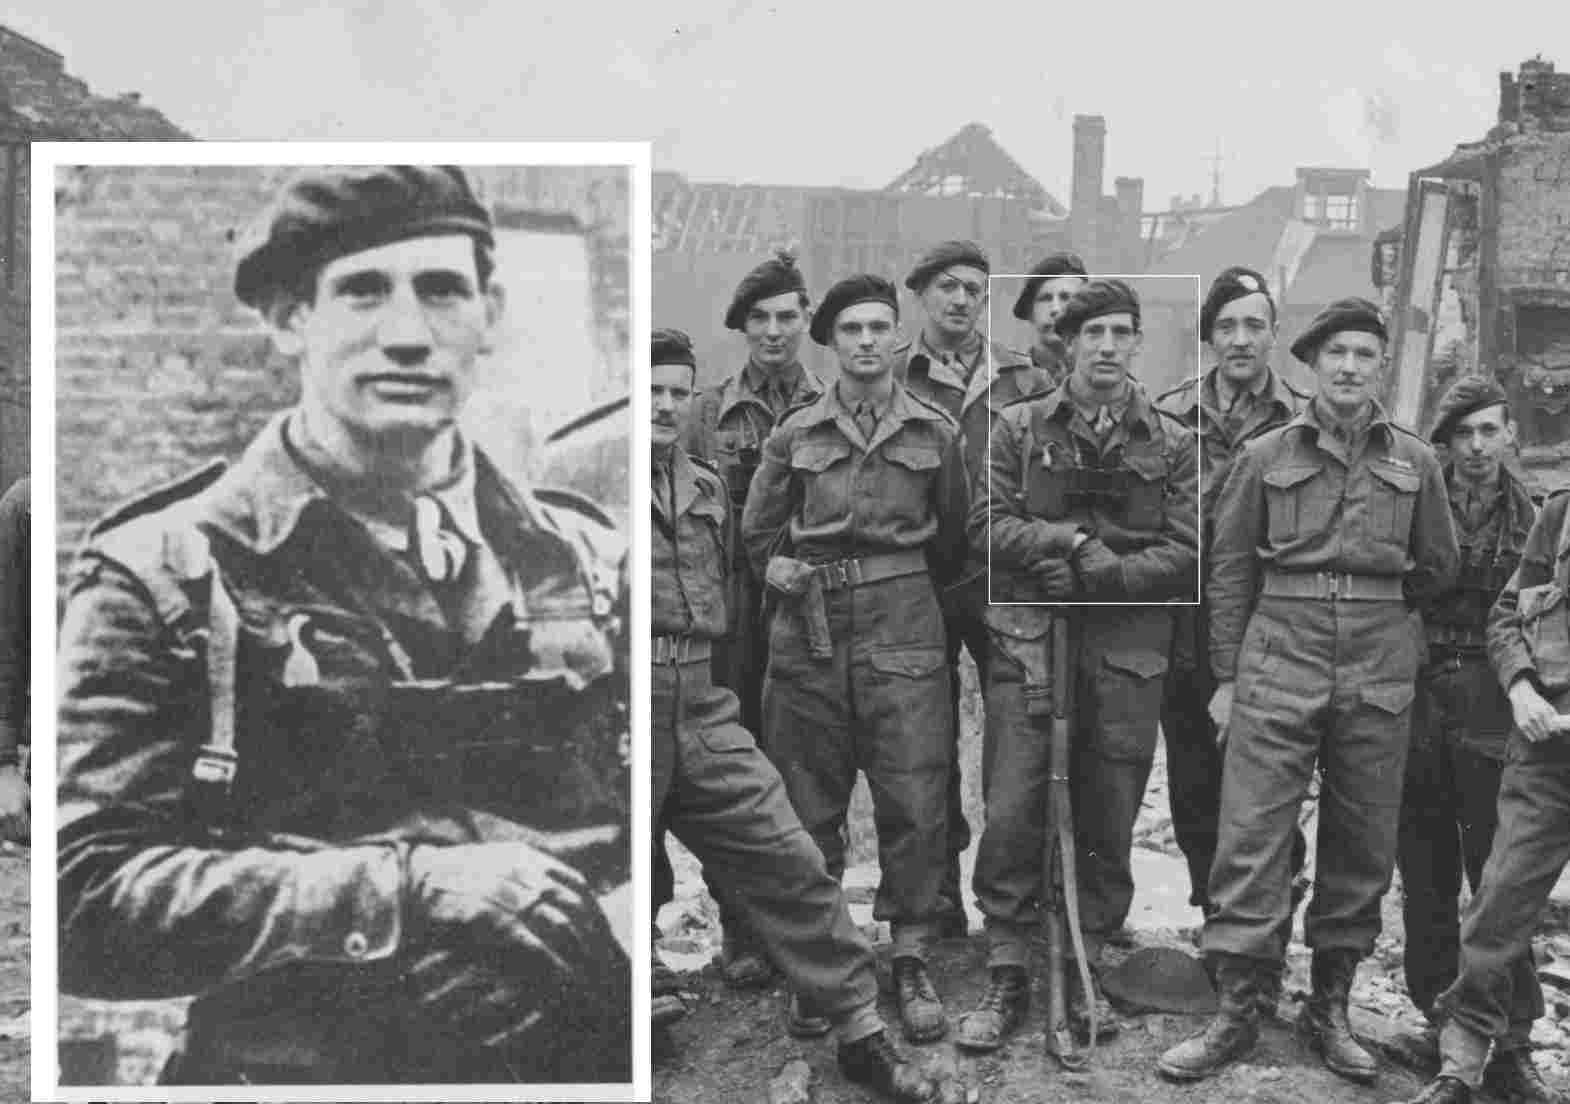
In July this year a group of soldiers from from the 2nd Battalion the Royal Anglian Regiment conducted a battlefield study in Normandy following the actions of their antecedent Regiments. The purpose of the exercises was to undertake a Battlefield Study over four days in Normandy with the aim of enhancing the conceptual training of Officers WOs and NCOs of an infantry battalion with regard to the conduct of operations of a light role battalion in conventional war, operating in conjunction with other forces. Around 25 officers and NCOs took part, preparing pre tour briefings and syndicate exercises for work on each stand.

The Normandy battlefield offers a good basis for battlefield studies, drawing on the wide range of military operations undertaken by the British Army in different phases of war. Following the story of the County regiments which were merged to form the Royal Anglian Regiment was an opportunity to personalise the Normandy campaign. Each of the companies of the current battalion is associated with one of the antecedents; the Royal Lincolnshire Regiment, Royal Leicestershire Regiments Northamtonshire and Bedfordshire & Hertfordshire Regiments. Soldiers from each of these regiments took part in the Normandy campaign, which offered an opportunity to explore different infantry roles in a major war.

1st Battalion Royal Lincolnshire. Parent formation: 8th infantry Brigade of 3rd Infantry division, landed on D Day and took part in the 3rd Infantry divisions battles for Caen .

4th Battalion Royal Lincolnshire Regiment. 146 Brigade of 49 infantry Division. Landed on 13th June, D+7 and took part in the battles south of Bayeux The division was transferred to the 1st Corps on East of Caen and fought in the breakout from Normandy, the advance to the Seine and the capture of le Havre.

1st Battalion the Royal Leicestershire Regiment: 147 Brigade of 49 infantry division. This battalion was not originally scheduled to serve in Normandy. It replaced the 6th Battalion the Duke of Wellington’s Regiment disbanded at the end of June 1944. It fought in the 49th Divisions battles during the breakout from Normandy and afterwards.

IMG-20140702-00086
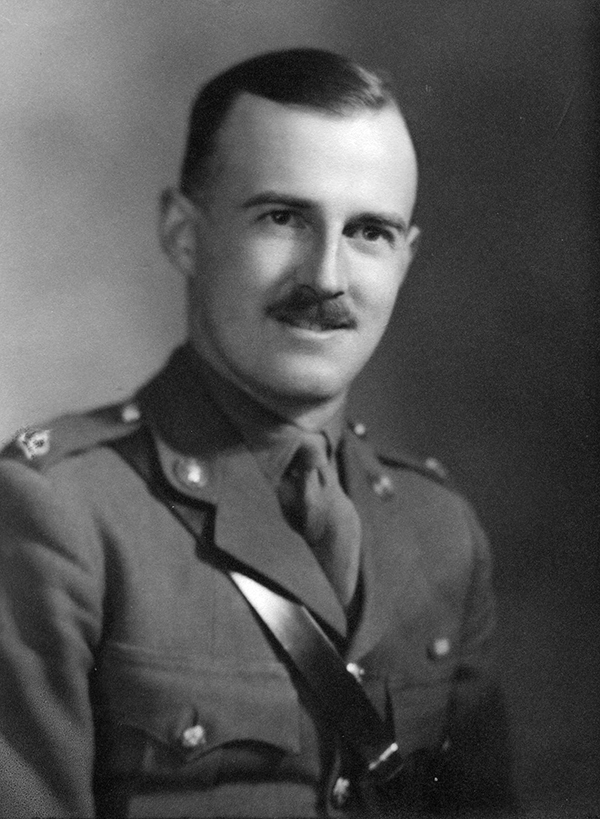
2nd Battalion the Hertfordshire Regiment joined 9 Beach Group, and the commanding officer, Lieutenant Colonel J.R. Harper, was appointed overall commander. The Infantry battalions which served as beach Sub Area troops are not as well known as the assault infantry. Despite Harper’s hope that it would be redeployed as infantry upon the completion of this task, it was disbanded on 17 August and the soldiers dispatched in replacement drafts to other units.

No formed battalions of the Northamptonshire Regiment took part in the Normandy campaign, but individual officers and soldiers did.

STRONG POINT COD – SWORD BEACH

The 2nd Battalion the Royal Lincolnshire Regiment landed on Sword beach on D Day.

2577_00060 BARBER, Maj Robert Heberden 67170
Major Barber Northamptonshire Regiment, OC D Company 2nd Battlaion East Yorkshire Regiment D Day.

Five hours earlier Major R H Barber of the Northamptonshire Regiment had led D Company of the 2nd Battalion the East Yorkshire Regiment, one of the assault waves on Sword beach. A veteran of the North West Frontier, he was also a falconer and had published a bibliography of Falconry. He was killed by a mortar bomb which struck his Company head quarters and is buried in Hermanville War Cemetery.
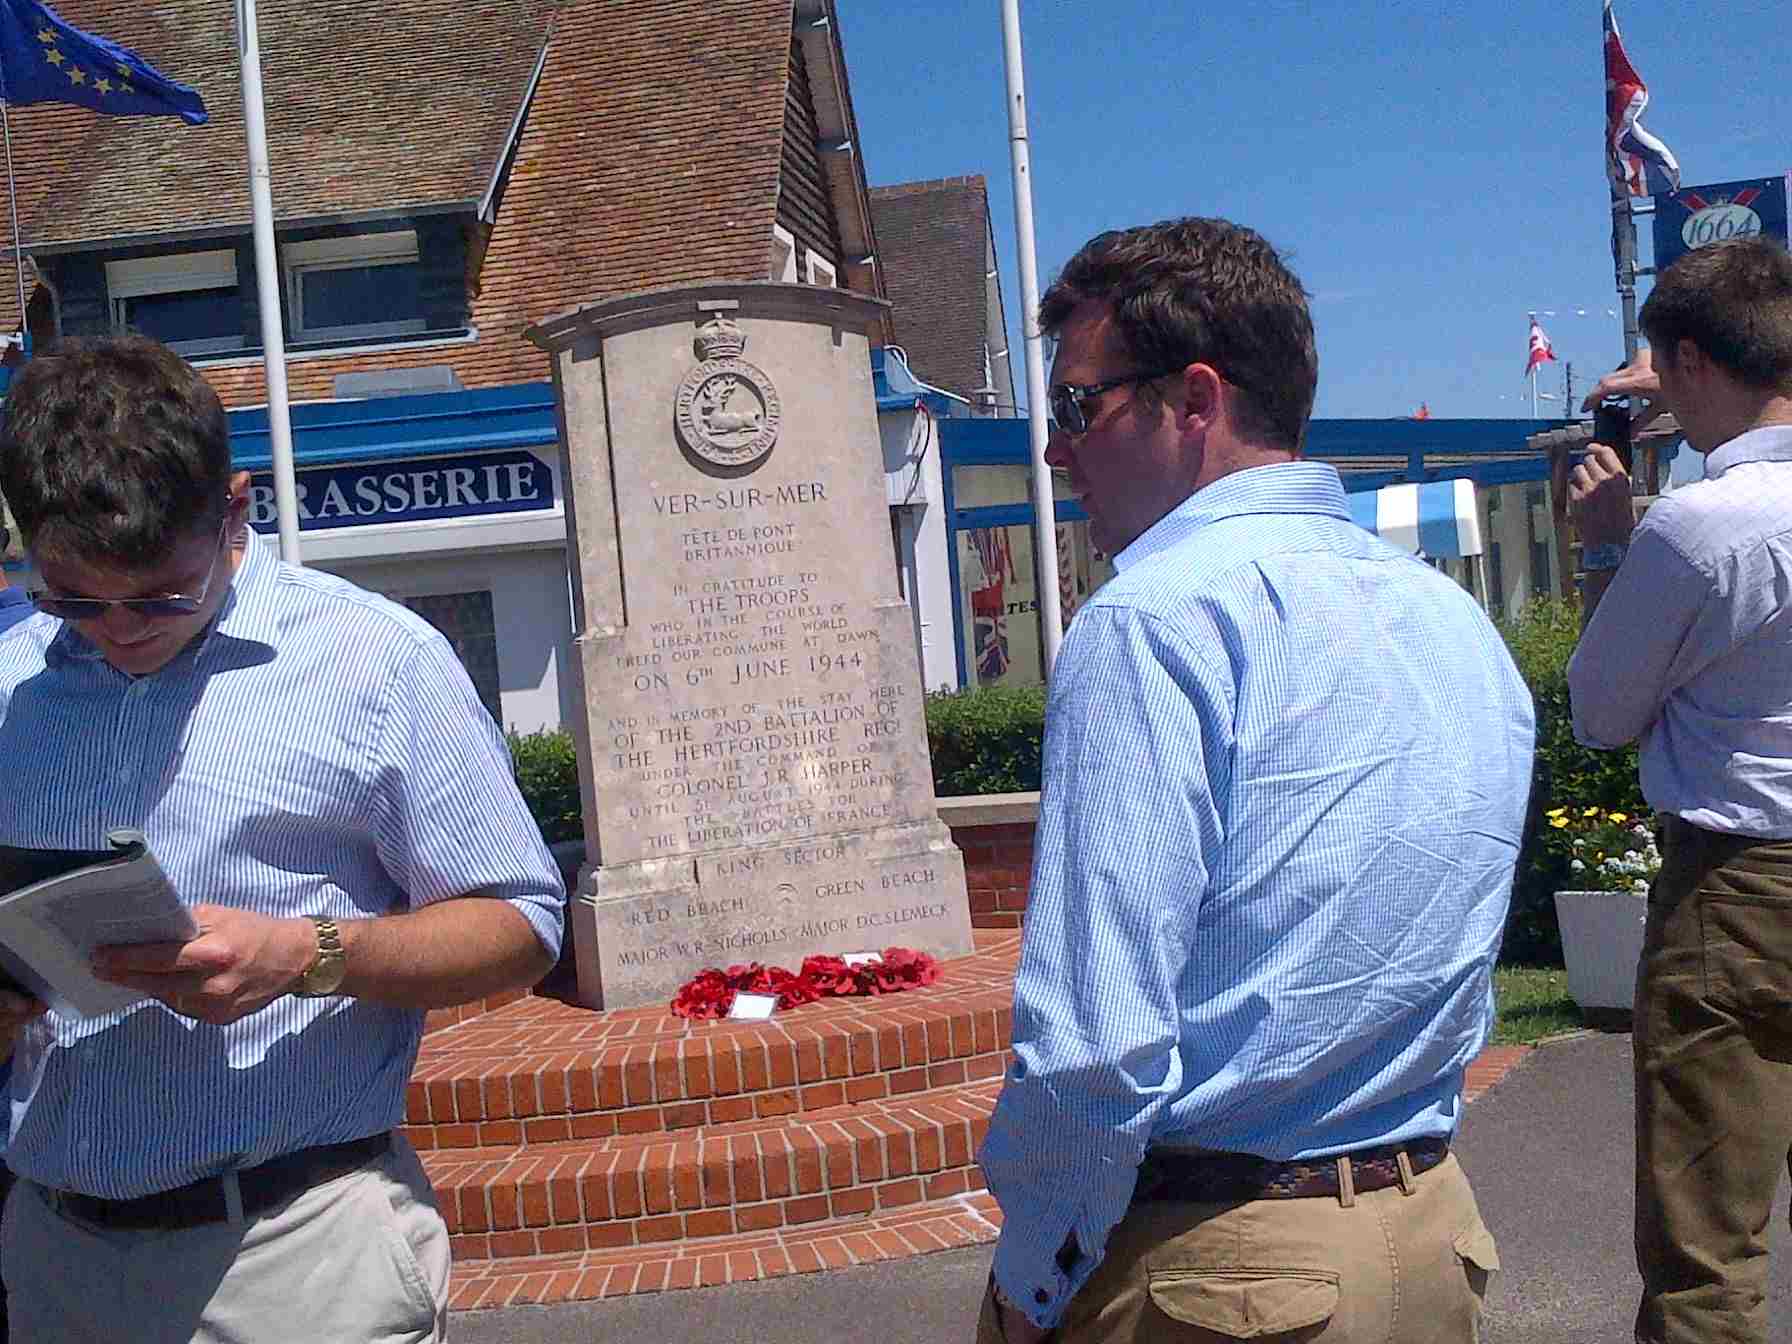
VER SUR MER

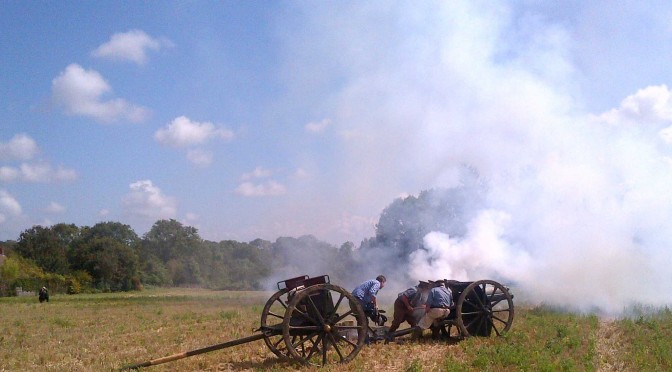
On the morning of 6 June 1944 the 2nd Hertfordshires landed in the fourth wave on King Sector of Gold Beach, through which two brigades of the 50th Division would come ashore. This unit landed on D Day at Ver-sur-Mer and provided local security, command and control and labour for unloading ships on King Sector of Gold Beach. It was involved in fighting throughout D Day and it cleared bypassed

Operations by 2 Herts to clear German positions East of Gold Beach 6 June 1944.

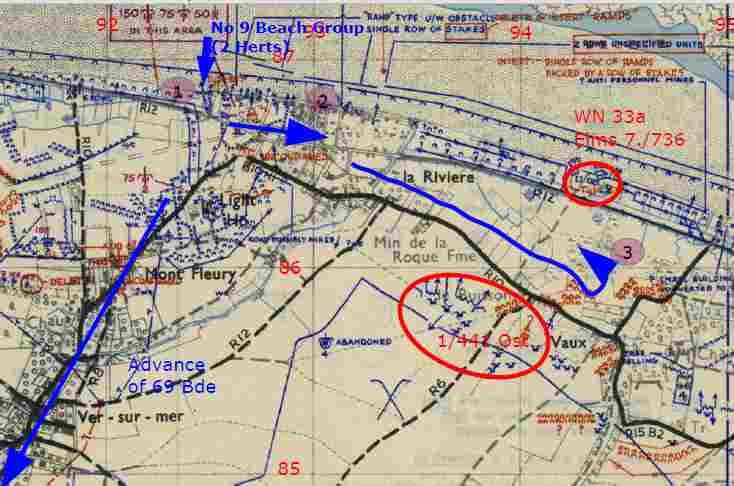
positions in the hamlet of Vaux that had been harassing movement on the beach, the assault being supported by one of the group’s Bofors guns. In the following days the battalion assisted the Royal Engineers in clearing land mines and moving supplies off the beach. A memorial to the regiment stands near the point at which they landed. Even though the British had built a prefabricated Mulberry harbour at Arromanches, about half of all stores landed on the Normandy beach head was landed on the open beaches

Martlet25June
A German 75mm anti-tank gun with its dead crew members lying in the roadway, while a disabled Panther tank sits down the lane in Fontenay-le-Pesnel, Operation Martlet. (Lieutenant Handford, No 5 Army Film & Photographic Unit – IWM B 5939 Licensed under Public domain via Wikimedia Commons)

OP MARTLET TESSEL WOOD AND RAURAY
Operation Martlet was the first major action for the 4th Lincolns. This was a Divisional attack to clear the Rauray feature. This was an area of high ground which dominated the Western Flank of the attack planned by VIII Corps, called Operation Epsom to the East of The bloody battles between the 49th Division and some of the toughest German Army and SS Panzer formations led to the destruction of much German armour and the 49th Division squiring the nickname of “Butcher Bears.” It is possible to trace the story of these actions over the rural landscape, which although not marked by many memorials, remains identifiable. The Ruray ridge is a place to look at the British army on the defensive against an armoured opponent. Although the 1st Tyneside Scottish bore the brunt of the German attack, 4th Lincolns were engaged to their west.
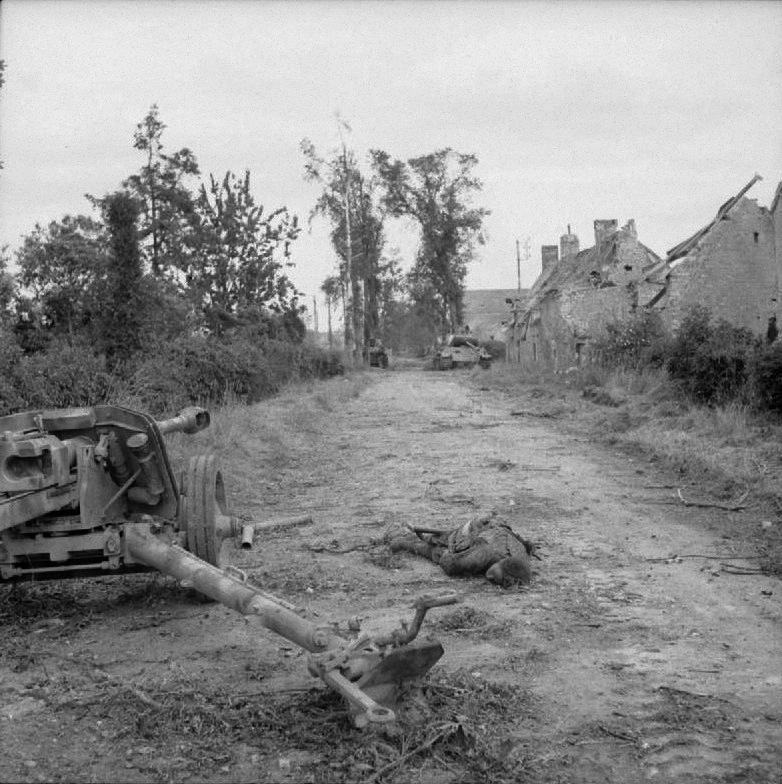
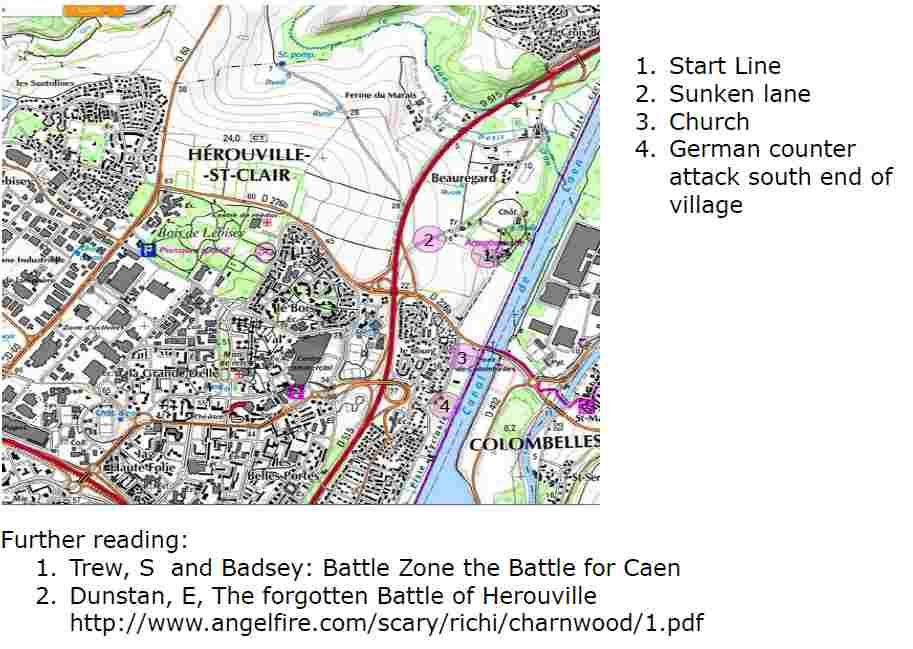
HerouvilleHEROUVILLE

Operation Charnwood 7-8th July 1944, the capture of Caen was 2nd Lincolns first major action. It was a three divisional attack supported by massive firepower, including the first use of heavy bombers for tactical bombing. The 2nd Lincolns were at the extreme left of the line. Their attack was made with minimal artillery support and over ground exposed to fire from across the Orne canal on their own left. The capture of Herouville was a tough fight which cost the 2nd Lincolns around 200 casualites. The CWGC records 50 members of 2nd Lincolns killed between 8-12 July, many of whom are buried in plot II of Ranville Commonwealth War Cemetery. The Herouville

The View from the Start line. Herouville Church spire is just visible in the centre.

area is not as heavily developed as other suburbs of Caen and it is still possible to follow the action on the ground and walk the assault route.  There is an excellent account of this action written by a descendent of a veteran who took part in the action. http://www.angelfire.com/scary/richi/charnwood/2.pdf

On the objective - discussion around the 2 Lincs memorial Herouville
On the objective – discussion around the 2 Lincs memorial Herouville

OP GOODWOOD
Operation Goodwood 18-20 July 1944 was an attack by three armoured divisions supported by artillery and aircraft in a southerly direction East of Caen. Three infantry divisions carried out subsidiary operations in support of op Goodwood. The 3rd Infantry Division’s role was to attack towards Traon to protect the Eastern flank of the armoured advance. 2nd Lincoln’s was deployed in Banneville. The dry ground had been so badly churned up by bombing that it was difficult to dig slit trenches. The battalion endured bombardment from mortars which cost it ten officers and 200 other rank casualties in 72 hours. One of the best places to contemplate this operation is the War Cemetery at Bannevile en Campagne, which is not far from “Black Orchard”. After this action 3rd Infantry Division were redeployed to the Western flank of the British Second Army, but 2nd Lincoln’s do not seem to have been involved in further heavy fighting in Normandy.

The Normandy battles offer an opportunity to explore the role of leadership in units undergoing the strains of battle. The unit that the 1st Leicesters replaced,6th Duke of Wellingtons, had disintegrated under the pressure of heavy casualties. The respective roles of officers and warrant and non-commissioned officers under these circumstances makes for an interesting discussion topic.

AUGUST 1944

breakout_49_div
Map showing the breakout battles of 49th Div

In mid August the 49th Division, and with it the 4th Lincolns and 1st Leicesters were on the left flank of the 1st Canadian Army offensives along the Caen to Falaise road which formed the northern jaws of the Falaise Pocket. The Germans which the Lincolns and Leicesters faced were conducting an orderly withdrawal towards the Seine and sought to impose delay on each river line. Several of the villages remember the these units as their liberators. In the past groups of veterans have been feted in Conteville, Poussy la Campagne, Billy, Airan and Chicheboville. There is a memorial to 4th Lincolns in the village of Airan. The acting CO Major Stokes was killed by a stray shell on the 13th August. His death was particularly mourned as an ex-city counsellor and pre war TA soldier. The advance to the Seine is an episode which has been overshadowed by the capture of Paris. Yet the river crossings of the Vie and Touques were no picnic. On the 19-20th August the 4th Lincolns struggled to cross the Vie and on the 23 Aug river Touques was only crossed as divisonal crossing with heavy casualties for 1st Leicesters.
The 49th Division had a further operation in Normandy, the capture of Le Havre in Upper Normandy. The advance to the Seine is a chance to examine the operations of the British Army in the Advance to combat and obstacle crossing.
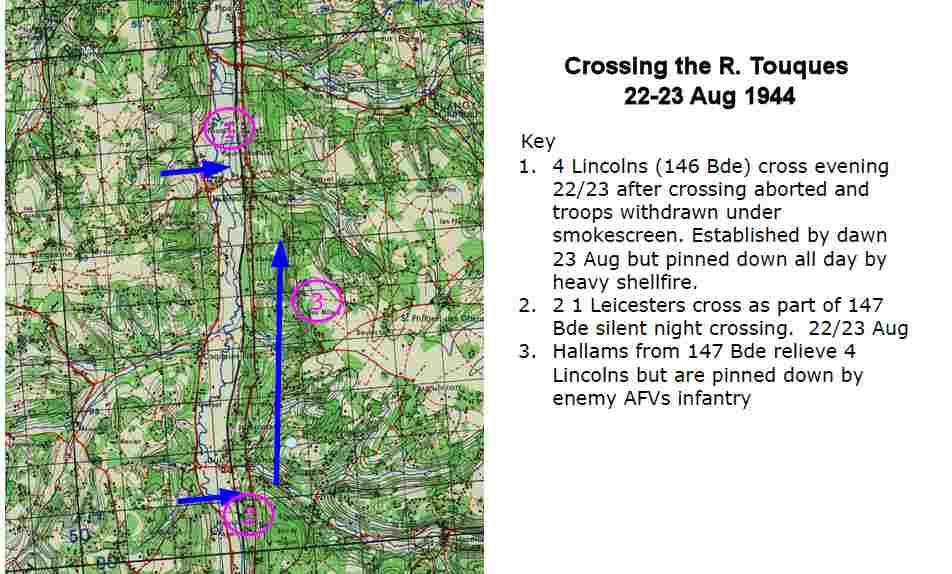
R Touques

THE COST

The Commonwealth War Graves Commission database lists 338 men of the antecedent Regiments of 2 Royal Anglian Regiment who died between 6th June and 31st August 1944 and are buried or commemorated in France or the UK. In the Normandy campaign there were 3.5 wounded for each dead, so the total casualties suffered by the four battalions serving in the campaign and individual soldiers attached to other units would have been around 1,200..

The casualties were not evenly distributed between the Regiments. 248 of the dead were from the Lincolns, 54 from the Leicesters, 27 from The Beds and Herts and 9 from the Northamptonshires.

Two battalions of the Lincolnshire Regiment served in Normandy, one from D Day. The CWGC records list 123 of the dead from 2nd Battalion which landed on D Day and 118 from the 4th,,which landed a week later. The Leicesters which landed in July, lost all but eight of their war dead in August, after the break out had started.

No_3 Cdo_and Herbert
L:t George Herbert DCM MM of the Northamptonshire Regiment, pictured with other officers from No 3 Commando. The DCM was for Vaagso as a corporal and the MM for Dunkirk. Heavily armed with rifle, pistol and a cosh liberated from an underground carriage,  he is “ally.”  Sadly this decorated soldier fell on 8th June.

Although no units of the Northamptonshire Regiment served in Normandy, six officers and two private soldiers are buried or commemorated in Normandy. Two of the officers were killed as Commanders with other infantry units. Two of the officers and two of the privates died as Army Commandos and one officer with 8 Para.

These figures are not entirely consistent. The CWGC records do not always include the correct unit and may have excluded soldiers from other cap-badges who became casualties while serving with one of these units, such as Lt James Richardson a Canadian Officer Loaned to the 2nd Lincolns, who died of his wounds on the 9th July. However they give an indication of the scale of losses.

CASUALTIES AND THE REALITIES OF WAR FOR AN INFANTRY BATTALION IN NORMANDY

IMG-20140703-00097
Row of Lincolnshire Regiment graves Ranville CWC.

Dividing 1,200 casualties/338 dead by the 88 day duration of the campaign gives an average of 13-14 casualties per day of which, around 4 would be fatal, a loss of around a section plus per day. However the casualties did not occur at a steady rate. 42 men died on the 8th July, almost all lost in the 2nd Battalion’s attack on Herouville, and a further 21 were lost on 20th July in Op Goodwood. 24 men of the 1st Leicesters were killed on the 23 August, in the assault crossing of the River Torques, a largely forgotten engagement and under visited battlefield, while Op Martlet cost 4th Lincolns 15 dead on 25th June. Multiplying these numbers by the number of wounded would mean that these units would have lost between 60 and 160 men, between one and two companies on these days.

Most of the losses would have been suffered from the 360 riflemen in the rifle companies in each battalion. The total losses of 1,200 approximate to the number of riflemen in the rifle companies of the four battalions which served in the campaign and are more than the three which served as infantry. Perhaps this is why the Normandy campaign was such a good place to study leadership within an infantry battalion in war.

In addition to the story of these units the itinerary also included a study of the battle for the Hillman position captured by the 1st Suffolks, antecedents of 1st Battalions’s Vikings rather than the Poachers of the 2nd battalion. We also included lunch stops in Arromanches and Pegasus bridge, which offered museums and shops to explore.

A CUSTOMISED BATTLEFIELD STUDY FOR ANY CAP BADGE?

This battlefield study followed the fortunes of the antecedents of one cap badge. There was plenty to see and talk about, and much that was unique to this tour. The same kind of tour could be probably be undertaken for almost any British army unit with WW2 antecedents.

To find out more about planning staff rides and battlefield studies contact Frank@Baldwinbattlefieldtours.com


baldwin battlefields logo

Edward IV and the Wars of the Roses.

Author: David Santiuste; Pen and Sword Military: ISBN 978 184884 5497. This softback edition has 146 pages with a further 45 of abbreviations, notes and bibliography.

Edward IV and the Wars of the Roses, by David SantiusteThis is not a full biography of Edward IV. It is more a reassessment of his military career and role as a commander. By the author’s own admission, it is not based on extensive archival research of his own. The notes, however, suggest reliance on some of the most prominent experts of the period, notably the late Professor Charles Ross, in conjunction with more contemporary research. Helpfully, it does include a family tree, which is necessary because of the complex family connections of most of the main players; the importance of which cannot be underestimated. Having looked up David Santiuste (a tutor at Edinburgh University) on the internet, it is clear to me that although this work is constructed in a solidly academic style, he intended this book to also appeal to a more general readership.Santiuste_Edw4_WofR

To modern thinking, most of the battles in the Wars of the Roses would only be classified as skirmishes. It must, however be remembered that the population of the country at this time was in the region of 2,500,000 and therefore the pool of men to fight was limited, especially as this was effectively civil war and the combatants split between the two sides.

David Santiuste suggests that events at the Battle of Northampton (1460) which was Edward’s first command in the absence of his father, may have influenced his later strategic conduct; although it is likely that Warwick had overall command.

Edward4The author asserts that Edward’s leadership qualities stem from his great height and personal charisma, even as an 18 year old. The battle of Mortimer’s Cross (1461) was Edward’s first personally crucial battle and like many more, the outcome was heavily influenced by the weather. The rare phenomenon of parhelia (the apparition of three suns caused by refraction of sunlight through ice crystals) was seen before the battle and Edward convinced his frightened men that this was a good omen, representing the Holy Trinity. Surely quick thinking on his part, as this would have bolstered the morale of a frightened body of men. People in the Middle Ages were very superstitious and believed strongly in omens of this sort. The fact is that Edward’s great height of some 6ft 4” must have made him very noticeable. To men seeing him in the thick of the fighting would have been a great encouragement. Mr Santiuste quotes from the leading commentators of the time and even Edward’s detractors all admit to his fine stature and good looks. No bad thing for a medieval king who had to take the crown in battle and then demonstrate strength enough to rule.

a4bcea916cf93be7dc277ec9d75edc87Edward was not present at the second battle of St Albans, which followed hard on his victory at Mortimer’s Cross. Warwick was comprehensively defeated at this encounter and I think it true to say that he may have been a better sailor than a soldier. The author suggests that Edward was already seeing that his destiny lay in his own hands and he already ‘no longer bowed to Warwick’.

st_albans_1In spite of this defeat, the Yorkists gained control of London because the city denied access to the Lancastrians. This has much to do with the fact that the Lancastrian armies of the period developed a reputation for plunder and savagery towards the general populace. Edward, on the other hand, was noted for his strict discipline, commanding ‘that no man in his own army should act thus, on pain of death’. Then came probably the most important battle of this first part of the civil war and bloodiest ever fought on English soil; Towton.

6a00d8341c98c253ef014e5fcb84b7970cThis represented a decisive Yorkist victory, which resulted in Edward’s confirmation as king, followed by his coronation. The butcher’s bill of Towton has been the subject of much speculation for many years and is inevitably discussed in this work, with the author attempting to rationalise the claims of the chroniclers of the period with the more recent archaeological evidence, concluding that whatever the final figures were, the armies of both sides would have been as large as possible (bearing in mind the losses suffered in recent battles) because the outcome of this battle would confirm the crown on Edward or Henry.

This book does not deal with the personal, more salacious side of Edward’s character. Although the issue of Edward’s marriage is briefly mentioned, the author develops the many reasons for Warwick’s disaffection with Edward’s regime. It is too easy to simply blame the marriage. Edward was clearly a very able sovereign and in fact, his choice of bride was the final realisation to the Earl of Warwick that Edward was his own man and wasn’t going to be ‘guided’ by the earl on all main issues. I think it likely that the breach with Warwick was inevitable as he probably believed he would be the power behind the throne – no matter who the king married.
The author then goes on to describe the events resulting in the final disintegration of their relationship, which ultimately resulted in the alliance of Edward’s treacherous brother George with the earl and his tactical withdrawal to the Low Countries to regroup. Had the king not done this, it would have surely resulted in the loss of his head, never mind what turned out to be the temporary loss of his throne.Wars-of-the-Roses-07-1-300x225

Mr Santiuste details Edward’s time in Bruges and eventual persuasion of his brother-in-law, Charles the Bold to lend him the resources to mount an invasion to regain his crown. Edward landed at Ravenspur at the mouth of the Humber on March 2nd 1471, cleverly suggesting that he had only come to claim his rights as the Duke of York, but quickly gathered an army and with remarkable speed regained London; the Lancastrian lords abandoning Henry VI to his fate.

Battle_of_Barnet,_early-battle.svgEdward’s supporters had soon rallied and rearmed and the Yorkists were able to give battle at Barnet on April 14th, Easter Sunday 1471. A remarkable turn around, which resulted in the death of the Earl of Warwick, finally breaking Neville power. George of Clarence had turned his coat again and now Edward went on to fight his final battle at Tewkesbury, resulting in the death of Henry VI’s heir and most of the Lancastrian hierarchy. Those that survived went into exile. Only then did he order the death of Henry VI, probably belatedly realising that while ever he lived, he would be a focus for rebellion.

treaty-of-picquigny-grangerThe second period of Edward’s reign was marked by peace as there was now no viable threat to his regime. Probably the most controversial event was the Treaty of Picquigny (1475). Edward took an army to France, but agreed the treaty with Louis XI on the bridge at Picquigny, which paid a pension to Edward of 50,000 crowns per annum with a down payment of 75,000. This continued for seven years, until Louis reneged on the agreement. This represents millions at today’s values and Edward probably regarded it as his finest hour, thereby avoiding a costly war and supplementing the exchequer. His remaining brother, Richard however, did not. This event may mark the beginnings of his disaffection with the king, while remaining a loyal lieutenant.

Edward IV is a much ignored king who school history books write off as a tyrannical despot. Yet this is surely not so. David Santiuste describes a man who time and again tried to rehabilitate his enemies, with varying success. His patience with the treachery of his brother George is a good example of this. History has shown that he was the victor of this conflict and an undefeated general. When Edward died unexpectedly in 1483, he was personally rich and the exchequer was full.

Sovereign's Misericord detail c. Doug HardingThe four battles of Mortimer’s Cross, Towton, Barnet and Tewkesbury are among the most important to English history. This book gives full accounts of them all, with details of weapons, tactics and the logistical difficulties that a medieval army would face. The book also includes three maps; one a general map showing the locations of all the battles and two more detailed ones, covering Towton and Tewkesbury. I would have liked to see two more to cover Mortimer’s Cross and Barnet and find myself wondering why these weren’t included.

Recently Professor Saul David has described Edward IV as one of history’s most ‘overrated’ people. David Santiuste’s work demonstrates that Edward’s record as a commander and leader of men equals the more accepted warrior princes of the Hundred Years War.

This is a comparatively short work, but the author has been careful not to be distracted from his main theme, while placing Edward’s actions in the context of his policies, both at home and in a wider Europe. A worthwhile read.

Barbara Taylor
March 2012

After Néry…The Batteries of 1 RHA in the First World War

Last_gun_at_Nery

Two dramatic episodes from 1914 have been the centre of  commemorations for the Royal Artillery. E Battery were supporting the cavalry screen ahead of the BEF when they fired the famous first shot on 22nd August 1914. The role of L battery in the “Affair at Néry” on 1st September 1914 has caught media and public attention ever since 1914. The German surprise attack on the 2nd British Cavalry brigade was beaten off with heroic acts rewarded by three Vcs and two MMs to the men of L Battery, and led to the award of the Honour Title of “Néry”. These events have tended to overshadow the other actions undertaken by E and L battery during the First World War, and by other batteries of the current 1st Regiment RHA.(1)

The current batteries are A Battery (The Chestnut Troop), B, E, L (Nery) and O Battery (The Rocket Troop) . Their 1914 home stations and wartime deployment are summarised in the following table.

Battery Station in 1914 Deployment
A Ambala India Indian Bde RHA then XVIth Bde RHA 4 Cav Div/Army troops
B Ambala India XVth Bde RHA 29 Div
E Newbridge, UK 1 Cav Div then 3 Bde RHA – 2 Cav Div.
L Aldershot, UK 1 Cav Div then XVth Bde RHA
O Ipswich,UK Vth Brigade RHA 8 Div then Army troops


Each Battery was commanded by a Major with a battery captain, and three subaltern section commanders. Two Subsections formed a Section and in a six gun battery these would be designated as Left, Centre and Right Sections. A Subsection consisted of a single gun and limber drawn by six horses (with three drivers), eight gunners (riding on the limber or mounted on their own horses), and an ammunition wagon also drawn by six horses (with three drivers).

The 13 Pdr Nery gun on Display in the Imperial War Museum london
The 13 Pdr Nery gun on display in the Imperial War Museum london

RHA batteries were armed with the 13 Pdr Gun. The 13 Pdr fired a 13 lb shrapnel shell to a range of 5,900 yd (5,400 m). The 18 Pdr, which equipped the Field Artillery fired a projectile weighing nearly 50% heavier and for which an HE shell was in service by October 1914. It also out-ranged the 13 Pdr and had a range of 6,525 yd (5,966 m) and 7,800 yd (7,100m) with the trail dug in. During the course of the war all but E Battery were re-equipped with 18 Pdr.

The introduction of the dial sight had made it possible to operate in an indirect role. However the flat trajectory of the 13 Pdr and the limited signal equipment tended to restrict indirect fire to situations where the battery commander could position the guns behind cover and act as the observer from a position where he could see the guns and the target. There were no established forward observer parties, but as trench warfare developed and telephones and wire became more widely available, an observation post might be deployed at some distance from the battery or a liaison team sent to the infantry.

Although indirect fire techniques were known and practised, the RHA went to war with equipment better suited to operating in the direct role. The 13 Pdr had a flat trajectory and it would be difficult to find good indirect gun positions in broken country such as the industrial landscape of Mons. The only ammunition provided for the 13 Pdr was shrapnel, which is very effective against troops in the open, but almost useless against troops behind cover.

The part the Horse Artillery played in the opening months was not far removed from pre war expectations. British Cavalrymen were equipped with the same SMLE rifle as the infantry and marksmanship training, which gave them an edge of the carbine equipped Germans in dismounted action. However, it was the battery of 13 Pounders supporting each brigade which contained the major part of its fire power, and guns which would inflict the majority of casualties in the Fist World War..

Positioning a 18 Pdr Gun The Battle of Arras April 1917

The Commonwealth War Graves Commission (CWGC) records 233 men as serving in one of the batteries. (2)  Given WW1 norms of two wounded for each dead, this would imply around 700 casualties during the war. The establishment of a 1914 RHA Battery was five officers and 200 other ranks, giving 1,025 for the five current batteries. This gives a conservative estimate of a fatality rate of just under 23% of the establishment across all batteries. The casualties were not evenly distributed. L Battery’s 78 fatalities implies a figure of killed and wounded well in excess of the battery establishment of 205. Nor was 1914 the year in which L Battery suffered its highest casualties.

 Current 1 RHA Batteries Fatalities 1914-1921
A B E L O All Batteries
1914 0 0 4 26 0 30
1915 1 12 1 9 3 26
1916 2 8 0 1 5 16
1917 3 30 9 30 17 89
1918 23 6 2 11 12 54
1919 0 2 3 0 1 6
1920 0 4 1 1 0 6
1921 3 3 0 0 0 6
Total 32 65 20 78 38 233

(Note that these figures are an indicative minimum.  The CWGC database does not always identify the unit in which a soldier served. . )

Even before Néry, the fortunes of war placed L Battery in a position to play a significant role in the battles of Elouges on the 24th and Le Cateau on the 26th. On each occasion they brought down fire on German troops attempting to outflank the army. Even without Néry curtailing their participation in the campaign, L Battery were one of the most actively engaged RHA Batteries.

The fighting in the early months of the First World War was very different to other campaigns on the Western Front, or even other campaigns of the war. The pattern of warfare was closer in some ways to that of the previous century. The battles were of short duration with one side disengaging. Mons, Le Cateau, Elouges and Néry can be identified by a single day. At Le Cateau the British Army even deployed anachronistically on an open plain with the guns drawn up in the front line as if it were 1815. It was not until the battle of the Aisne that both sides became aware of the power that C20th weapons gave to the defence. After the trench lines developed between September and November 1914 the character of the war changed to become one continuous engagement. There would be no more individual battle days as bloody as Nery, but a trickle of casualties throughout the four years of the war, with some days bloodier than others.

1915

In November 1914 O Battery arrived on the Western Front as part of the Vth Brigade RHA in the 8th Infantry Division’s artillery. . In 1915 The Chestnut Troop joined them on the Western Front as part of I Indian Brigade, Royal Horse Artillery. They both took part in the battles in the Neuve Chapelle area 1914-15.

The rebuilt L Battery joined B battery in the XVth RHA Brigade as part of the divisional artillery of the 29th Division in 1915. This division was formed from regular army garrisons around the world and first deployed in the Gallipoli campaign. It would become known as the “Indomitable” 29th and would take part in more attacks than any other formation. There is no specific monument in Gallipoli for the artillery of the 29th Division. However, one of the first fatalities suffered by the reconstituted L battery was Bombardier Darbyshire, who only relinquished the layers seat of F Sub at Néry after his ears and nose bled from concussion. He was killed on 12th July 1915 and is buried in Lancashire Landing Cemetery at Cape Helles, along with nine other horse gunners from B and L Battery. A further seventeen are buried or commemorated elsewhere in Turkey, Egypt and Malta.

 1916

   After the evacuation from Gallipoli the 29th Division was brought back to the Western front, in time for the big push on the Somme. The Divisional symbol of the red triangle can be seen at Newfoundland Park, and tin triangles can be seen on the packs of the soldiers from the divisions filmed on the First Day of the Somme.  At 07.30 on the 1st July the 2nd Royal Fusiliers and 16th Battalion the Middlesex Regiment stormed the crater formed by the detonation of the Hawthorn mine. 2 Lt Grant-Suttie and a party of telephonists from B Battery advanced with the CO of 16th Middlesex into the mine crater, but were forced to withdraw, with Bdr Port wounded, and Bdr Brockett and Driver Indge missing.  Brockett’s body was found and he lies in Hawthorn Ridge Cemetery No.1, Auchonvillers.  Indge’s was never identified but might be one of the 68 unidentified graves in this cemetery. He is commemorated on the Thiepval Memorial to the Missing.

 O battery also took part in the battle of the Somme supporting the operations of the 8th Division on its disastrous first day, and in October in the battle of Le Transloy. Three O battery soldiers are buried on the Somme.  The lower number of fatalities in 1916 than in 1917 and 1918 might be attributed to the weakness of the German counter battery artillery in the Somme.  Nor were any of the batteries placed in situations were they were exposed to small arms or direct fire.  There were very few occasions in 1916 where sufficient ground had been gained to justify moving the guns forward. No German counter attacks threatened the guns.

 1917

Second Battle of the Scarpe: 24 Apr 1917 15 Brigade RHA action. (1) 50 Div Captures Wancourt Ridge.  (2) 15 Bdee deploys forwards. (3) German Counterattack recaptures Guemappe
Second Battle of the Scarpe: 24 Apr 1917 15 Brigade RHA action. (1) 50 Div Captures Wancourt Ridge. (2) 15 Bdee deploys forwards. (3) German Counterattack recaptures Guemappe

1917 was the bloodiest year for the 1st RHA Batteries, and can be attributed to the three major British offensives in that year. The 29th Division (B & L ) and V Brigade RHA (O Bty) took part in all three offensives. E Battery in two and Chestnut Troop in one.

18 Pdr guns under fire at the Battle of Arras 24 Apr 1917

The five week long Arras offensive 9 April – 16th May 1917 was one of the most intense the BEF endured. The daily casualty rate over the course of the battle was higher than any other BEF offensive. The initial attack was very successful, largely due to improvements in artillery technology and tactics,. German batteries were located by sound ranging and flash spotting, improved fuses increased lethality and enabled wire to be cut more easily. Aerial observation techniques and creeping barrages made it easier for the infantry to assault. In 1917 O Battery’s Vth RHA Brigade became an army artillery brigade and used to support whatever part of the line needed additional artillery support. On 9th April they supported the attack on Vimy Ridge by the Canadian Corps.

When attacks were successful artillery would need to be redeployed forwards if the infantry were not to advance beyond artillery range. On 24 April B and L Batteries followed up an infantry advance into a valley just North of the Wancourt Tower. As soon as the success signal was given the guns galloped forwards. According to the infantry the advance of the guns was a magnificent and inspiring sight, carried out with great dash and skill.(3) Unfortunately a German counter attack drove the infantry off the ridge, leaving L and B Battery in the open within rifle and machine gun range of German troops. The operations on the Arras front between April and June 1917 cost the XVth Bde RHA 49 killed, (including the BC and another officer from B Battery and six other officers) 74 wounded (including officers from each of B and L officers) and a further 13 men evacuated with shell shock.

There is a memorial outside Langemarck to Harry Patch, the last survivor of the Great War whose and his comrades, took part in the the attack Langemarck on 16 August 1917.  B and  L Batteries supported fired on the fireplan Barrage map supporting the attack on .
There is a memorial outside Langemarck to Harry Patch, the last survivor of the Great War whose and his comrades, took part in the the attack Langemarck on 16 August 1917. B and L Batteries supported fired on the fireplan Barrage map supporting the attack on .

The 29th Division was used as an assault division twice in the 3rd Battle of Ypres, fought in a muddy artillery landscape. The artillery destroyed the drainage along with the buildings and vegetation. On 16th August the 29th division assaulted the Langemark area alongside the 20th Division which included the late Harry Patch and his pals. Seven weeks later 29 Division attacked again on 4th October towards Poelcappelle. The main memorial to this attack is the memorial to Private Fred Dancocks of the 4th Worcesters who was awarded the VC for his gallantry capturing a bunker near Namur crossing on the old Ypres-Staden railway line, which is now a footpath.

The 3rd Battle of Ypres was an artillery battle. The Germans held the ring of low hills around Ypres. As the allies advanced it was hard to find solid ground for gun positions around the muddy shell holes. Solid platforms might be constructed from wood or even boxes of rations. These made it easier for the German counter battery fire. During the campaign B, L and O battery would have spent a lot of time in their gas masks. The Germans unleashed a new horror on the battlefield during this battle, drenching gun positions with persistent blister agent – Mustard Gas.

Part of the predicted fire plan supportign the attack at Cambrai
Part of the predicted fire plan supporting the attack at Cambrai

After the 3rd Battle of Ypres petered out in the muddy ruins of Passchendaele the 29th Division was picked to reinforce the 3rd Army’s attack at Cambrai. This battle was a test for new technology and tactics. Instead of a lengthy preliminary bombardment, the battle of Cambrai would use 400 tanks and a short intense fire plan based on predicted targets. The fire plan was as innovative as the massed use of tanks. All of the batteries of the current 1 RHA took part in this battle. The initial attack, on 20th November created a breach in one of the stronger sector of the Hindenberg line, capturing as much ground in fifteen hours as in five months in the Ypres Salient. The Germans too had a tactical surprise in store. On 30th November they too launched an attack under a heavy predicted barrage, in their case led by storm troops which infiltrated into and then broke through British infantry on the salient caused by the British success. This advance threatened the army artillery massed behind the British infantry, with some Germans within 40 yards of the guns. L Battery was order to act the rearguard to allow the army artillery to escape. They and a mixed force of infantry and artillerymen inflicted around 150 casualties on the Germans before withdrawing. The eight L Battery soldiers commemorated on the Cambrai memorial are evidence of the cost of this operation. The official history includes praise for L Battery, a rare mention of an individual battery.(4)

Cambrai would be a good battle for a 1st RHA commemoration. This the one battle in the war in which each battery served. It allows for a focus on the tactical and technical innovation which has characterised the professional ethos of the Royal Regiment.

1918

This Walford watercolour captures the spirit of the actions by Chestnuts, D and O Batteries in March 1918

At the beginning of 1918, the Germans had a chance to win the First World War before the American Army took the field in strength. The Germans redeployed troops released from the Eastern Front by the collapse of Imperial Russia. After three years of allied attempts to break the stalemate of the Western Front, the German offensives from 21th March initiated a eight months of mobile warfare.  Between March and June the Germans achieved a series of breakthroughs and forced the allies back.

All of the Batteries were involved in these battles.  The Cavalry divisions were deployed to plug gaps in the line. The majority of Chestnut Troop’s war dead are buried or commemorated on the Somme battlefields of 1918.  There is an account in the History of the Royal Artillery on the Western Front of how the observed fire from E and two other RHA Batteries held a German advance on the 22nd March for a whole day. (5) The BC of O Battery was given 600 infantrymen back from leave, eight lewis guns from No3 Kite Balloon Company to fill a gap in the line. (6)

These battles are rarely the subject of battlefield studies.  They are as significant as defensive battles as Mons or Le Cateau, but much larger.  These are the only major defensive battles fought by the British Army that approach the scale of the operations on the Eastern Front in WW2.

"British Artillery speeding along in pursuit of the fleeing foe." Did the NY Tribune publish a picture of E Battery in October 1918?
“British Artillery speeding along in pursuit of the fleeing foe.” Did the NY Tribune publish a picture of E Battery in October 1918?

The tide turned in August with the dramatic breakthrough at Amiens which repeated the techniques demonstrated at Cambrai, but on a larger scale.  450 tanks supported by a surprise predicted barrage by just under 1,500 guns and 800 aircraft broke through and destroyed a German army in what was the “Black day” for the German army.  Chestnut Troop, E and O Battery took part in these operations.

Menin Gate 1918. From positions on the Left of this view, B and L batteries fired  the barrage behind which the infantry cleared the Germans from Ypres ay the end of the war.
Menin Gate 1918. From positions on the Left of this view, B and L batteries fired the barrage behind which the infantry cleared the Germans from Ypres ay the end of the war.
The Menin Gate today

After Cambrai the 29th Division was redeployed to the Ypres sector and fought in the defensive battle of the Lys and in the counter attacks in the summer On the 27th September 1918 B & L batteries, with the other batteries of 15 Bde RHA came into action outside the Menin Gate in Ypres.(7) The following morning they fired a creeping barrage in support of the 29th Division attack which recaptured the ground ceded in April capturing the village of Gheluveldt by the end of the day. L and B Batteries were deployed forwards to Gheluveldt on the 30th September, and supported the attacks over the River Lys in October.

1919 and Afterwards

The Armistice did not mean demobilisation.  The CWGC records war dead until 1921 as the regular army was deployed to respond to the messy aftermath of the War.  The CWGC records the deaths of Lance Naik Batu Khan of Chestnut Troop in St. Sever Cemetery Extension, Rouen (23 Dec 1918) and  Driver Noor Mohammed of B Battery in Haidar Pasha Cemetery in Turkey (30 Jan 1920), and serve as a reminder of the British Army as an Imperial force and the Regular Army’s relationship with the Indian Sub continent.

The history of 1st RHA’s batteries on the First World War is that of the Western Front, its batteries were ubiquitous, “quo fas et gloria decunt”. Their actions took place among some of the familiar land marks of the Western front. Their battles tell the story of the development of technology and tactics during the wear and the part that the Gunners.  Anyone taking a professional interest in the develo-pment of artillery on the battlefield would be remiss if they restricted their interest to the 1914 battles.

These were also actions in which at least 233 men lost their lives and perhaps 500 wounded. One of the key themes of commemoration is Remembrance, which should include understanding what these men did and why.  The Centenary is an opportunity to visit the graves, memorials and the places where these men fought and fell. Of course,  we celebrate the achievements of the Bradbury, Dorrell and Nelson at Nery, worthy of the highest award for gallantry that Britain can bestow. It is proper that L Battery remembers these men and the others that were lost at Nery. But the Centerary ought to be the time to find out about some of the other men who served the guns and remember them.  Were the eight members of L Battery who fell on 30th November at Cambrai necessarily less brave? Were any of the men who fell any less mourned?

While many people are familiar with the battles and battlefields of the Western Front, far fewer have explored them from the Gunner’s point of view.  The actions by the 1 RHA batteries are ideal topics for battlefield studies, conveniently located from the UK.  The Centenary of the First World War is an ideal opportunity to undertake low level battlefield studies.

For more information on planning battlefield studies ands staff rides contact Gunner Tours  www.gunnertours.com

gunner tours logo white on brown

 NOTES

[1]   This article is based on a talk given to the Officers of the 1st Regiment Royal Horse Artillery on 8th April 2014.

[2]  www.CWGC.org  These are minimum numbers.  The CWGC also lists RHA  as “15 Brigade RHA,”  which may include soldiers who might or might not be members of B or L Battery.  They might have been members of Y Battery, the Warwickshire TA RHA Battery or the Brigade Ammunition Train.

[3]  Farndale The Royal Regiment of Artillery on the Western Front

[4]  Esmond, J E. Military Operations France and Belgium 1917, The Battle of Cambrai  CH XV  HMSO  1934

[5]  War Diary D Battery RHA quoted in Farndale The Royal Regiment of Artillery on nthe Western Front

[6]  Esmond, J E. Military Operations France and Belgium 1918, the German March Offensive and its preliminaries, CH XV  HMSO  1934

[7]  WO/95-2291 15 Bde RHA War Diary Entry September 1918