At the beginning of February I attended an event in Brussels that really impressed me. Liberation Route Europe is an ambitious project, a marketing initiative to promote remembrance tourism of the Second World War across the continent of Europe. It was started by a Dutch charity, but now encompasses Europe from Sicily to the UK and Normandy to Poland. I met a great bunch of people. There are several impressive achievements.
• A walking trail covering Liberation Routes from London to Berlin via Normandy.• An impressive Rough Guide “Liberation Routes”, with a mixture of history, a campaign guide information about museums, memorials and cemeteries.
• A network of guides, museums and tourism organisations to support inbound travel.
• Generating business with inbound tour operators using the Liberation Route.
• Political support and engagement by senior European politicians. Liberation Route Europe’s Patron is Martin Schultz, a past President of the European Parliament and previous key-note speakers include Frans Timmermans, the Vice President of the EU Commission.
No punches pulled in a critique of Poland’s current ruling party view of history
• A willingness to debate contentious contemporary issues. The event included several presentations of gaps or critical interpretations, including the Dutch neglect of its post war experience in Indonesia, and the current day Russian and Polish government driven historic narratives. There was a debate between two MEPs about the extent to which the EU should have an authorised narrative. A little incongruous, inconclusive and less than exciting, but significant that it took place.
Their website has a mixture of history and tourism offers. History takes the visitor to story lines, based on historic themes, geographic locations and personal stories. An invitation to Travel the route offers directs visitors to offers for individual, groups, educational tours, guides – and the Rough Guide.
Way marker design for the walking trails
The history behind the Liberation Route is based on an agreed historic interpretation named as the “Magna Carta”. This interpretation, agreed by eight historians of different nationalities, draws on the full range of individual experiences of the populations of European states during the Second World War. This acknowledges that loyalties were divided and avoids judgements on the actions of a generation that is fading from personal memory. The liberal politicians supporting the project see the story of the Second World War, and its roots in fascism and racial supremacy as an important warning from history. The inclusive interpretation focusing on the common experiences of European populations is an ideological counter to the nationalism and intolerance of modern populism.
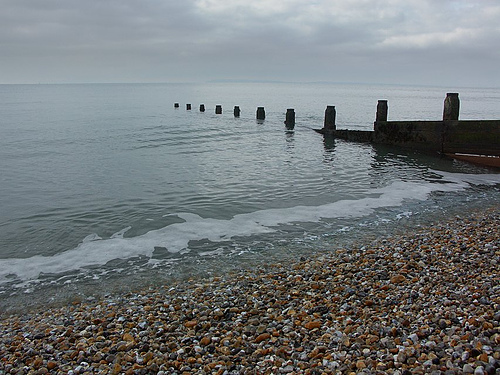
The conference took place in the Royal Museum of the Armed Forces and Military History in Brussels under a Spitfire on the tail of a V1 flying bomb. Brussels and Antwerp, like London faced intense bombardment in 1944-45. There is no museum in London that tells the story of London’s defence against the V1 blitz. In Belgium they are opening museums and interpretation centres to tell the story of their heritage. In Britain we are closing military museums.
Liberation Route Europe has been keen to engage with Britain. The Liberation Route walk starts in London. Whatever the UK’s future relationship with Europe, it does not affect its role in the Second World War and there is a common interest in promoting heritage to inbound tourists. However, many Britons are skeptical of “Euro History”. Some question how Germans can tell the story of WW2. Nor does the Liberation Route Europe focus on the heritage of 1944-1990 fit the British narrative with its finest hour in 1940.
Recent research segments tourists by their interests, referred to as passion communities, rather than by demographics. One segment is described as explorers of cultural identify. Around one third of visitors plan to visit sites associated with the world wars. This roughly reflects the segment covered by dark tourism research and the research commissioned by the Royal British Legion. Liberation Route Europe is ahead of the game as a focus for organising inbound tourism for this sector. Britain, committed to existence outside the EU needs to up its game.
2015 has been a big year for centennial anniversaries; 100th of Gallipoli, 200th of Waterloo and the 600th of Agincourt among others. Yet one of the most significant for the history of the Gunners has been largely overlooked.
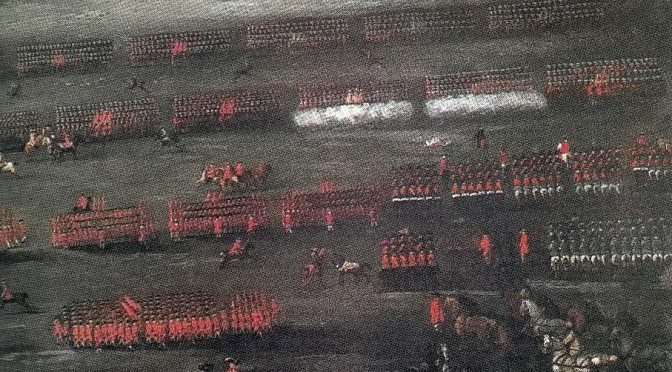
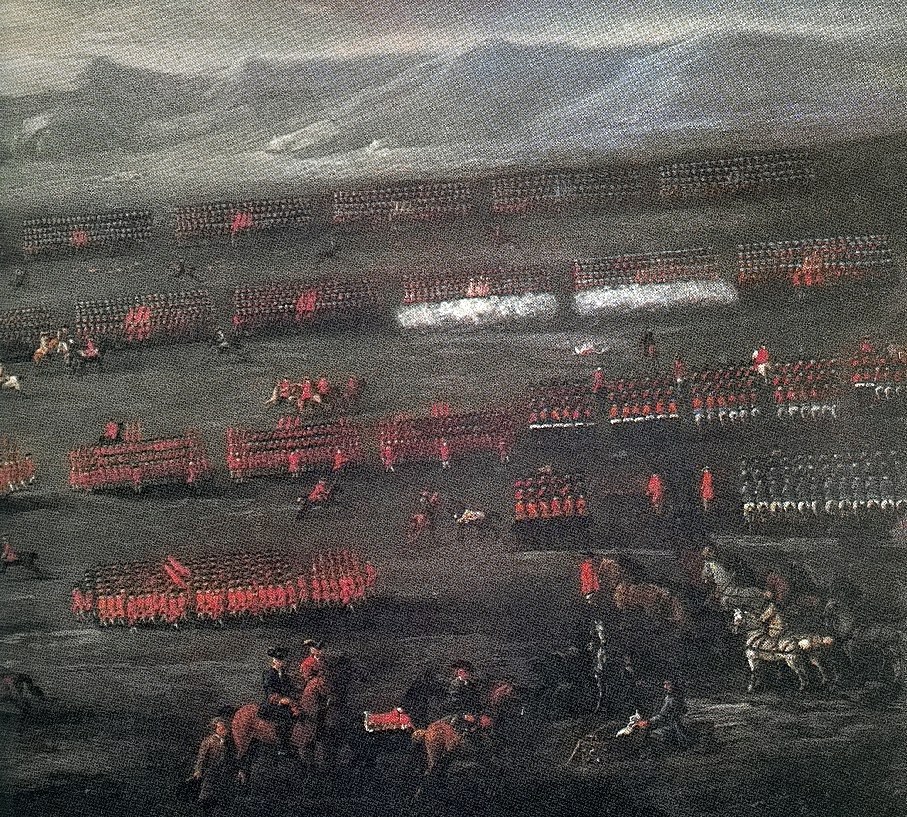
12-13th November were the 300th anniversaries of two battles at Preston (12-Nov 1715) in Lancashire and Sherrifmuir in Scotland (13 Nov 1715) that decided the fate of the 1715 Jacobite Rebellion. On the death of Queen Anne in 1714 the crown of Great Britain passed to her second cousin George Elector of Hannover, a protestant rather than to her half-brother James, a catholic, exiled in France.
On 8th September John Erskine, Earl of Mar raised the standard at Braemar in the name of King James VIII of Scotland and III of England. By 22nd October his army of nearly 20,000 men had captured most of Scotland North of the Firth of Forth. Mar was indecisive and lacked any experience of campaigning. He hesitated and gave the Hanoverians under John Campbell 2nd Duke of Argyll time to increase the strength of his forces. The armies met at Sherrifmuir North East of Stirling on the 13th November 1715. Despite Mar outnumbering Argyll by perhaps as much as three to one the battle was inconclusive.
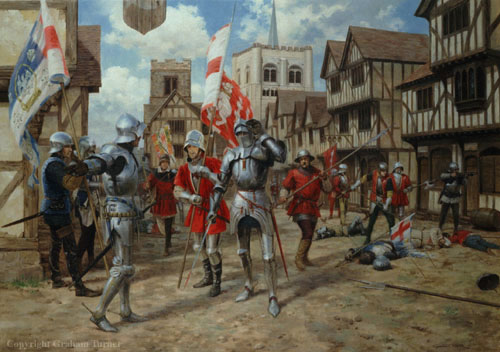
Meanwhile, in England Jacobite supporters in the West of England and Northumberland prepared to rise for the House of Stuart, led by three peers and six MPs. The government arrested the leaders and deployed troops to Bristol Plymouth and Southampton to prevent these ports falling into Jacobite hands. The rising ion Northumberland did take place, supported by several peers, and joining forces with a force of Scottish Jacobites from the Borders moved into Lancashire, where they hoped to find support. Government troops caught up with this force in Lancashire and attacked them around the town of Preston on 12th November, with the main attack along Fishergate. The Jacobites had the best of the first day, inflicting heavy losses on the government troops, in what is probably the last battle in England. However, after reinforcements arrived, the majority of the Jacobite army surrendered.
Artillery did not play a significant role in either battle. At the time, there was no peacetime artillery organisation, and an artillery train was organised for each campaign from the gunners in the Tower. It took so long to find men to man the artillery train that the rebellion was over before the train was ready to march. This was a dangerous weakness and the Duke of Marlborough, obtained a Royal Warrant to form a permanent regiment. Accordingly, the Royal Regiment of Artillery was created in 1716.
Both battlefields are accessible. Sherrifmuir is still moorland. Although Preston has grown and sprawled over the centuries, the road layout remains the same. If you want to visit either, contact us.
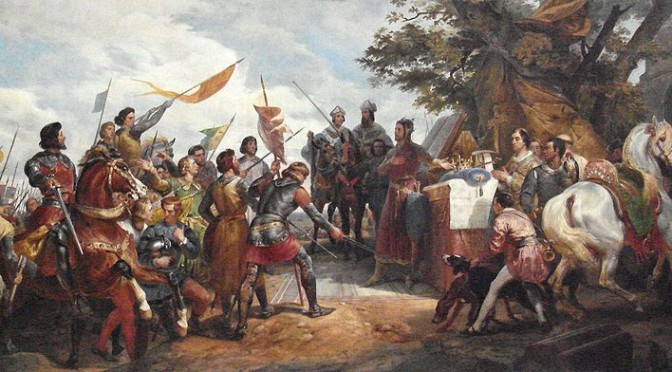
Prince Louis of France was invited by the rebel barons to become king of England following King John’s refusal to accept the Magna Carta he had sealed at Runnymede. Over 200 castles in England were besieged, by the rebel barons or King John’s forces, in what became the First Barons’ War. This aimed to safeguard the rights, privileges and liberties of the clergy and the nobles as enshrined in the Magna Carta, but spilt out into a dynastic war for the English throne. This was only settled with the death of King John, and his succession by King Henry III. Even then, the dispute continued until the end of the century.
The Battles and Sieges
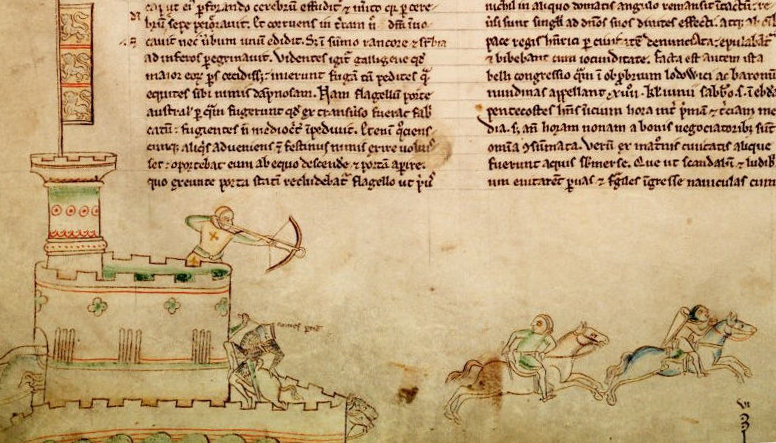
There were dozens of battles and sieges between 1214 and 1267. This was an era of castles and sieges. Many of the castles still stand. At Rochester you can still see the damage caused by John’s army when it undermined the corner of the keep using the fat of 40 pigs to create a fire fierce enough to burn the props. These are events populated by heroes, heroines and villains that could have been created by Hollywood. There are princes fighting for their kingdom, wicked sherriffs, heroines, callous mercenaries, treacherous pirates and outlaws. A summary of the main military events are here.
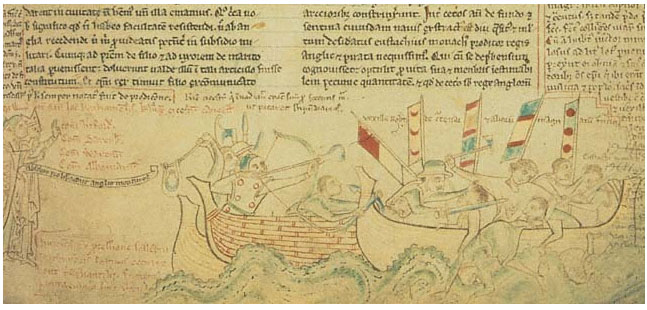
The Capture of Eustace the Monk: Mercenary, Pirate and Outlaw
The Battlefields Trust is planning to create a Battlefield Trail covering the battles and sieges of the barons wars. This will be a major project and be timed to coincide with the 800th anniversary of Magna Carta as well as the 750th Anniversary of the Siege of Lewes. The Battlefields Trust is a member of Magna Carta 800. One of the most exciting developments is the inclusion of battlefields in the Magna Carta 800 Trail being developed for Vist England. This is the first time it has been possible to promote Britain’s Battlefield heritage as part of a tourism strategy.
If you want to help with this project contact Edward Dawson Project Director at the Battlefields Trust. magnacarta800@battlefieldstrust.com See more here http://www.battlefieldstrust.com/page136.asp
British Battlefields has been set up to promote and organise visits to British military heritage. It will be offering battlefield tours to the battlefields of Magna Carta.
Author: David Santiuste; Pen and Sword Military: ISBN 978 184884 5497. This softback edition has 146 pages with a further 45 of abbreviations, notes and bibliography.
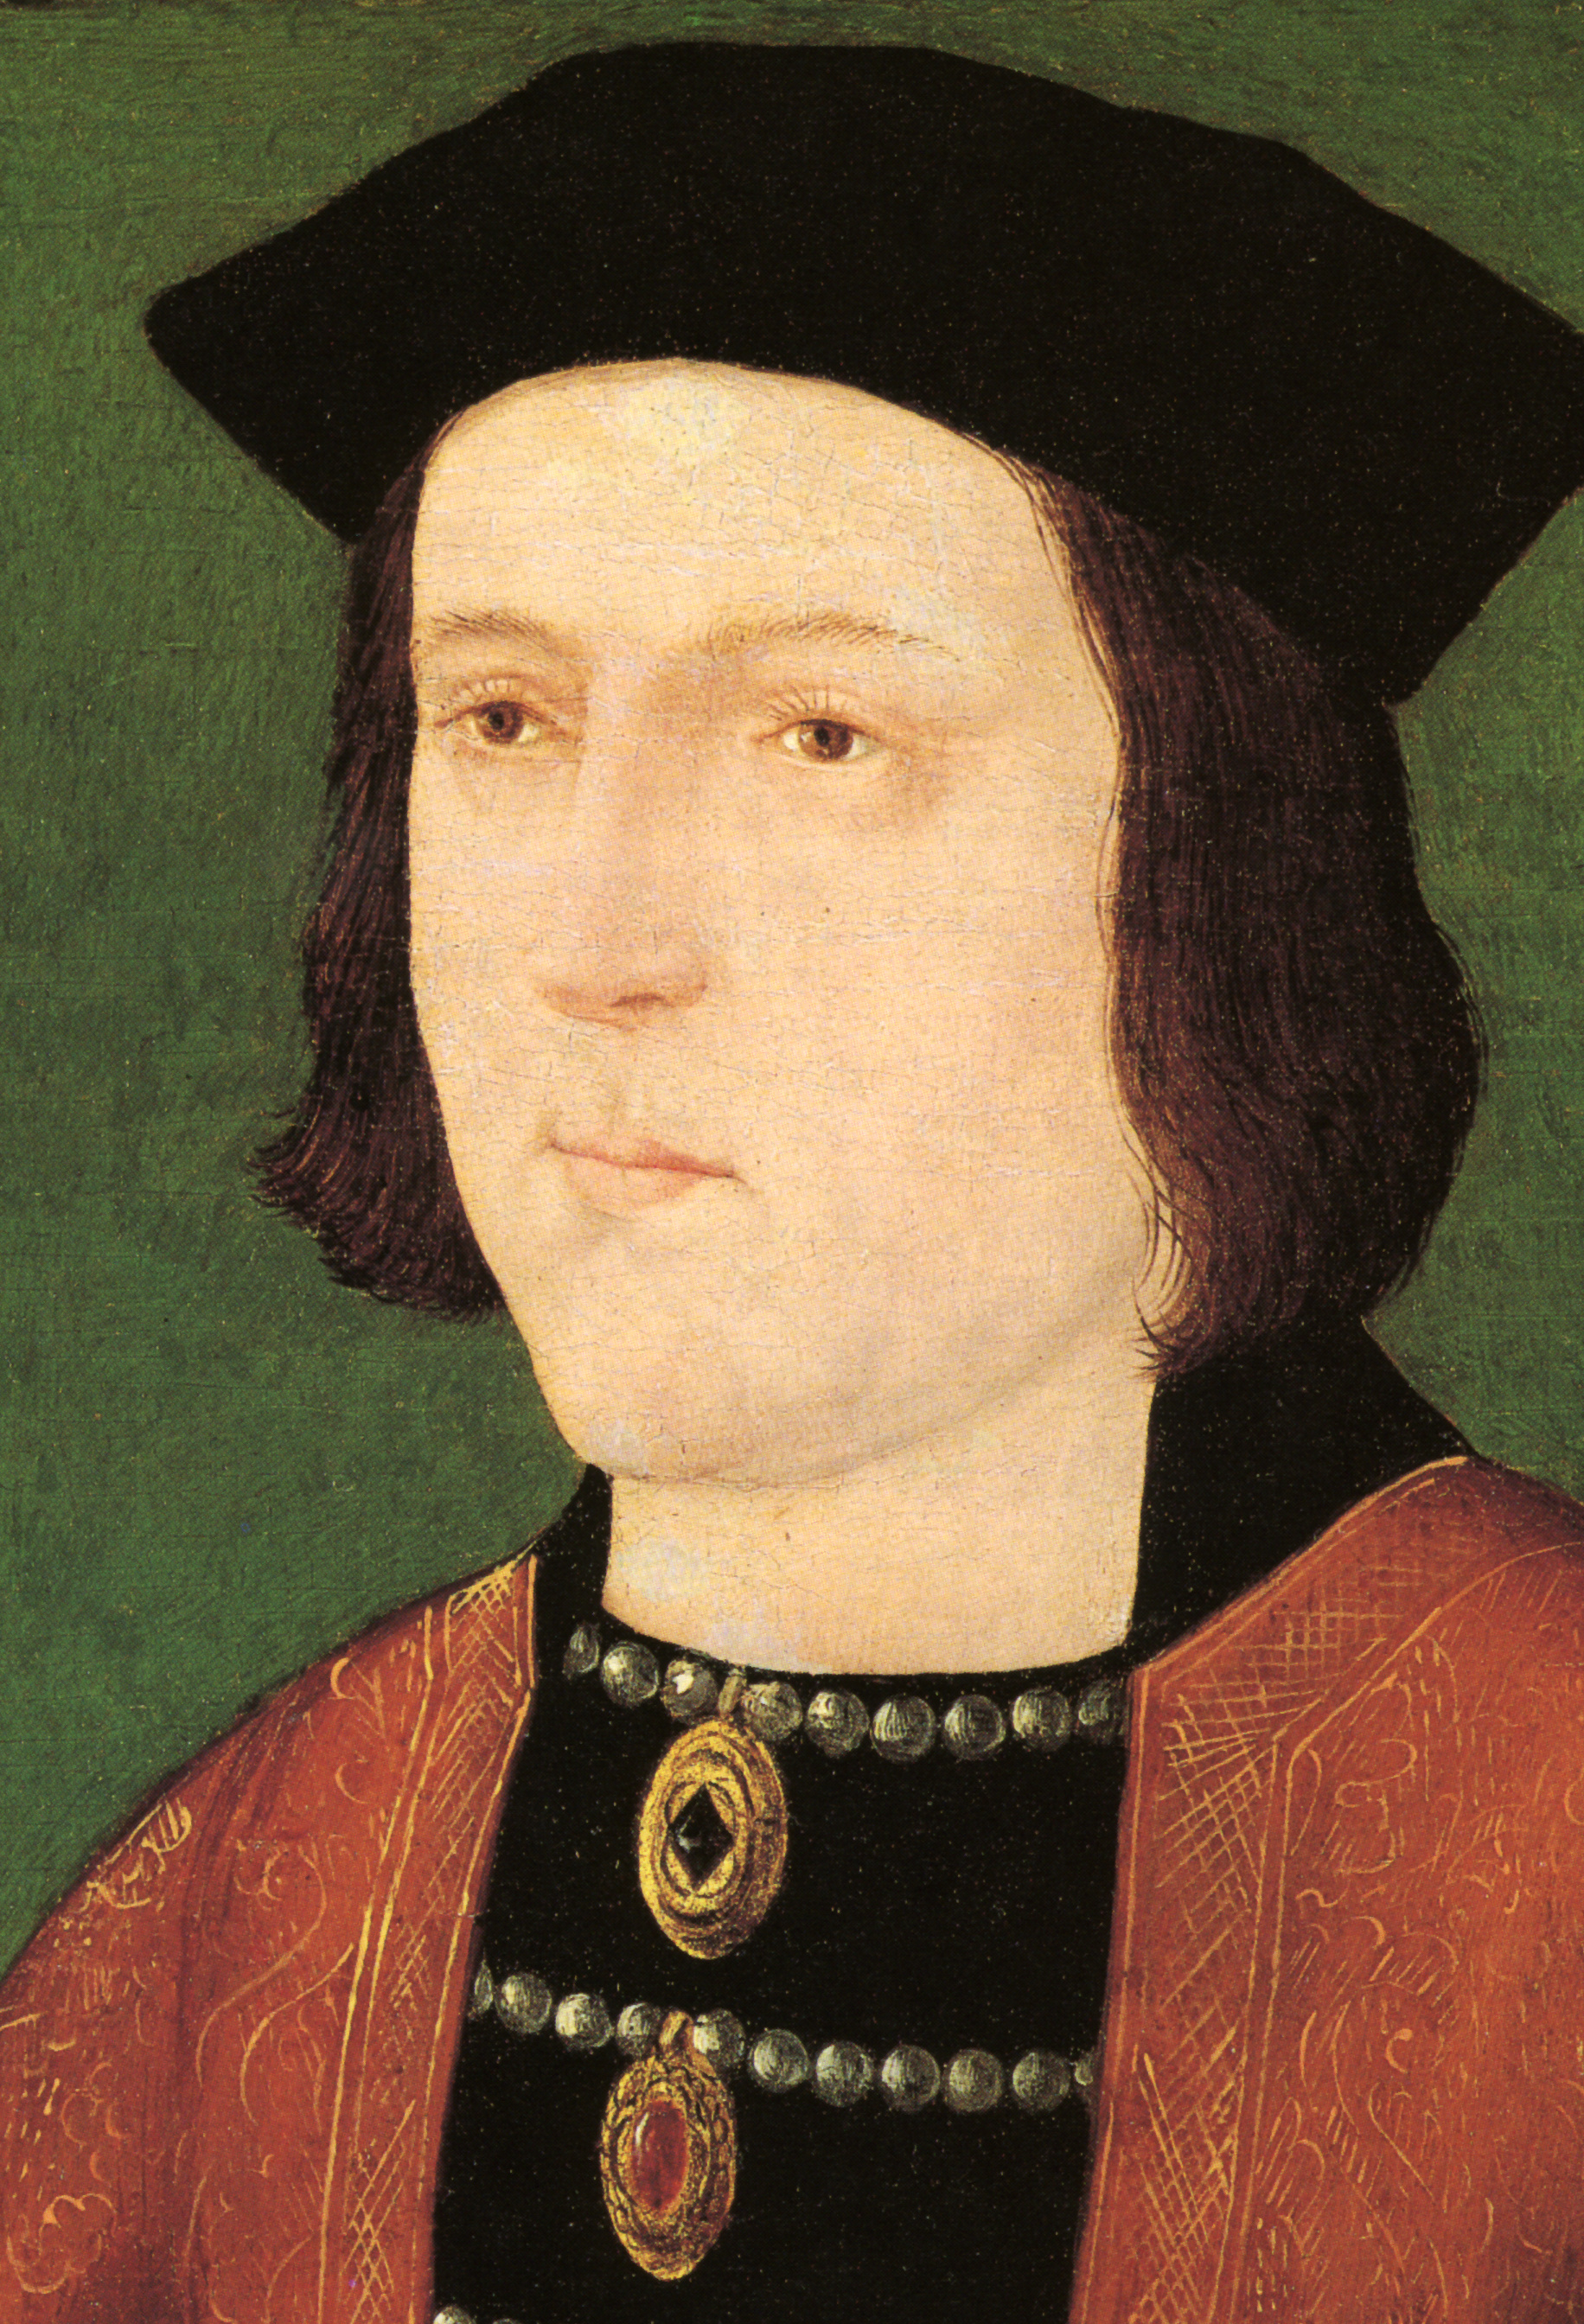
This is not a full biography of Edward IV. It is more a reassessment of his military career and role as a commander. By the author’s own admission, it is not based on extensive archival research of his own. The notes, however, suggest reliance on some of the most prominent experts of the period, notably the late Professor Charles Ross, in conjunction with more contemporary research. Helpfully, it does include a family tree, which is necessary because of the complex family connections of most of the main players; the importance of which cannot be underestimated. Having looked up David Santiuste (a tutor at Edinburgh University) on the internet, it is clear to me that although this work is constructed in a solidly academic style, he intended this book to also appeal to a more general readership.
To modern thinking, most of the battles in the Wars of the Roses would only be classified as skirmishes. It must, however be remembered that the population of the country at this time was in the region of 2,500,000 and therefore the pool of men to fight was limited, especially as this was effectively civil war and the combatants split between the two sides.
David Santiuste suggests that events at the Battle of Northampton (1460) which was Edward’s first command in the absence of his father, may have influenced his later strategic conduct; although it is likely that Warwick had overall command.
The author asserts that Edward’s leadership qualities stem from his great height and personal charisma, even as an 18 year old. The battle of Mortimer’s Cross (1461) was Edward’s first personally crucial battle and like many more, the outcome was heavily influenced by the weather. The rare phenomenon of parhelia (the apparition of three suns caused by refraction of sunlight through ice crystals) was seen before the battle and Edward convinced his frightened men that this was a good omen, representing the Holy Trinity. Surely quick thinking on his part, as this would have bolstered the morale of a frightened body of men. People in the Middle Ages were very superstitious and believed strongly in omens of this sort. The fact is that Edward’s great height of some 6ft 4” must have made him very noticeable. To men seeing him in the thick of the fighting would have been a great encouragement. Mr Santiuste quotes from the leading commentators of the time and even Edward’s detractors all admit to his fine stature and good looks. No bad thing for a medieval king who had to take the crown in battle and then demonstrate strength enough to rule.
Edward was not present at the second battle of St Albans, which followed hard on his victory at Mortimer’s Cross. Warwick was comprehensively defeated at this encounter and I think it true to say that he may have been a better sailor than a soldier. The author suggests that Edward was already seeing that his destiny lay in his own hands and he already ‘no longer bowed to Warwick’.
In spite of this defeat, the Yorkists gained control of London because the city denied access to the Lancastrians. This has much to do with the fact that the Lancastrian armies of the period developed a reputation for plunder and savagery towards the general populace. Edward, on the other hand, was noted for his strict discipline, commanding ‘that no man in his own army should act thus, on pain of death’. Then came probably the most important battle of this first part of the civil war and bloodiest ever fought on English soil; Towton.
This represented a decisive Yorkist victory, which resulted in Edward’s confirmation as king, followed by his coronation. The butcher’s bill of Towton has been the subject of much speculation for many years and is inevitably discussed in this work, with the author attempting to rationalise the claims of the chroniclers of the period with the more recent archaeological evidence, concluding that whatever the final figures were, the armies of both sides would have been as large as possible (bearing in mind the losses suffered in recent battles) because the outcome of this battle would confirm the crown on Edward or Henry.
This book does not deal with the personal, more salacious side of Edward’s character. Although the issue of Edward’s marriage is briefly mentioned, the author develops the many reasons for Warwick’s disaffection with Edward’s regime. It is too easy to simply blame the marriage. Edward was clearly a very able sovereign and in fact, his choice of bride was the final realisation to the Earl of Warwick that Edward was his own man and wasn’t going to be ‘guided’ by the earl on all main issues. I think it likely that the breach with Warwick was inevitable as he probably believed he would be the power behind the throne – no matter who the king married.
The author then goes on to describe the events resulting in the final disintegration of their relationship, which ultimately resulted in the alliance of Edward’s treacherous brother George with the earl and his tactical withdrawal to the Low Countries to regroup. Had the king not done this, it would have surely resulted in the loss of his head, never mind what turned out to be the temporary loss of his throne.
Mr Santiuste details Edward’s time in Bruges and eventual persuasion of his brother-in-law, Charles the Bold to lend him the resources to mount an invasion to regain his crown. Edward landed at Ravenspur at the mouth of the Humber on March 2nd 1471, cleverly suggesting that he had only come to claim his rights as the Duke of York, but quickly gathered an army and with remarkable speed regained London; the Lancastrian lords abandoning Henry VI to his fate.
Edward’s supporters had soon rallied and rearmed and the Yorkists were able to give battle at Barnet on April 14th, Easter Sunday 1471. A remarkable turn around, which resulted in the death of the Earl of Warwick, finally breaking Neville power. George of Clarence had turned his coat again and now Edward went on to fight his final battle at Tewkesbury, resulting in the death of Henry VI’s heir and most of the Lancastrian hierarchy. Those that survived went into exile. Only then did he order the death of Henry VI, probably belatedly realising that while ever he lived, he would be a focus for rebellion.
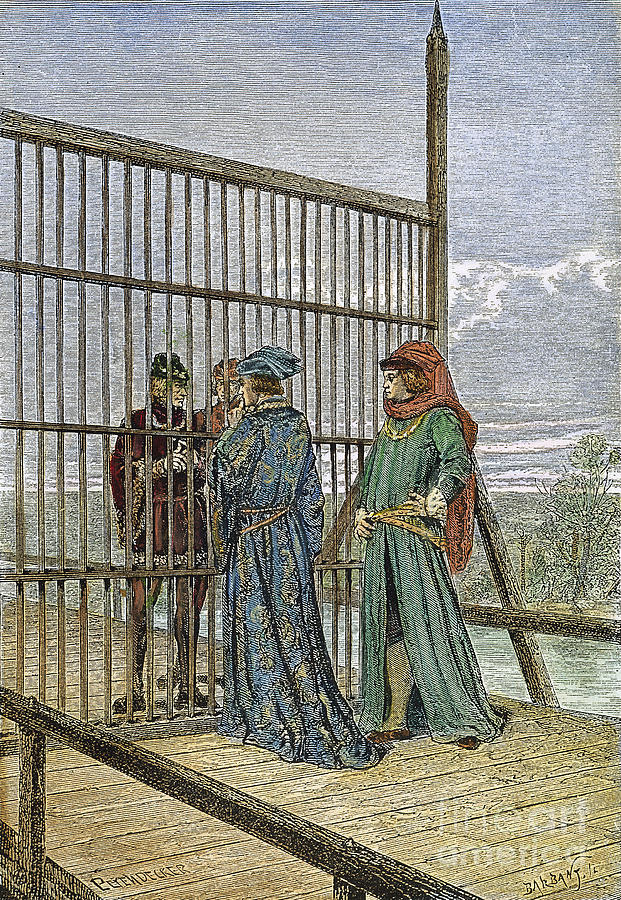
The second period of Edward’s reign was marked by peace as there was now no viable threat to his regime. Probably the most controversial event was the Treaty of Picquigny (1475). Edward took an army to France, but agreed the treaty with Louis XI on the bridge at Picquigny, which paid a pension to Edward of 50,000 crowns per annum with a down payment of 75,000. This continued for seven years, until Louis reneged on the agreement. This represents millions at today’s values and Edward probably regarded it as his finest hour, thereby avoiding a costly war and supplementing the exchequer. His remaining brother, Richard however, did not. This event may mark the beginnings of his disaffection with the king, while remaining a loyal lieutenant.
Edward IV is a much ignored king who school history books write off as a tyrannical despot. Yet this is surely not so. David Santiuste describes a man who time and again tried to rehabilitate his enemies, with varying success. His patience with the treachery of his brother George is a good example of this. History has shown that he was the victor of this conflict and an undefeated general. When Edward died unexpectedly in 1483, he was personally rich and the exchequer was full.
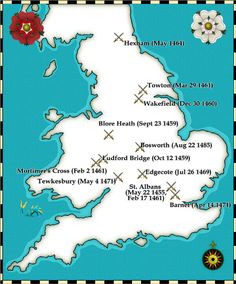
The four battles of Mortimer’s Cross, Towton, Barnet and Tewkesbury are among the most important to English history. This book gives full accounts of them all, with details of weapons, tactics and the logistical difficulties that a medieval army would face. The book also includes three maps; one a general map showing the locations of all the battles and two more detailed ones, covering Towton and Tewkesbury. I would have liked to see two more to cover Mortimer’s Cross and Barnet and find myself wondering why these weren’t included.
Recently Professor Saul David has described Edward IV as one of history’s most ‘overrated’ people. David Santiuste’s work demonstrates that Edward’s record as a commander and leader of men equals the more accepted warrior princes of the Hundred Years War.
This is a comparatively short work, but the author has been careful not to be distracted from his main theme, while placing Edward’s actions in the context of his policies, both at home and in a wider Europe. A worthwhile read.
Two dramatic episodes from 1914 have been the centre of commemorations for the Royal Artillery. E Battery were supporting the cavalry screen ahead of the BEF when they fired the famous first shot on 22nd August 1914. The role of L battery in the “Affair at Néry” on 1st September 1914 has caught media and public attention ever since 1914. The German surprise attack on the 2nd British Cavalry brigade was beaten off with heroic acts rewarded by three Vcs and two MMs to the men of L Battery, and led to the award of the Honour Title of “Néry”. These events have tended to overshadow the other actions undertaken by E and L battery during the First World War, and by other batteries of the current 1st Regiment RHA.(1)
The current batteries are A Battery (The Chestnut Troop), B, E, L (Nery) and O Battery (The Rocket Troop) . Their 1914 home stations and wartime deployment are summarised in the following table.
Battery
Station in 1914
Deployment
A
Ambala India
Indian Bde RHA then XVIth Bde RHA 4 Cav Div/Army troops
B
Ambala India
XVth Bde RHA 29 Div
E
Newbridge, UK
1 Cav Div then 3 Bde RHA – 2 Cav Div.
L
Aldershot, UK
1 Cav Div then XVth Bde RHA
O
Ipswich,UK
Vth Brigade RHA 8 Div then Army troops
Each Battery was commanded by a Major with a battery captain, and three subaltern section commanders. Two Subsections formed a Section and in a six gun battery these would be designated as Left, Centre and Right Sections. A Subsection consisted of a single gun and limber drawn by six horses (with three drivers), eight gunners (riding on the limber or mounted on their own horses), and an ammunition wagon also drawn by six horses (with three drivers).
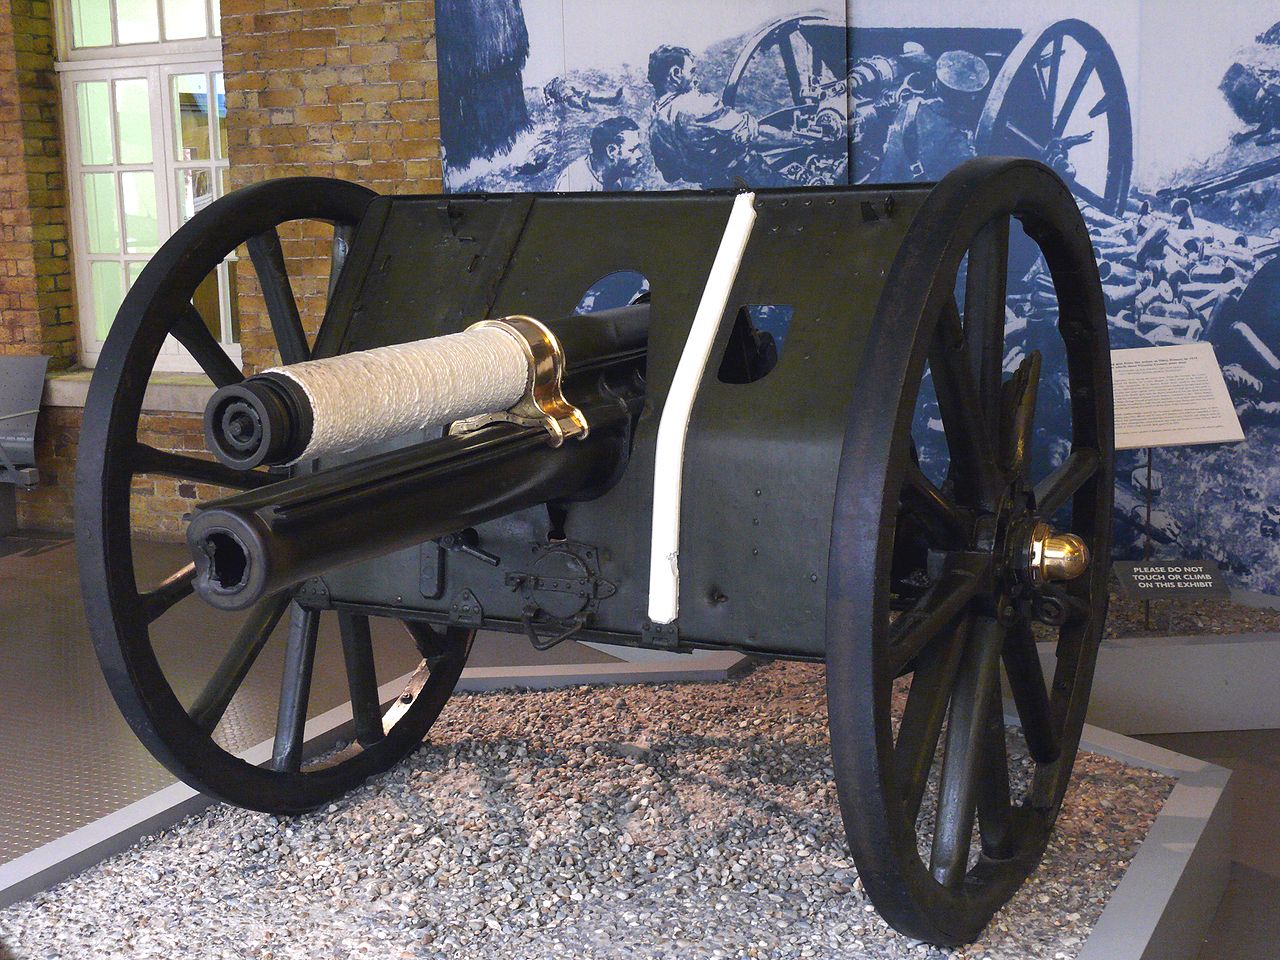
The 13 Pdr Nery gun on display in the Imperial War Museum london
RHA batteries were armed with the 13 Pdr Gun. The 13 Pdr fired a 13 lb shrapnel shell to a range of 5,900 yd (5,400 m). The 18 Pdr, which equipped the Field Artillery fired a projectile weighing nearly 50% heavier and for which an HE shell was in service by October 1914. It also out-ranged the 13 Pdr and had a range of 6,525 yd (5,966 m) and 7,800 yd (7,100m) with the trail dug in. During the course of the war all but E Battery were re-equipped with 18 Pdr.
The introduction of the dial sight had made it possible to operate in an indirect role. However the flat trajectory of the 13 Pdr and the limited signal equipment tended to restrict indirect fire to situations where the battery commander could position the guns behind cover and act as the observer from a position where he could see the guns and the target. There were no established forward observer parties, but as trench warfare developed and telephones and wire became more widely available, an observation post might be deployed at some distance from the battery or a liaison team sent to the infantry.
Although indirect fire techniques were known and practised, the RHA went to war with equipment better suited to operating in the direct role. The 13 Pdr had a flat trajectory and it would be difficult to find good indirect gun positions in broken country such as the industrial landscape of Mons. The only ammunition provided for the 13 Pdr was shrapnel, which is very effective against troops in the open, but almost useless against troops behind cover.
The part the Horse Artillery played in the opening months was not far removed from pre war expectations. British Cavalrymen were equipped with the same SMLE rifle as the infantry and marksmanship training, which gave them an edge of the carbine equipped Germans in dismounted action. However, it was the battery of 13 Pounders supporting each brigade which contained the major part of its fire power, and guns which would inflict the majority of casualties in the Fist World War..
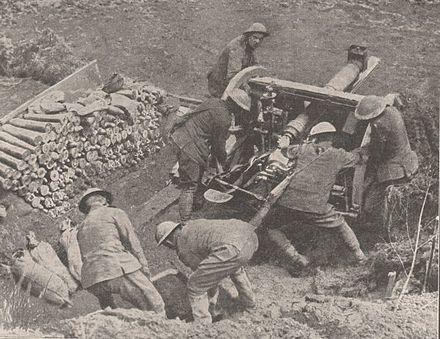
Positioning a 18 Pdr Gun The Battle of Arras April 1917
The Commonwealth War Graves Commission (CWGC) records 233 men as serving in one of the batteries.(2) Given WW1 norms of two wounded for each dead, this would imply around 700 casualties during the war. The establishment of a 1914 RHA Battery was five officers and 200 other ranks, giving 1,025 for the five current batteries. This gives a conservative estimate of a fatality rate of just under 23% of the establishment across all batteries. The casualties were not evenly distributed. L Battery’s 78 fatalities implies a figure of killed and wounded well in excess of the battery establishment of 205. Nor was 1914 the year in which L Battery suffered its highest casualties.
Current 1 RHA Batteries Fatalities 1914-1921
A
B
E
L
O
All Batteries
1914
0
0
4
26
0
30
1915
1
12
1
9
3
26
1916
2
8
0
1
5
16
1917
3
30
9
30
17
89
1918
23
6
2
11
12
54
1919
0
2
3
0
1
6
1920
0
4
1
1
0
6
1921
3
3
0
0
0
6
Total
32
65
20
78
38
233
(Note that these figures are an indicative minimum. The CWGC database does not always identify the unit in which a soldier served. . )
Even before Néry, the fortunes of war placed L Battery in a position to play a significant role in the battles of Elouges on the 24th and Le Cateau on the 26th. On each occasion they brought down fire on German troops attempting to outflank the army. Even without Néry curtailing their participation in the campaign, L Battery were one of the most actively engaged RHA Batteries.
The fighting in the early months of the First World War was very different to other campaigns on the Western Front, or even other campaigns of the war. The pattern of warfare was closer in some ways to that of the previous century. The battles were of short duration with one side disengaging. Mons, Le Cateau, Elouges and Néry can be identified by a single day. At Le Cateau the British Army even deployed anachronistically on an open plain with the guns drawn up in the front line as if it were 1815. It was not until the battle of the Aisne that both sides became aware of the power that C20th weapons gave to the defence. After the trench lines developed between September and November 1914 the character of the war changed to become one continuous engagement. There would be no more individual battle days as bloody as Nery, but a trickle of casualties throughout the four years of the war, with some days bloodier than others.
1915
In November 1914 O Battery arrived on the Western Front as part of the Vth Brigade RHA in the 8th Infantry Division’s artillery. . In 1915 The Chestnut Troop joined them on the Western Front as part of I Indian Brigade, Royal Horse Artillery. They both took part in the battles in the Neuve Chapelle area 1914-15.
The rebuilt L Battery joined B battery in the XVth RHA Brigade as part of the divisional artillery of the 29th Division in 1915. This division was formed from regular army garrisons around the world and first deployed in the Gallipoli campaign. It would become known as the “Indomitable” 29th and would take part in more attacks than any other formation. There is no specific monument in Gallipoli for the artillery of the 29th Division. However, one of the first fatalities suffered by the reconstituted L battery was Bombardier Darbyshire, who only relinquished the layers seat of F Sub at Néry after his ears and nose bled from concussion. He was killed on 12th July 1915 and is buried in Lancashire Landing Cemetery at Cape Helles, along with nine other horse gunners from B and L Battery. A further seventeen are buried or commemorated elsewhere in Turkey, Egypt and Malta.
1916
After the evacuation from Gallipoli the 29th Division was brought back to the Western front, in time for the big push on the Somme. The Divisional symbol of the red triangle can be seen at Newfoundland Park, and tin triangles can be seen on the packs of the soldiers from the divisions filmed on the First Day of the Somme. At 07.30 on the 1st July the 2nd Royal Fusiliers and 16th Battalion the Middlesex Regiment stormed the crater formed by the detonation of the Hawthorn mine. 2 Lt Grant-Suttie and a party of telephonists from B Battery advanced with the CO of 16th Middlesex into the mine crater, but were forced to withdraw, with Bdr Port wounded, and Bdr Brockett and Driver Indge missing. Brockett’s body was found and he lies in Hawthorn Ridge Cemetery No.1, Auchonvillers. Indge’s was never identified but might be one of the 68 unidentified graves in this cemetery. He is commemorated on the Thiepval Memorial to the Missing.
O battery also took part in the battle of the Somme supporting the operations of the 8th Division on its disastrous first day, and in October in the battle of Le Transloy. Three O battery soldiers are buried on the Somme. The lower number of fatalities in 1916 than in 1917 and 1918 might be attributed to the weakness of the German counter battery artillery in the Somme. Nor were any of the batteries placed in situations were they were exposed to small arms or direct fire. There were very few occasions in 1916 where sufficient ground had been gained to justify moving the guns forward. No German counter attacks threatened the guns.
1917
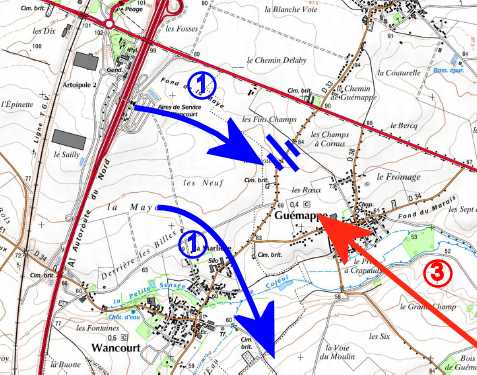
Second Battle of the Scarpe: 24 Apr 1917 15 Brigade RHA action. (1) 50 Div Captures Wancourt Ridge. (2) 15 Bdee deploys forwards. (3) German Counterattack recaptures Guemappe
1917 was the bloodiest year for the 1st RHA Batteries, and can be attributed to the three major British offensives in that year. The 29th Division (B & L ) and V Brigade RHA (O Bty) took part in all three offensives. E Battery in two and Chestnut Troop in one.
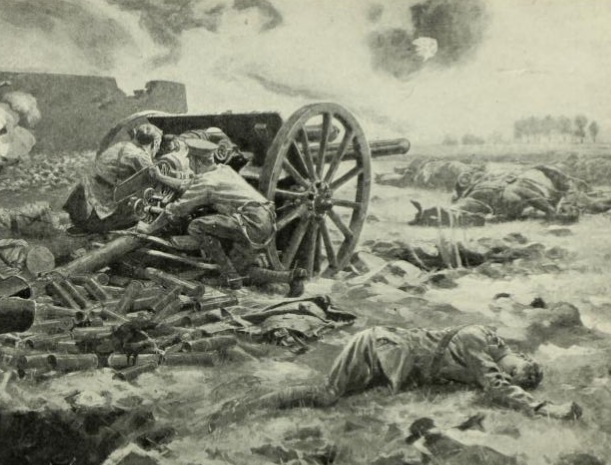
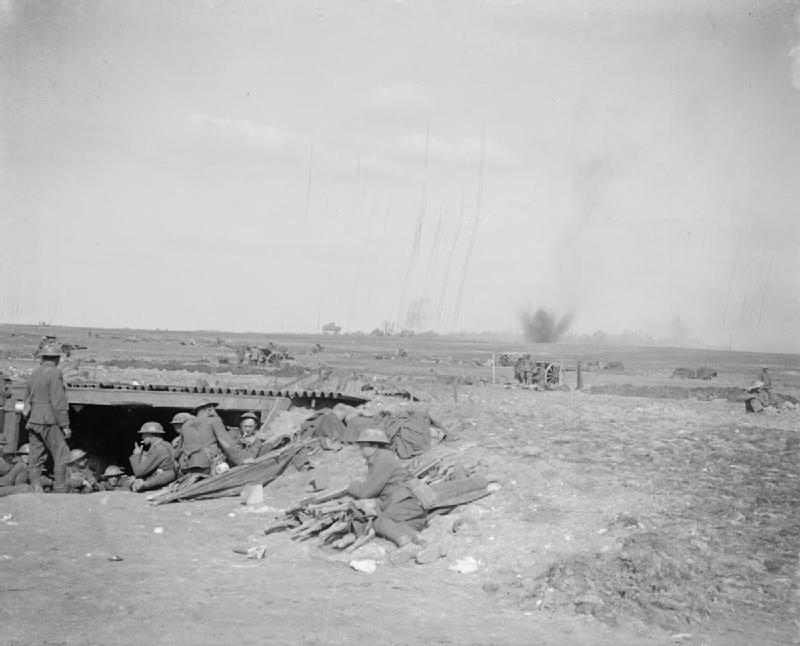
18 Pdr guns under fire at the Battle of Arras 24 Apr 1917
The five week long Arras offensive 9 April – 16th May 1917 was one of the most intense the BEF endured. The daily casualty rate over the course of the battle was higher than any other BEF offensive. The initial attack was very successful, largely due to improvements in artillery technology and tactics,. German batteries were located by sound ranging and flash spotting, improved fuses increased lethality and enabled wire to be cut more easily. Aerial observation techniques and creeping barrages made it easier for the infantry to assault. In 1917 O Battery’s Vth RHA Brigade became an army artillery brigade and used to support whatever part of the line needed additional artillery support. On 9th April they supported the attack on Vimy Ridge by the Canadian Corps.
When attacks were successful artillery would need to be redeployed forwards if the infantry were not to advance beyond artillery range. On 24 April B and L Batteries followed up an infantry advance into a valley just North of the Wancourt Tower. As soon as the success signal was given the guns galloped forwards. According to the infantry the advance of the guns was a magnificent and inspiring sight, carried out with great dash and skill.(3) Unfortunately a German counter attack drove the infantry off the ridge, leaving L and B Battery in the open within rifle and machine gun range of German troops. The operations on the Arras front between April and June 1917 cost the XVth Bde RHA 49 killed, (including the BC and another officer from B Battery and six other officers) 74 wounded (including officers from each of B and L officers) and a further 13 men evacuated with shell shock.
There is a memorial outside Langemarck to Harry Patch, the last survivor of the Great War whose and his comrades, took part in the the attack Langemarck on 16 August 1917. B and L Batteries supported fired on the fireplan Barrage map supporting the attack on .
The 29th Division was used as an assault division twice in the 3rd Battle of Ypres, fought in a muddy artillery landscape. The artillery destroyed the drainage along with the buildings and vegetation. On 16th August the 29th division assaulted the Langemark area alongside the 20th Division which included the late Harry Patch and his pals. Seven weeks later 29 Division attacked again on 4th October towards Poelcappelle. The main memorial to this attack is the memorial to Private Fred Dancocks of the 4th Worcesters who was awarded the VC for his gallantry capturing a bunker near Namur crossing on the old Ypres-Staden railway line, which is now a footpath.
The 3rd Battle of Ypres was an artillery battle. The Germans held the ring of low hills around Ypres. As the allies advanced it was hard to find solid ground for gun positions around the muddy shell holes. Solid platforms might be constructed from wood or even boxes of rations. These made it easier for the German counter battery fire. During the campaign B, L and O battery would have spent a lot of time in their gas masks. The Germans unleashed a new horror on the battlefield during this battle, drenching gun positions with persistent blister agent – Mustard Gas.
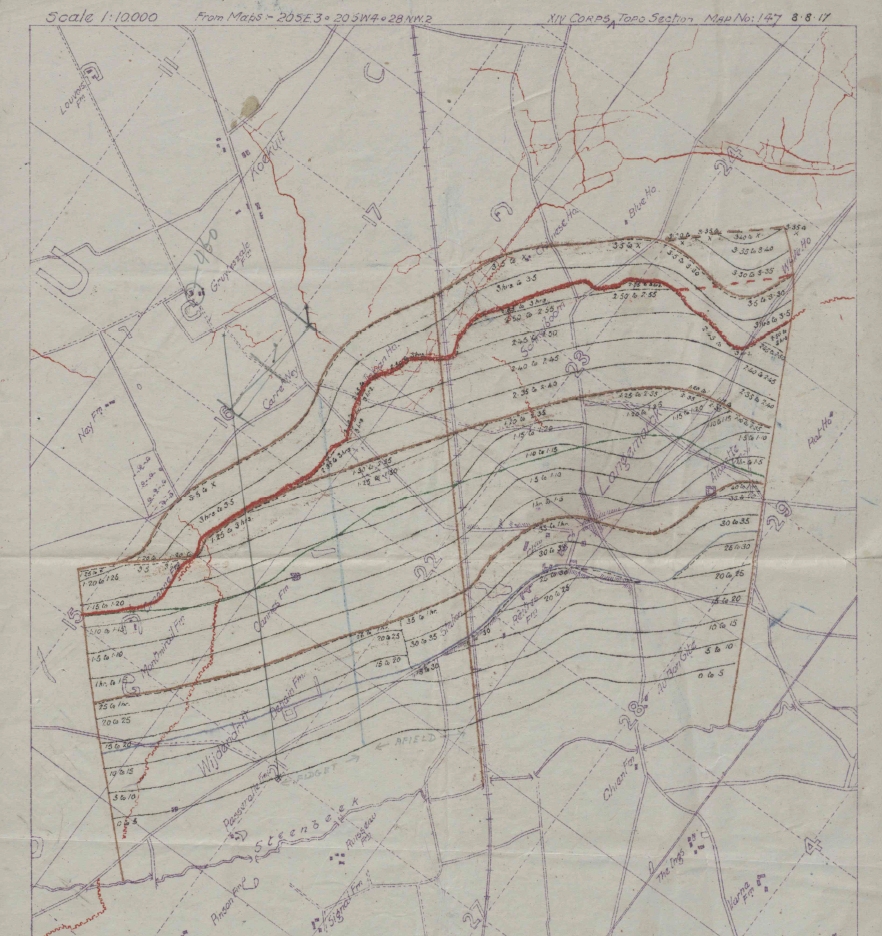
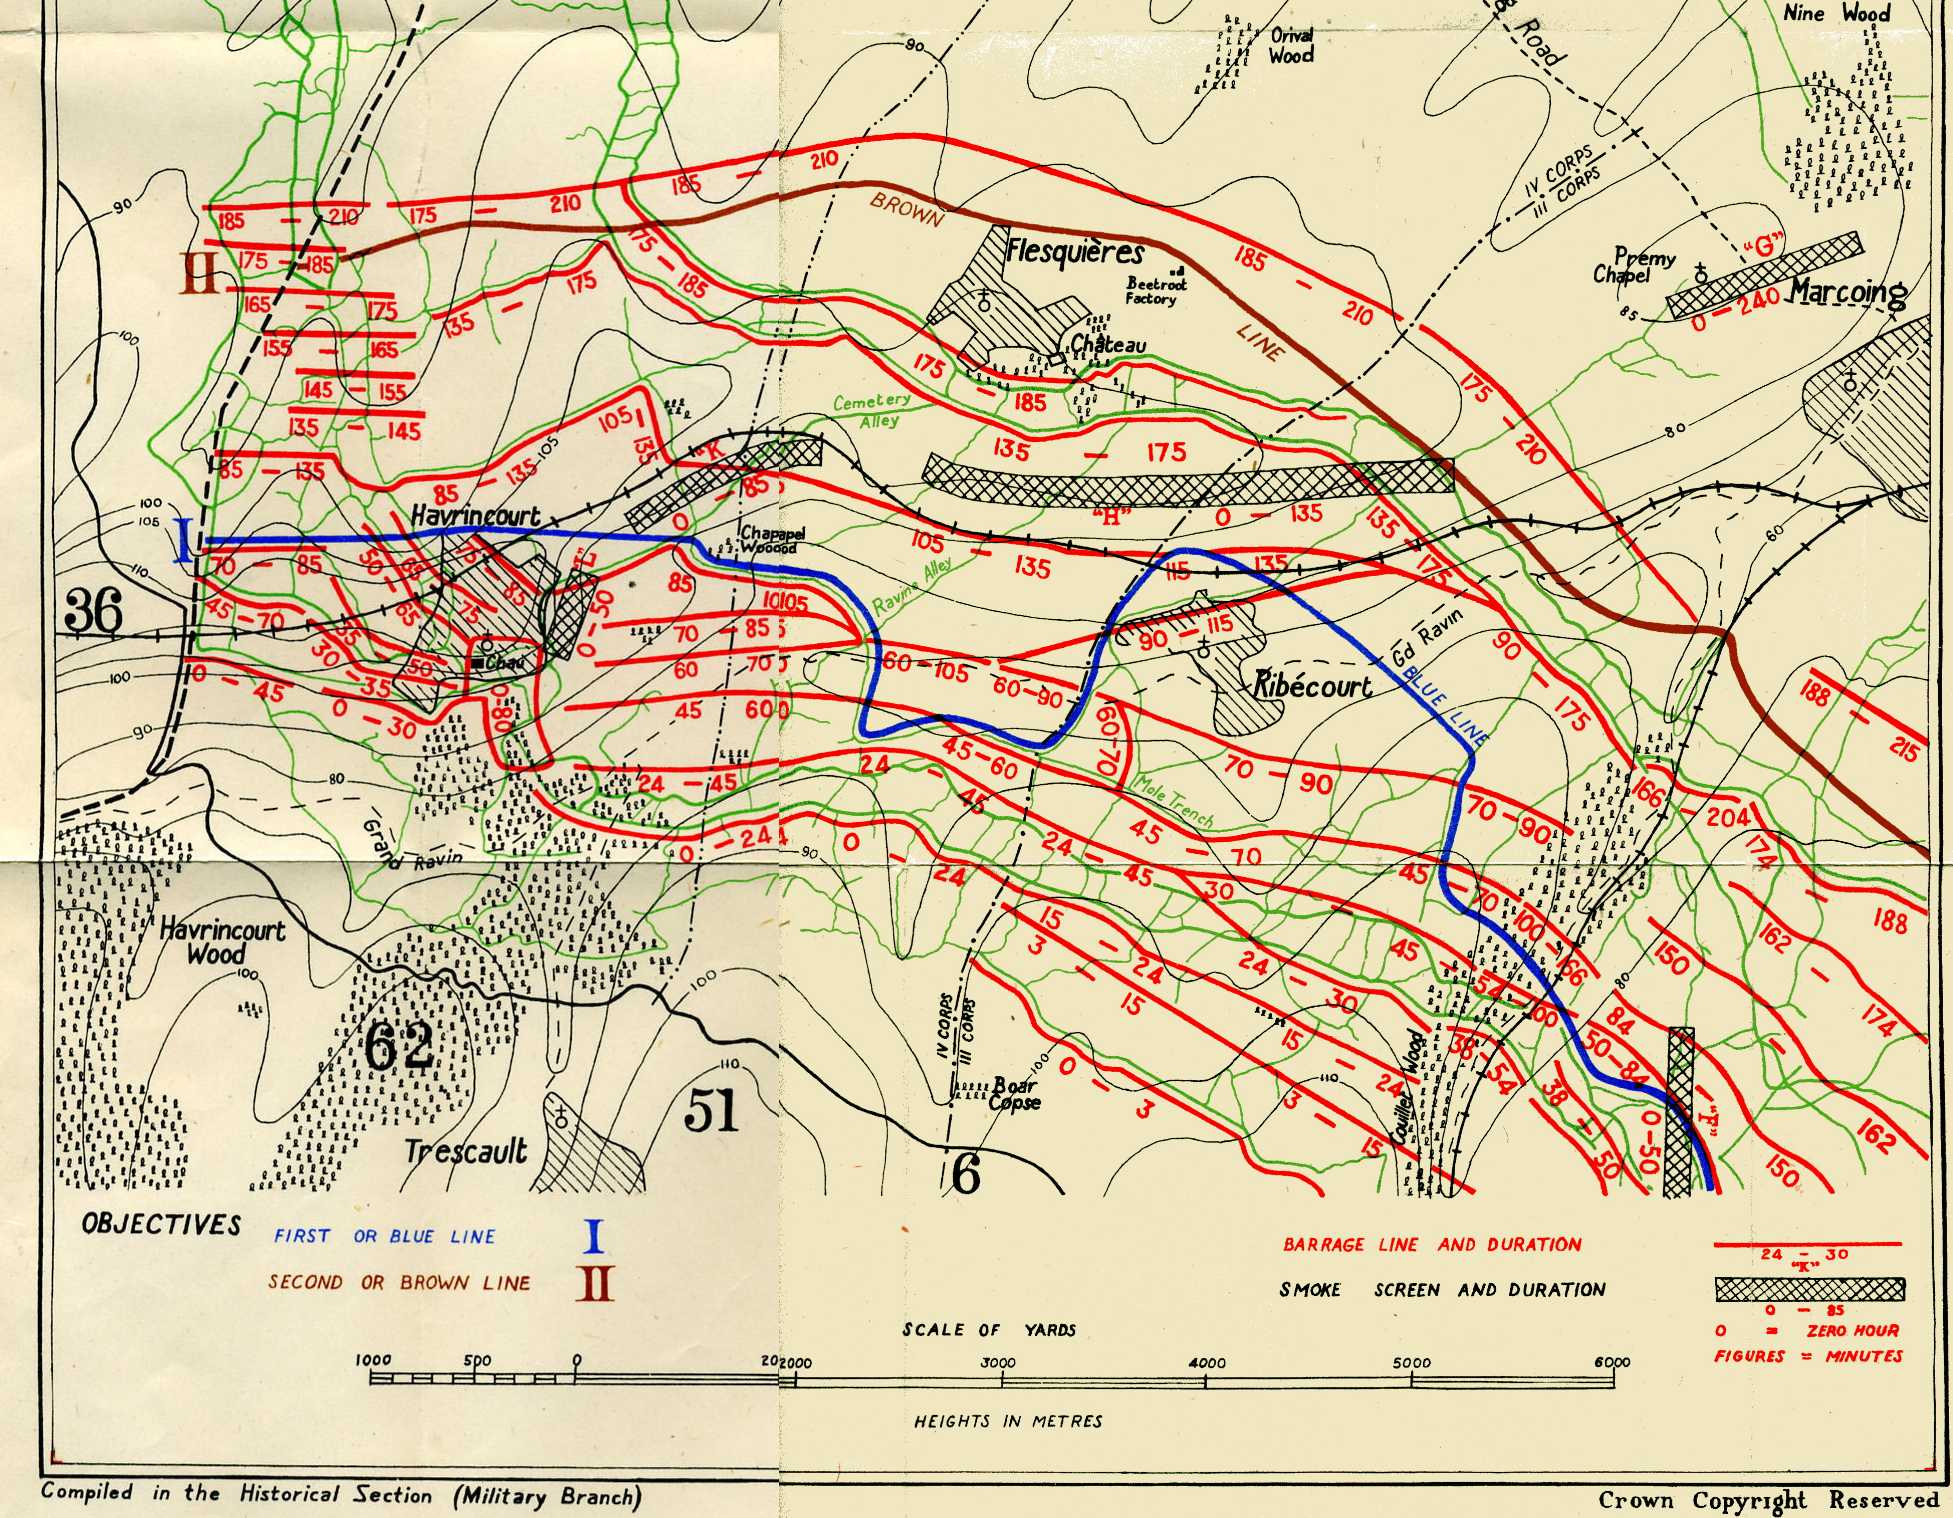
Part of the predicted fire plan supporting the attack at Cambrai
After the 3rd Battle of Ypres petered out in the muddy ruins of Passchendaele the 29th Division was picked to reinforce the 3rd Army’s attack at Cambrai. This battle was a test for new technology and tactics. Instead of a lengthy preliminary bombardment, the battle of Cambrai would use 400 tanks and a short intense fire plan based on predicted targets. The fire plan was as innovative as the massed use of tanks. All of the batteries of the current 1 RHA took part in this battle. The initial attack, on 20th November created a breach in one of the stronger sector of the Hindenberg line, capturing as much ground in fifteen hours as in five months in the Ypres Salient. The Germans too had a tactical surprise in store. On 30th November they too launched an attack under a heavy predicted barrage, in their case led by storm troops which infiltrated into and then broke through British infantry on the salient caused by the British success. This advance threatened the army artillery massed behind the British infantry, with some Germans within 40 yards of the guns. L Battery was order to act the rearguard to allow the army artillery to escape. They and a mixed force of infantry and artillerymen inflicted around 150 casualties on the Germans before withdrawing. The eight L Battery soldiers commemorated on the Cambrai memorial are evidence of the cost of this operation. The official history includes praise for L Battery, a rare mention of an individual battery.(4)
Cambrai would be a good battle for a 1st RHA commemoration. This the one battle in the war in which each battery served. It allows for a focus on the tactical and technical innovation which has characterised the professional ethos of the Royal Regiment.
1918
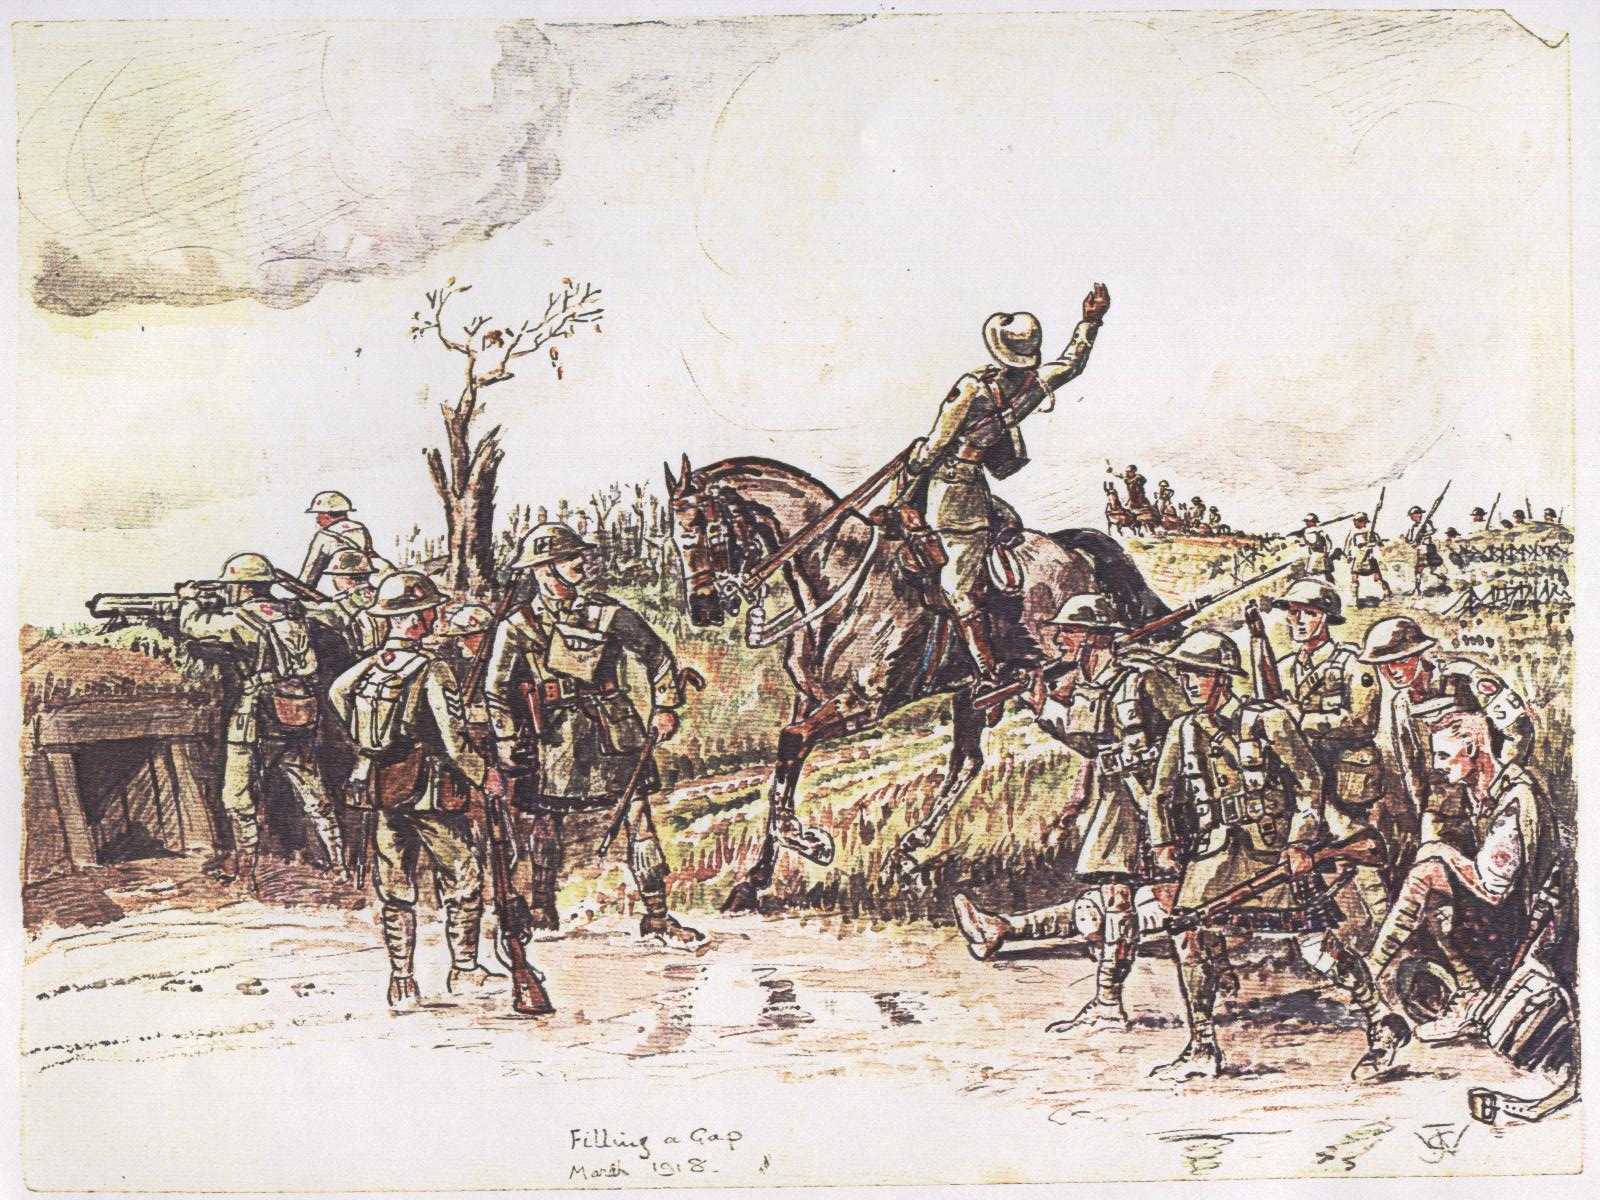
This Walford watercolour captures the spirit of the actions by Chestnuts, D and O Batteries in March 1918
At the beginning of 1918, the Germans had a chance to win the First World War before the American Army took the field in strength. The Germans redeployed troops released from the Eastern Front by the collapse of Imperial Russia. After three years of allied attempts to break the stalemate of the Western Front, the German offensives from 21th March initiated a eight months of mobile warfare. Between March and June the Germans achieved a series of breakthroughs and forced the allies back.
All of the Batteries were involved in these battles. The Cavalry divisions were deployed to plug gaps in the line. The majority of Chestnut Troop’s war dead are buried or commemorated on the Somme battlefields of 1918. There is an account in the History of the Royal Artillery on the Western Front of how the observed fire from E and two other RHA Batteries held a German advance on the 22nd March for a whole day. (5) The BC of O Battery was given 600 infantrymen back from leave, eight lewis guns from No3 Kite Balloon Company to fill a gap in the line. (6)
These battles are rarely the subject of battlefield studies. They are as significant as defensive battles as Mons or Le Cateau, but much larger. These are the only major defensive battles fought by the British Army that approach the scale of the operations on the Eastern Front in WW2.
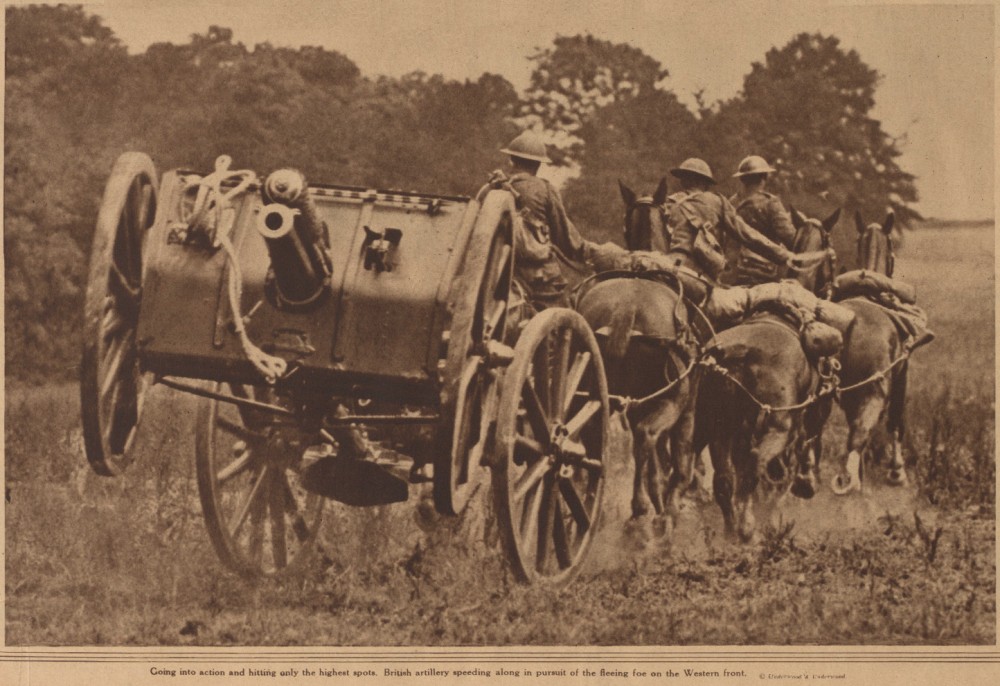
“British Artillery speeding along in pursuit of the fleeing foe.” Did the NY Tribune publish a picture of E Battery in October 1918?
The tide turned in August with the dramatic breakthrough at Amiens which repeated the techniques demonstrated at Cambrai, but on a larger scale. 450 tanks supported by a surprise predicted barrage by just under 1,500 guns and 800 aircraft broke through and destroyed a German army in what was the “Black day” for the German army. Chestnut Troop, E and O Battery took part in these operations.
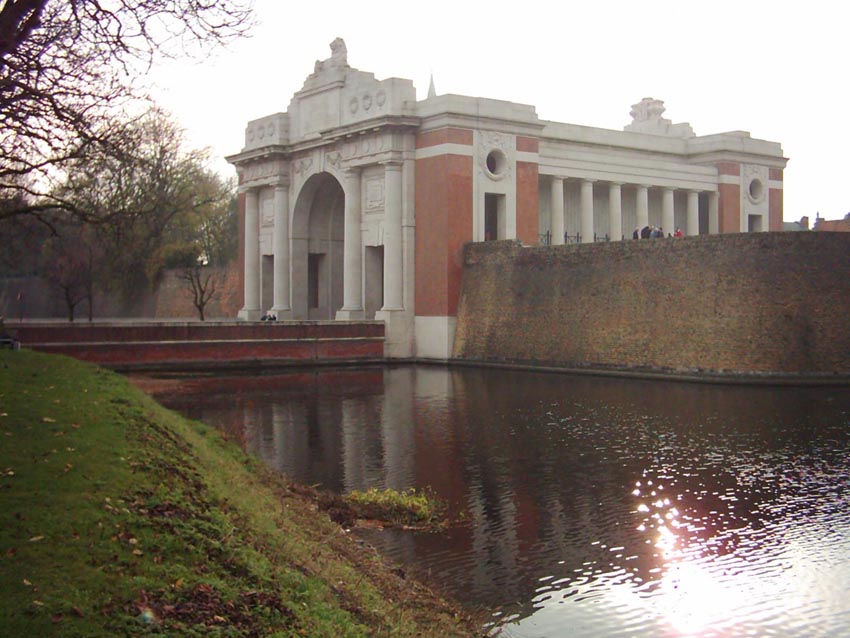
Menin Gate 1918. From positions on the Left of this view, B and L batteries fired the barrage behind which the infantry cleared the Germans from Ypres ay the end of the war.The Menin Gate today
After Cambrai the 29th Division was redeployed to the Ypres sector and fought in the defensive battle of the Lys and in the counter attacks in the summer On the 27th September 1918 B & L batteries, with the other batteries of 15 Bde RHA came into action outside the Menin Gate in Ypres.(7) The following morning they fired a creeping barrage in support of the 29th Division attack which recaptured the ground ceded in April capturing the village of Gheluveldt by the end of the day. L and B Batteries were deployed forwards to Gheluveldt on the 30th September, and supported the attacks over the River Lys in October.
1919 and Afterwards
The Armistice did not mean demobilisation. The CWGC records war dead until 1921 as the regular army was deployed to respond to the messy aftermath of the War. The CWGC records the deaths of Lance Naik Batu Khan of Chestnut Troop in St. Sever Cemetery Extension, Rouen (23 Dec 1918) and Driver Noor Mohammed of B Battery in Haidar Pasha Cemetery in Turkey (30 Jan 1920), and serve as a reminder of the British Army as an Imperial force and the Regular Army’s relationship with the Indian Sub continent.
The history of 1st RHA’s batteries on the First World War is that of the Western Front, its batteries were ubiquitous, “quo fas et gloria decunt”. Their actions took place among some of the familiar land marks of the Western front. Their battles tell the story of the development of technology and tactics during the wear and the part that the Gunners. Anyone taking a professional interest in the develo-pment of artillery on the battlefield would be remiss if they restricted their interest to the 1914 battles.
These were also actions in which at least 233 men lost their lives and perhaps 500 wounded. One of the key themes of commemoration is Remembrance, which should include understanding what these men did and why. The Centenary is an opportunity to visit the graves, memorials and the places where these men fought and fell. Of course, we celebrate the achievements of the Bradbury, Dorrell and Nelson at Nery, worthy of the highest award for gallantry that Britain can bestow. It is proper that L Battery remembers these men and the others that were lost at Nery. But the Centerary ought to be the time to find out about some of the other men who served the guns and remember them. Were the eight members of L Battery who fell on 30th November at Cambrai necessarily less brave? Were any of the men who fell any less mourned?
While many people are familiar with the battles and battlefields of the Western Front, far fewer have explored them from the Gunner’s point of view. The actions by the 1 RHA batteries are ideal topics for battlefield studies, conveniently located from the UK. The Centenary of the First World War is an ideal opportunity to undertake low level battlefield studies.
For more information on planning battlefield studies ands staff rides contact Gunner Tours www.gunnertours.com
NOTES
[1] This article is based on a talk given to the Officers of the 1st Regiment Royal Horse Artillery on 8th April 2014.
[2] www.CWGC.org These are minimum numbers. The CWGC also lists RHA as “15 Brigade RHA,” which may include soldiers who might or might not be members of B or L Battery. They might have been members of Y Battery, the Warwickshire TA RHA Battery or the Brigade Ammunition Train.
[3] Farndale The Royal Regiment of Artillery on the Western Front
[4] Esmond, J E. Military Operations France and Belgium 1917, The Battle of Cambrai CH XV HMSO 1934
[5] War Diary D Battery RHA quoted in Farndale The Royal Regiment of Artillery on nthe Western Front
[6] Esmond, J E. Military Operations France and Belgium 1918, the German March Offensive and its preliminaries, CH XV HMSO 1934
[7] WO/95-2291 15 Bde RHA War Diary Entry September 1918
What is the connection between the unusual officer holder of a Plantagenet Local Goverment Position, the Second Battle of Lincoln and Utah Beach in Normandy?
Funerary effigy of King John, Worcester Cathedra
The answer is a woman, Nicholaa de la Haye. Chatelaine of Lincoln Castle and Sherriff of Lincoln, described by the anonymous contemporary French Chronicler from Bethune as a “very cunning, bad hearted and vigorous old woman” Nicholaa was a remarkable medieval woman who played a significant part in the Second Battle of Lincoln, 20 May 1217, the turning point of the First Barons War.
Nicholaa de la Haye is thought to have been born between 1150 and 1155 into a Lincolnshire family which claims to have owned the Barony of Brattlesby since pre Norman times. Nicholaa outlived two husbands, William FitzEmeis, who died in c. 1178, and Gerard de Camville, who died in c. 1215. The closing months of King John’s reign and the opening years of King Henry III’s minority not only saw her directing the royalist defence of Lincoln castle against the supporters of the French Prince Louis but also saw he created sheriff of the county of Lincoln. (1) The story of Robin Hood, and its villain the Sherrif of Nottingham gives an insight into the life of a Plantagenet local government official. Nicholaa was involved in seizing land from rebels and taking and moving hostages. However she might be described in heroic terms by the Royal party as the manful defender”, she was King John’s servant and carrying out some of his dirty work.
Nicholaa de-La-Haye was a benefactor of Castle Acre Priory in Norfolk.
The De La Haye Family took its name from La Haye-du-Puits in the Manche department on the Cotentin peninsular. Her second husband Gerard de Camville had commanded King Richard’s fleet and his family name was from an area near la Haye-du-Puits. Nicholaa’s family inheritance included land in Poupeville and Varreville in Normandy, on what would be the rear exits from Utah Beach. The lands in France were ultimately settled to Nicholaa’s sister Julia and her husband, which may have removed the potential for conflicting loyalties as King John had lost Normandy to the king of France in 1204.
Lincoln Castle
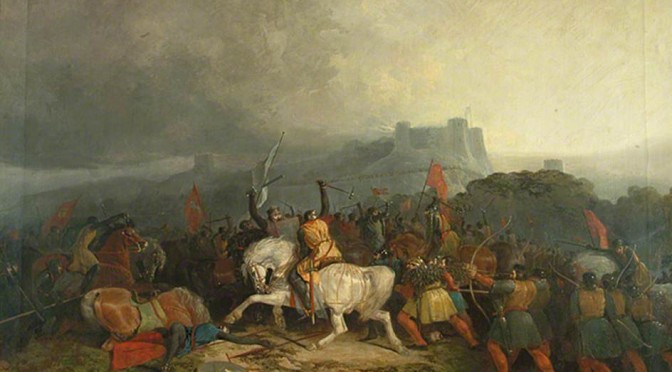
20 May is the 797th anniversary of the second Battle of Lincoln. which was fought around Lincoln Castle on 20th May 1217. The battle was fought between the forces of the future Louis VIII of France and those of King Henry III of England, in what is known as the First Baron’s War. This conflict lasted from 1215-17 and arose in the aftermath of the signing of Magna Carta. King John repudiated the Carta and the Barons invited Prince Louis to England to depose King John. After the death of John ion October 1216, his faction fought in the name of the infant King Henry III. By May 1217 the French forces were as far North as Lincoln. Lincoln Castle itself was held for the Royalist party by Nicholaa de la Haye.
Illustration of the Battle of Lincoln. thought to show the death of the Compte de Peche.
Louis’ forces were attacked by a relief force under the command of William Marshal, 1st Earl of Pembroke. One of the most famous soldiers of his day. The Comte du Perche, commanding the French troops, was killed and this heavy defeat led to Louis being expelled from his base in the southeast of England. This event is known as “Lincoln Fair” after the looting that took place afterwards. The citizens were loyal to Louis so Henry’s forces sacked the city, which was regarded as being pro rebel.
Lincoln Castle is still preserved and as the site of one of the extant copies of Magna Carta.
Local tradition holds that this C13th funerary effigy is of Nicolaa de-la-Haye who died in 1230. The late C13th clothing suggests it might be a niece instead
There is a further Normandy battlefield connection. Nicholaa’s lands included Folkingham, the site of one of the airfields used by the US 82nd Airborne division in September 1944 for their airborne landings in the Netherlands
The sites of associated with Magna Carta and the are barons wars check the Magna Carta 800th Website
For more information on visiting the battlefield of Lincoln, and other sites from the Barons’ wars contact British Battlefields.
Interpretation of the Battlefield of Lewes by Sir Charles Oman
14th May 2014 is the 750th anniversary of the Battle of Lewes, a key event in the Barons wars, which resulted, in the cocmmitment of the Kings of England to abide by the Magna Carta signed just under fifty years earlier.
The Battle of Lewes was one of two main battles of the conflict known as the Second Barons’ War. It took place at Lewes in Sussex, on 14 May 1264. It marked the high point of the career of Simon de Montfort, 6th Earl of Leicester, and made him the “uncrowned King of England”. Henry III left the safety of Lewes Castle and St. Pancras Priory to engage the Barons in battle and was initially successful, his son Prince Edward routing part of the Baronial army with a cavalry charge. However Edward pursued his quarry off the battlefield and left Henry’s men exposed. Henry was forced to launch an infantry attack up Offham Hill where he was defeated by the Barons’ men, defending the hilltop. The royalists fled back to the castle and priory and the King was forced to sign the Mise of Lewes, ceding many of his powers to Montfort.
King Henry III, in his efforts to subdue the reforms springing from the Provisions of Oxford of 1258, provoked a baronial faction led by Simon de Montfort, Earl of Leicester, to the extent that civil war as only a matter of time.
Simon de Montfort and the baronial army marched on the King at Lewes and positioned themselves on the crest of the Downs to the north-west of the town. The King’s foot soldiers followed the cavalry under Prince Edward up the long hill, but were pushed right back against the Castle and Priory in the town. The royal army suffered significant casualties, several leading supporters of the King had fled, and much of the town was ablaze.
The only near contemporary account is from one William of Rishanger. Chronicle of William de Rishanger of the Barons’ Wars ed. J.O.Halliwell (Camden Society 1840). Here in the English Heritage Battlefield report.
Earl Simon passed that night without sleep, giving time, as was his habit, to divine offices and prayers and exhorting his men to make sincere confessions. Walter de Cantilupe, Bishop of Worcester, absolved them all, and commanded that for the remission of their sins they should manfully strive for justice on that day, promising to all who should die thus the entry into the heavenly kingdom.
Battle being therefore certain, at daybreak before the rising of the sun, they went out from the village of Fletching, where a great part of them had spent the night, and which was about ten miles from Lewes. Before the start earl Simon de Montfort girt Gilbert de Clare with a knight’s sword.
When they had marched near the town of Lewes and were hardly two miles distant from it, Simon with his men ascended a hill and placed his chariot there in the middle of his baggage, and having purposely placed and firmly erected his standard upon it, he encircled it with many armed men.
Then with his own forces he held the ground on either side and awaited the issue of events. In the chariot he set four London citizens, who a little before, when he passed the night in Southwark, had conspired to betray him. This he did as a warning.
When he had thus prudently arrayed his forces, he ordered white crosses to be sewn on their backs and breasts over their armour, so that they should be distinguished from their enemies, and to indicate that they were fighting for justice. At dawn the baronial army suddenly attacked the king’s guards who had gone out to seek for food or fodder and killed many of them.
When the king therefore was sure of the coming of the barons, he soon advanced with his men, with his standards unfurled and preceded by the royal banner, portending the judgment of death, which they call the ‘Dragon’. His army was divided into three parts: the first line was commanded by Edward, the king’s eldest son, together with William de Valance, earl of Pembroke, and John de Warenne, earl of Surrey and Sussex; the second by the king of Germany with his son Henry; and the third by king Henry himself. The baronial forces were divided into four, of which the first line was given to Henry de Montfort, the second to Gilbert de Clare together with John FitzJohn, and William of Montchensy; in the third were the Londoners under Nicholas Segrave; while the earl himself with Thomas of Pelveston led the fourth.
Then Edward with his line rushed on his enemies with such violence that he compelled them to retreat, and many of them, to the number of sixty knights, it is said, were overwhelmed. Soon the Londoners were routed, for Edward thirsted for their blood because they had insulted his mother, and he chased them for four miles, slaughtering them most grievously. But through his absence the strength of the royalists was considerably diminished.
Meanwhile many of the might men of the royal army, seeing the earl’s standard on the hill and thinking he was there, made their way thither and unexpectedly slew those London citizens, for they did not know that they were on their own side. In the meantime the earl and Gilbert de Clare were by no means inactive, for they smote, threw down and killed those who opposed them, endeavouring with the utmost eagerness to take the king alive. Therefore many of the king’s supporters rushed together – John earl of Warenne, William de Valance, Guy de Lusignan, all the king’s half brothers, Hugh Bigod and about three hundred warriors – and seeing the fierceness of the barons, fled. There were captured Richard, the king of Germany, Robert Bruce and John Comyn, who had led the Scots thither. Also King Henry had his horse wounded under him, and giving himself up to earl Simon was soon brought under guard to the priory.
There were killed on that day many Scottish barons, and a great number of the foot soldiers who came with them had their throats cut. Meanwhile Humphrey de Bohun earl of Hereford, John FitzAlan earl of Arundel, William Bardolf, Robert de Tateshale, Roger de Somery, Henry Percy and Philip Basset were taken prisoner. But on the king’s side there fell the justiciar, William of Wilton and Fulk FitzWarin, the one slain by a sword, the other drowned in the river. On the barons’ side fell Ralph Haringod, baron, and William Blund the earl’s standard bearer. On both sides five thousand are said to have fallen.
When Edward and those fighting with him returned from the slaughter of the Londoners, not knowing what had happened to his father, he went round the town and came to Lewes castle. When he did not find his father there, he went to Lewes priory, where he found his father and learned what had happened. Meanwhile the barons made an assault on the castle, but as those shut up in it defended themselves manfully, the barons withdrew. When Edward saw their boldness within the castle, he was greatly inspirited, and collecting his men again, he wished to continue the battle afresh. Discovering this the barons sent arbitrators of peace, promising that they wished to treat for an effectual peace the next day.
12/13 May 1944
Louvain: 120 aircraft – 96 Halifaxes, 20 Lancasters, 4 Mosquitos – of 6 and 8 Groups.3 Halifaxes and 2 Lancasters lost. The bombing was more accurate than on the previous night and considerable damage was caused in the railways yards.
This was the second night in succession that Bomber Command had raided Leuven (knonw by Francophone Wallons as Louvain) On the night 11-12th the results had not been satiusfactory wioth the bombing scattered and little evidence of damage to the rail infrastructure. On The raid which started shortly after midnight on 13th May caused the following damage.
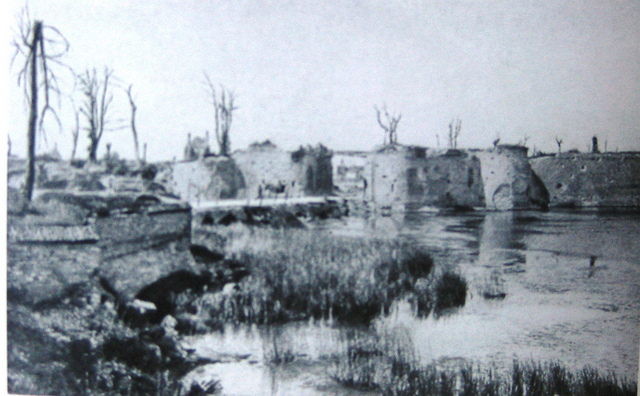
Bomb Damage in Leuven.
474 buildings in Leuven were completely destroyed, including a university building, three churches, two schools, thirty-seven factories, two buildings of city and a monastery. No less than 1300 buildings were severely damaged, including five university buildings, a church, four monasteries, eight factories and six public buildings (including the Palace of Justice and the Little Prison). A thousand buildings were slightly damaged. In the parish of Wilsele 183 buildings were completely destroyed, 280 severely damaged buildings and 150 mildly affected panden.Te Herent 14 buildings were completely destroyed, 58 severely damaged and 80 slightly damaged. All bombing in 1944 together accounted
Damaged buildings in Leuven
for the destruction of 634 homes and become uninhabitable for 1,166 homes on a total housing stock of 4,223 homes, about 25%. A large part of Blauwput had disappeared. The 15th century Chapel Blauwput was badly damaged as the Parish Church.
Air Vice Marshal Sir Arthur Tedder
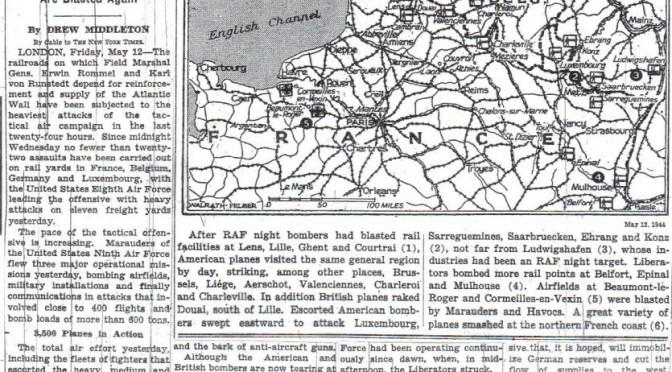
The Allied Commanders responsible for planning D Day were keen to use the strategic bombers of Bomber Command and the 8th Air Force against targets which would delay rthe rate at which allied reinforcements could reach the Normandy battlefield. These attacks would need to take place across Belgium and Northern France to conceal the site of the landings. British Airman Arthur Tedder was Eisenhower’;s Deputy and credited with leading the transportation plan. There were two obstacles in persuading the allies to adopt this plan. Firstly he had to overcome the resistance of the commanders of the strategic air forces to switch from the targets they considered important, Secondly, Churchill needed to be persuaded that the results would justify the casualties among the allied populations.
Churchill anguished about giving an order which would kill Belgians and Frenchmen. Churchill made many decisions during the war which would result in the loss of lives which were to some degree or other “innocent”. He ordered the Royal Navy to sink the French Fleet in 1940, and the aerial bombing of German cities, containing civilians and foreign workers. The decisions to bomb key points on the railway system in Belgium and France bothered him more than most. Alanbrooke’s diary entry for 5th April mentions “At 10.30, had to attend one of those awful evening meetings with the PM. We were kept up till 12.45 a,m. discussing use heavy bombers to support the invasion. he is opposed to Tedder’s plan”.
The rais d was carried out by No 6 Group with aircraft from 419, 420, 425, 426, 427, 429, 431 and 432 Sqns RCAF. Five heavy bombers were lost on this raid, two in the route in and one of the return. One was shot down by flak and four by night fighters, at least three of these were by “Experten” Major Martin Dawes.
419 Squadron Lancaster Bomber markings
419 RCAF appear to have the heaviest losses, losing two aircraft and 13 men dead.
“Louvain May 12/13th 1944 Takeing off at 2155 and heading out to the target the crew and aircraft were shot down near Sint-Genesius-Rode which was 12 km S of Brussels. None of this very experienced crew survived. VR-W KB710 P/O H I Smith Pilot 22nd sortie F/O J Moore Navigator F/O W R Finlayson Bomb Aimer F/O W W Price Wireless Op. Sgt. R Bull Field Engineer Sgt. J C O’Connell Upper Gunner Sgt. S G Livingstone Rear Gunner VR-W ‘s crew was a very experienced one with many of them at the 16 operation mark. The Wireless Operator F/O Smith having a total of 22 trips. And The crew of VR-X had P/O Edwards and F/O Campbell who were a quarter of a way through their tours while the other airmen were on their second or third operation. VR-X KB713 P/O B F Edwards Pilot on his 8th sortie F/O R R Campbell Navigator F/S P Dewar Bomb Aimer F/S R S Smith Wireless Op. Sgt. J R Carruthers Flight Engineer P/O J A Webber Upper Gunner P/O H E Oddan Rear Gunner
419 Sqn RCAF were based at RAF Middleston St George. This is now Teeside Airport. Photos here
Leuven was rebuilt and its name appears on every can or bottle of Stella Artois beer, which is brewed there.
No one will know whether the Battle of Normandy would have been D Day invasion would have succeeded without the bombing campaign. The civilian and air force losses are as much a part of the campaign as that of any infantryman storming ashore.
If oyu qwould like to find out more about visiting the heritage associated with Airpower contact info@airpowertours.com
Prince Louis of France was invited by the rebel barons to become king of England following King John’s refusal to accept the Magna Carta he had sealed at Runnymede. Over 200 castles in England were besieged, by the rebel barons or King John’s forces, in what became the First Barons’ War. This aimed to safeguard the rights, privileges and liberties of the clergy and the nobles as enshrined in the Magna Carta, but spilt out into a dynastic war for the English throne. This was only settled with the death of King John, and his succession by King Henry III. Even then, the dispute continued until the end of the century.
The Battles and Sieges
There were dozens of battles and sieges between 1214 and 1267. This was an era of castles and sieges. Many of the castles still stand. At Rochester you can still see the damage caused by John’s army when it undermined the corner of the keep using the fat of 40 pigs to create a fire fierce enough to burn the props. These are events populated by heroes, heroines and villains that could have been created by Hollywood. There are princes fighting for their kingdom, wicked sherriffs, heroines, callous mercenaries, treacherous pirates and outlaws. A summary of the main military events are here.
The Capture of Eustace the Monk: Mercenary, Pirate and Outlaw
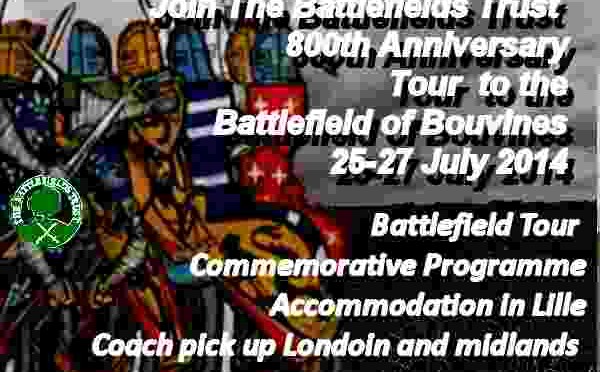
The Battlefields Trust is planning to create a Battlefield Trail covering the battles and sieges of the barons wars. This will be a major project and be timed to coincide with the 800th anniversary of Magna Carta as well as the 750th Anniversary of the Siege of Lewes. The Battlefields Trust is a member of Magna Carta 800. One of the most exciting developments is the inclusion of battlefields in the Magna Carta 800 Trail being developed for Vist England. This is the first time it has been possible to promote Britain’s Battlefield heritage as part of a tourism strategy.
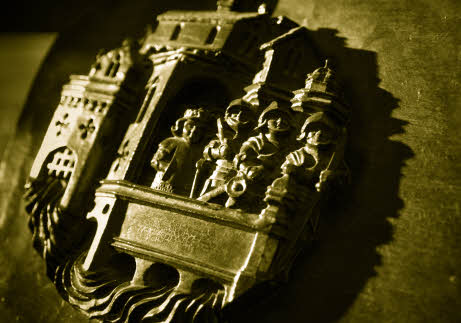
There is a chance to hear military historian Julian Humphrys talking about the military history of Magna Carta on Tuesday 19th March 2013 between 12:30-14:00. This will be hosted by The Fusiliers Museum London in the Officer’s Mess of The Royal Regiment of Fusiliers HM Tower of London
In his talk Julian Humphrys will focus on three key episodes in the Magna Carta War: King John’s dramatic capture of Rochester in 1215, Hubert de Burgh’s stubborn defence of Dover in 1216 and William Marshall’s crushing defeat of the French at Lincoln in 1217.
British Battlefields has been set up to promote and organise visits to British military heritage. It will be offering battlefield tours to the battlefields of Magna Carta.
Troops coming ashore landing from Landing ships during an invasion exercise in Britain 5 May 1944
Exercise Fabius 2-7 May 1944 was, arguably, the largest training exercise to take place in the UK. It would be the final rehearsal for Operation Overlord . It was a rehearsal of the landings on the four invasion beaches in the Normandy coast between the rivers Orne and Dives; ( Sword, Juno, Gold and Omaha beaches) .
Utah beach, geographically separated from the other four beaches was considered a separate assault from naval point of view. The rehearsal for the landing on Utah Beach was Exercise Tiger and took place on 26-30 April on Slapton Sands in Devon.
Ex Fabius allowed participants the chance to rehearse under conditions as close as possible to those they would face. It also allowed the ports to practice supporting a large scale landing. This was a dress rehearsal with the landing forces approaching the beaches behind mine sweepers and landing craft lowered ten miles off shore. The landings were accompanied by live firing from ships.
Men of 6th Battalion the Green Howards receive 48-hour ration packs before embarking onto landing ships during Exercise Fabius 5 May 1944. IWM H38222 These men will land on Gold beach a month later.
The assault troops for each of the D Day beaches would practice landing on a stretch of coast with a similar configuration to that they would face on D Day. The exercise was too close to D Day for any further experimentation or changes to the plan. Some units would not return to their previous accommodation, but instread to their assault assembly area.
3rd British Infantry Division was assigned to assault Sword beach with the town of Ouistrhem and the River Orne on their left flank and the city of Caen as its objective. On Exercise Fabius it landed near Littlehampton with the River Arun on its Left and Arundel its objective.
On 5th May Hayling Island would substitute for Gold Beach.
Robin Dunn, who was Battery Commander of 16 Battery of 7 Field Regiment claimed post war that there were problems which were identified and if put right would have enabled the allies to do better on D Day.
” While at Bolney we had our final rehearsal of the invasion on the south coast near Arundel……..We had a new divisional commander, Tom Rennie, who had commanded a brigade of 5lst Highland Division with distinction in 8th Army and had a high reputation. The commander of 185th Brigade was Brigadier K. R Smith, who had been with the brigade for some time and had so far in the war seen no action. He was a good trainer of troops who had worked us hard during our training in Scotland. But he did not fully accept the role of the brigade in the divisional plan. We had heard that 21st Panzer Division had been identified as having recently arrived about thirty miles inland of our landing beach. The presence of this division became a fixation in K.P.’s mind. He was haunted by the idea that, if 185th Brigade pushed too boldly inland, 2lst Panzer would come round our right flank, which was in open country and cut us off from the beaches. There was wooded country on the left and KP. wished to infiltrate his infantry through the woods beside the river and approach the objective in that way along the divisional left flank. During our final rehearsal he attempted this manoeuvre, which involved keeping one battalion on our original thrust line and passing the other two round their left flank in a wide turning movement. The result was chaos. The battalions became separated from one another and the Brigadier lost communication with the flanking force which lost all momentum. I was at brigade HQ when Tom Rennie arrived and said wearily, ‘You won’t let this happen on the day will you KP? It would have been better, even at that late stage, if he had sacked KP. on the spot.” Robn Dunn Sword and Wig.
Littlehampton, the stand in for Ouestsrhem on the dress rehearsal for D Day
Although many fewer than on Ex Tiger, there were casualties on Exercise Fabius. On the Morning of 4 May twin engine fighter bomber aircraft of Coastal Command attached Allied motor boats inflicting many casualties. Possibly the German attack on Ex Tiger had made the airmen a little trigger happy.
Places associated with the story of the training and rehearsals for D day can be found across Britain, from the sections of Atlantic Wall built in Scotland to the beaches which stood in for the Norman Coast.
Military history, Battlefield heritage and Touring


 • An impressive Rough Guide “Liberation Routes”, with a mixture of history, a campaign guide information about museums, memorials and cemeteries.


 King Louis the First of England!