Tag Archives: France

Health and Safety and the First Day of the Somme


The first day of the Somme is best known for 57,000 casualties suffered by the British Army; the largest in a single day, and the event that supports the idea of British generals as “Butchers and Bunglers.” Yet, paradoxically, it was concern for safety which led to disastrously high casualties and failure of most of the attacks.
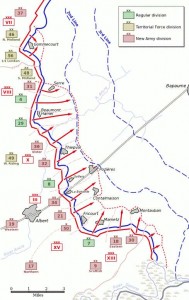
Somme map first day
Attacks on the British Sector of the Somme

The battle of the Somme originated from a decision taken in December 1915, that the Entente powers, Britain, France, Italy and Russia would all launch an attack as soon as possible in 1916. The Somme was selected as the site of the Anglo French offensive because it was the junction between the two armies. It was originally envisaged that the French Army would take the lead. However, the German offensive at Verdun, started in February 1916 cost the French and Germans armies over 200,000 casualties each. By June 1916 not only would the British have to take the lead at the Somme, offensive but the bear This had two consequences, there were fewer French troops available which meant that the British would have to take the lead. Furthermore, the attack of the Somme was imperative to take pressure from the French at Verdun.
rawlinson
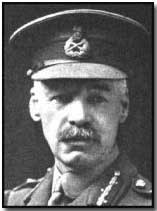
Sir Henry Rawlinson, commander of the Fourth Army. His initial plan for a methodical advance was rejected.

The British Army had limited experience of offensive battles, and had never planned an operation of the scale of the battle of the Somme. In March 1915 the British had launched a successful breach into the German lines at Neuve Chapelle, supported by a concentrated barrage by the artillery of the British Expeditionary Force. During other attacks in 1915 a shortage of artillery ammunition had prevented the British from repeating this level of fire support. However, by 1916 British industry had geared up to supply the vastly expanded British Expeditionary force swelled by millions of volunteers who Kitchener’s New Army recruited in 1914-15.

The largest ever British Army would be supported by the huge quantity of artillery pieces,  1072 light and 442 medium and heavy guns

GHQ issued no special instruction on the co-operation of infantry and artillery as, in the words of the official history, this main feature of the theory of the assault was well understood. In summary, towards the the close of the bombardment, shortly before Zero, the artillery would put down an intense barrage on the enemy front trenches; at Zero this would be lifted and dropped on the next trench, from which it would be lifted at a fixed time. Before each lift, the infantry under cover of the barrage was to creep to within as close assaulting distance as the barrage permitted. This was around 100 yards from the enemy’s front parapet and the infantry was to assault as soon as the barrage lifted.”
Douglas_Haig
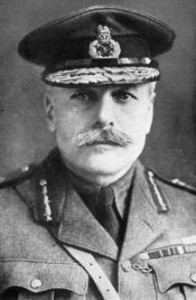
General Douglas Haig. He applied pressure to spread the artillery very thinly

It was impressed on all, at conferences by both Haig and Rawlinson that “nothing could exist at the conclusion of the bombardment in the area covered by it.” Owing to this optimism, the problem of evicting the Germans from the labyrinth of trenches was seen just as one of assault only. It was not seen as a race for the parapet between the attackers across no man’s land against the defenders in the their dug outs. Instead it was seen as something that could be done at leisure.

Not everyone shared this assumption. “Some Regimental officers suggested that the infantry might creep even nearer to the barrage, as was done later on and in at least one instance on the 1st of July. Forty yards was suggested instead of a hundred but it did not receive official approval. (1)
rock-paper-scissors
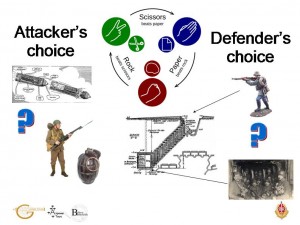
The race for the parapet: lethal game of rock-paper-scissors

The race to the parapet was the essence of attacking a trench. It can be envisaged as a rather deadly form of ‘rock-paper-scissors’. The defenders can either be in their dugouts or manning the trenches. The attackers can either send artillery rounds or infantrymen. Defenders lining trenches would slaughter attacking infantry but were vulnerable to artillery fire. Defenders would be reasonably safe in their dugouts, but could do nothing if the attackers were waiting at the top of the dugout steps. The key was for the assaulting infantry to be so close to the artillery barrage that the defenders had no time to react.
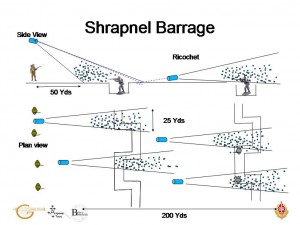
Shrapnel Barrage
Infantry could advance close behind the directional shrapnel barrage.

The shrapnel shells from the British 18 Pdr Field gun were highly directional, and ejected forwards, like the blast from a shotgun. In the Boer war the British found that infantry could advance to within 50 yards with some safety. Japanese troops had also used these tactics in the Russo-Japanese War, as had the French in their costly 1915 offensive in Champagne. The “dapper and charismatic” artilleryman Robert Nivelle had developed a creeping barrage (le barrage roulant) 80-100m ahead of the leading infantry. (2)
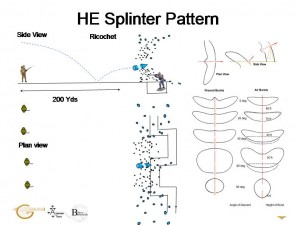
HE splinters
Shell splinters for HE shells could fly hundreds of yards laterally, making it dangerous for friendly troops to approach closer than 200 metres.

The trouble with this tactic was that it had a fatal cost. Artillery rounds do not all land in the same place, but are scattered in a cigar shaped pattern, through variation in the propellant and further dispersed by variations in the wind and of temperature and human error in laying the piece. So “getting close to the barrage” inevitably meant “in a place likely to be struck by shrapnel from a shell that fell shorter than most”. Indeed the rule of thumb, later in the war, was that unless the infantry were taking casualties from their own artillery fire, then they were not close enough.

So the commanders faced a dilemma. The men lost to artillery fire would usually be far lower than the casualties suffered from the machine guns of alert defenders. However, if the artillery preparation was going to leave the defenders unable to resist then would it be right to expose the infantry to friendly fire casualties?
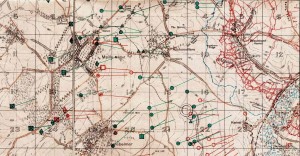
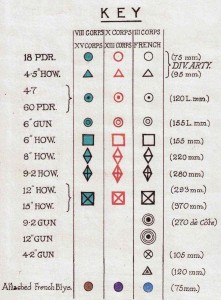
Artillery Dispositions 26th June 1916 behind Newfoundland Park
British (and some French) Artillery positions behind 29th Division of VIII Corps at Beaumont Hamel

To make matters worse, the gunners firing the barrage were mostly Kitchener’s Army men. Their gunners, technicians and officers had limited training and experience, and were Artillery Keyusing ammunition and guns produced by newly expanded or hired suppliers. It might have been sensible to apply nn extra safety margin. The plans for the 1st July seem to bear this out.
The fire plan for the first day of the Somme specified an artillery barrage that would lift from the German front line trenches at zero hour, even though the distance between the British and German Trenches was much wider – from 200-800 metres across most of the assault frontage. Some British units left their trenches before zero hour, and worked their way as close as possible to the German trenches. Where they did, the British succeeded in capturing the German front lines; the Ulstermen at the Schwaben redoubt, the Highland Light infantry at the Leipzig redoubt and the 30th Division near Maricourt. Elsewhere, success was more illusive and on much of the front the assaulting infantry faced fully manned trenches.
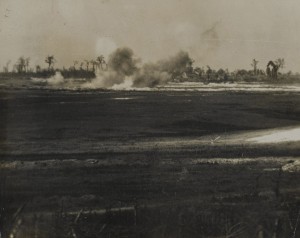
Beaumont Hamerl 1916 NAM 59353
Artillery Bombardment Beaumont Hamel Somme 1916

The excessive safety distance between the starting barrage and the infantry wasn’t the only reason that casualties were so heavy and the gains so slight on the 1st July.  There needed to be enough breaches in the German wire. Where the wire was intact, the advance stopped. It helped if the defenders were crushed in their dugouts  or demoralised by the barrage. There were more, and heavier guns, and the dug outs were less deep south of the Albert-Bapaume.   The Germans had to be prevented from bringing down their own defensive barrage preventing movement across no mans land.  There were fewer German guns  south of the Albert Bapaume Road, and the British could call on the more numerous French heavy guns for counter battery .
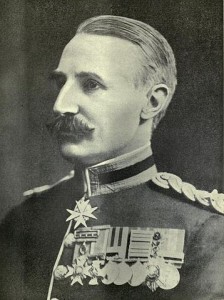
By F. A. Swaine - http://www.archive.org/details/cu31924088057223, Public Domain, https://commons.wikimedia.org/w/index.php?curid=2494174
Lieutenant General Sir Aylmer Hunter-Weston By F. A. Swaine – http://www.archive.org/details/cu31924088057223, Public Domain, https://commons.wikimedia.org/w/index.php?curid=2494174

The worst losses and least success was on the frontage of the VIIIth corps where a “safety factor” played a grotesque part in the tragedy that unfolded. A number of a mines had been dug under the German trenches. Almost all were scheduled to be detonated at 07.28, on the 1st July, two minutes before zero hour. This would allow two minutes for the debris to fall before the British infantry assaulted the crater. One of these was under the Hawthorn redoubt near the village of Beaumont Hamel. The commander of VIII Corps, Lieutenant General Sir Aylmer Hunter-Weston wanted this to be fired some hours before the attack, so that the redoubt could be occupied before the assault, but sufficiently in advance that any general alarm would have died down by zero hour. This was vetoed by more senior commanders, but as a compromise the mine would be fired at 07.20, ten minutes before Zero.
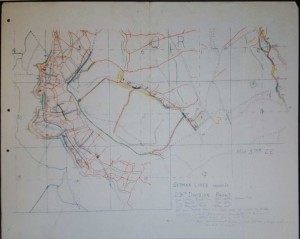
2015-06-23 18.52.16_wire cxutting
Barrage map for 29th Division at Beaumont Hamel showing wire cutting tasks for 18 pdr batteries (blue) and trench mortars (brown) and preparation targets for 4.5″ Howitzers (yellow)

This allowed for a plan to occupy the crater early, but it required the heavy artillery bombardment of the redoubt and adjacent trenches to lift during the assault. However, instead of fire lifting only from the immediate area, all of the VIII Corps heavy artillery was ordered to lift at 7:20 a.m. and the field artillery to lift at 7:25 a.m. A light Shrapnel barrage fired by the divisional field artillery, was to continue on the front trench until zero hour but in the 29th Division sector, half of the guns were to lift three minutes early.
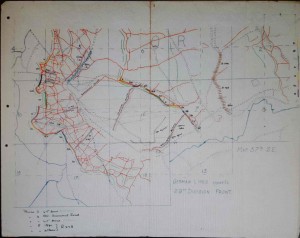
2015-06-23 18.52.30_barrage map 2
Barrage map for 29th Division Artillery showing the sections of front line trench and final lines for each battery.

This allowed the German defenders ten minutes notice of the impending assault and condemned the infantry from three divisions to heavy casualties and failure across the breadth of their front. It did not matter how well the wire had been cut or whether the infantry crept out into no man’s land. One of the attacking battalions lost all its officers before zero hour.

So why did the seemingly responsible commanders, who were professional experienced soldiers, get this decision so wrong?
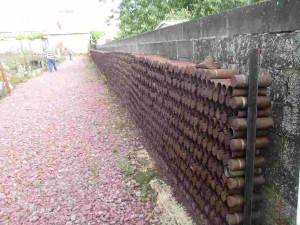
shrapnel shells_LR
7,000 shrapnel shells, enough for a divisional creeping barrage

One simplistic, but popular explanation is that the commanders were incompetent “butchers and bunglers”iii. Professor Norman Dixon in the Psychology of Military Incompetence (4) argued that there was something about military training which led to poor decision making. Indeed, the performance of General Sir Aylmer Hunter Weston is hard to describe as anything less than incompetent. “Hunter-Bunter” was a strange man with a command style reminiscent of that of the monstrous Blackadder creation General Sir Anthony Cecil Hogmanay Melchett. The disastrous decision to lift fire early across the VIII Corps front was very much in keeping with his micro-management and idiosyncratic decision-making. He had a history of over compensating for the risks of friendly fire in Gallipoli. He was found out on the first day on the Somme. Afterwards, although he retained his command, he was never entrusted with command in an offensive and only employed on quiet sectors. Could he have been removed earlier?  To be fair to Rawlinson and Haig, Hunter-Weston was new to the Western Front. He had commanded the 29th Division and then the VIII Corps at Cape Helles in Gallipoli and arrived with his corps as an experienced commander and a reputation of relatively competent performance.
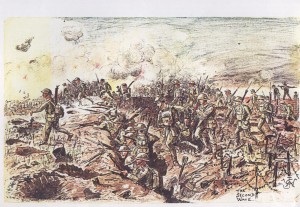
secondwave
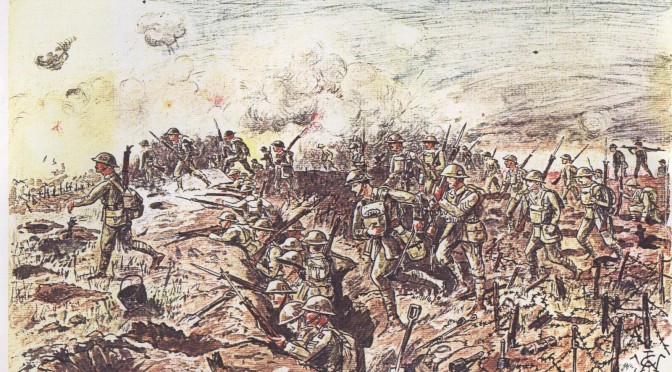
The Second Wave: Colonel Walford’s Impression of an attack on the Somme, following the barrage shown on the left

Elsewhere in the BEF the disastrous decision about fire plan timings resulted from agreements between groups of people, commanders and subordinates and their staffs.

In the first instance, the senior commanders were not looking at this problem. The correspondence between Rawlinson and Haig shows a focus on the problems of exploiting success. In earlier battles such as Loos and Neuve Chapelle the British infantry had taken the German first line wherever they had adequate artillery support.

The plan for the Somme was a bad compromise. Rawlinson, commander of the fourth army, put forward a plan for a phased advance, initially taking just the first German line, which he and his staff thought was within the capabilities of the resources available. Haig did not think this was ambitious enough. He rejected the plans and insisted that an attempt should be made to breach both the front line and the second line to ensure that any opportunity for a breakthrough was not missed.
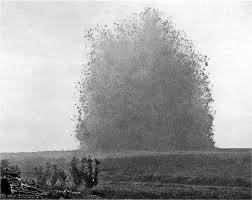
By F. A. Swaine - http://www.archive.org/details/cu31924088057223, Public Domain, https://commons.wikimedia.org/w/index.php?curid=2494174
Hawthorn Redoubt mine. By F. A. Swaine – http://www.archive.org/details/cu31924088057223, Public Domain, https://commons.wikimedia.org/w/index.php?curid=2494174

On this occasion Haig was able to impose his will on Rawlinson, despite reservations about the artillery being spread too thin made by the newly appointed artillery adviser at GHQ, General Birch. Birch and Rawlinson, having expressed their opinions in private, then issued orders and expressed their confidence in them.

As the Official History notes, not everybody assumed that the enemy would be flattened by the preparatory barrage. There seems to have been sufficient internal criticism for Rawlinson to include the following in the Fourth Army tactical notes;

“it must be remembered that all criticism by subordinates of their superiors, and of orders received from superior authority, will in the end recoil on the heads of the critics and undermine their authority with those below them.” (5)
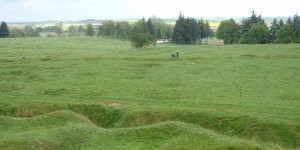
60
The battlefield today. Part of the 29th Division sector in Newfoundland Park.  The barrage on the German trenches at the far side of the patk was provided by 13 battery of  XVII Field Brigade, which is still in the Royal Artillery as part of 28/143(Tombs Troop) Battery an AS 90 battery in 19 Regiment.

This was hardly the atmosphere in which to challenge the fundamentals of the plan. The late, great professor Richard Holmes remarked in the episode on the Battle of the Somme in the Western Front BBC series that the generals of the first world war were stronger in physical than moral courage.
It should be said that the BEF was very quick to learn and the next major attack, on the 14th July, less than two weeks after the first day, was conducted with a much greater concentration of artillery fire and with the infantry following a creeping barrage.
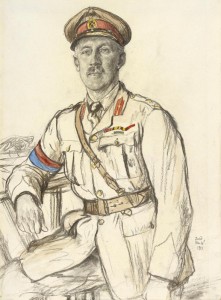
Major-general_James_Frederick_Noel_Birch,_Cb_Art.IWMART1784
Major General J F N Birch CB, Haig’s senior Gunner argued that the artillery was spread too thin

There is a modern relevance of the battle of the Somme. This was a major high profile project into which much had been invested and expected. The resources available weren’t enough to deliver the hoped for results. At the heart of the plan were flaws that, could have been spotted and rectified but were not. The plan required subordinates to achieve “stretch targets”, “do more with less”, and “sell the party line” within an organisational culture that inhibited internal criticism.

The safety margin dilemma occurs frequently across all walks of life. If anything, the compensation culture makes it harder to choose to take risks. It is very hard to imagine the modern British Army willingly encroach on safety distances even if was the only way to win a battle.

We may not face machine guns and un-cut wire, but we often make important business and other decisions against a back ground of pressure from peers and superiors to agree to deliver uncertain commitments as part of a team effort. Many of us are under pressure to support decisions that have been made and face severe personal and career sanctions for whistle blowing. What is it that we can do to be more effective both as leaders in these situations and followers?

If you would like to visit the Somme and see the story of the artillery on the Somme join Gunner Tours on the Somme  Centenary tour. info@gunnertours.com

Somme_centenary


The centenary of the battle of the Somme, which took place between June-and November 1916, has a special significance in Gunner history. This was the largest battle fought by the British army, costing 400,000 casualties. While public interest in the battle centres on the infantry who went 'over the top' on the first of July, the Gunner battle started a week earlier with the opening bombardment by the largest number of guns assembled.

The Somme was essentially an artillery battle, with the guns the only weapons capable of clearing wire, destroying and neutralising defences and artillery. This was an awesome responsibility, and the success or failure of the infantry was down to the effectiveness of the fire plan. The story of how the Royal Artillery learned during the campaign is one of successful innovation, and a matter of pride to Gunners.

It is also a human story. We will see where Gunner staff work made a difference; where Gunners went over the top with the infantry and where . Gunners worked to the point of exhaustion in the service of the guns.

This tour will tell this story at the places where this largest artillery battle took place 100 years after the opening barrage was fired.

 Notes:

(1) Brigadier-General Sir James E. Edmonds; Military Operations: France and Belgium, 1916, Volume I: Sir Douglas Haig’s Command to the 1st July: Battle of the Somme,, 1932

(2) Strong P and Marble S, Artillery in the Great War

(3) John Laffin;s polemic “Butchers and Bunglers of World War one” is the publication which is most associated with the term.

(4) Dixon N F, On The Psychology Of Military Incompetence, Basic Books, 1976

(5) Fourth Army Tactical Notes
Vive L’Entrepreneur!

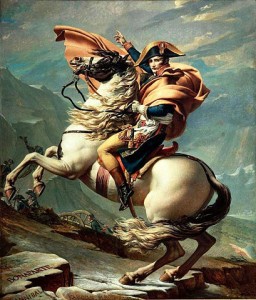
409px-David_-_Napoleon_crossing_the_Alps_-_Malmaison1If Entrepreneurs are leaders willing to take risks and exercise initiative, taking advantage of market opportunities by planning, organizing, and employing resources, often by innovating new or improving existing products, then Napoleon Bonaparte had these qualities in bucket loads. Bonaparte was born to an inconsequential Italian family in Corsica, but rose to make himself master of most of Europe. He was the ultimate executive chairman.
.
jean-lc3a9on_gc3a9rc3b4me_003Napoleon’s rise offers a lot of inspiration for the ambitious. He certainly took advantage of opportunity, turning the chaos of revolutionary France to his personal advantage, risking his life, as well as political and personal fortunes. He was someone who got things done and left a lasting mark. He made lasting changes to much of Europe’s legal systems and administration. He also left advice in his military maxims: “those who would aspire to become a great captain should study the great captains of history”. Napoleon’s domain was the military and political rather than business worlds. However, there is a lot to be learned from his working methods, leadership style and career.

In a world without telephones or electronic messages, he managed, indeed micromanaged most of Europe from the detailed information he carried in his carriage which doubled as an office. His management style is a case study in personal productivity, decision making, executive selection and delegation. His mastery of public relations and leadership was literally legendary; the Napoleonic Legend is quite a legend. He appealed to soldiers and civilians, political and financial backers, and, according to the Duke of Wellington his appearance on the battlefield was worth forty thousand men. We may all like to think that our personal presence makes a difference to those around us, but Napoleon was someone whose influence was acknowledged by his enemies.

Detail from the Coronation of Napoleon by Louis David

Napoleon’s career offers the kind of parables that illustrate some of the challenges faced by entrepreneurs. He had no exit strategy. By 1811 he had achieved almost everything he might have reasonably wanted for himself and his family. He ruled Europe and his family were on half a dozen thrones. He had a son and the foundations of a dynasty that might have dominated Europe if not the world. But he could not stop, and no one could stop him. As a self made man, he saw no need for governance. At his coronation he took the imperial crown from the Pope’s hands to crown himself. There were no constraints on his ultimately self destructive path.

His dynasty faced many of the problems facing businesses set up with family and circles of friends. Few of his family had any aptitude for leadership and management. Some of his early loyal friends were promoted beyond their competence. There was no easy way to bring outside talent into Napoleon’s management team.

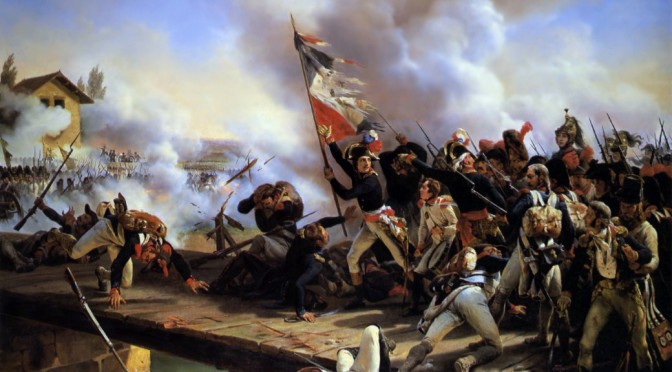
La_Bataille_du_Pont_d'ArcoleNapoleon’s immediate subordinates, the Marshals, his “management team” are interesting. They were gallant soldiers and talented commanders, most of whom could never have risen to positions of power before the French Revolution. Under Napoleon’s direction they were a formidable team, but struggled when given independent roles. Was this because Napoleon was very good at coaxing a team performance from mediocre subordinates? Or, did his working methods stifle independent thought?

If you want to read more:-

Andrew Roberts recent biography “Napoleon the Great” is very sympathetic to Napolean.

Charles Esdaile’s Napoleon’s Wars: An International History, 1803-1815 is much less so.

Napoleon’s Military Maxims are here http://www.military-info.com/freebies/maximsn.htm

logo brownIf you would like to visit some places to visit associated with Napoleon

Paris was Napoleon’s Imperial Capital, and much in the city which marks his legacy, including his tomb in les Invalides.

The battlefield of Waterloo is the site of Napoleon’s final defeat and a good place to contemplate not merely the man but his place in public memory.

The battlefields of Austerlitz and Wagram near Brno and Vienna are places to consider Napoleon at the height of his powers.

Contact us at Business Battlefields

Shades of Private Ryan – Britain’s “Bedford Boys”

I recently took a group of businessmen on a visit to the battlefields of the western front.  One of them, Richard Whittemore, told me a fascinating story.  His great-grandfather was one of six brothers who served in the First World War.  Three of them died and are buried in France.   A fourth is commemorated on the Helles Memorial  in Gallipoli.

 Private 6710 Whittemore Sidney JPM 6 Nov 1914

Sydney Whittemore was a regular soldier who served in the 1st Battalion of the Bedfordshire Regiment. This unit fought at Mons Le Cateau and the battles of the Marne and Aisne before deploying to Ypres. He died on 7th Nov 1914. The battalion had recently deployed to the trenches East of Ypres. According to the war diary, “Enemy broke through line held by Regt about 200 yards to our left, carrying next Regt & some of our men with them. Our supports were moved to left… & assisted in driving enemy back. Qr. Mr.Sergt. Byford [4893 Thomas William BYFORD, DCM] (awarded Distinguished C. Medal) collected about 40 men & captured trench held by 21 Germans, killing or capturing all. Pte. Falla [8095 William FALLA, DCM] (awarded Distinguished C. Medal) ran on in advance, & getting on left of trench enfiladed enemy whilst remainder were rushing the trench. Our casualties about 7 officers & 140 other ranks killed wounded 7 missing. It is likely that Sidney Whittemore was fatally wounded, as he is buried in Bedford House Cemetery, several miles west.

Lieutenant Frederick Whittemore MC

hill60may1915 Frederick Whittemore was a hero. He joined the army, aged 18 in 1896 in the Bedfordshire Regiment. He served in the Boer War as a soldier. By 1914 he was Company Sergeant Major in the 2nd Battalion the Bedfordshire Regiment in South Africa. On 17th October he was commissioned in the field to replace the officers that had been lost up to that point. 2 Lt Whittemore was wounded on the 29th October 1914 in the first battle of Ypres. On his recovery he joined the 1st battalion and served with distinction in the heroic defence of Hill 60. As the sniper Officer he was credited with accounting for over 50 of the attacking Germans, but was wounded again with as bayonet. His actions resulted in the award of the Military Cross in December 1915.

whittemorefj“Following twenty years of service in the regiment and having served through two wars, Lieutenant Whittemore, MC, was mortally wounded during a night patrol on 29 March 1916. His comrades tried desperately to recover his body, but despite several attempts, were unable to reach it. As a result, Lieutenant Whittemore is remembered on the Arras Memorial to the missing. “

It was soldiers like Frederick and Sydney Whittemore who epitomised the “Old Contemptables” of the BEF.

13657 Private Whittemore G W 9th Bn Sherwood Foresters (Notts and Derby Regiment).

George Whittemore was a member of one of the first Kitchener Battalion of the Nottinghamshire and Derby Regiment which formed in Derby in 1914. It sailed for Gallipoli and landed at Suvla bay in August 1915. He was killed on 15th October 1915 but has no known grave and is commeorated on the Helles memorial.

G/14877 Private Whittemore F A, (MM and bar) 7th battalion Royal Sussex Regiment

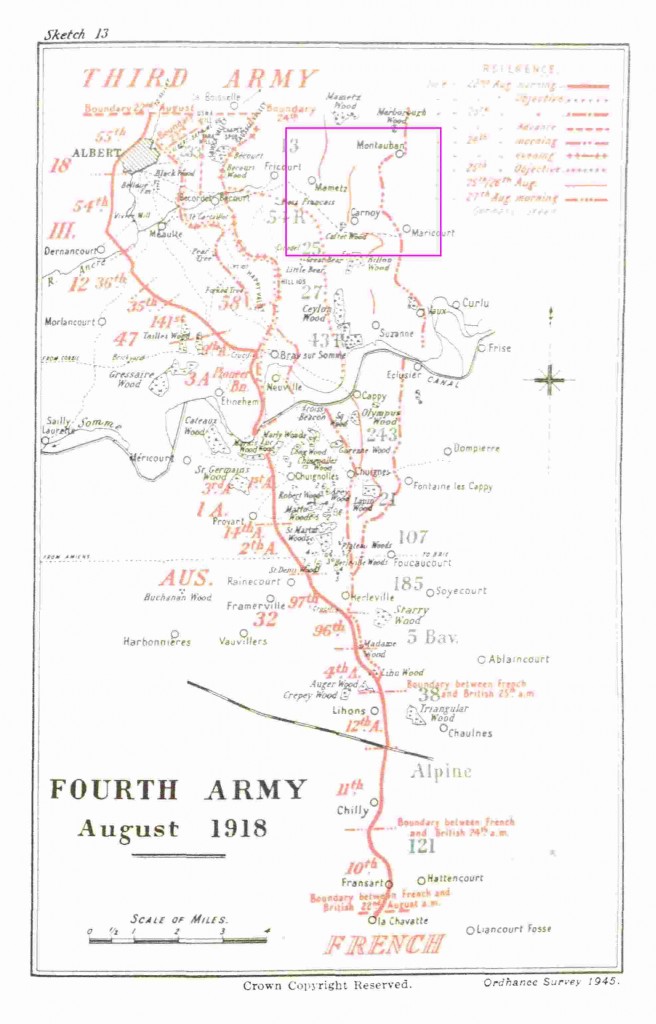
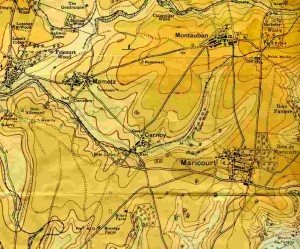
7 R Sussex WhittemoreFrederick Arthur Whittemore served in the 7th battalion The Royal Sussex Regiment died on 26th August 1918 aged 21. This gallant young soldier was killed in an attack on the Carnoy- Montebaun spur, almost on the 1st July 1916 front line. The attack in which he was killed seems to have been casually organised and ill supported, and as fatal to the assaulting infantry as any on the 1st July 1916.  The total advances was planned to be three miles. There was “some difficulty calculating the barrage, as the position of the leading troops of 35th Brigade was not known and it was not possible to arrange for the barrage to conform with the barrage of the 58th Division, (the other formation attacking.) . Divisional orders were not ready until 11 pm, and did not reach the commander of 36 Brigade until after midnight and 2 am before he could collect his battalion commanders to issue verbal orders for a 4 am attack, and there were three miles to march to reach the start point. Further delay took place in consequence of the late arrival of the pack mules with reserve small arms ammunition , and of shelling which forced the battalions to leave the road and march across wire and trenches on a compass bearing, the latter part of the way in single file.

EPSON scanner imageThus the 7th Royal Sussex (and 5th Royal Berkshire) were unable to reach the starting line in time to move off before 4.30 and 4.45 am respectively, and lost the barrage, which in any case dropped too too far ahead, nearly 1500 yards, to be of any use. Both came under machine gun fire. The Royal Sussex were held up in the valley in front of their first objective. The Germans spotted a gap between the two battalions and counter attacked, threatening part of the R Sussex near some old mine craters, (from the pre July 1916 front line). The fight went on all day until the neighbouring formation on the left captured a key village behind the German right at around 4.30 pm. (2) The CWGC records list 24 soldiers from 7th Royal Sussex who died between 26 and 28th August 1918. Three of these men, like Frederick Whittemore were recipients of the Military Medal.

19833 Private Whittemore C Bedfordshire Regiment

whittemore 4th Beds

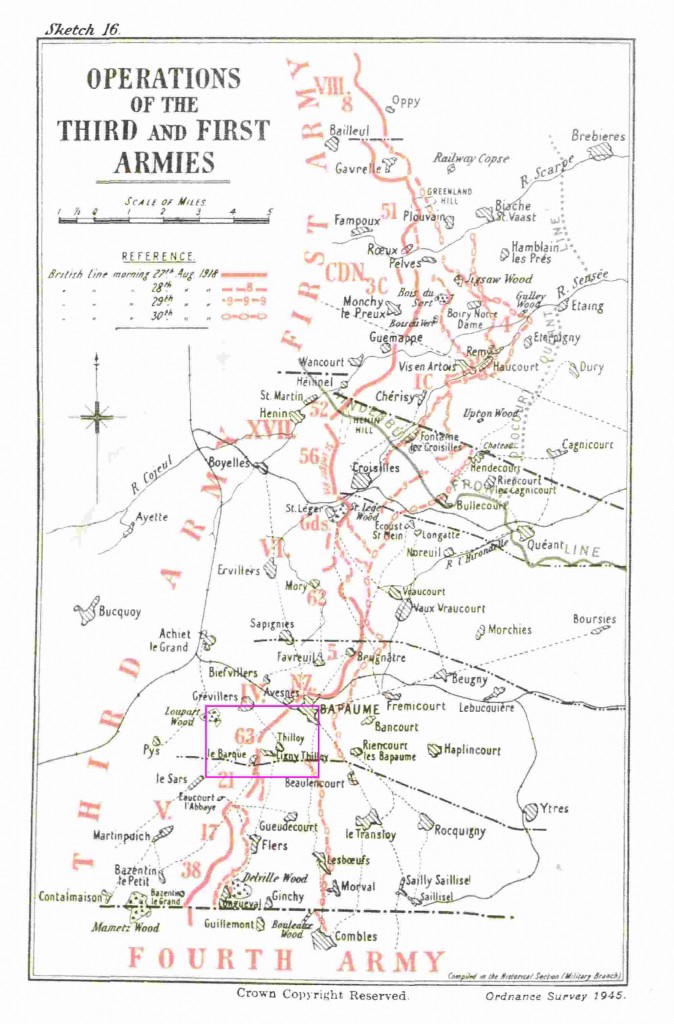
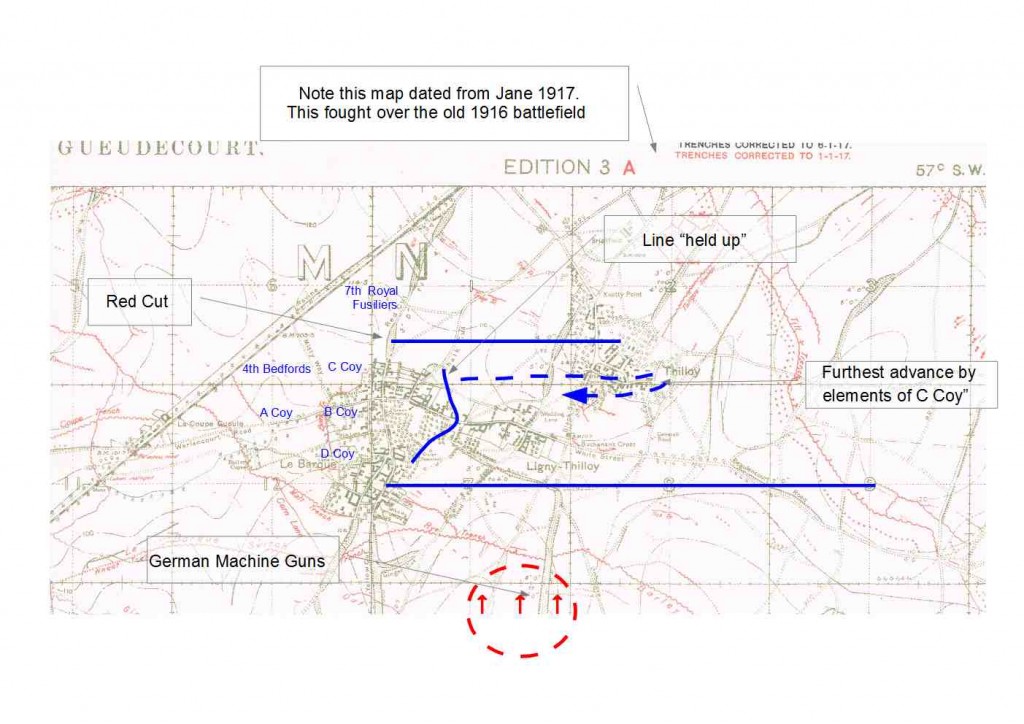
19833 Private C Whittemore of the 4th Battalion the Bedfordshire Regiment died , aged 23 on the 27th August 1918 and is buried in the AIF burial Ground Flees. He probably died in one of the two attacks made by 190th Brigade on Thilloy.4 Bedfords 27 Aug 1918

There is a report on this action here. ttp://www.bedfordregiment.org.uk/4thbn/4thbtn1918appendices.html

He may have served alongside Charles Laughton.

http://www.huntscycles.co.uk/C%20L%201%20Home%20Page.htm

Richard’s grandfather survived the war. The medal cards list a Whittemore in the Bedfordshire Regiment, awarded the Mons star who survived the war. The family tradition is that he was a machine gunner, and suffered such severe shell shock that he spent the rest of his life in mental institutions. His family maintained a fiction that he had run off to India and married someone there. In fact he was incarcerated in a local mental hospital a few miles from where his children were growing up. He died and is buried in an unmarked grave.

Ieper-20150321-00455_LR

This was the result of some internet work and I am not sure exactly what the family relationships were.  However there seem to have been a lot of casualties, and medals awarded to a relatively small number of brothers or cousins.

 baldwin battlefields logo

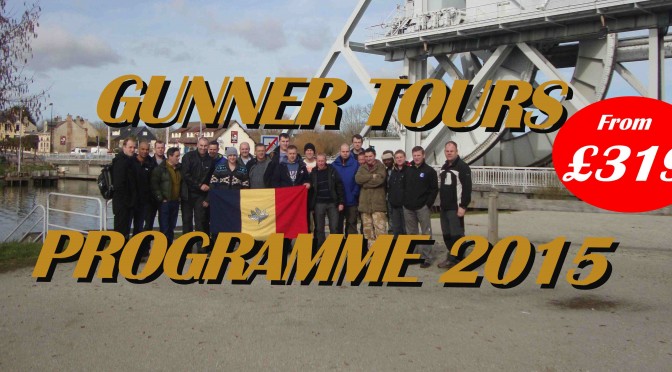
Gunner Tours Public Tour Programme 2015


Gunner Tours have launched the 2015 public tour programme. They tell the story of the key battles with a focus on the role that the artillery played, and the stories of those who served the guns. Around 25% of the British Army of the First World War served in the Royal Field, Garrison or Horse Artillery, and a similar proportion in the Second World War.

First World War

The First World War was an artillery war. Success and failure was largely determined by how artillery was used and how well the guns were served.

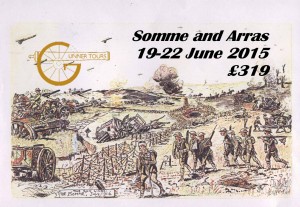
  • Somme and Arras 19-22 June 2015 A loSomme_Arrasng weekend of four days
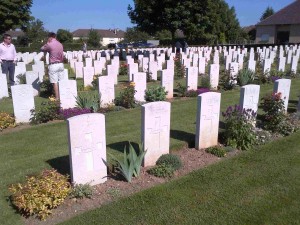
    and three nights to two of the largest battles of the First World War. The 1916 battle of the Somme was the largest and most costly battle fought by the British Army. The Arras battles of April-May 1917 were the most intense of the war. This area was also where the war on the western front was decided in the open warfare of 1918. £319

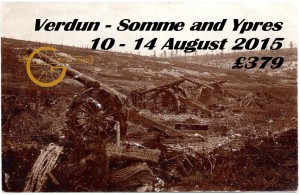
  • Verdun, Somme and Ypres 10-14 August 2015. Five days and Verdun_somme-arras_10-14_Aug_LRfour nights. We will visit three of the most important battlefields on the Western Front, and look at the British French and German gunners. The battle for Verdun in 1916 was the first of the huge battles of attrition. The Somme offensive of 1916 was designed to relieve the pressure on the French army at Verdun. The battles for the Ypres salient were the longest and bloodiest battles fought in Belgium. £379

  • Wipers” 11-14 September 2015 Four days and three nights. TheWipers 11-14 sep 2015 Belgium city known as Ieper in Flemish and Ypres in French was known to British soldiers as “Wipers.” It was the main seat of British Army’s operations in Belgium from October 1914 to the end of the First World War, and a focus for Remembrance since then. Our tour will look at the artillery side of the story and of the gunners who served and suffered there. £319

  • BEF Western front NovBEF Western Front 9-13 November 2015 Five days and four nights, covering the sites of the major battles of the British Expeditionary Force from Mons in 1914 to victory in 1918. £349

Second World War 

Gunner Tours is offering two tours to Normandy, based on the specialist knowledge and expertise of our chief guide Frank Baldwin who has written about the role of artillery on D Day and in the Normandy campaign as well as providing the written guide to the D Day Beaches for the Royal Artillery for the 70th Anniversary of D Day.dday & normandy 6-10july

  • D Day and the Battle for Normandy 6-10 July 2015 This is five
    days and four nights expedition to the D Day sites and some of the battles inland. £359

  • D Day Beaches and Landing Sites 2-5 October 2015, A visit overdday_and landing grounds a long weekend to the D Day beaches and Landing sites. There is a gunner story on each beach and landing site. £329

For details on each tour click the link in the date or check the details on the Gunner Tours website

 TO BOOK A PLACE ON  THESE TOURS CALL 01943 433457

IN THE FOOTSTEPS OF A COUNTY REGIMENT IN NORMANDY


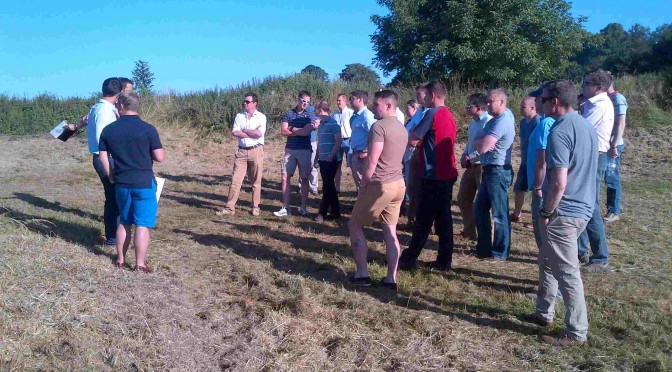
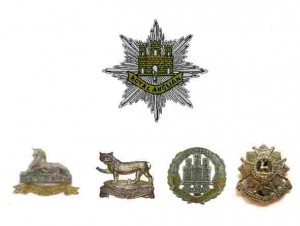
cap badgesIn July this year a group of soldiers from from the 2nd Battalion the Royal Anglian Regiment conducted a battlefield study in Normandy following the actions of their antecedent Regiments. The purpose of the exercises was to undertake a Battlefield Study over four days in Normandy with the aim of enhancing the conceptual training of Officers WOs and NCOs of an infantry battalion with regard to the conduct of operations of a light role battalion in conventional war, operating in conjunction with other forces. Around 25 officers and NCOs took part, preparing pre tour briefings and syndicate exercises for work on each stand.

The Normandy battlefield offers a good basis for battlefield studies, drawing on the wide range of military operations undertaken by the British Army in different phases of war. Following the story of the County regiments which were merged to form the Royal Anglian Regiment was an opportunity to personalise the Normandy campaign. Each of the companies of the current battalion is associated with one of the antecedents; the Royal Lincolnshire Regiment, Royal Leicestershire Regiments Northamtonshire and Bedfordshire & Hertfordshire Regiments. Soldiers from each of these regiments took part in the Normandy campaign, which offered an opportunity to explore different infantry roles in a major war.

1st Battalion Royal Lincolnshire. Parent formation: 8th infantry Brigade of 3rd Infantry division, landed on D Day and took part in the 3rd Infantry divisions battles for Caen .

4th Battalion Royal Lincolnshire Regiment. 146 Brigade of 49 infantry Division. Landed on 13th June, D+7 and took part in the battles south of Bayeux The division was transferred to the 1st Corps on East of Caen and fought in the breakout from Normandy, the advance to the Seine and the capture of le Havre.

1st Battalion the Royal Leicestershire Regiment: 147 Brigade of 49 infantry division. This battalion was not originally scheduled to serve in Normandy. It replaced the 6th Battalion the Duke of Wellington’s Regiment disbanded at the end of June 1944. It fought in the 49th Divisions battles during the breakout from Normandy and afterwards.

IMG-20140702-000862nd Battalion the Hertfordshire Regiment joined 9 Beach Group, and the commanding officer, Lieutenant Colonel J.R. Harper, was appointed overall commander. The Infantry battalions which served as beach Sub Area troops are not as well known as the assault infantry. Despite Harper’s hope that it would be redeployed as infantry upon the completion of this task, it was disbanded on 17 August and the soldiers dispatched in replacement drafts to other units.

No formed battalions of the Northamptonshire Regiment took part in the Normandy campaign, but individual officers and soldiers did.

STRONG POINT COD – SWORD BEACH

The 2nd Battalion the Royal Lincolnshire Regiment landed on Sword beach on D Day.

2577_00060 BARBER, Maj Robert Heberden 67170
Major Barber Northamptonshire Regiment, OC D Company 2nd Battlaion East Yorkshire Regiment D Day.

Five hours earlier Major R H Barber of the Northamptonshire Regiment had led D Company of the 2nd Battalion the East Yorkshire Regiment, one of the assault waves on Sword beach. A veteran of the North West Frontier, he was also a falconer and had published a bibliography of Falconry. He was killed by a mortar bomb which struck his Company head quarters and is buried in Hermanville War Cemetery.

VER SUR MER

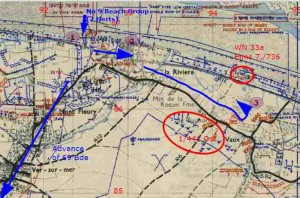
On the morning of 6 June 1944 the 2nd Hertfordshires landed in the fourth wave on King Sector of Gold Beach, through which two brigades of the 50th Division would come ashore. This unit landed on D Day at Ver-sur-Mer and provided local security, command and control and labour for unloading ships on King Sector of Gold Beach. It was involved in fighting throughout D Day and it cleared bypassed

Operations by 2 Herts to clear German positions East of Gold Beach 6 June 1944.

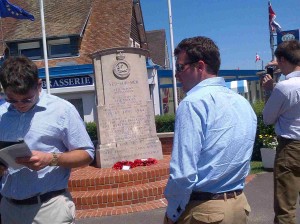
positions in the hamlet of Vaux that had been harassing movement on the beach, the assault being supported by one of the group’s Bofors guns. In the following days the battalion assisted the Royal Engineers in clearing land mines and moving supplies off the beach. A memorial to the regiment stands near the point at which they landed. Even though the British had built a prefabricated Mulberry harbour at Arromanches, about half of all stores landed on the Normandy beach head was landed on the open beaches

Martlet25June
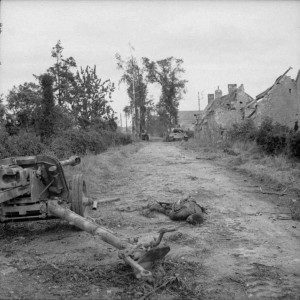
A German 75mm anti-tank gun with its dead crew members lying in the roadway, while a disabled Panther tank sits down the lane in Fontenay-le-Pesnel, Operation Martlet. (Lieutenant Handford, No 5 Army Film & Photographic Unit – IWM B 5939 Licensed under Public domain via Wikimedia Commons)

OP MARTLET TESSEL WOOD AND RAURAY
Operation Martlet was the first major action for the 4th Lincolns. This was a Divisional attack to clear the Rauray feature. This was an area of high ground which dominated the Western Flank of the attack planned by VIII Corps, called Operation Epsom to the East of The bloody battles between the 49th Division and some of the toughest German Army and SS Panzer formations led to the destruction of much German armour and the 49th Division squiring the nickname of “Butcher Bears.” It is possible to trace the story of these actions over the rural landscape, which although not marked by many memorials, remains identifiable. The Ruray ridge is a place to look at the British army on the defensive against an armoured opponent. Although the 1st Tyneside Scottish bore the brunt of the German attack, 4th Lincolns were engaged to their west.

HerouvilleHEROUVILLE

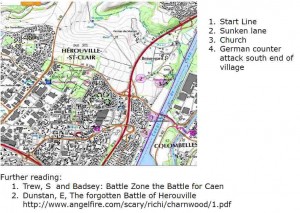
Operation Charnwood 7-8th July 1944, the capture of Caen was 2nd Lincolns first major action. It was a three divisional attack supported by massive firepower, including the first use of heavy bombers for tactical bombing. The 2nd Lincolns were at the extreme left of the line. Their attack was made with minimal artillery support and over ground exposed to fire from across the Orne canal on their own left. The capture of Herouville was a tough fight which cost the 2nd Lincolns around 200 casualites. The CWGC records 50 members of 2nd Lincolns killed between 8-12 July, many of whom are buried in plot II of Ranville Commonwealth War Cemetery. The Herouville

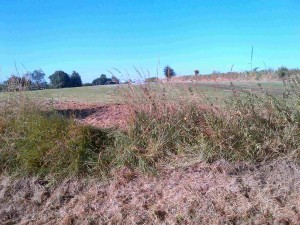
The View from the Start line. Herouville Church spire is just visible in the centre.

area is not as heavily developed as other suburbs of Caen and it is still possible to follow the action on the ground and walk the assault route.  There is an excellent account of this action written by a descendent of a veteran who took part in the action. http://www.angelfire.com/scary/richi/charnwood/2.pdf

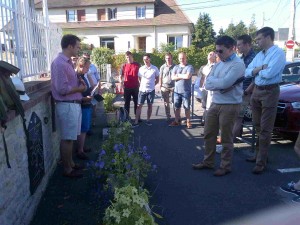
On the objective - discussion around the 2 Lincs memorial Herouville
On the objective – discussion around the 2 Lincs memorial Herouville

OP GOODWOOD
Operation Goodwood 18-20 July 1944 was an attack by three armoured divisions supported by artillery and aircraft in a southerly direction East of Caen. Three infantry divisions carried out subsidiary operations in support of op Goodwood. The 3rd Infantry Division’s role was to attack towards Traon to protect the Eastern flank of the armoured advance. 2nd Lincoln’s was deployed in Banneville. The dry ground had been so badly churned up by bombing that it was difficult to dig slit trenches. The battalion endured bombardment from mortars which cost it ten officers and 200 other rank casualties in 72 hours. One of the best places to contemplate this operation is the War Cemetery at Bannevile en Campagne, which is not far from “Black Orchard”. After this action 3rd Infantry Division were redeployed to the Western flank of the British Second Army, but 2nd Lincoln’s do not seem to have been involved in further heavy fighting in Normandy.

The Normandy battles offer an opportunity to explore the role of leadership in units undergoing the strains of battle. The unit that the 1st Leicesters replaced,6th Duke of Wellingtons, had disintegrated under the pressure of heavy casualties. The respective roles of officers and warrant and non-commissioned officers under these circumstances makes for an interesting discussion topic.

AUGUST 1944

breakout_49_div
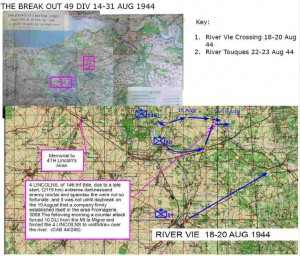
Map showing the breakout battles of 49th Div

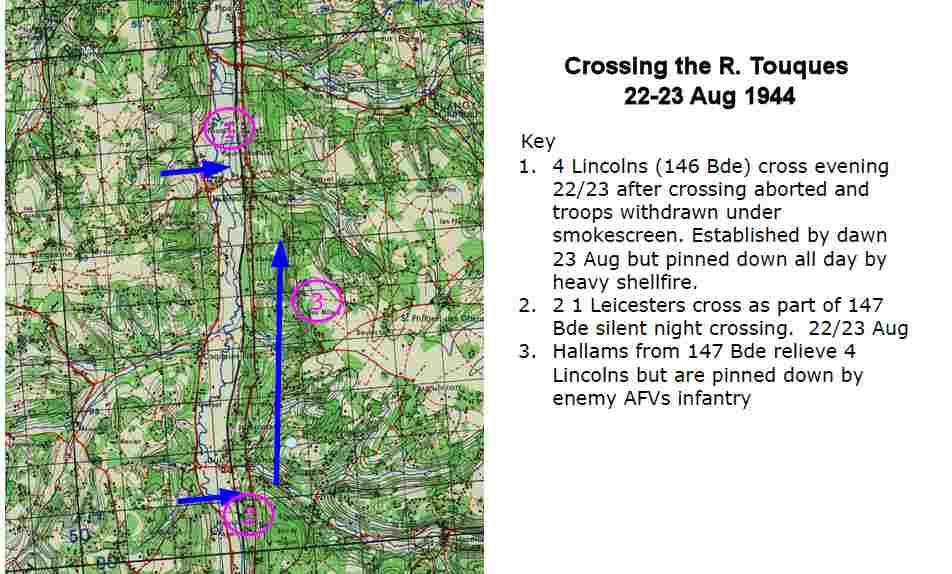
In mid August the 49th Division, and with it the 4th Lincolns and 1st Leicesters were on the left flank of the 1st Canadian Army offensives along the Caen to Falaise road which formed the northern jaws of the Falaise Pocket. The Germans which the Lincolns and Leicesters faced were conducting an orderly withdrawal towards the Seine and sought to impose delay on each river line. Several of the villages remember the these units as their liberators. In the past groups of veterans have been feted in Conteville, Poussy la Campagne, Billy, Airan and Chicheboville. There is a memorial to 4th Lincolns in the village of Airan. The acting CO Major Stokes was killed by a stray shell on the 13th August. His death was particularly mourned as an ex-city counsellor and pre war TA soldier. The advance to the Seine is an episode which has been overshadowed by the capture of Paris. Yet the river crossings of the Vie and Touques were no picnic. On the 19-20th August the 4th Lincolns struggled to cross the Vie and on the 23 Aug river Touques was only crossed as divisonal crossing with heavy casualties for 1st Leicesters.
The 49th Division had a further operation in Normandy, the capture of Le Havre in Upper Normandy. The advance to the Seine is a chance to examine the operations of the British Army in the Advance to combat and obstacle crossing.R Touques

THE COST

The Commonwealth War Graves Commission database lists 338 men of the antecedent Regiments of 2 Royal Anglian Regiment who died between 6th June and 31st August 1944 and are buried or commemorated in France or the UK. In the Normandy campaign there were 3.5 wounded for each dead, so the total casualties suffered by the four battalions serving in the campaign and individual soldiers attached to other units would have been around 1,200..

The casualties were not evenly distributed between the Regiments. 248 of the dead were from the Lincolns, 54 from the Leicesters, 27 from The Beds and Herts and 9 from the Northamptonshires.

Two battalions of the Lincolnshire Regiment served in Normandy, one from D Day. The CWGC records list 123 of the dead from 2nd Battalion which landed on D Day and 118 from the 4th,,which landed a week later. The Leicesters which landed in July, lost all but eight of their war dead in August, after the break out had started.

No_3 Cdo_and Herbert
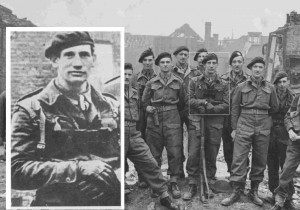
L:t George Herbert DCM MM of the Northamptonshire Regiment, pictured with other officers from No 3 Commando. The DCM was for Vaagso as a corporal and the MM for Dunkirk. Heavily armed with rifle, pistol and a cosh liberated from an underground carriage,  he is “ally.”  Sadly this decorated soldier fell on 8th June.

Although no units of the Northamptonshire Regiment served in Normandy, six officers and two private soldiers are buried or commemorated in Normandy. Two of the officers were killed as Commanders with other infantry units. Two of the officers and two of the privates died as Army Commandos and one officer with 8 Para.

These figures are not entirely consistent. The CWGC records do not always include the correct unit and may have excluded soldiers from other cap-badges who became casualties while serving with one of these units, such as Lt James Richardson a Canadian Officer Loaned to the 2nd Lincolns, who died of his wounds on the 9th July. However they give an indication of the scale of losses.

CASUALTIES AND THE REALITIES OF WAR FOR AN INFANTRY BATTALION IN NORMANDY

IMG-20140703-00097
Row of Lincolnshire Regiment graves Ranville CWC.

Dividing 1,200 casualties/338 dead by the 88 day duration of the campaign gives an average of 13-14 casualties per day of which, around 4 would be fatal, a loss of around a section plus per day. However the casualties did not occur at a steady rate. 42 men died on the 8th July, almost all lost in the 2nd Battalion’s attack on Herouville, and a further 21 were lost on 20th July in Op Goodwood. 24 men of the 1st Leicesters were killed on the 23 August, in the assault crossing of the River Torques, a largely forgotten engagement and under visited battlefield, while Op Martlet cost 4th Lincolns 15 dead on 25th June. Multiplying these numbers by the number of wounded would mean that these units would have lost between 60 and 160 men, between one and two companies on these days.

Most of the losses would have been suffered from the 360 riflemen in the rifle companies in each battalion. The total losses of 1,200 approximate to the number of riflemen in the rifle companies of the four battalions which served in the campaign and are more than the three which served as infantry. Perhaps this is why the Normandy campaign was such a good place to study leadership within an infantry battalion in war.

In addition to the story of these units the itinerary also included a study of the battle for the Hillman position captured by the 1st Suffolks, antecedents of 1st Battalions’s Vikings rather than the Poachers of the 2nd battalion. We also included lunch stops in Arromanches and Pegasus bridge, which offered museums and shops to explore.

A CUSTOMISED BATTLEFIELD STUDY FOR ANY CAP BADGE?

This battlefield study followed the fortunes of the antecedents of one cap badge. There was plenty to see and talk about, and much that was unique to this tour. The same kind of tour could be probably be undertaken for almost any British army unit with WW2 antecedents.

To find out more about planning staff rides and battlefield studies contact Frank@Baldwinbattlefieldtours.com


baldwin battlefields logo

SOUTH NOTTS HUSSARS BATTLEFIELD STUDY NORMANDY 2014 “PAYBACK FOR KNIGHTSBRIDGE”

Ex Hussar Hindsight was the final exercise for 307 (South Nottinghamshire Hussars) Battery Royal Artillery before the battery was disbanded, and took place in Normandy in May 2014. It’s an example of how a battlefield study focusing on the story of a specific unit can cover many aspects of the Normandy battles than might be expected, while focusing on the ethos and heritage of the unit itself.

The exercise aims included the following:-

  • Practice decision making, planning and carrying out battlefield procedures in a simulated all arms environment, etc”
  • Practice in the estimate and orders process, etc.
  • Extract the lessons from operations in Normandy relevent to sustained operations, the  “realities of war” and the significance of the core values of the British Army.
  • Appreciation of the SNH Ethos and an the human dimension to the battery’s military heritage.

The study started with a long drive from Nottingham on Friday returning on Sunday which allowed a day and a morning for visits to the battlefields. What follows is a sample of battles and incidents in the Normandy campaign in which the South Notts Hussars took part.

The 107th (South Nottinghamshire Hussars) Field Regiment Royal Artillery a territorial artillery unit from Nottinghamshire, best known for the desperate battle fought at “Knightsbridge” the nickname for a desolate piece of desert in Libya. On the 6th June 1942 the battery, unsupported by infantry or armour fought to the last gun and man against the Afrika Korps. The story of the gallantry of these men in their doomed action has been captured in books and on canvas. However, that was not the end of the story. The title and cap badge of the “South Notts Hussars”(SNH) was adopted by the 107th Medium Regiment (107 Med Regt) and 150th Field Regiment RA,(150 Fd Regt) which also received a trickle of survivors from the battle and some escapees from prisoner of war cages.

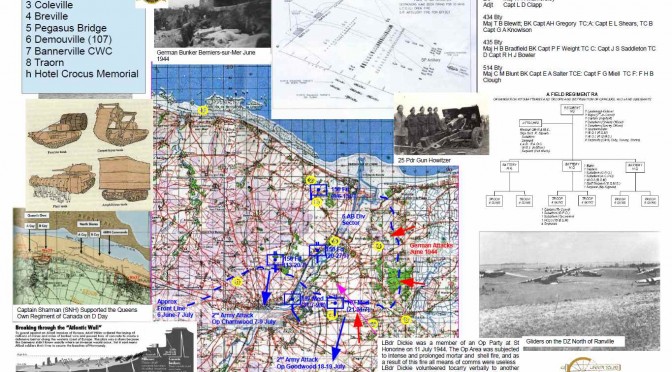
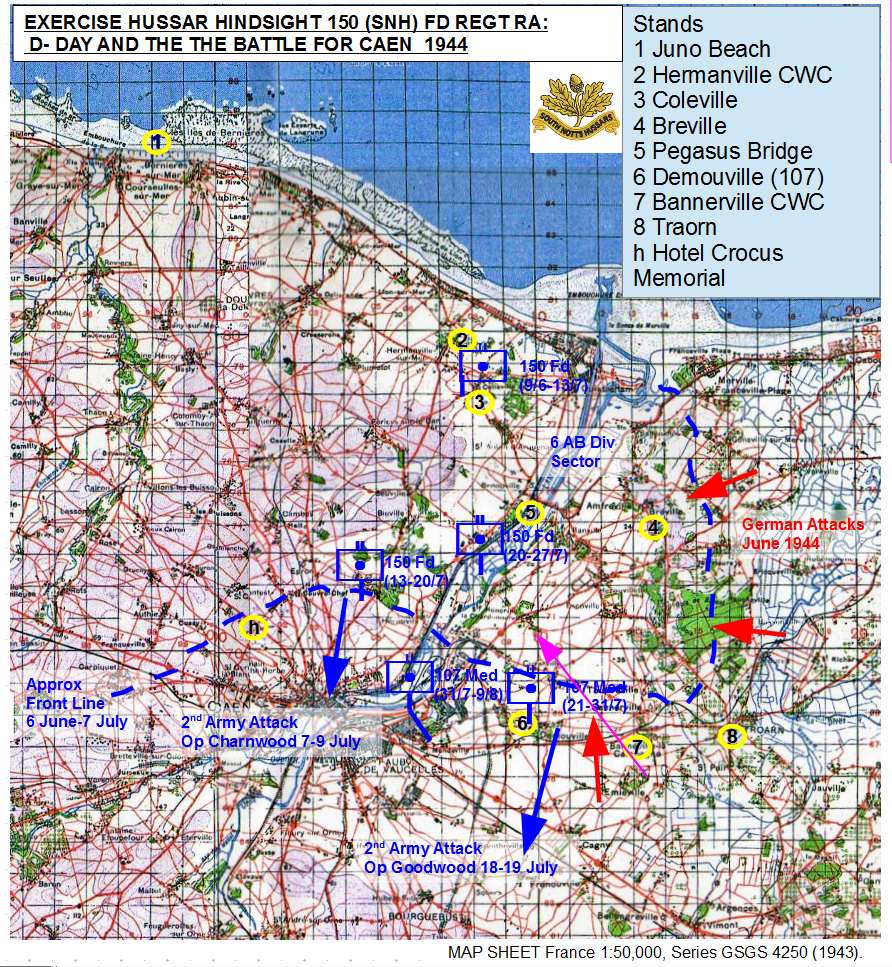
SATURDAY MORNING – 150 FD REGT AND THE D DAY BEACH AREAmap1Two years to the day after the destruction of the Regiment, members of the SNH landed in Normandy and played their part in the defeat of the German armies. Although neither unit landed on D Day, individual soldiers and officers from both SNH units served as additional FOO parties, which did land on D Day with the airborne forces and assault troops. The allies had a huge advantage in fire-power over the Germans, in the form of artillery, naval gunfire and aircraft. However, this fire-power could only be brought to bear if controlled by a forward observer. The scale of the airborne and seaborne invasion on D-Day meant that many more artillery observers would be needed for D-Day itself and shortly afterwards.

Captain Sharman from 150 Fd Regt trained as a Combined Operations Forward Bombardment Observation Officer and took part in the amphibious landing on Juno Beach supporting the Queens Own Regiment of Canada on D Day with fire from HMS Kempenfeld. (Stand 1. in the map above) The assault on Bernieres-Sur-Mer was quite costly and Sharman found it difficult to keep himself and his radio set fully under cover from enemy fire.

This was a good place for the battery to discuss the options facing the protagonists and practice military decision making.

The 6th Airborne Division, with a key role on the Eastern Flank of the beachhead had only one RA Regiment, one third of the proportion within an infantry division. Additional artillery OP parties were dropped by parachute or glider to provide the airborne troops with artillery support from artillery units landed by sea. LT Hastings also from the 150 Fd Regt SNH was one of these observers. At one point in the campaign these two officers met at the top of Ranville Church tower. Capt Sharman spotting ships while Lt Hastings, wearing his red beret, was observing artillery fire. These were not the only SNH soldiers to take part. Gunner John Woolmore of 107 Medium Regiment is recorded on the Bayeux memorial to the missing as killed on the 6th June 1944, the first member of the South Notts Hussars to be lost in the Normandy campaign. Presumably he was a member of a similar party, and either lost at sea or in the inundated ground.

150 SNH Fd Regt was part of the 4th Army Group Royal Artillery (4 AGRA) but for almost the entire Normandy campaign was under command of the 6th airborne division. The recce parties landed on the 7th June and the guns on the 9th June. Between 9 June and 15 July the Regiment was deployed in action in the fields immediately West of the village of Coleville- Sur Mer, now Coleville Montgomery.(Stand 3)

It took part in the defensive fires which stopped the German attacks mounted between the 9-12th June. During the 24 hour period from 12 June 1944, 150 Field Regt fired 7,828 rounds, starting with Fire plan “Arrow” that supported the attack by 12 Para which seized Breville. This is regarded as the turning point, after which the airborne bridgehead east of the River Orne was never seriously threatened.   The battle of Breville is suitable for a TEWT and to explore the realities of war.

After this 150 Field Regiment settled into a static routine, supporting the programme of raids undertaken by the paras and commandos, a counter mortar campaign and several fire plans supporting the other formations of 1st British Corps The Gun position was subject to occasional artillery fire and regular night time bombing from the Luftwaffe. The evidence of this is in the Hermanville CWGC Cemetery, on the edge of the next village. (Stand 2) Lt Davey, an Assistant CPO was killed by bomb fragments of an anti personnel bomb which hit his command post on 9th June 1944, the first night the Regiment deployed. Other problems facing them were the mosquitoes and the flies which fed on the bloated corpses of animals and humans.  This was a good place for the battery to explore the implications of sustained operations.

The OP Parties took part in the raids and shared the dangers of the infantry. The second SNH grave in Hermanville is of Bdr Nelson, the BC’s assistance who died of wounds received when a shell burst over his and the BC’s heads on 14th June.

One of the more hazardous jobs in the Regiment was that of the OP Signaller, responsible for maintaining line and radio communications – even under fire. LBdr Dickie was a member of an OP Party at St Honorine on 11 July 1944, in support of an attack by 51 Highland Division. (Shown with the purple arrow)  The OP Area was subjected to intense and prolonged mortar and shell fire, and as a result of this fire all means of communications were useless. LBdr Dickie volunteered to carry an urgent request to fire in support of our own troops to another Arty OP. He successfully crossed 250 yards of open ground under very heavy fire to deliver the messages. The artillery support thus obtained undoubtedly did much to relieve the heavy enemy fire. For this, Lbdr Dickie was awarded the Military Medal.

SATURDAY AFTERNOON – 107 MEDIUM REGIMENT ON THE ROAD TO FALAISE

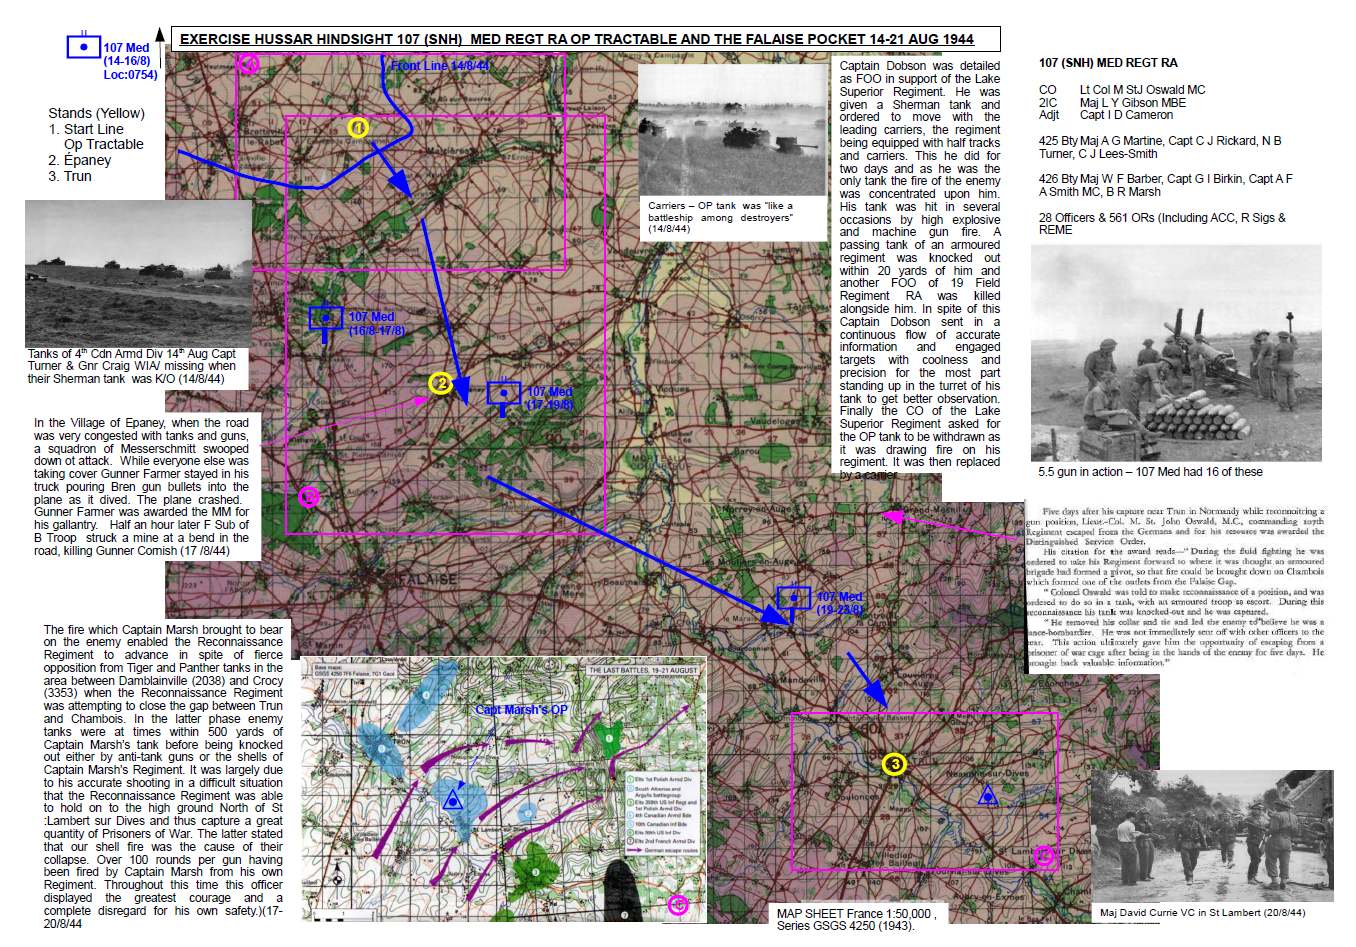
map2The 107th (South Notts Hussars) Medium Regiment was given the title and number of the 107th RHA destroyed near Knightsbridge. It was a medium Regiment of 18 x 5.5” guns formed into two batteries 425 and 426 batteries. The latter was commanded by Major W F Barber who had commanded the original 426 battery pre war, been captured at Knightsbridge, but made a dramatic escape from Italy.

The Regiment landed in Normandy in July as part of 9 AGRA. By 21 July the Regiment had been deployed to Demouville SE of Caen. (Stand 6 in the Battle for Caen Map) This was a low lying, unhealthy, much shelled and bombed location in a salient further forwards than medium guns were usually deployed. From this area the Regiment supported the 2 Canadian Corps in its attacks south from Caen to Falaise. It took part in the fire plan to support the innovative Operations Totalise and Tractable as part of 9 AGRA. These assaults used heavy bombers by night and day to try to support deep attacks by Armours, mechanised and motorised troops into the German defences. The use of heavy bombers carried a high risk of “friendly fire” and the War Diary of 9 AGRA notes that action by a pilot from B/Flight 662 AOP Sqn managed to prevent US Bombers from bombing 107 Med Regiment.

On 14th August as part of Operation Tractable 107th Med Regt was under command 4th Canadian Armoured Division. The plan was to was to attack with phalanxes of armour, accompanied by infantry mounted in carriers and APCs and supported by engineer vehicles through a smoke screen, to enable the armour to penetrate the German defences, supported by a fire plan of artillery fire and bombing by medium and heavy bombers. (Stand 2 in Road to Falaise Map)  The operations between Caen and Falaise offer a very different terrain and tactical setting to that of the D Day beaches and a place to explore mechanised operations..

OP Parties were mounted in Sherman OP tanks, which were modified for use as OP vehicles by removing the main armament to fit a map table and the replacement disguised with a rubber barrel. Capt Turner was travelling with the HQ of 4th Canadian Armoured Brigade when it came under fire from anti tank guns. His was one of several knocked out. Turner was wounded in the arm and bailed out. He managed to get Gnr Craig his signaller out of the tank before it caught fire. Gnr Craig and the other seriously wounded were loaded into an armoured ambulance which was itself knocked out and Gunner Craig’s body has never been found.

Captain Dobson, whose OP Assistant was Gnr Moore MM set off in support of the Lake Superior Regiment, an infantry unit mounted in carriers. Captain Dobson’s Sherman was described as “like a battleship among destroyers,” attracting enemy fire. His coolness under fire over two days was rewarded with a Military Cross.

The 4th Canadian Armoured Division was then ordered to block the escape route of the Germans trapped in the Falaise Pocket. 107th Med Regt’s guns were brought forwards to bring fire into the pocket. On the 17th August the gun batteries came under air attack from German fighter bombers while on the move in the village of Epaney.(Stand 2 Road to Falaise Map)  One of the aircraft was shot down by Gunner Farmer with a Bren gun, for which he was awarded the Military Medal, but within half an hour one gun tractor hit a landmine, killing Gnr Cornish and wounding three other men. The speed of the advance and the confused situation around the edges of the Falaise pocket brought new problems.

A recce party, led by the CO, Lt Col Oswald and escorted by a troop of tanks was ambushed and the CO captured. He later escaped from captivity and returned a few days later. One newly occupied battery positions came under fire from German infantry and mortars and at one point the medium artillery was ordered to prepare for tanks. The medium artillery was need to both fire South West into the pocket and east to prevent the Germans from breaking back in. (In the area of Trun shown as Stand 3 on the Road to Falaise map)

The 29th Canadian Armoured Regiment, the South Alberta Regiment, was the lead armoured battle group, was ordered to take Lambert-sur-Dives, which dominated the river crossings through which many of the trapped Germans were heading. It was the cork in the neck of the Falaise Pocket. Captain Marsh of the 107th was an FOO deployed in support of D Squadron of the 29th regiment under the command of Major David Currie, who was awarded the Victoria Cross for his part in this action. The citation for Captain Marsh’s MC was signed by Canadian Corps commander General Simmonds the Army Commander. “Enemy tanks were at times within 500 yards of Captain Marsh’s tank before being knocked out either by anti-tank guns or the shells of Captain Marsh’s Regiment. It was largely due to his accurate shooting in a difficult situation that the Reconnaissance Regiment was able to hold on to the high ground north of St Lambert-sur-Dives and thus capture a great quantity of Prisoners of War. The latter stated that our shell fire was the cause of their collapse. Over 100 rounds per gun having been fired by Captain Marsh from his own Regiment, it was the fire from 107 med Regt which enabled the 29th Canadian armour Regiment to hold their positions and that their fire, over 100 rounds per gun was instrumental in the capture of the thousands or prisoners.” One of the Germans formations trapped inside the pocket was the 21st Panzer Division, which had been among their tormentors at Knightbridge. (Capt . Marsh’s Op is shown on the map in Blue East of Trun, close to the viewing platform for St Lambert -sur-Dives

SUNDAY MORNING – 150 FD REGT IN OP PADDLE – A NEGLECTED CHAPTER IN THE NORMANDY CAMPAIGN

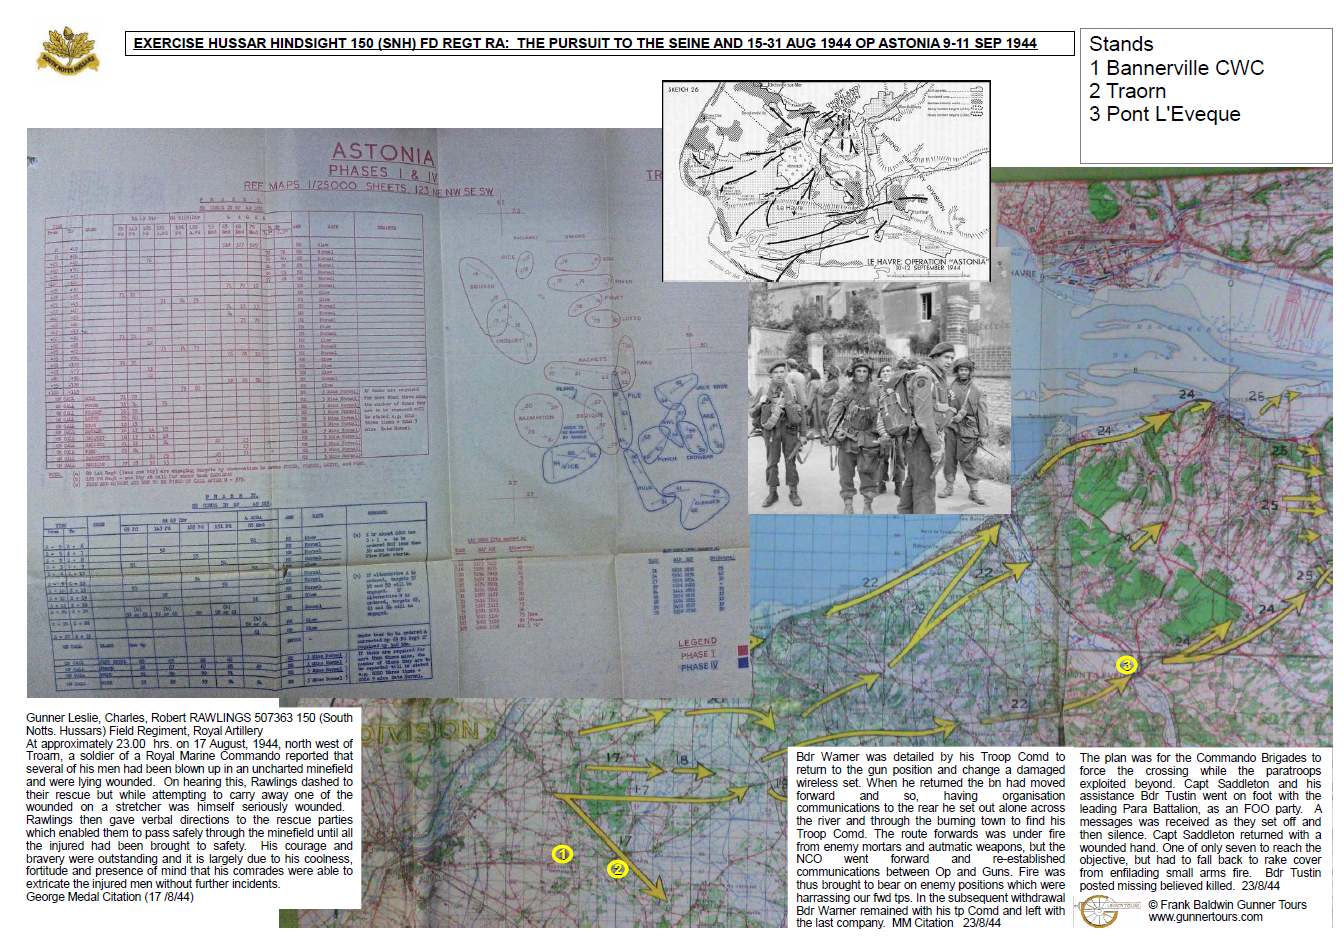
map3

The journey home on Sunday Morning started with an act of Remembrance at Bannerville Commonwealth War Cemetery, where several South Notts Hussars as buried.    The route followed the actions fought by 150 Fd Regt in the second half of August and the beginning of September 1944.

The situation on the Eastern flank changed in mid August 1944 as the German position in Normandy collapsed. At the same time as the allies executed a short envelopment of the German 7th Army at Falaise, Montgomery planned a wider encirclement, trapping the Germans outside the Falaise pocket against the river Seine. The I Corps, with 6th Airborne Division (6 AB Div) on the left flank, on the coast, would form the left wing of this advance, with the intention of linking up with the Third US Army. The 6th AB part was Operation Paddle. This operation, often overlooked in the story of the Normandy campaign took two weeks and was no walk over.

The operation was a frontal attack on the positions held by the German 711th Infantry division, which had been ordered to hold a series of delaying positions, based on the rivers emptying into the bay of the Seine. While the Germans were, at this point trying to extricate as much of their army as possible, every day’s delay

The 6th Airborne Division was a lightly equipped infantry formation intended to seize and hold objectives, rather than undertake mobile mechanised operations. It lacked the communications equipment for mobile warfare and the integral artillery. For this operation 6th AB Div’s three airborne brigades were augmented by two commando brigades, a Dutch motorised Brigade and a Belgian motorised battle group. It had some armour from its own recce Regiment. The 150th SNH Fd Regt, was placed under command of 6 Airborne Division for the advance supporting different parachute, air landing and Special Service, (commando) brigades.

The operation started with an attack from the positions which had been occupied for the past three months and ended on the banks of the Rover Seine. The first stage was to cross the river Dives. The battlefield was littered with minefields, marked and unmarked. Late in the evening at 11 pm. on 17 August, 1944, north west of Troarn, (Stand 2 on the Pursuit to the Seine map) a soldier from a Royal Marine Commando reported that several of his men had been blown up in an uncharted minefield and were lying wounded. On hearing this, Gunner Rawlings dashed to their rescue but while attempting to carry away one of the wounded on a stretcher was himself seriously wounded. Rawlings then gave verbal directions to the rescue parties which enabled them to pass safely through the minefield until all the injured had been brought to safety. For this action Rawlings was awarded the George Medal.

Two days later, at Putot-en-Auge on 19th Aug 150 Fd were key in assisting 3rd Para Brigade to break up a German counter attack and help them to drive back the Germans capturing 160 prisoners as well anti tank and anti aircraft guns.

At the next river, the Touques, 6th AB Division tried to force an attack at Pont L’Eveque. (Stand 3 on the Pursuit to the Seine Map)  The fighting around Pont L’Eveque took the best part of three days from 21-24rd August. On the 22nd 5 Para Brigade attempted to force their way through with a battalion infiltrating through the town while a second battalion attacked via two fords south of the town. This assault was beaten back. On the 23rd the attack was resumed through the town and a foothold made on the eastern bank, but again forced to withdraw. Only seven men reached the objective, but were forced to withdraw. Two of these were Captain Saddleworth the FOO, who had been wounded the previous day. He was pinned down in the river itself and, while attempting to neutralise a sniper with a Tommy gun was wounded again in both hands. His OP Ack Bdr Tustin was fatally wounded in the same engagement. A second FOO, Captain Clough was wounded on the same day. The Germans brought down sufficiently heavy and accurate fire, for the actions taken by Bdr Warner the Op Signaller that day to re-establish communications between the Op and guns, to be rewarded with the MM.

The last river before the Seine was the River Risle and the crossing at Pont Audemer was also heavily contested by the Germans on the 26th August. The following day 150 Fd were detached from 6AB Division which would return to the UK. 150 Fd’s next battle was the final major operation in Normandy itself, the capture of the port of Le Havre as part of Operation Astonia.  The port of le Havre can be seen from the post war bridge over the Seine.  150 Fd Regt’s  part in the attack is documented on the Op Astonia Fireplan schedule and trace, included on the map.

The South Nottinghamshire Hussars were a British yeomanry unit which spent the first 150 years of its existence maintaining law and order, and war service in the First World War as mounted cavalry. In 1922 the SNH were one of the Yeomanry Regiments which converted to gunners. They retained their own cap badge the acorns and a selection of customs. It was one of some 20 former yeomanry regiments which took part in the Normandy campaign as Regiments of Royal Artillery. Despite this tradition, the 307 (South Notts Hussars) Fd Battery RA is about to disband, with the title and traditions being subsumed into the Royal Yeomanry

“Normandy” was not an honour title for 307 Battery. The battles in Normandy did not eclipse the gallantry, and steadfastness demonstrated by its predecessor at Knightsbridge. This was a chance to see how artillery was used in different phases of war and in a mechanised and dismounted environment over different types of terrain. It was possible to tell the story from D-Day to the Falaise Gap and the Seine through the stories of members of the South Notts Hussars. The 307th Battery RA was not very different to other batteries whose lineage includes service in Normandy. The 150thFd and 107th Med Regts were not elite units. Nor had they been singled out for a special role.

If not would like to find out more about developing a customised Normandy battlefield study focusing on a particular cap badge, or unit heritage contact Gunner Tours www.gunnertours.com  info@gunnertours.com

gunner tours logo white on brown

GUNNERS ON THE D-DAY BEACHES – ANNOTATED GUIDE MAP FOR SALE

Here is an opportunity to obtain a unique guide prepared for the British Army which is a guide to the Royal Artillery story of the actions on the D Day Beaches and landing grounds.

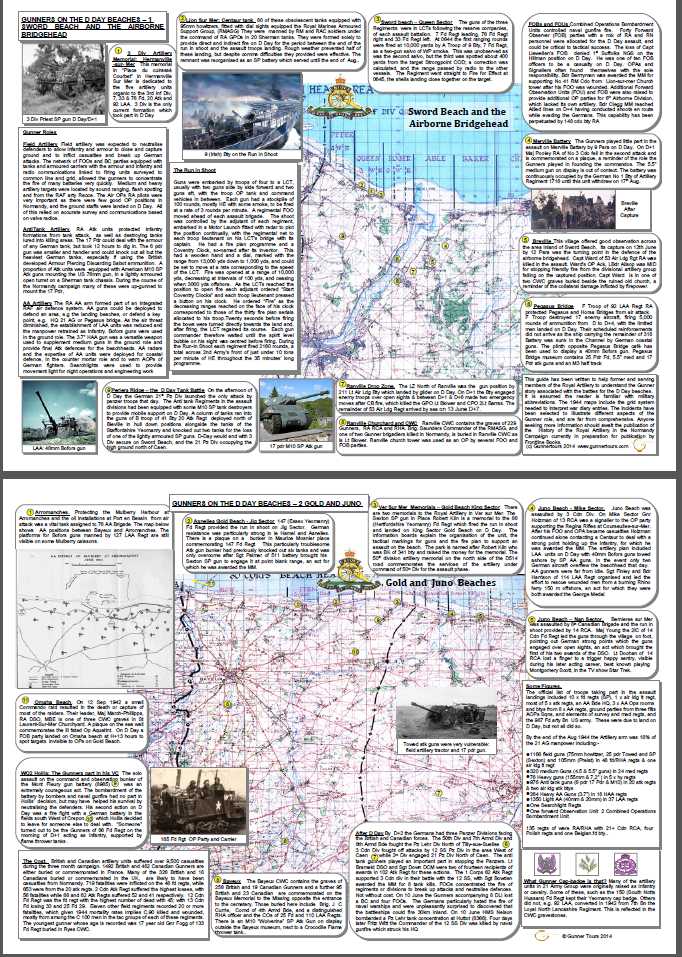
Although the Royal Artillery was the largest single element of the 1944 British Liberation Army. there is little to inform the casual visitor to the D Day Beaches or the role of the Gunners or their achievements.  There four memorials to the Gunners to the 86 Fd Reg 147 and the artillery of the 3rd and 50th Divisions.  The only  explanation of field artillery are on the information board surrounding the Sexton SP Gun commemorating the 86th (Hertfordshire Yeomanry) Field  Regiment   There are neither memorials nor any explanation for the Anti tank or AA artillery.  There are artillery pieces scattered around Normandy, but usually out of context.   other branches of the Artillery AA  with no explanation.   There are only two places that mention the exploits of individual Gunners  or their  sacrifice.

A handout has been prepared for  Royal Artillery soldiers attending the 70th anniversary of the D Day Landings to  explain the Gunner story associated with the major D Day sites.  The incidents have been selected to illustrate the different roles of the Gunners and draw attention to those men whose action made a difference.

handout overall The A3 double sided annotated map includes:-

  • A copy of a 1944 map of the British beaches and the Orne bridgehead with the 1944 grid to help to interpret the locations in war diaries.
  • Description of the Gunners role at different places on the most visited  D Day locations.
  • Mention of the Gunners who took part in the actions at places from Merville Battery to Omaha Beach.
  • Summary information about the role, organisation and equipment of the artillery of 21 Army Group.
  • Information about Gunner war dead.

extract_2If you would like to have your own copy of the map, a high resolution electronic copy can be yours for £6.00, for your own non commercial use.  If you want a hard copy printed for you it will cost an additional £3.50 plus postage and packing.  Send an email to the author frank.baldwin@gunnertours.com

For every copy sold Gunner Tours will donate £1 to the Royal Artillery Charitable Fund. If you would like to make your own donation you can do so though their Virgin Giving page. 

If you would like a print of David Rowlands’ splendid painting of 9 (Irish) Battery firing the Run in Shoot on Sword Beach order it from his website 

The Sheriff of Lincoln a “very cunning, bad hearted and vigorous old woman”

What is the connection between the unusual officer holder of a Plantagenet Local Goverment Position, the Second Battle of Lincoln and Utah Beach in Normandy?
Funerary effigy of King John, Worcester Cathedra

The answer is a woman, Nicholaa de la Haye. Chatelaine of Lincoln Castle and Sherriff of Lincoln, described by the anonymous contemporary French Chronicler from Bethune as a “very cunning, bad hearted and vigorous old woman”  Nicholaa was a remarkable medieval woman who played a significant part in the Second Battle of Lincoln, 20 May 1217, the turning point of the First Barons War.

Nicholaa de la Haye is thought to have been born between 1150 and 1155 into a Lincolnshire family which claims to have owned the Barony of Brattlesby since pre Norman times. Nicholaa outlived two husbands, William FitzEmeis, who died in c. 1178, and Gerard de Camville, who died in c. 1215. The closing months of King John’s reign and the opening years of King Henry III’s minority not only saw her directing the royalist defence of Lincoln castle against the supporters of the French Prince Louis but also saw he created sheriff of the county of Lincoln. (1) The story of Robin Hood, and its villain the Sherrif of Nottingham gives an insight into the life of a Plantagenet local government official. Nicholaa was involved in seizing land from rebels and taking and moving hostages.   However she might be described in heroic terms by the Royal party as the manful defender”, she was King John’s servant and carrying out some of his dirty work.

480px-Castle_Acre_Priory
Nicholaa de-La-Haye was a benefactor of Castle Acre Priory in Norfolk.

The De La Haye Family took its name from La Haye-du-Puits in the Manche department on the Cotentin peninsular. Her second husband Gerard de Camville had commanded King Richard’s fleet and his family name was from an area near la Haye-du-Puits. Nicholaa’s family inheritance included land in Poupeville and Varreville in Normandy, on what would be the rear exits from Utah Beach. The lands in France were ultimately settled to Nicholaa’s sister Julia and her husband, which may have removed the potential for conflicting loyalties as King John had lost Normandy to the king of France in 1204.

800px-Lincoln_Castle_Entrance-BAnew
Lincoln Castle

20 May is the 797th anniversary of the second Battle of Lincoln. which was fought around Lincoln Castle on 20th May 1217. The battle was fought between the forces of the future Louis VIII of France and those of King Henry III of England, in what is known as the First Baron’s War. This conflict lasted from 1215-17 and arose in the aftermath of the signing of Magna Carta. King John repudiated the Carta and the Barons invited Prince Louis to England to depose King John. After the death of John ion October 1216, his faction fought in the name of the infant King Henry III. By May 1217 the French forces were as far North as Lincoln. Lincoln Castle itself was held for the Royalist party by Nicholaa de la Haye.

BitvaLincoln1217ortho
Illustration of the Battle of Lincoln. thought to show the death of the Compte de Peche.

Louis’ forces were attacked by a relief force under the command of William Marshal, 1st Earl of Pembroke. One of the most famous soldiers of his day. The Comte du Perche, commanding the French troops, was killed and this heavy defeat led to Louis being expelled from his base in the southeast of England. This event is known as “Lincoln Fair” after the looting that took place afterwards. The citizens were loyal to Louis so Henry’s forces  sacked the city, which was regarded as being pro rebel.

Lincoln Castle is still preserved and as the site of one of the extant copies of Magna Carta.

Local tradition holds that this C13th funerary effigy is of Nicolaa de-la-Haye who died in 1230. The late C13th clothing suggests it might be a niece instead

There is a further Normandy battlefield connection. Nicholaa’s lands included Folkingham, the site of one of the airfields used by the US 82nd Airborne division in September 1944 for their airborne landings in the Netherlands

The sites of associated with Magna Carta and the are barons wars check the Magna Carta 800th Website

For more information on visiting the battlefield of Lincoln, and other sites from the Barons’ wars contact British Battlefields.

  1. PD D Thesis by Louise Jane Wilkinson Thirteenth Century Women in Lincolnshire.
  2. Anonymous of Bethune

“KING” LOUIS, MAGNA CARTA AND THE BARONS WARS 1214-67

File:BitvaLincoln1217ortho.jpg
The Battle of Lincoln – A defeat for “King” Louis

King Louis the First of England!

Prince Louis of France was invited by the rebel barons to become king of England following King John’s refusal to accept the Magna Carta he had sealed at Runnymede. Over 200 castles in England were besieged, by the rebel barons or King John’s forces, in what became the First Barons’ War. This aimed to safeguard the rights, privileges and liberties of the clergy and the nobles as enshrined in the Magna Carta, but spilt out into a dynastic war for the English throne. This was only settled with the death of King John, and his succession by King Henry III. Even then, the dispute continued until the end of the century.

The Battles and Sieges

There were dozens of battles and sieges between 1214 and 1267.  This was an era of castles and sieges. Many of the castles still stand. At Rochester you can still see the damage caused by John’s army when it undermined the corner of the keep using the fat of 40 pigs to create a fire fierce enough to burn the props.    These are events populated by heroes, heroines and villains that could have been created by Hollywood.  There are princes fighting for their kingdom, wicked sherriffs, heroines, callous mercenaries, treacherous pirates and outlaws.   A summary of the main military events are here.

http://magnacarta800th.com/history-of-the-magna-carta/key-magna-carta-locations-1214-1267/

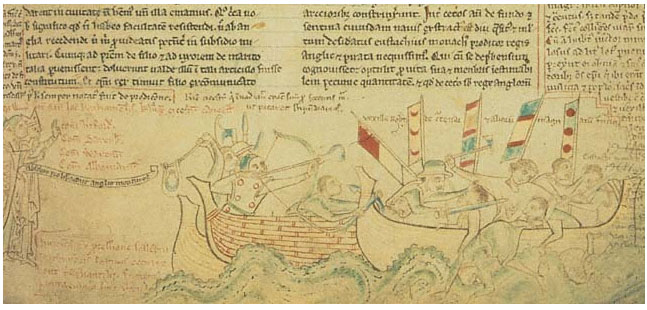
The Capture of Eustace the Monk: Mercenary, Pirate and Outlaw

The Battlefields Trust is planning to create a Battlefield Trail covering the battles and sieges of the barons wars. This will be a major project and be timed to coincide with the 800th anniversary of Magna Carta as well as the 750th Anniversary of the Siege of Lewes. The Battlefields Trust is a member of Magna Carta 800. One of the most exciting developments is the inclusion of battlefields in the Magna Carta 800 Trail being developed for Vist England. This is the first time it has been possible to promote Britain’s Battlefield heritage as part of a tourism strategy.

There is a chance to hear military historian Julian Humphrys talking about the military history of Magna Carta on Tuesday 19th March 2013 between 12:30-14:00. This will be hosted by The Fusiliers Museum London in the Officer’s Mess of The Royal Regiment of Fusiliers HM Tower of London

In his talk Julian Humphrys will focus on three key episodes in the Magna Carta War: King John’s dramatic capture of Rochester in 1215, Hubert de Burgh’s stubborn defence of Dover in 1216 and William Marshall’s crushing defeat of the French at Lincoln in 1217.

For details and to book check the Jkust Giving Page here. – See more at: http://www.justgiving.com/Magna-Carta-Lecture-19th-March#sthash.kYTSq5zP.dpuf

British Battlefields has been set up to promote and organise visits to British military heritage. It will be offering battlefield tours to the battlefields of Magna Carta.  Brit_Bat_logo_lores

3-4 May 1944.The Raid on Mailly-Le-Camp:- No Milk Run

“We were circling this flare for approximately half a hour and becoming increasingly worried as it appeared impossible to receive any radio instructions due to an American Forces Broadcasting Station blasting away. I remember only too well the tune, “Deep in the heart of Texas”, followed by hand clapping and noise like a party going on. Other garbled talk was in the background but drowned by the music.

photo1_maillymemlcerlemixte
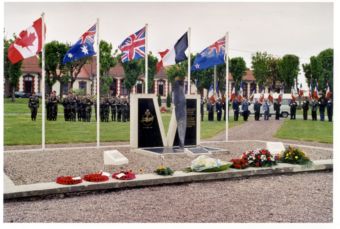
Memorial at Mailly-le-Camp Cemetery, France

Whilst this noise was taking place I was suddenly aware from my position that several Lancasters were going down in flames, about five aircraft and the fire in  each was along the leading edge of the main plane. I saw some of the planes impact  on the ground with the usual dull red glow after the initial crash.  My job was to keep my eyes open for enemy aircraft so I did not dwell for more  than fleeting seconds on those shot down planes.
Account by Sgt Eeles 49 Sqn

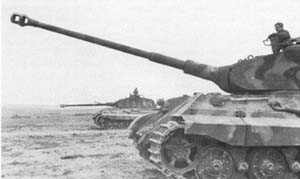
Pz  VI B  "King Tiger" Tanks training at Mailly -le-Camp
Pz VI B “King Tiger” Tanks training at Mailly -le-Camp

On 3–4 May 1944, during the German occupation of France, the town was subject to a heavy Allied bombing. During preparations for the Normandy invasion (Operation Overlord), 346 British Avro Lancasters and 14 de Havilland Mosquitoes of RAF Bomber Command attacked the German military camp situated near the village of Mailly-le-Camp. Mailly-le -Camp was a French military training area used by the germans for training their armoured Troops and the raid was an attempt to hinder the Germans preparing their reserved for the forthcoming invasion. .

35ceivo
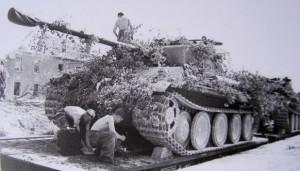
German PZ Mk V Panther Tank unloading at Mailly-le -Camp, presumably aftert the raid, from the damage to the station buildings.

Generally missions to targets in France rather than Germany were seen by the RAF as easy missions, and did not always count towards the number of operational sorties in a Bomber crew’s tour of duty. There were far fewer German night fighter and AA defences than over German cities, and the shorter routs gave the defenders less time in which to inflict casualties.

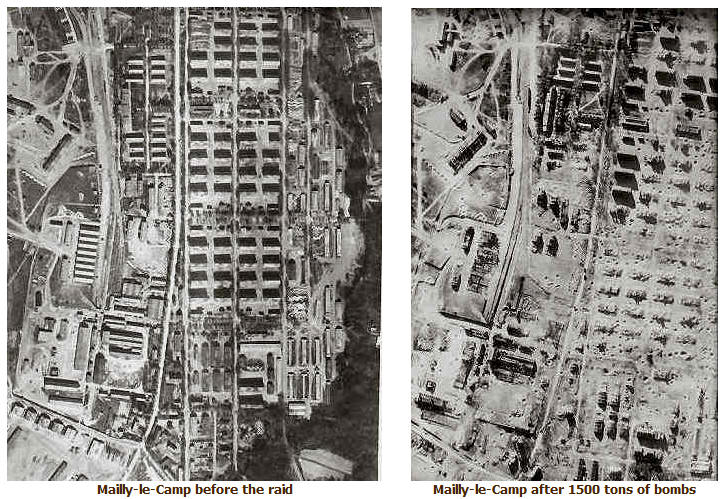
Although the target was accurately marked, communications difficulties led to a delay in the Main Force attack, during which Luftwaffe fighters intercepted the force. Subsequently, 1500 tons of bombs were dropped on the camp, causing considerable damage to the weapons and equipment held there and heavy casualties ot the Germans in the camp. No French civilians were killed in the bombing, although there were a small number of casualties when one of the Lancasters shot down crashed on a house.

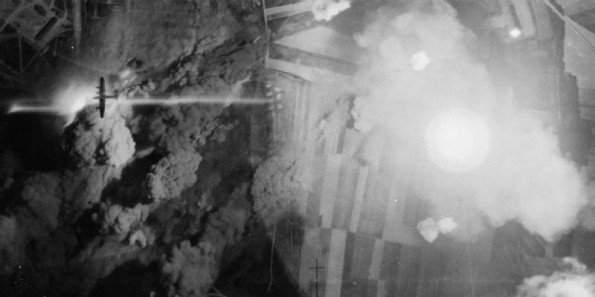
Mailly-raid-image-595x297
Bomb flash photograph from the Raid 3-4 May 1944

42 Lancasters – some 11.6% of the attacking force – were shot down – accounting for approx 300 personnel. Losses of 10% were regarded as unsustainable by Bomber Command. The losses on the 3-4th May were proportionately as bad as some of the raids on Berlin or the Ruhr.

The Commonwealth War Graves records show 356 RAF war dead on the 3rd and 4th May worldwide. Of these 299 are in France or on the Runnymede memorial. Mostly men in their early 20s. There were eighteen teenagers, including 18 year old Sgt Raymond Dance,(207 Sqn) from Benson Oxfordshire The two oldest, aged 36 were Sgt James Ellis (550 Sqn) and Sgt John MacDougall (431 Sqn ) from Canada.

imgC
Before and after photogralhs showing damage to the barracks at Mailly-le-Camp

Thirty five men are listed as serving with 101 Squadron RAF,. (Though the RAF web site says that only 32 men were lost in four Lancaster Bombers) The RAF website entry also comments “101 Squadron flewon more raids than any other bomber Squadron during the bomber campaign and suffered the highest casualties, losing 1176 aircrew” It is sobering to consider that even at its largest establishment the squadron;might have had no more than 200 aircrew on its establishment.

The wikipedia Entry for this unit says “ 101 Squadron Lancasters were later equipped with a top secret radio jamming system codenamed “Airborne Cigar” (ABC) operated by an eighth crew member who could understand German, some with German or Jewish backgrounds known as “special operators” commonly abbreviated to “spec ops” or “SO”. They sat in a curtained off area towards the rear of the aircraft and located and jammed German fighter controllers broadcasts, occasionally posing as controllers to spread disinformation. The aircraft fitted with the system were distinctive due to the two large vertical antennae rising from the middle of the fuselage. Deliberately breaking the standing operating procedure of radio silence to conduct the jamming made the aircraft highly vulnerable to being tracked and attacked, which resulted in 101 Squadron having the highest casualty rate of any RAF squadron.” They certainly did over Mailly le Camp

800px-Lancaster_I_NG128_Dropping_Load_-_Duisburg_-_Oct_14_-_1944
A 101 Sqn Lancaster bombing on daylight raid on Duisburg, later in the war.

101 Sqn were based in RAF Ludford Magna. A stone memorial tothe Squadron’s dead, unveiled on the village green in July 1978, permanently marks its residency. Ludford Magna is twinned with the French Village of Voue whose churchyard is the burial place of nine men who died in the early hours of 4th May 1944. There is a emmorial to 101 Sqn in Ludford Magna. Although the airfield has been nretutrned to farmland it is possible to see the perimeter track.

Looking_towards_Harpgates_Plantation_-_geograph.org.uk_-_201014
RAF Ludford Magna airfield today, with the remains of the perimeter track still visible